As much as I enjoy browsing yootoob, I am often perplexed about some of the things that do (or do not) show up in my recommendations. To be sure, I get videos reflecting my interests (I get a LOT of woodworking, homesteading, theology, economics content as you would expect from my subscription list and browsing history) but sometimes something shows up that has me scratching my head, either from relevance or timeliness. This video is one of the latter.
Nine months ago while building the greenhouse I was frustrated by the uneven ground and its affect on my sawhorses, so I screwed two of them together at a right angle as I blogged here. This video would have been helpful to view at that time but never showed up in my feed. Until now.
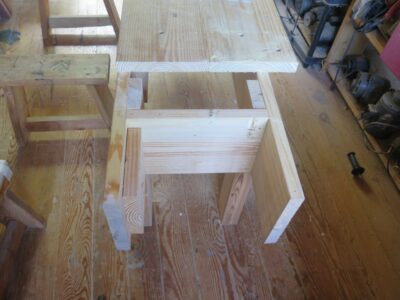
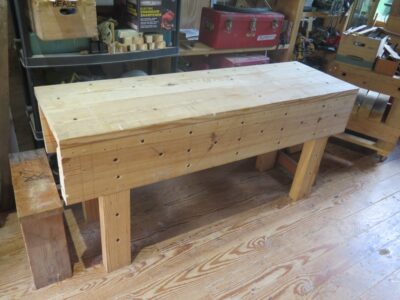
Last year when prepping for the Labor Day weekend 18th Century Trades Fair down at Fair Lawn Farm I included a stripped-down Nicholson workbench. As useful as the bench is for demonstrating and didactic exposition, it needed to be stripped down further.
What I’m subtracting is two feet from the length of the original 8-foot bench; one-half foot from one end, a-foot-and-a-half from the other. There are a couple reasons, not the least is being an 8-foot bench is a little bit much for this 70-year-old to rassle solo. Also, the larger bench took up too much space in my work area at the Fair. I also will refrain from bringing a large display table for my pile of joinery samples. Absolutely no one took a look at them so out they go, at least for this event.
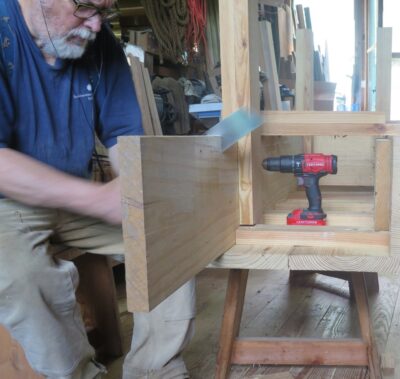
The Nicholson bench has many benefits to providing a heritage work station, including simple and fast making (I can make one in less than a day), in addition to ease of both assembly and disassembly. In this case It was a piece of cake to disassemble one end of the bench and cut off 18-inches and move those legs two feet.
At the other end I just marked off six inches and sawed it off.
In the end I had the same bench, only two feet shorter.
But, I’m not just subtracting. This year I will be adding a leg vise to the workbench along with a Moxon vise.
Several years ago, probably at one of the French Oak Roubo Project builds, Benchcrafted’s Jameel Abraham and I were chatting about the massive weight of good workbenches and good vises.
“Why couldn’t we collect carved thimble boxes instead of cast iron hunks?” he groused. “Instead we acquire stuff by the ton!”
At least he has the sense to only keep a couple benches in his studio. I, on the other hand, have not been so restrained. In great part due to my plan to host classes and workshop at the barn, I wound up with a dozen-and-a-half hefty benches scattered around, more than enough for every student who might come. (The cessation of that plan for a couple of reasons has made that situation non-optimal.) This preparation was exacerbated by my own fascination with workbenches, and plenty of space to put any that I bought or made.
I’ve reluctantly(?) come to the realization that I have too much real estate occupied by benches I do not use, at least as workbenches. I still have about 15 benches, but only use (at most) five of them as workbenches with any frequency, i.e. more than once a year. The rest are little more than really, really stout work tables.
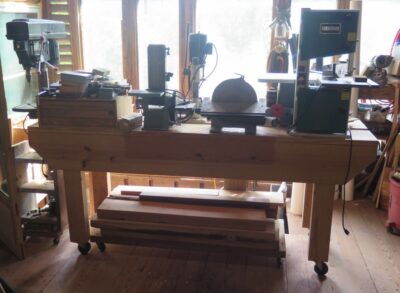
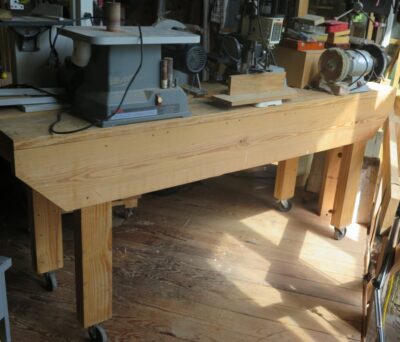
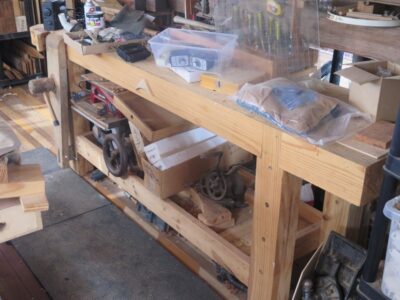
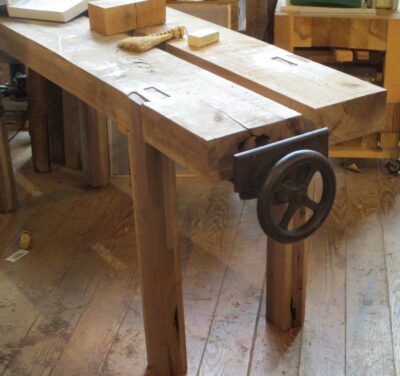
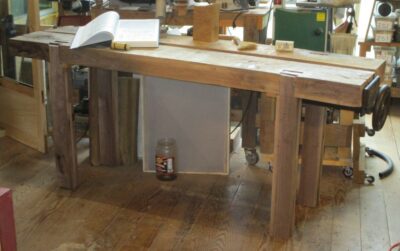
So I’ve taken the first small steps to eliminating or repurposing the inventory. I’ve sold two, and last week repurposed an eight-foot Nicholson as a rolling bench to hold benchtop machines. Obviously this is not a permanent nor irreversible arrangement — I can flip and remove the casters in about ten minutes — but it does provide a glimpse of what is possible, especially as I continue to explore the world of different workbench forms a la the ongoing Japanese planing beam build.
Rather than a hodgepodge of little rolling tables I now have all my main benchtop machines on one surface, easily accessible from both sides as the oversized casters make it a snap to wheel it out and around.
It’s pretty hard to get much more simple than a Japanese planing beam with its three components: the beam, the base, and the “X” legs. In my case I laminated two 11/4 pieces of vintage cypress (c.1840) for the beam and will use some of the same stock for the legs. But the base took a little more thought.
The answer came last year when my brother and I were processing firewood, in this case cutting up a large white oak that had fallen in a windstorm two years before, having been knocked down by two falling maple trees. It took us the better part of three days to trim and work our way down the twin trunks of the oak after doing the same for the maples. The main trunk was almost stick straight and as we neared the bottom I found by planing beam base. About four feet up from the root mass I cut a bole about 3-1/2 feet in length and about 22 inches in diameter, bark included.
It weighed about 350-400 pounds at that point and we wrestled it onto the truck and set it up on smaller bolts to let it dry for a bit on the ground underneath a piece of EPDM roofing placed over it.
Several months later I managed to get it upright and on to my hand truck and brought it into the barn, setting it horizontally on the floor in the unheated part for further seasoning. By the time I got to working it the weight had dropped perhaps 20-30 pounds but it was still really heavy. Nevertheless I wrangled it out of that corner with my log hook and rolled it out to the central room on the main floor where I began to cleave off the bark and majority of the sap wood with an adz and a slick, reducing the size to about 19″ diameter and reducing the weight further another 20+ pounds.
Afterward, somehow I wrangled it up onto my firewood-cutting cradle without injury, in order to clean up the surface mostly with a drawknife.
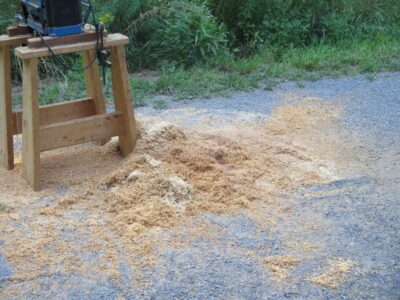
Mrs. Barn now has two trash bags of drawknife shavings to use for woodstove fire tending next winter.
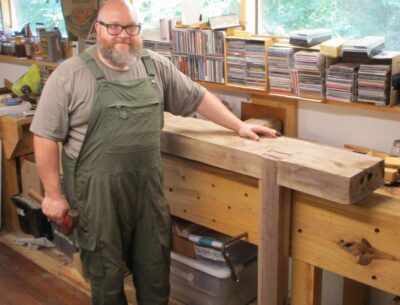
In the end I wound up with a sublime section of tree, mostly straight and exceedingly dense white oak.
Stout, brother, stout.
Up next – cutting and fitting to the end of the beam.
It’s been more than six months since I put this project aside (not my longest hiatus for sure — my Ultimate Portable Workbench project has been dormant and partially assembled for several years now) and the time has come to move it forward. The Japanese planing beam is something I have wanted since first reading Toshio Odate’s book more than four decades ago (!), and more recently inspired by Adrian Preda’s video from three years ago.
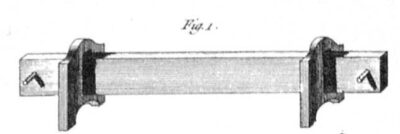
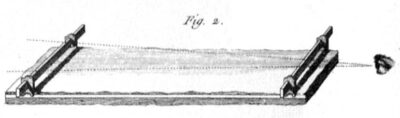
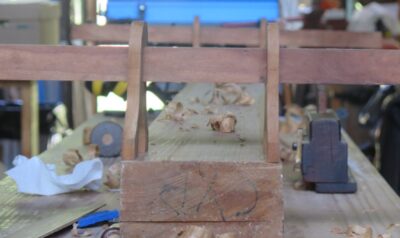
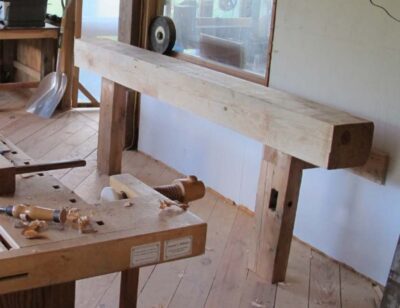
Given the many moons of settling and relaxing it was time to true the beam and remove the 1/16″ of wind it had from one end to the other. Since I am all about cultural appropriation I appropriated Roubo’s technology for flattening stock, beginning with his winding sticks on stilts.
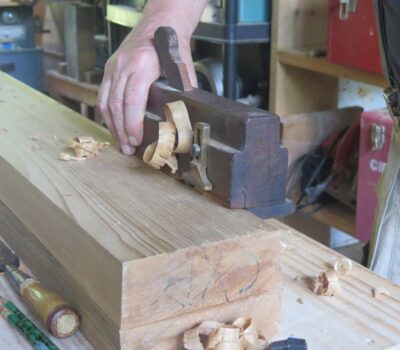
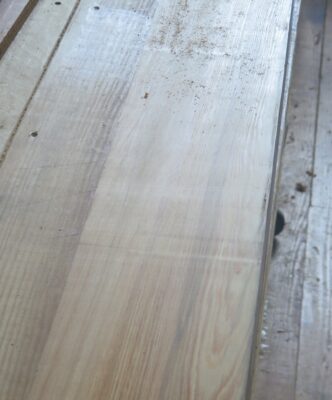
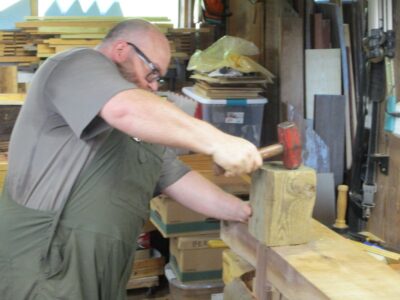
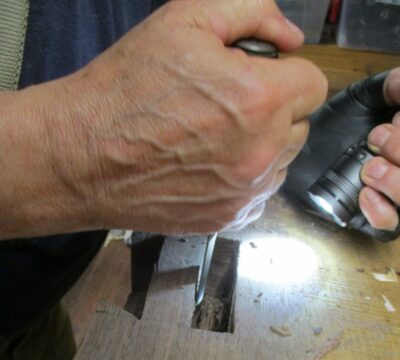
Using my shoulder plane I shot declining rabets on the necessary opposite sides until the winding sticks aligned. This picture is just a stroke away on each rabet to be done.
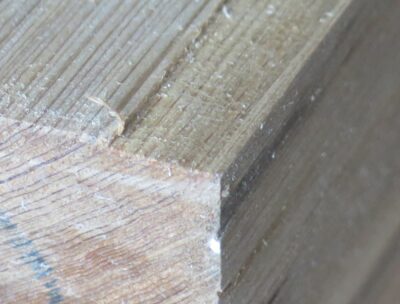
Using my #5 set up as a foreplane to work off of the tapered rabets I got the beam flat in a few minutes. With that done I rotated the beam 90-degrees in both directions and used a cabinetmaker’s square to square up those edges. I did nothing to the underside.
Up next — working on the ~400-pound bolt into the base.
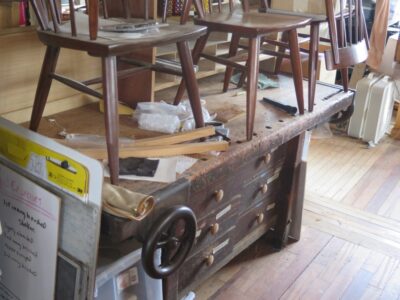
While cleaning up/out the big shed in Maryland I came across this big stout bedroom dresser (pic looks odd because it is standing up on one end). I vaguely remember someone gave it to me to empty out an old house and the piece is a beast.
Combined with the inspiration from BobR’s recent video on making himself a new workbench, my “I wonder if…” brain got to thinking. Can a massive but useless bedroom dresser be turned into a premium workbench? I guess I’ll find out.
I’ll be pursuing this project once I get some other workbench projects out of the way. In the meantime, I’ve got a Japanese planing beam and my Ultimate Portable Workbench to finish up.
One of the great things about possessing and occupying the barn is that I have 7,000 square feet of space. And occupy it I do. Lots of storage, lots of work space(s). As a matter of fact, I have more than a dozen work stations allowing me to set up multiple projects, moving from one to the other as needed. Or more truthfully, moving from a cluttered one to a less cluttered one.
Thus the down side to occupying the barn. It needs more regular cleaning than I am inclined to do.
I have two dear friends, MikeM and MartinO, whose shops are so neat and orderly at all times they are what critics of shop videos would say, “It looks like no one ever works there, they are too clean.” I can attest that Mike and Martin are indeed so orderly their shops do look that way. Whether it is by necessity or temperament, the shops reflect the orderliness of the men themselves. Everything is in its place, put away immediately after use. Everything is kept clean, all the time, beginning with the moment a task is completed.
I will resist the churlish temptation to brand this as some sort of psychosis (smile). Alas, I do not possess the traits these two neatniks have as my operating system.
For the past few months I have been paying the price for my own poor housekeeping habits, working my way back into regular shop time by cleaning the place, one work station at a time. The end in in sight but I know well enough the trial of messiness will return soon enough.
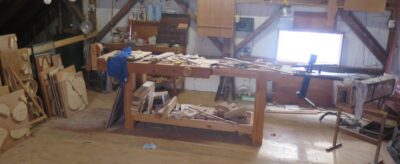
Here’s a partial montage of my work stations. I apologize in advance for the photography; trying to get good images when the space is ambient light and blinding snow reflection is blasting through the windows.
On the east wall, directly underneath a double row of windows is my FORP monster workbench, 8-1/2 feeet long and probably close to 500 pounds. This bench gets used almost every day, currently is is the working platform for assembling my parquetry units for the big tool cabinet I’m making. Underneath the bench is a cabinet full of marquetry/parquetry tools and supplies, and my stash of adhesives. They are located here to be near the wall propane furnace.
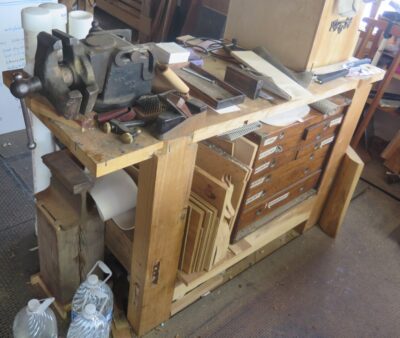
Turn around from Roubo and you’ll find my third child. If I was a Viking I would have this one buried with my in the mound. This bench, with one of my Emmerts on board, is my most used piece in the whole shop. I’m currently using it tp layout the doors of the parquetry tool cabinet.
One step behind and parallel to this bench is an early Roubo, not really successful but good enough to use as my metalworking and tool repair bench. It has an Emmert machinists vise on it, and many jigs underneath.
Midway along the north wall is another Roubo bench, now my primary finishing station. Underneath are cabinets full of brushes, pigments, and tube paints, etc.
Turn around from my finishing bench and you will find the Studleyesque bench I built for the exhibit now almost a decade ago. It is perfectly usable as a general bench, but I mostly use it for my sellable inventory underneath, and packaging orders to ship out.
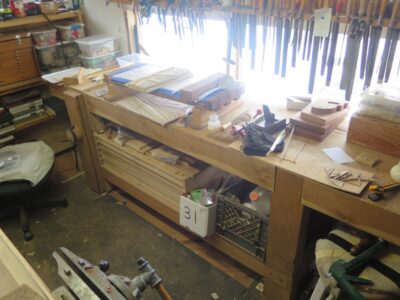
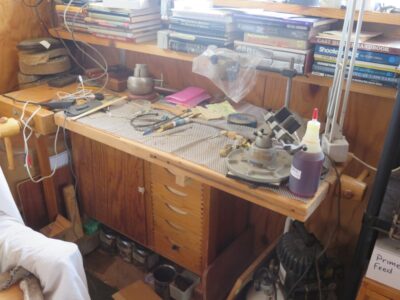
Down in the northwest corner of my shop is my “fine work” bench, a salvaged and renovated Sjoberg I use for all manner of small scale work. Gunsmithing, engraving, checkering, silicone mold making, chasing, etc.
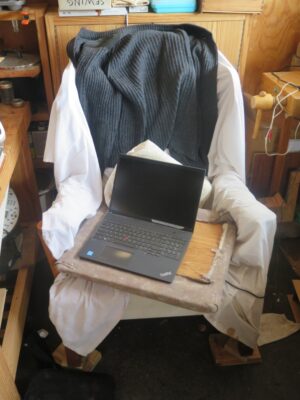
Literally adjacent to the Sjoberg bench is my writing station. You might not think writing is work, but I promise you it is. The chair frame was made by my Roubo translation collaborator Philippe Lafargue. I use a turned over seat deck from a long gone project as my lap desk.
In the corner opposite my engraving station is my waxworks, encompassing all manner of wax processing. It’s on top of a large map case unit full of veneers, mother of pearl pieces, and other exotic material. Keeping the waxwork tidy is an unwinnable proposition, I just try to keep it usable with minimal fuss.
And this is just some of the stuff inside my 15′ x 35′ heated shop.
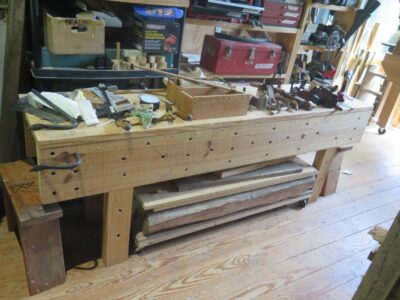
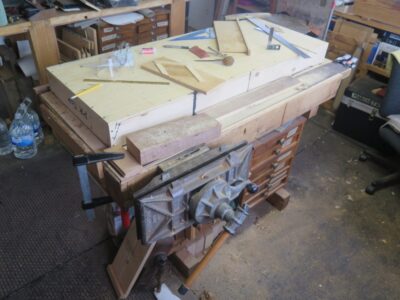
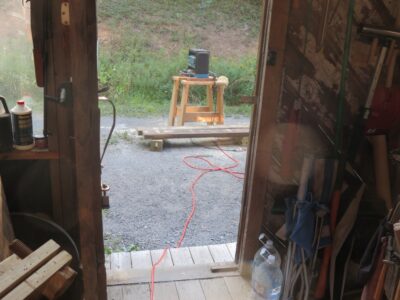
Stepping outside the heated shop is the “great room” in the center of the floor. In the center of that is this Nichiols that I use whenever I am traveling to demonstrate traditional hand tool work. It gets used here too, currently for making a Japanese planing beam and the base frame for the parqutery tool cabinet.
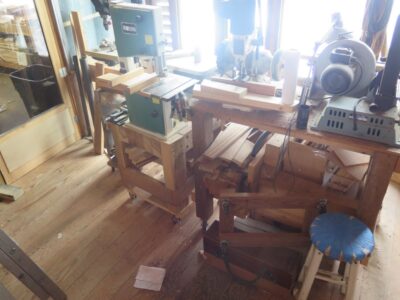
The north side of the great room is just tool and supply storage, but along the south edge is the space for my lathe, chop saw, and a vintage machinist lathe I bought at Donnely’s and then it was restored by my long time friend Jersey Jon.
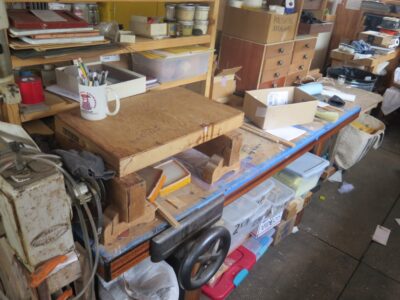
At the east end of the room, in front of the wall o’windows, are two rolling benches with a variety of power machines, and next to them is my drill press.
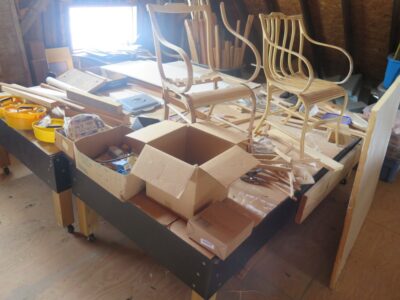
On the opposite side of the floor from my shop is a space I originally designated as a classroom. It contains several work stations for students, but now serves as an intermediate space for things in process of being “put away.”
Then on the fourth floor is my Gragg chair workshop.
At one end of the 40 x 24 space is my Roubo workbench, steam box and many bending and assembly jigs.
I also have a couple of large assembly tables that can be situated as the need arises.
So there is a truncated account of all the work stations I need to clean.
Image from early 2012, the year before we moved to Shangri-la. At this point the shop was still mostly empty space.
In my early days of working in the barn one of the very first things I did was install a massive (8″ x 10″ x 8′) planing beam along one wall of the shop, but over time I realized it was mostly 1) the most robust junk shelf in the world, and 2) a tremendous space hog consuming too much valuable wall and floor space I could not afford. Especially given the reality that eventually I had several other options for hand planing workstations. In the end I dismantled the beam and repurposed the timber into something else.
Still, I never lost that ephemeral sentiment that, particularly in the realm of Japanese toolwork, an inclined planing beam would be a nice addition to the place. [N.B. it seems as though I am creating new workbenches about as fast as I get rid of the old ones! Mrs. Barn thinks I have “a workbench problem.” She is incorrect; I do not have “a workbench problem,” I have a lot of workbenches. Completely different thing.]
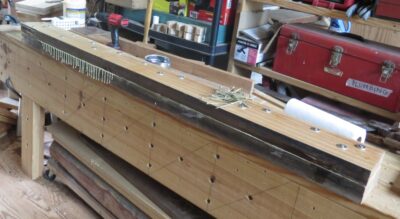
Thus I set about trying my hand at the classic Japanese planing beam using some of my less-than-perfect cypress planks as the core, glued together to make something stout. By “less than perfect” I mean that one side of the 11/4 c.1840 water tank staves was a little beat up or degraded. I extracted a pair of the staves from my stash and ran them through my little power planer that has been my corded apprentice for nearly forty years.
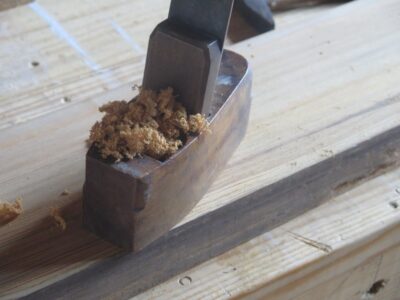
Once I got the gluing surfaces cleaned up I dressed them with a toothing plane to remove the planer chatter and increase the surface area for the glue contact.
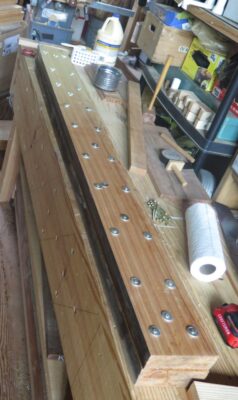
Using the technique for gluing stack laminations I learned in the foundry pattern shop 45 years ago I employed screws to temporarily clamp the two planks together, this time using 4″ decking screws with fender washers underneath each screw head. The clamping power of this system is impressive, as you can tell from the squeeze-out. I left them overnight then removed all the screws and washers.
Since the compression divots and the screw holes are all on the underside of the beam they are of no consequence.
Our plan from the beginning of Tim’s bench-building visit was to fabricate what was essentially a kit, since everything had to fit as individual pieces into his compact station wagon for the trip home.
Our final day together was spent sorta assembling the bench to make sure it fit together the way we wanted. Since it was a split-top Roubo, we could each work on one half of it at different work stations. This was Tim’s first big woodworking project so I let him do much of the work.
In the end we screwed some temporary cleats to the underside of the slabs in order to get it up on its feet, and mounted Tim’s piano maker’s vise for the obligatory pictures.
The rest of the work, installing the stretchers and cross battens and trimming the legs to length, will be accomplished by Tim once he gets back home.
We made exact measurements prior to beginning the construction so it all fit into his little station wagon, just barely clearing the rear hatch and dashboard.
And with that he was on the road back home to work on completing the bench as time allows.
NB – Tim has been making steady progress but the terminus has not yet arrived.
I am fairly confident that had Roubo’s contemporaries owned Shinto rasps, they would’ve used them That’s my story and I am sticking to it.
That is all we did, all day. That, and listen to music.
Then, with the gentlest taps possible we put the pieces together for the rear half.
Since the whole thing had to be disassembled for the trip home we made little effort to get it, well, all together. We did just enough to know that it could go together once it got there.


Recent Comments