I am fairly confident that had Roubo’s contemporaries owned Shinto rasps, they would’ve used them That’s my story and I am sticking to it.
That is all we did, all day. That, and listen to music.
Then, with the gentlest taps possible we put the pieces together for the rear half.
Since the whole thing had to be disassembled for the trip home we made little effort to get it, well, all together. We did just enough to know that it could go together once it got there.
There’s actually a bit of overflow from Day 1 but this is mostly about Day 2 activities.
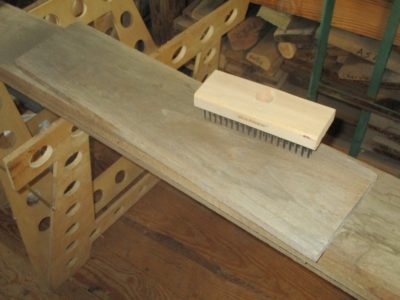
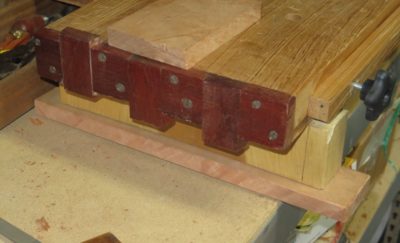
The regions of epoxy/sawdust fills had hardened, and then flattened with a variety of tools like Surform, Auriou, and Vixen files and rasps.
We started off by spacing the legs on the top. This was easy enough as Tim was going to use his sublime Studleyesque piano-maker’s vise as the tail vise for the bench (of all the piano makers’ vises I’ve seen it is the closest one to Studley’s). We set that in place and laid out the leg joints accordingly to be symmetrical.
Tim was so taken with this German horned toothing plane I made sure to send it home with him. I liked it a lot too, but I have another dozen toothing planes. Still, if I find another one like that one…
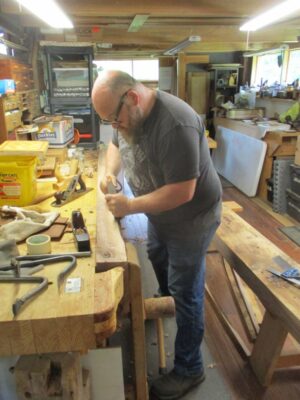
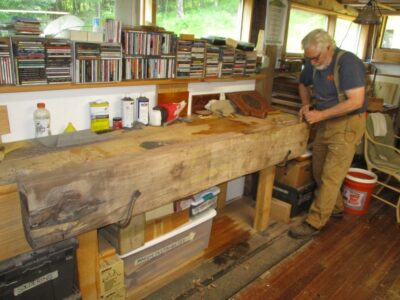
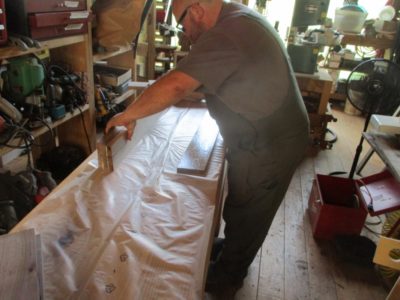
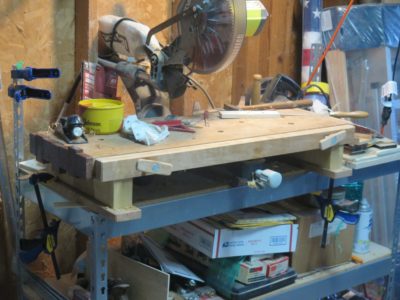
Since I do not possess the industrial scale machines to flatten and square the slabs we had to do all that by hand. Our goal was not to accomplish pristine smooth slabs but rather get them square, flat and true, at least in the regions of the joinery. For the most part this was done with scrub and toothing planes, the final surfacing will be done by Tim next spring after the bench has been up on its feet through the winter.
Once again, with timbers this massive the Roubo winding sticks were worth their weight in gold. This started out with a wind of ~1/8″ and is now just a whisper from finished.
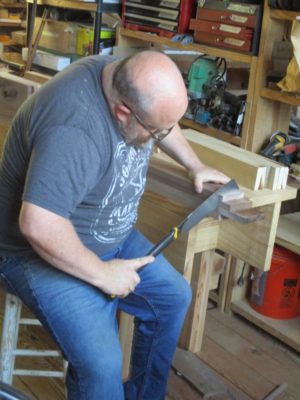
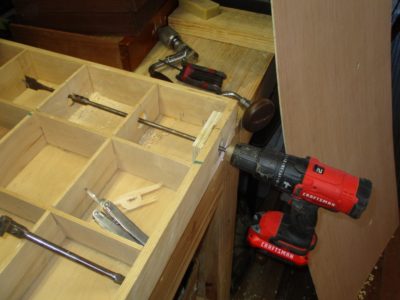
Once the first slab was trued we really got to work. I did the layout for the joints and cut the dovetail shoulders, demonstrated the first mortise and dovetail and Tim got to work on them while I worked on the other slab.
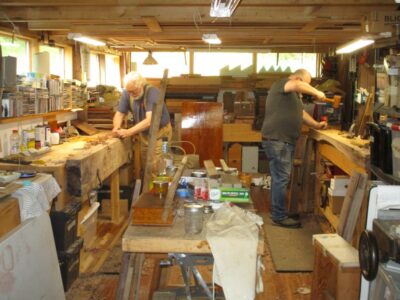
This is a favorite picture of two stout fellows hard at work during the hottest week of the decade, music blaring throughout the atmosphere.
With the overnight gluing of the leg and stretcher elements successful, we undertook their preparation for the joint cutting to come.
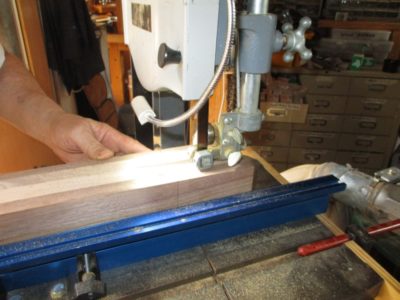
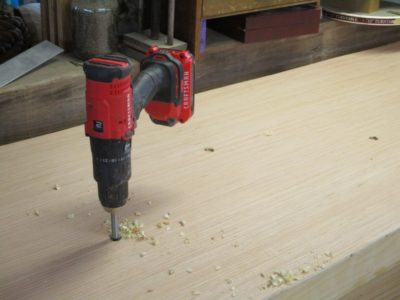
My little 4″ Makita jointer/planer combination was a priceless jewel in the process, squaring and flattening the edges.
We dragged my beloved Ryobi lunchbox planer out into the driveway to true all four edges, saving the planer shavings for use later in the day.
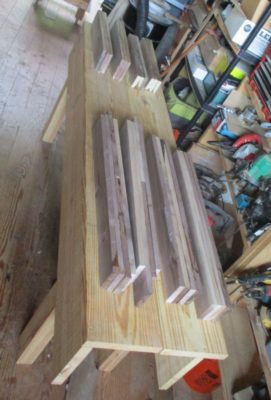
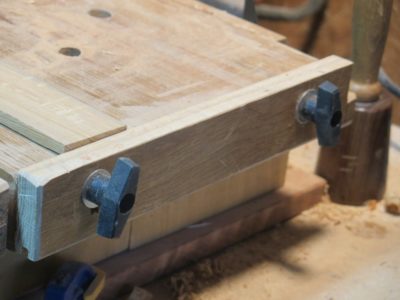
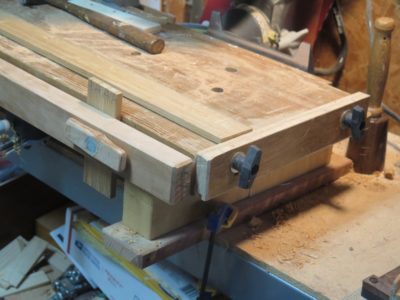
Tim set to work cutting all the elements to approximate length, cleaning up the ends so we could start cutting the double-tenon ends.
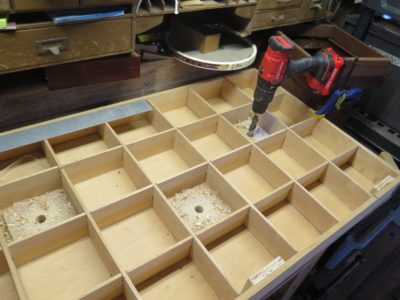
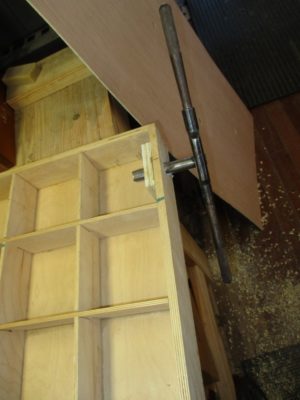
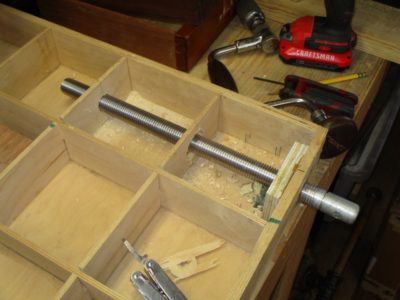
With one end established I laid out the three sections of the top joints, two tenons and one central open mortise.
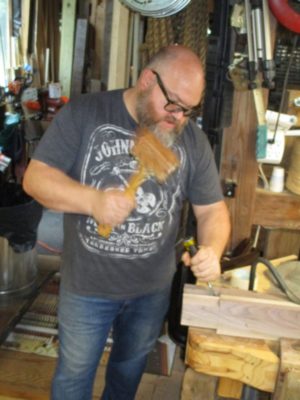
The lines of the mortises were cut on the bandsaw.
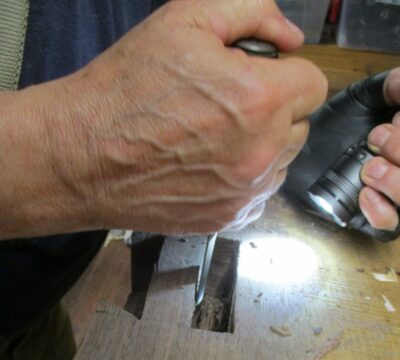
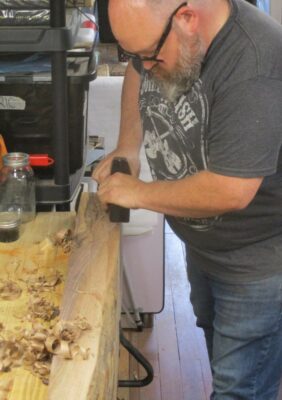
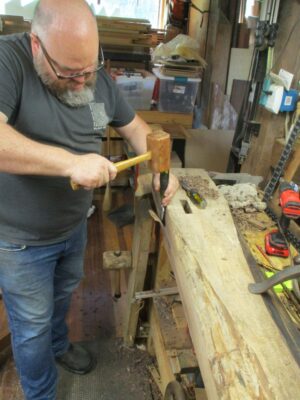
The waste material was removed with mallet, chisel, and brute force. My technique is to drive down along the base of the joint, then split out a half inch of waste at a time from the end grain.
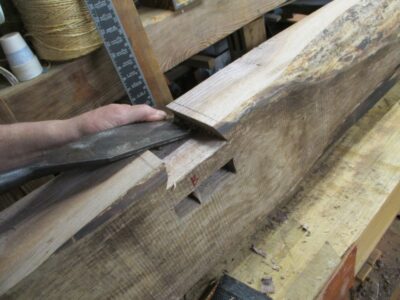
While Tim was working on the open mortises I cut the dovetails on the outer corners.
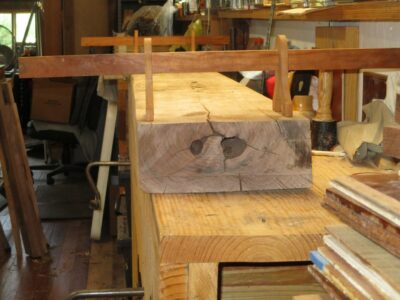
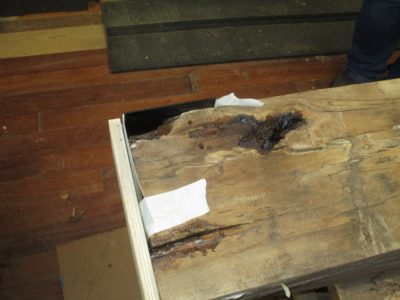
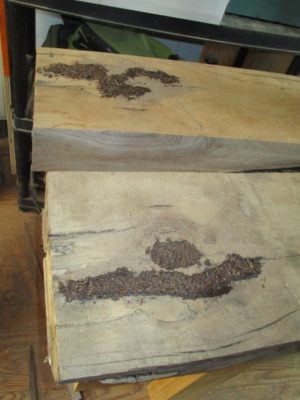
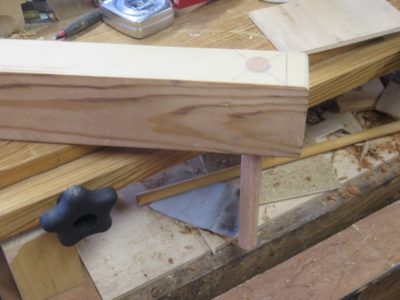
It was then time to turn our attentions to the one corner of the slabs that needed to be built up due to the wain edge of the slab.
I sized the area with a diluted solution of West System epoxy thinned with alcohol for greater penetration.
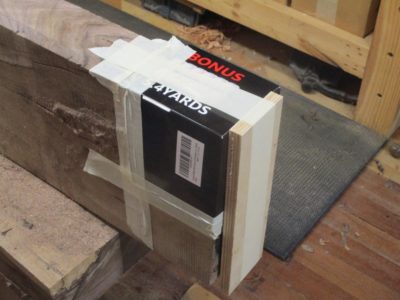
I made a coffer out of a box and taped it in place.
With that corner “face up” we had a perfect form to fill the void.
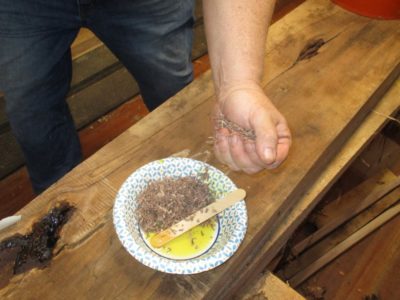
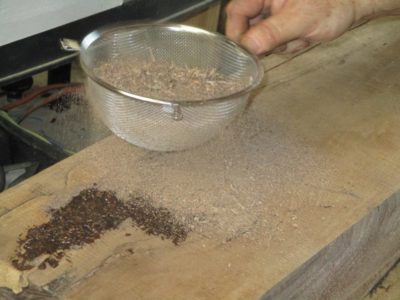
I mixed some West System epoxy and thinned it with alcohol, then saturated a pile of planer shavings to make a fill material which was stuffed into the void.
One final drizzling of the thinned epoxy and a last sprinkle of shavings completed that task and it was left to harden overnight.
I first met Webmeister Tim during my research for the H.O. Studley tool cabinet book, probably around 2012 or 2013. I got an email from a fellow who said, “Hey, I think I’ve got a vise like the ones you are talking about.” I arranged to meet him in person at a diner in southern Maine and sure enough, he had a vise much like the ones about which I had been waxing ecstatic. Tim was a wood turner but not yet a full-spectrum woodworker, so he allowed me to borrow his vise to study, and eventually, to display in the 2015 exhibit that coincided with Handworks 2015. Of all the piano-lakers’ vises I’ve seen his is the closest to Studley’s.
Our agreement was that he would come and get it, “Whenever.”
Well, after more than a decade of long-distance friendship, including dozens of phone calls relating to the business of the donsbarn.com website, which he now steers, “Whenever” finally occurred last month. Finally aligning the stars of our respective lives, he was able to come to Shangri-la and spend a week with us in the Virginia hinterlands. It was truly a great time of fellowship and productive work together.
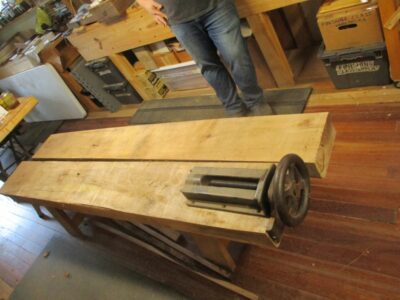
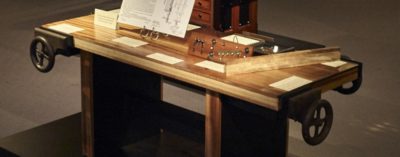
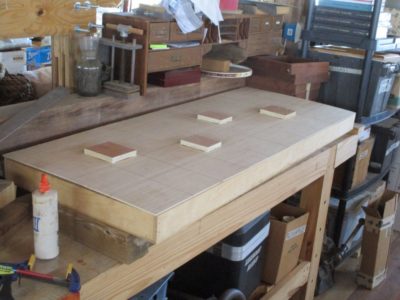
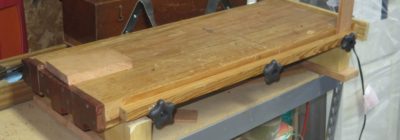
Our focus for the week was to build him a heritage workbench that would last the rest of his life and probably any eventual grandchildren and great-grandchildren as well. The raw material for the bench was my slabbed black walnut, the style of the bench a split-top Roubo.
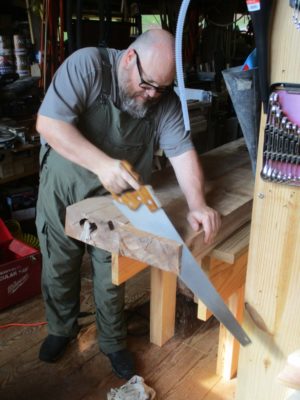
I worked him really hard during the week, beginning with hand sawing the almost 5″ thick slabs to length.
There were a couple of regions of the slabs needing attention, so we saturated them with diluted West System epoxy and walnut sawdust, followed by a top sprinkling of sawdust on top to provide a good surface for final finishing when it got to that point.
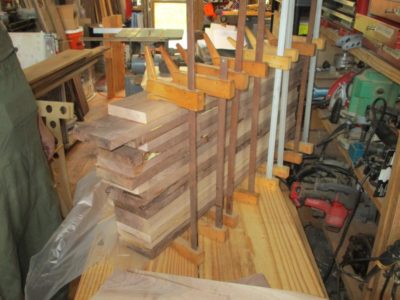
I did not have slab stock for the legs and stretchers, so we had to laminate them from black walnut cut from the same tree and some vintage stock I had in my lumber barn. For the newer stock we ran them through my little Ryobi 10″ planer that has been serving me well for about 35 years.
For the vintage stock from my barn, they had been planed eons ago so all they needed was a quick scrubbing with a wire brush to remove any debris and freshen up the surfaces for gluing.
Then glued-up they were with T3 to accommodate any situation the bench might find itself in the future.
Thus endeth Day One of the Great Webmeister Tim Bench Build.
At the end of July I’ll be building a premium workbench for Webmeister Tim, who will be visiting. In order to get in the mind-groove I was browsing youtube for inspiration, not that I really need it, and stumbled across this wonderful short video chronicling the construction of a bench the analog of which I have built four or five. I probably use at least one my three remaining iterations of them on an almost daily basis (given my inventory of more than a dozen workbenches, one is never more than a step or two away from one). Easy and inexpensive to build, yielding a heritage workbench for centuries to come.
I might take a slightly different path for some of it but en toto this one is solid gold.
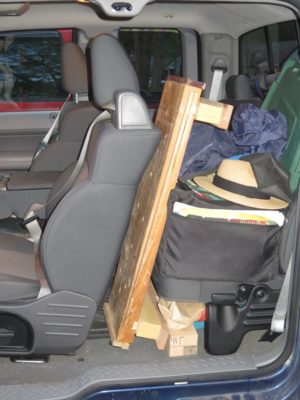
One of the unintended outcomes for my cypress auxiliary bench is that it fits perfectly behind my driver’s seat, making it nearly effortless to take it with me whenever I travel. Given my frequent travels to visit family I’m thinking this auxiliary bench will log a lot of miles.
Until this blindingly obvious flash of insight I always laid the auxiliary bench flat on the seat or in the bed, sometimes causing a logistical conundrum about how to stack the cargo, and in what order. Now all of those concerns are assuaged, and the inclusion of this accessory will simply be routine.
One of the key features of The Ultimate Portable Workbench is its weight, or more precisely, its lack of weight and its rigid stability. That is to be expected for a portable bench, designed for on-site furniture restoration projects. This concept has been unfolding in my brain and shop for three decades.
My estimate for Version 4.0 is a fighting weight of 50-60 pounds, not featherweight but manageable especially since it folds flat-ish. Even though I no longer have any plans for on-site work (there could always be a project that temps me, but it has been a very long time since I did any on-site work) I am going to finish this version as a gift to my son-in-law, given his nomadic status (military) for another ten years.
One of the critical improvements in this version is the increase of work-holding capacity to the point where the bench could suffice for almost any woodworking venture. In addition to the two twin-screw Moxon-style vises I figured out a way to incorporate holdfasts into the design and function. The critical thing was, as I alluded before, thinking beyond the realm of steel/iron holdfasts. They work perfectly in this or any other application but they add unnecessary weight. But, what about holdfasts made from lighter material? At one point I thought about trying to cast some aluminum holdfasts myself, but I have had such success with wooden holdfasts I have decided to pursue that avenue enthusiastically.
Following Mike Siemsen’s perhaps tongue-in-cheek reference in his brilliant video I made a first proof-of-concept model. Imperfect to be sure, but successful enough to propel my further development.
One of the main faults for the initial prototype was that I had not oriented the grain direction of the clamping arm properly. So after a short time in service the arm broke exactly where you would expect. Solving that problem was simple and straightforward, my favorite kind of solution.
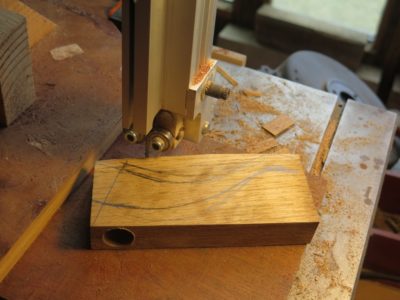
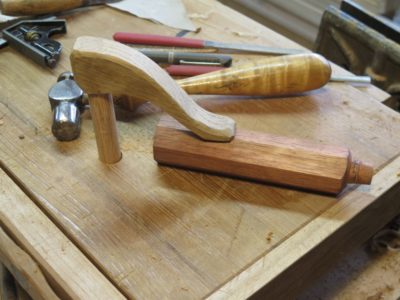
First, rather than making the arm from a scrap piece of pine in the kindling box I used one of the dozens of white oak sample blocks I had boxed under one of the benches. I created these for a corporate presentation many years ago that I would thought was going to lead to a consulting gig, but it never did. I provided a complete set of samples for each attendee in my presentation so I had a lot of these blocks awaiting a new purpose.
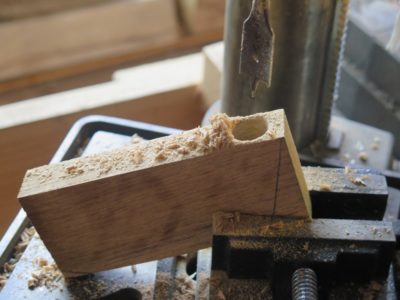
Once I determined the general nature and shape of the holdfast overall I placed the block in the drill press at the inclination I desired and drilled a 3/4″ hole to accommodate the 3/4″ oak vertical post.
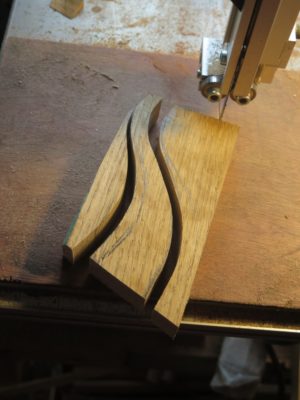
I rough-shaped the block with the bandsaw and glued a length of 3/4″ oak dowel into the arm.
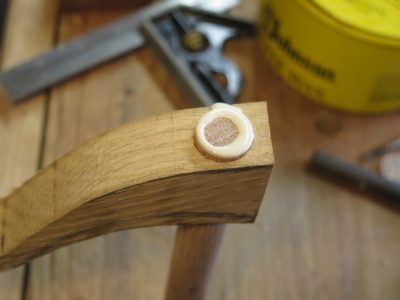
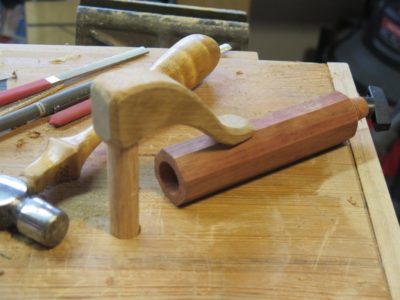
Once the glue was set — I used T3 since I have a lot of it on hand at the moment — I finished shaping the head/arm with rasps.
And with that it was done and ready to get to work. I’d guess my total time of fabrication for the holdfast was about 10-15 minutes.
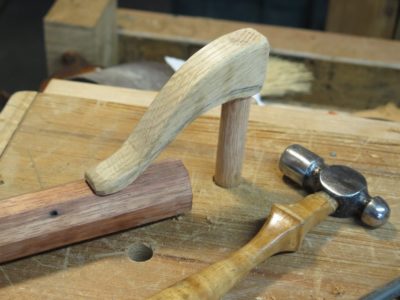
It works exceedingly well, holding whatever piece might be reasonably worked on The Ultimate Portable Workbench.
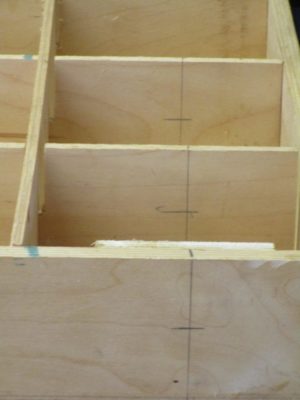
With shop life resuming some vague semblance of normal after late winter and the presence of Li’l T on the scene, I’ve been able to return to working on the Ultimate Portable Workbench. I’ve now reached the stage where I need to layout the holes for the vise screws, and for the holdfasts as well. You see, I’ve decided that even though this is a portable workbench where low weight is among the highest goals, a set of holdfasts can be a much-valued addition. Hence, my exploration of wooden holdfasts. More about that next Wednesday.
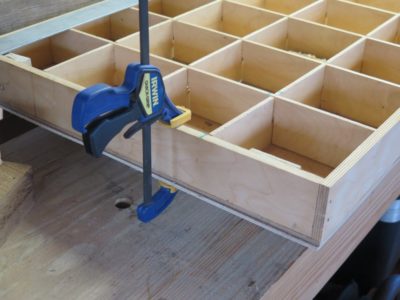
For now my main objective was to locate the holdfast holes so that I could add some backing blocks to the insides of the top and bottom plywood skins. This started by just arbitrarily selecting the locations and marking out the centers of grid boxes and drilling 3/4″ holes.
I then clamped the second skin to the underside of the half-constructed torsion box in order to simply use the holes in the first skin to drill the holes in the second skin.
With that step accomplished I marked the grid pattern on the underside of the second skin so I knew where to put the backing blocks. Once again I used T3 adhesive, in part because I had a lot on hand and because I could not always be sure of the environment for the bench.
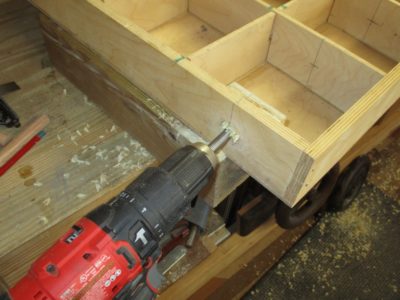
Once the blocks were secured I just used the holes in the skin to guide the drilling of the holes through the block. This process allowed me to get perfectly aligned upper and lower collars in place so that holdfasts could be used in this feather weight bench.
Once that was finished I set the second skin aside and moved on to the threaded holes for the vises. I had already glued backing blocks in those locations.
I drilled the holes through the apron and the grid using a combination of drill bits to accomplish the desired ends. The hole in the apron was 7/8″, in the grid web the holes were 1″ to accommodate the 1″ vise screws.
Fortunately I have a set of extra large taps and dies, rescued from the trash eons ago, so making the matching threaded openings was a snap.
While at my daughter and son-in-law’s house recently knocking off a ton of piddling little jobs I took the opportunity to use and revise my cypress planing board/bench top from a couple years ago.
One thing I did to the board was add another planing stop to the bare end of the bench. It was just a simple thing, an oak board with a couple slots cut into it and a tightening screw for each slot so the board could be raised or lowered as needed.
Along the long sides I moved one of the shooting shelves up and skewed a bit towards the flat top so that it would serve me needs more satisfactorily. I’m doing almost all of my work with either a block plane or a small jack plane so there was no need for a really deep shelf distance from the top. The other shelf was removed altogether and turned into a really low-tech Moxon vise using bolts and handles from the local hardware store. Not robust enough for hard daily use but certainly enough for my needs, or so I thought.
After a few days of using it I decided to step it up a tad. I replaced the old narrow shelf/jaw with a new piece of 5/4 x 1-3/4″ cherry, affixed to the top with two 1./2″ NC bolts embedded with epoxy into two “T” handles. Sure, it is not as functional as a full-blown Moxon but more than sufficient for light duty on-site work. The jaw is purposefully off-set 1/4″ below the bench top to provide another shooting shelf.
As I mentioned earlier I was able to use a small Woodcraft holdfast on the bench top with great success. I ordered some more of them but they were beefier than the previous ones and I thought they were too much for this little work station. It was then that I heard the sound of my palm smacking my forehead with the recollection of the first minute of Mike Siemsen’s fabulous video on woodworking without vises.
So I asked myself, “Self, could a useful holdfast be made from, you know, wood?” So, in keeping with the unofficial title of the barn, The Proof of Concept Place (h/t my pal John H) I gave it a try. Using a piece of 2x literally from the kindling barrel and a piece of dowel from the scrap box I drilled and glued them together, then shaped the assembly with the band saw and a rasp.
In action it was astounding! To be sure I need to reorient the grain of the arm to eliminate as much of the short grain as possible, but the performance of the scrap wood holdfast had me gobsmacked. I will blog about step-by-step making the real one in a couple weeks.
PS my new best buddy “Li’l T” made it home last night after nine harrowing days in the Neonatal Intensive Care Unit. Prayers of rejoicing abound coast-to-coast in thanks for God’s providence and the medical magickery. He is home and in the loving arms of his parents but is more than a little fussy; I think he might have heard me comment on the true inflation rate (~17% if calculated with the same formula as 45 years ago) and his share of the national debt his predecessors have hung around his neck. That would crank up anyone. Gotta be careful what I say within earshot of the little guy.
During a recent visit to keep our daughter company (read: fuss and spoil) while her husband is away on travel as she approaches her “due date,” Mrs. Barn and I undertook a number of little projects around the house, things they have just been too busy to address while renovating their “fixer upper.” In order to provide myself the maximum capability given the circumstances (being military and spending every available minute on house renovations my son-in-law is not able to have a dedicated workbench. Yet. But I have plans…) I grabbed my bench-top raised planing board to use on top of his garage work table, along with my “traveling kit.” about which I will post soon.
To this point back at the barn I have used the planing board as little more than an elevated work surface, not insignificant but certainly not exploiting its capacity to the maximum. I was recently inspired by a video from Tamar over at 3X3. This is perhaps the most elegant and high-function solution to the problem of auxiliary/bench-top work station I’ve seen. Ever since seeing the unit built by my friend WilliamD at an SAPFM event several years ago I’ve been a complete fan of the concept, and a couple years ago Adrian Preda’s version lit a fire under me.
With my planing board sitting on the garage worktable I made a number of modifications to enhance its capabilities at being a productive shop accessory, especially in a setting that was not outfitted as completely as my own shop.
My first action was to attach skids underneath the “legs” for two reasons; first I wanted it raised about an inch for my use in the barn (it may be only an inch, but sometimes an inch makes all the difference in the world when doing hours of work at the station), and second I needed a means to clamp it down to the work table in the garage. I used some cherry I had and simply screwed it to the bottoms of the legs, making it effortless to remove or revise in the future.
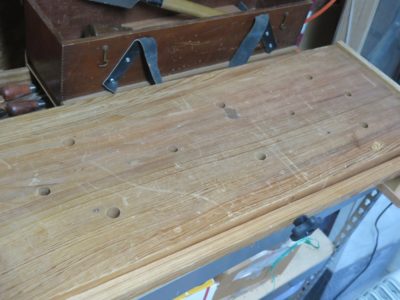
My next modification was drilling a series of dog/holdfast holes through the top. With the accessories I already possessed this enhanced the performance immensely.
The center row of holes is 5/8″ matching the small Woodcraft holdfast while the other holes are 3/4″ to accommodate the Lee Valley devices. At some point in the future I am going to experiment with making home-made holdfasts.
Next week I’ll discuss the remaining modifications.


Recent Comments