The complete 2018 Barn workshop schedule, which I will post every couple of weeks to help folks remember the schedule.
************************************************
Historic Finishing April 26-28, $375

Making A Petite Dovetail Saw June 8-10, $400
Boullework Marquetry July 13-15, $375

Knotwork Banding Inlay August 10-12, $375
Build A Classic Workbench September 3-7, $950
contact me here if you are interested in any of these workshops.
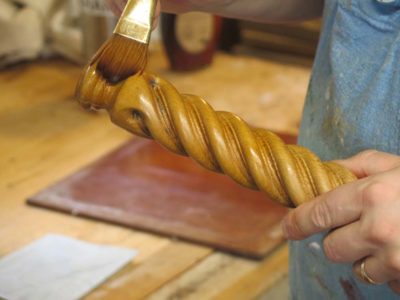
Recently I was noodling around with the gigantazoid wood vise screw that was part of the FORP package from several year ago. Since I only got my bench up on its feet in recent months, I’d had no reason to give the leg vise much thought. These screws were custom made by Lake Erie Toolworks specifically for the FORP benches, and are a thing of fearsome beauty and function.
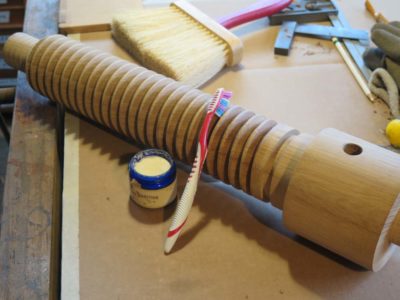
To make sure it would operate easily I ordered some unscented mutton tallow and worked into both sets of threads with a toothbrush, and sure enough it works like a charm.
Previously I had been using wax on threads like these, sometimes even a wax/petroleum jelly blend, but find the tallow to work much better. Since we live in sheep country I’ll have to see if any of the locals make it.
Recently I was back in Mordor and had the chance to visit with my old pal Tom. I first met Tom at a community flea market, he was selling tools and I was looking. I waited too long to get what I wanted from his table, but in our subsequent conversation he indicated he had another one and I could have it in exchange for some lessons in lathe-work. That started a decade-long tradition of my spending Wednesday evenings in his spacious and well-equipped shop. It seems even more spacious now since my projects are no longer there taking up space.
Mrs. Barn would occasionally ask on my return from these Wednesday evenings, “How’s Tom and his family? What did you talk about?”
My reply was generally something like, “Sweetie, we are guys. We didn’t talk about anything but woodworking.” Wednesday nights were often dedicated to building workbenches and sharpening tools.


Since I moved to Shangri-la Tom has built some new workbenches (I was really impressed with both his Roubo-esque bench and a terrific little Nicholson) and has started some new projects, but going there was a welcome homecoming of sorts. He visits me here with some regularity, at least a couple times a year, and he like so many others was crucial in the completion of the barn. He has his own bench here, autographed by The Schwarz.

While driving to Tom’s shop I did notice that a regal oak tree along the driveway had come down. It was at least 25-feet in girth. For scale of the picture, imagine me standing next to this wreckage with my hand straight over my head. It would have not reached the top of the horizontal trunk. As you can tell, the tree was a mere shell of itself by the time it came down, with the core hollowed out by disease and rot.
We spent most of the afternoon going to our favorite local sawmill where I placed an order for 300 b.f. of clear southern yellow pine, just to add to the inventory. The price has jumped since I last bought some clear SYP eight years ago, skyrocketing 33% to 60 cents a board foot! I’ll pick up the order in three weeks and it will be ready to use next spring.
While we were chatting in the shop, Tom said, “In all the years you have been coming here you have only indicated one of my tools you would like to have, so I got you one.” He had, and I was very appreciative of it. It is an absolute treasure an immediately assumed a place of prominance in the shop
Stay tuned.
The complete 2018 Barn workshop schedule, which I will post every couple of weeks to help folks remember the schedule.
************************************************
Historic Finishing April 26-28, $375
Making A Petite Dovetail Saw June 8-10, $400
Boullework Marquetry July 13-15, $375
Knotwork Banding Inlay August 10-12, $375
Build A Classic Workbench September 3-7, $950
contact me here if you are interested in any of these workshops.
And speaking of workbenches, you’ll have the opportunity to work with me at The Barn building your own version of either a basic Roubo or Nicholson bench in Southern Yellow Pine. Thanks to my adapting David Barron’s innovative system for building laminated Roubo benches, and the elegant simplicity of the Nicholson bench, you can arrive empty handed (except for your tools) on Monday and depart at the end of the week with a bench fully ready to go. The only likely hindrance to this outcome is if you spend too much time simply looking at the mountain vista on the horizon.
The finished bench does not include holdfasts or vise mechanisms; if you want those you can supply your own or I can order them for you separately. And if you prefer a 5-1/2″ slab for the Roubo bench rather than the 3-3/4″ slab, there will be an additional $100 materials fee.
============================================
The complete 2018 Barn workshop schedule:
Historic Finishing April 26-28, $375
Making A Petite Dovetail Saw June 8-10, $400
Boullework Marquetry July 13-15, $375
Knotwork Banding Inlay August 10-12, $375
Build A Classic Workbench September 3-7, $950
contact me here if you are interested in any of these workshops.
With the bench “assembled” I turned it over halfway and rough trimmed the bottoms of the legs. Even though I was handling it by myself, wrestling with a 350-pound behemoth is fairly straightforward if I am careful and make sure I am actually handling half or less of the total weight, which is the case if I am rolling or spinning it. With the legs cut to rough length I rolled it the rest of the way over so I could work on flattening the top for a couple of hours.
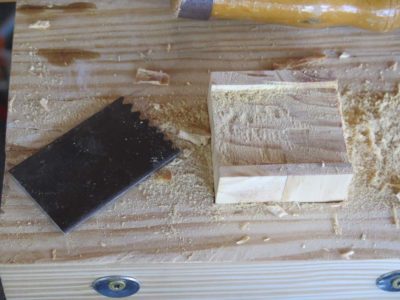
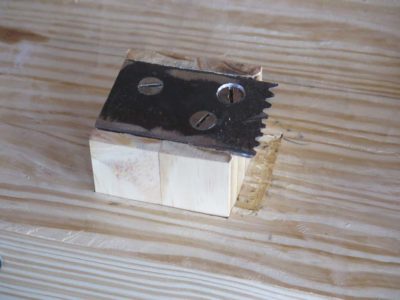

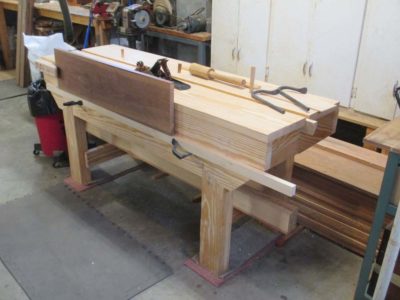
With the bench on its feet, but on a rolling cart so I could move it easily, I set about to installing the planing stop I had already glued up. I planed it such that the fit was very tight, counting on a few humidity cycles to induce ccompression fit on both the stop and the mortise in which it resides in the hopes of establishing a nice firm fit in the end. I’d wanted to put a full width (of the block) toothed tip on the stop but I did not have the piece of scrap steel in the drawer that could suffice so I just used what I had. I filed the teeth, drilled and countersunk the holes for some honkin’ big screws and assembled the stop. I also excavated the top of the bench so the entire assembly is flush.

photo courtesy of J. Rowe
photo courtesy of J. Hurn
With that I cut and affixed temporary(?) stretchers to the legs to support the shelf, Kreg screw style (without the Kreg jig), which on a decently built Roubo or Nicholson bench is the only functional purpose for stretchers. If mortised stretchers are needed to stabilize the bench structure, it wasn’t built well enough. Using scraps from the pile I cut and laid the shelf boards and attached the vise and for now, it was done. Come summer I will flatten the top again and call it quits. As it was the bench served my needs perfectly in Williamsburg to give me both a perfectly functioning work station and a focus for my sermon on workbenches and holdfasts,

While the glue for the laminated slab was setting I turned my attention to the legs and their integral tenons. As in previous efforts the three laminae of the leg are glued up with the center lamina off-set from the outer two by a distance equal to the thickness of the slab plus a smidge, using decking screws and fender washers as the clamping mechanism. These are removed after they have done their duty.
If I did my layout and glue-up of the top slab correctly, and cut the dovetail pins accurately on the tops of the legs, the double tenons are a perfect fit for the mortises already created in the top slab so all that is needed to put them together is a gentle tap to drive them home. Since the bottoms of the legs need to be trimmed to matching lengths ex poste the protruding excess is no bother to me.

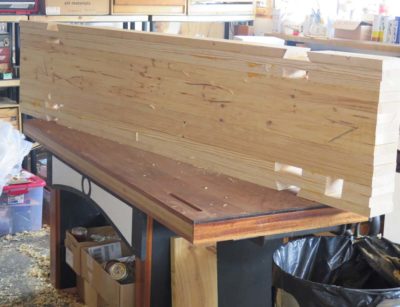
Before I do that, however, I de-clamp the slab after letting it sit overnight and spend an hour or so getting the underside flat enough to seat the legs evenly. I do not care about the underside being smooth, merely flat. A sharp scrub plane and fore plane make short work of it, as I said it was a little over an hour to get it to an acceptable point.
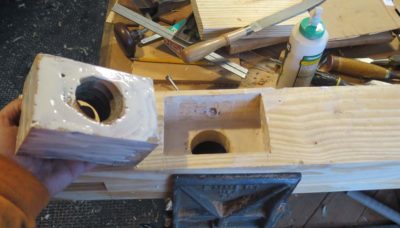

For this bench I did something I had not done before and remain unsure as to whether I would do it again. Since I was installing a vintage screw and nut from my stash I decided to inset the nut into the back side of the front left leg, where the leg vise would be installed since I am right handed (if you are left handed it goes at the other end). Doing this was no particular bother but I am unconvinced of its efficacy or necessity. I also cut the through-mortise on the lower leg for the pin bar of the movable chop/jaw.

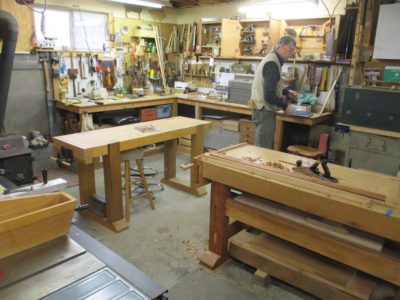
Before long I was assembling the bench and as you can see the space was ridiculously tight with not only this bench but two ripple molding machines being tuned up for the conference. Since this is the only heated working space I have, everything that needed to be worked on for WW18thC was there. It got to be pretty chaotic for a while. I am not particularly tidy as a workman and that shortcoming becomes really evident at times like this.
At this point the bench was assembled and I was at the 12-hour mark for the project.
Once I realized I needed to make another Roubo bench for WW18thC, my sixth or seventh such tool, I began with a selection of SYP 2×12 framing lumber stacked underneath the lathe. (Calling it my 18th bench includes a small number f no-account benches, for honest-to-goodness furniture making or repairing workbenches the real number is probably 13). I ripped in half as much material as I needed to make the bench and legs and loaded the ripped lumber into the truck to cart downstairs to the planer.
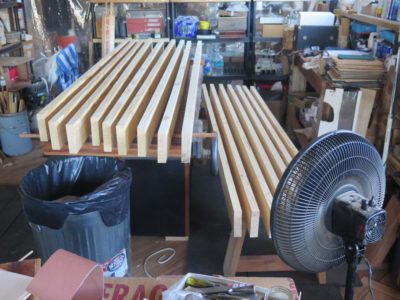
After running it through the 10″ Ryobi planer to get clean surfaces on both sides (although I will have to set aside some time to address the snipe issue, which seems to be getting worse. Go figure, I’ve only been using it hard for thirty years. Or, here’s a thought, run some new wiring down to the machine room/foundry so I can hook up my Mini-Max 15″ planer/joiner that has zero snipe) and then carting back up the the main floor I set them out spaced in my barely heated shop for a few days to equilibrate.
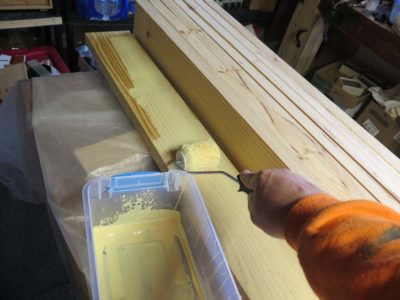
After spreading some plastic on the bench I glued up the core laminae using yellow glue to skirt any temperature issues. Previously with 3-3/4″ stock I assembled the bench tops in two pieces so I could run them through the planer once assembled, but since this was 5-1/2″ stock I was going to have to plane everything entirely by hand. No, I was not going to be slinging these slabs around to feed them through a planer.
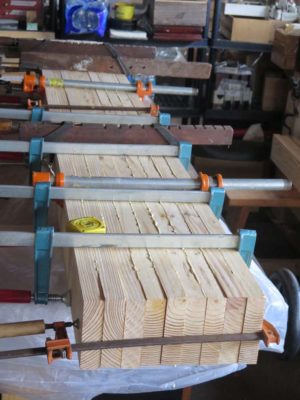
I had not yet finished fabricating Roub0’s panel clamps, which could be scaled-up to work perfectly for this process, so I wound up using practically every clamp I had of this size to get things glued.
The next day I came back to glued up the outer laminae with the mortises, using 5″ decking screws as the clamps. The resulting slab was right at the wight limit I could handle by myself.
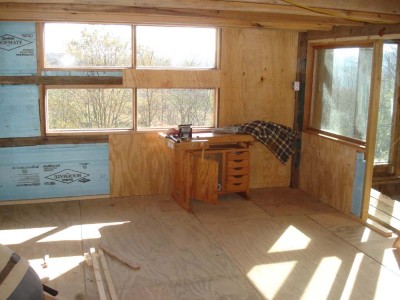
My studio space in the barn is a work in progress. It has been so since the first day I put a single, raggedy workbench in there several years ago even before all the walls were up, and the process will continue as long as I work there.
I find that the fluid nature of shop organization is one of the threads binding craftsmen together, and a source of celebration when we gather together. Fortunately for me, I do not have the urgent requirement for maximized cash flow velocity generation from my work space, since my primary source of income these days is in the crafting of words while sitting on my recliner.
And, since I have been limited in the scope of my activities recently I have been reflecting on, and to some degree changing, the spatial flow for the studio. One of the advantages of this long lead time of several years of working there is to evolve a better sense of what the space should be to best serve my needs. And now I am making those changes, albeit slowly as there is only so much you can do on one leg.
I’ve already written about the reconfiguration of one corner to more optimally serve as my bench for doing the “fussy” work I encounter frequently in the conservation and restoration of decorative artifacts, and increasingly the repair of vintage gun stocks.
Other issues have nagged me, and are now in the process of being resolved. The first of these was my inadequate space in a single location for the residence of my hand planes. I liked the space I had chosen, directly over the planing beam, but I needed to consolidate all my inventory, which involved several steps.
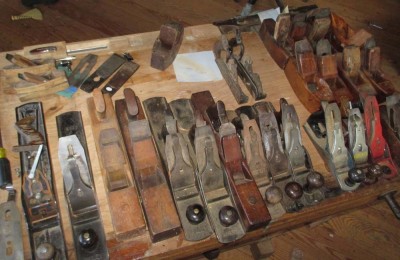
First, I started undertaking a serious evaluation of many of the planes marginal to my work, deciding what to keep and then tossing aside planes that took up space but were not part of my working regimen. Down they came and out they will go.
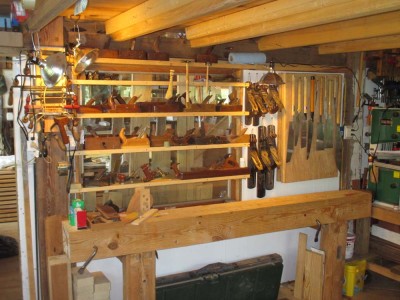
That cleared some space, but not enough. So, I added more shelving without adding more shelves. How? By simply doubling the depth of the shelves in situ. Why I did not do this from the git go remains a mystery. Then I removed the silly brackets holding my Stanley/Bailey planes and hung them on the wall.
Presto! The result is twice as many planes in the same visual space.
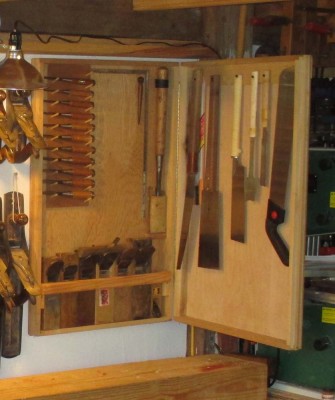
The next move was the consolidation and moving of my Japanese tools from a nearly inaccessible place on the east wall to a cabinet in the remaining niche over the planing beam. With saws on the outside and more saws, chisels, planes (and space for more on the inside) I am pleased with the result. (You needn’t scold me that I have the planes upside down in storage — I do not care)
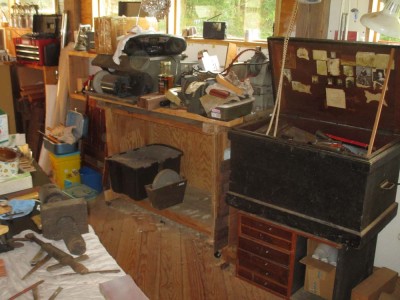
Two final (?) issues to be resolved are the rat’s nest of a space halfway down the long north wall, which had become nothing more than a pile of stuff, some good, some less so, but all in the wrong place. This hodgepodge will be replaced in October when I build my Nicholson bench prototype for the rescheduled Refinisher’s Group bench-build (probably May 2016). This can serve as another work bench and my sharpening station.
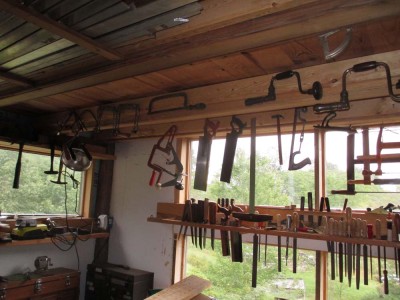
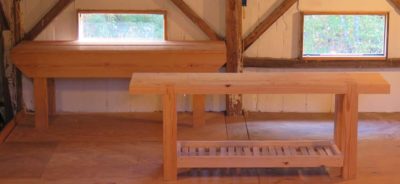
And I keep asking myself: with such a wealth of windows, why do I keep covering them up with stuff? Without a good answer other than, “Because you are an undisciplined slob,” I have begun to deliberately move many of the tools that were blocking the view to somewhere else, like alongside the overhead beams. That one will take a fair bit of trial and error to bring to fruition.
But I am determined to travel much less in the coming year or more, and pouring my time and creative energies into the barn and homestead. This will allow much in the way of improvements and I am anxious for them to unfold.
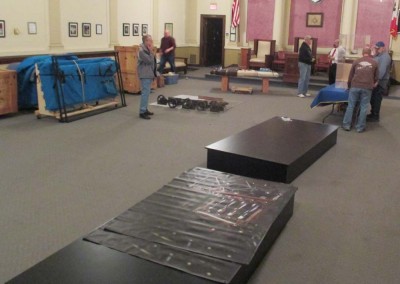
When closing down the HO Studley exhibit, one of the things I had to do was remove all of the exhibit paraphernalia from the exhibit hall, including the exhibit case for the tool cabinet, but also the platforms for the workbenches. This required me to rent a large cargo van to fit it all in for the drive back home.
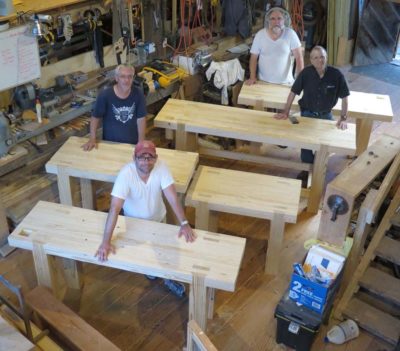
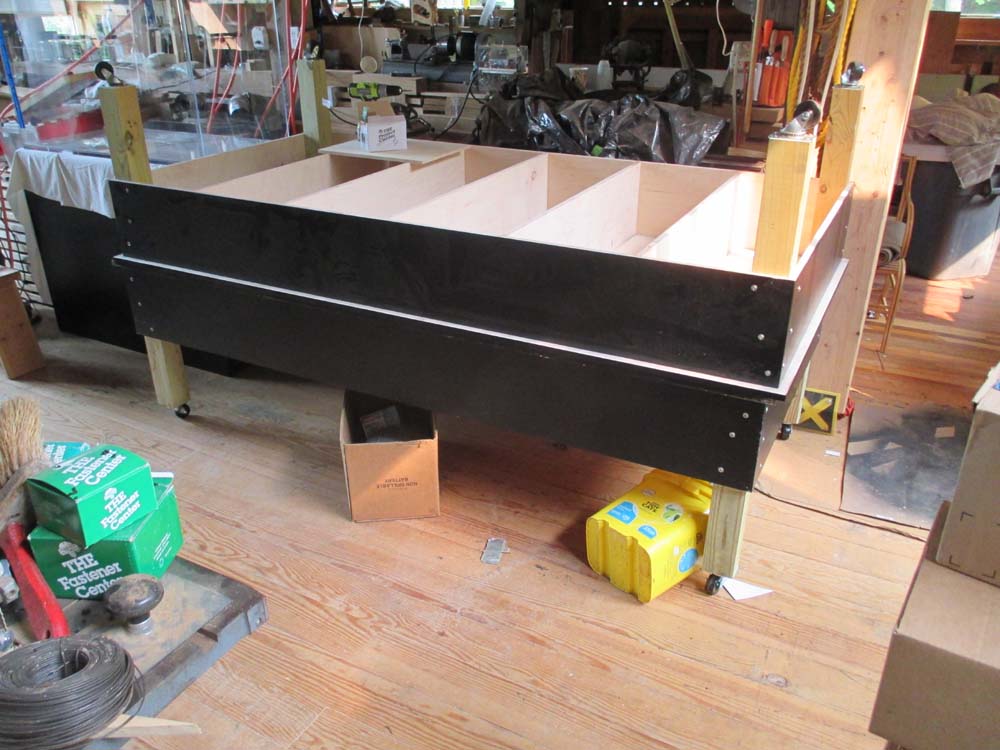
I haven’t figured out what to do with the exhibit case, but the platforms are already recycled into terrific assembly tables. Inasmuch as they were exceedingly stout well-buily 4×8′ platforms with 12″ skirts, all from cabinet-grade tulip poplar faced 3/4″ plywood, they were easily transformed into these new accouterments in the barn.

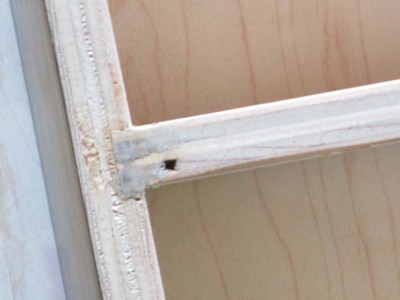
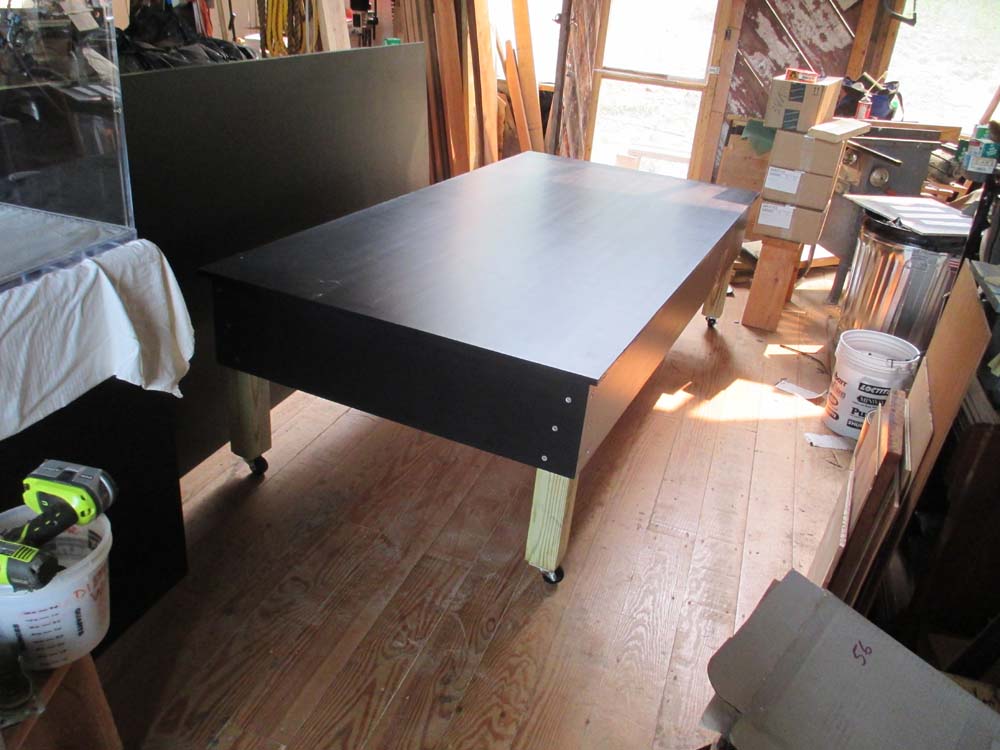
For each platform-now-table I took a single 8-foot 4×4 and cut in into four identical sections to serve as the legs. At each corner I screwed a leg into the two converging aprons, then affixed big casters to the bottom of each leg, flipped it over, and viola, a new and lovely work table!

I moved one into my main workshop to serve as a workstation for either conservation or assembly projects, and the other is currently against the wall in the classroom. But since they are both on wheels, it is 100% likely that they will simply be moved from place to place depending on the needs of the moment.
It sure made me glad I am no longer bound by the 220 s.f. footprint of my former shop in the basement of the Maryland house.


Recent Comments