For the past couple of months I’ve been spending the occasional minutes sawing veneer for my tool cabinet.
When calculating the amount of veneer I need for a particular parquetry project, I generally take the object’s gross area plus an additional 1/3rd, parquetry being at times a very wasteful undertaking. This is all the more true when deriving the raw veneer stock from irregular sources. In the case of my under-construction tool cabinet the gross area is roughly 4′ x 1-1/2′ plus 4′ x 3′ plus 4′ x 1-1/2′, or put more simply, 4′ x 6′, or 24 square feet. Adding another 8 square feet for waste I need to come up with 32 square feet of veneer stock.
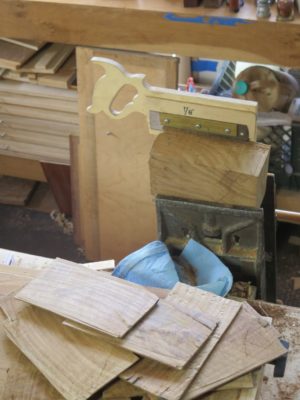
For the most part my starting point for creating the sawn oak veneers requisite for the tool cabinet parquetry was this pile of roughly 6x6x6 chunks salvaged from the FORP trash pile. I did have some larger pieces left over from my bench but I was saving them for something else.
My initial thought was to resaw the blocks into <1/8″ slices on my newly tuned up bandsaw. Alas, that bandsaw’s motor was just not up to the task even with a brand new variable pitch blade. Sawing 6-inches of dense, vintage white oak was just too much.
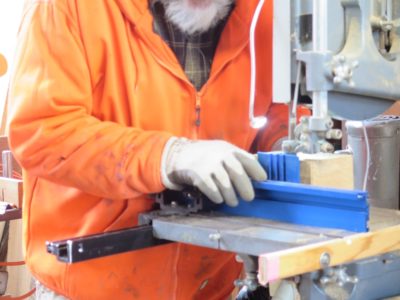
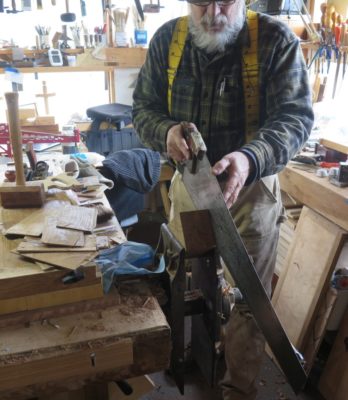
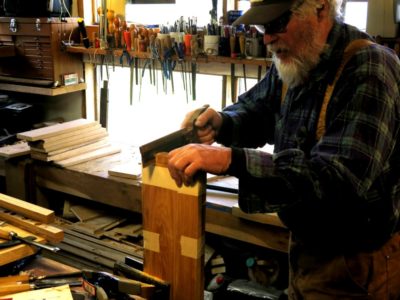
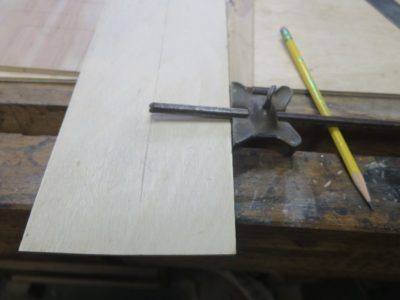
I found it was actually faster to cut the slices by hand, first scoring the edge all around the block with a kerfing plane, then moving on to the actual re-sawing with a hand saw. Normally this would be where I grab for one of my Roubo-esque frame saws, but the spatial logistics precluded that. Instead I used my 3-1/2 t.p.i. rip saw.
I found that this routine yielded around 2 square feet for an hour’s work. I was satisfied with that.
A few months ago I fulfilled a nearly two-year-long search to comply with Mrs. Barn’s admonition to purchase a new (to me) truck to succeed my 2003 S10 with 225,000 miles. I went round and round, at one point early in the search I was ready to purchase a new 2020 Tacoma 4WD based on reviews and friends’ recommendations. I went to the local-ist dealer ready to write out a check for the full amount of a new truck. That is, until I actually sat in one of them. I would not even turn the key and take it out for a drive. The bucket seat was among the most uncomfortable seating platforms I have ever experienced. Yes I had many objectives for the new-ish vehicle but among the non-negotiable ones was that had it be a comfortable fit for my aching hips and back. It meant that I had to go back 15 years to find a truck that fit the description.
But I did find one that fit my body, and once I knew what I wanted I just hunted until I could find one in good shape to buy. In the end I settled on a 60k-mile 2007 Ford with the fold-down console/semi-bench seat rather than the bucket seats that are apparently in every truck ever since. I do not suppose I need to recount the screaming insanity that is the car market these days, so I won’t. (Any person using the term “transitory inflation” has revealed themselves to be a belligerent ignoramus/ideologue unworthy of my attention.) The truck was 1/3 more than I expected to pay, but I did anyway.
It had many features I liked, but one void was the covering for the bed. I looked at a variety of option$ for this feature and remain in price $hock. It $eem$ the lift-up $hell I wanted wa$ in the neighborhood of $2000! Phooey on that.
Then recently while noodling around on youtube looking at woodworking videos I came across this Irish fellow building a cedar-strip canoe and was fascinated.
Use your imagination about how I just might combine my truck’s need for a lifting bed cover with this guy’s project. Instead of cedar strips I still have this pile of vintage 11/4 cypress…
Whenever I have a metalworking file that gets to the end of its usefulness, whether for sharpening saws or just shaping metal over at the fabrication bench, and regardless of the cause of its infirmity — is it worn out or just boogered up? — I never discard the old tool. It is almost always a great source of very hard tool steel so it goes into my scrap inventory for me to make something out of later.
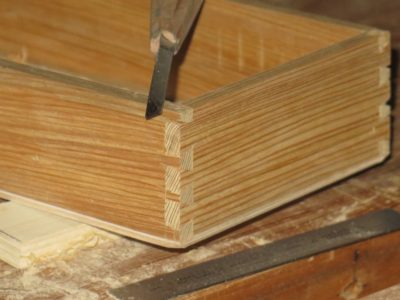
This habit and experience served me exceedingly well recently when we were up visiting L’il T (and his parents, of course). I carved out a little work station in their garage and just invent projects to occupy my time when I am not puttering around with house chores. Well, this trip I was making a tray for the traveling tool kit I bring with me. Much to my aggravation I realized at a particular point that I had not brought a dovetailing chisel for the small dovetails I was cutting into the ~5/16″ cypress stock I was using. My first attempt to chop the dovetails with my 1/4″ bench chisel did not yield a satisfactory result.
Since I am not at home on these trips I make a frequent, almost daily, pilgrimage to their local excellent hardware store. I set the project aside and figured I would see if the hardware store had a decent rack of steel bar stock I could use to make myself one of the triangular dovetailing chisels I like so much for small work. I have made several and find them indispensable for making tight petite dovetails. Although the hardware store did not have any bar stock that struck my fancy, I noticed their file rack nearby, and that they had a triangular file that would certainly fit the bill for about $7.
Sold.
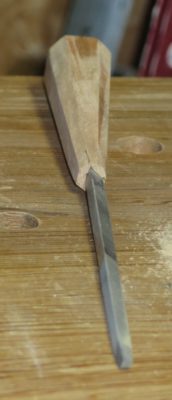
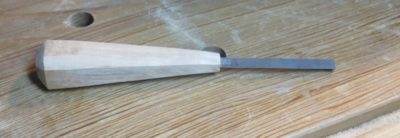
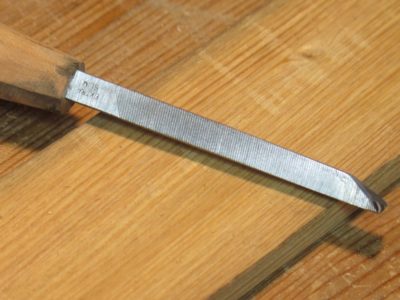
I brought the file home and set to work on it. Yes, it probably was a travesty to use a brand new file, but that’s all I had access to. My first task, undocumented alas, was to fashion a tapered octagon handle from some cherry in my scrap stash. I drilled and then drove the file tang into the handle. A little too vigorously, as it turned out. At some point soon I will fit the handle with a bronze ferrule, but I have not got there just yet.
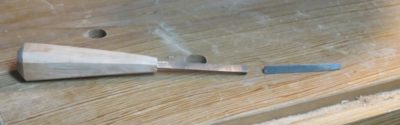
Using a Dremel tool with a cut-off wheel I chopped the file roughly in half.
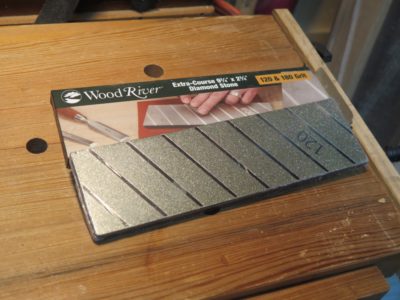
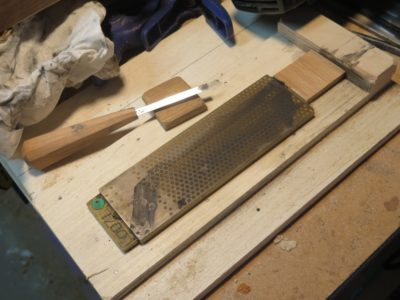
It was time to reach for my new-ish extra coarse diamond stone and get busy grinding off the file teeth and creating the bevel. This is exactly the kind of task this tool was created to accomplish, which it did surprisingly fast.
Once the coarse diamond stone had done its work I switched to the finer combination diamond to bring the surface to the place where it took only a few strokes on the 10,000 grit water stone to bring the bevel and the back to perfection.
In battle the new soldier performed with valor. You can see the blow out on one of the dovetail shoulders resulting from using the 1/4″ bench chisel. The rest of the joint shoulders were fashioned with the new tool, which is rapidly becoming one of my favorites. The fact that I fabricated it myself by re-purposing something extant only enhances my affection for it.
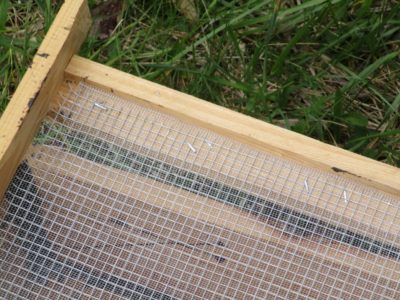
The end was definitely in sight. All I needed to do was make the fitted lid with two layers of screen, window screen supported by 1/4″ hardware cloth and haul it the 350 yards to the weir dam. Somehow I have misplaced the camera with most of the lid-making images.
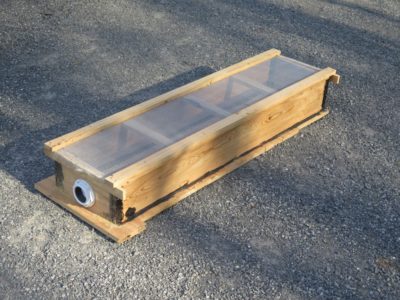
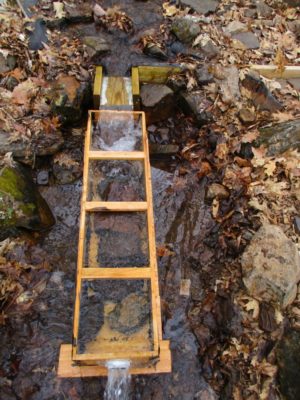
It was very satisfying to see the unit all together, ready to get to work. The only hard part of the project, really, was hauling it up the hill. It is very awkward and though not especially heavy, it was not a feather weight either. I actually strained a tendon in my left hand rasslin’ it up the hill but that is recuperating nicely.
Once I got it up to the top I had to spend some time re-configuring the creek bed since the new box is so different from the old Rubbermaid tub. But when it went in place with a solid WHUMP! as it filled with almost 100 pounds of water I knew the this was just right. To make sure it would stay put from either a rushing thunderstorm torrent or a rummaging bear I filled it with several hundred pounds of rocks.
The connection to the pipeline was a slip-fit gasket inside the shower drain fixture so I hooked it up and we were off to the races.
*Now all I have to do is make a new metal chute and it’s done.
It’s been quite a while since I 1) did any Boullework and 2) made a public presentation.
The last week or two I’ve been going through the exercises I’m demonstrating this coming Saturday to the SAPFM Blue Ridge Chapter, everything from making tordonshell to cutting some new Boullework panels.
When I assembled the metal and tordonshell packet and set about to sawing, the magic just wasn’t there. On a normal day once I get in the rhythm I can go for an hour or longer per saw bade, sometimes even half a day. But not this particular day. Sigh.
I was snapping blades like I was trying to break pasta. It took me four hours to saw a 1/2″ circle (and a pretty raggedy one at that) and I broke more than two dozen blades in the process. When I swept up the pile was truly impressive, but my camera was not handy.
Bad posture? Bad lot of blades? (it really does happen some time) Packet too thick? Rusty antiquated shoulder? Vision problems? (well, that is a given)
Some days are just like that. I’ll aim to get the bear tomorrow.
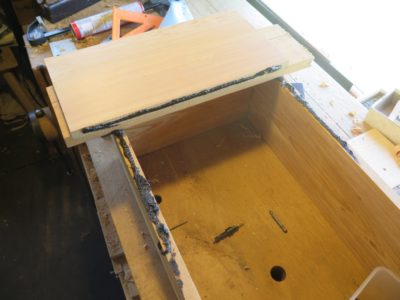
With the dovetailed box sides assembled I moved on to attaching the board bottom. The orientation of the wood there was such that it will cause the maximum swelling and thus compression sealing that panel.
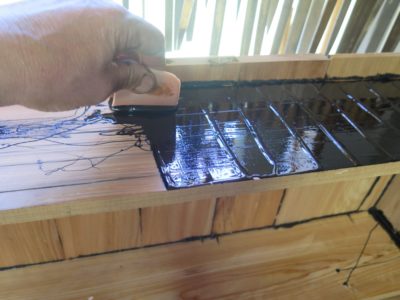
My strategery was to lay down a bead of asphalt and screw thing down tight for each board. I left each board over-length by about an inch to reduce the risk of splitting from the screws. I left the end board even longer to allow for a more stable outrigger effect when sitting in the stream after installation.
The successive board was tarred to both the sides and the preceding board. Tidiness was not the objective, sturdy durability and performance was. My only real objective was squeeze-out.
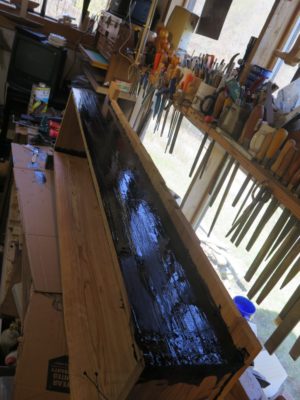
When the bottom was in place I turned my attention to one of the side boards that had a bit of surface cracking. I trowelled on some tar on that whole surface just to make sure it would remain intact. Probably overkill.
A line of tar on the inside and outside of each corner completed the assembly. Using a hole drill I installed the shower drain fixture that served as the connector for the penstock water line.
Now all I had to do was make the screen lid and haul the monster up the hill.
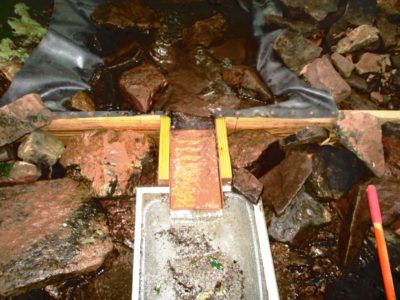
Not only was the severity of the winter weather manifest in the damage to the pipeline and master valve, the existing intake setup (pictured above) at the top of the system was thrashed. The Rubbermaid tub was several yards downstream from the weir (dam) and the copper chute was missing altogether. I cobbled the system back together to give myself a few days to make a new capturing basin. The time had come to construct the collector box I have vowed to make ever since installing the system.
Using some of my prized c.1840 11/4 bald cypress lumber I made the box I have always wanted. The first step was resawing the 11/4 stock into three equal boards roughly 4-feet long and eight inches wide for the long sides and a foot long for the ends, and the requisite number of cross-boards for the bottom. I started the process by cutting the initial kerfs on the table saw, then finishing the task by hand (the lumber was too wide for my upstairs band saw. I could’ve used the resaw bandsaw in the basement but would have had to move a whole lot of stuff to excavate it.) Sorry, no pics for this process.
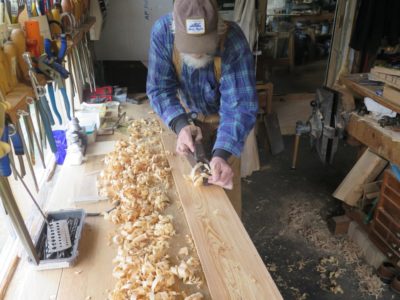
The boards were foreplaned as the finished surface. Incidentally, even though the wood is 180+ years old it is still tacky on the inside when re-sawn and planed, and cypress’ typical smell of patchouli oil fills the air! BTW I hate square-post-through-the-bench-top planing stops a la Roubo and always have. I much prefer the right-angle stop in the leg vise as shown here. It’s just how I roll, or rile, or whatever.
With the lumber prepped I set to cutting the dovetails in the corners. As is my custom I cut the tails on both pieces at the same time. Normally I nail the two boards together but this time I decided to tape them.
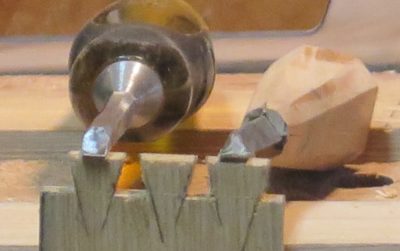
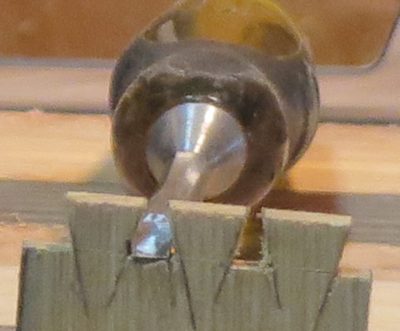
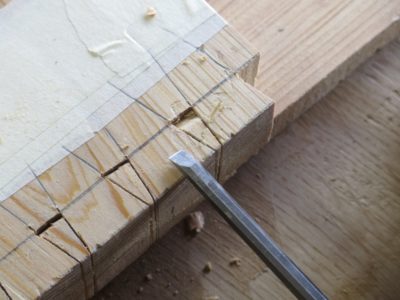
Another of my multitude of peculiarities is a dislike of sawing out the dovetail waste. I just incise the shoulder, pare out a bit, then go back and wail on the waste. In a minute or two they are done. I cut the pins basically the same way.
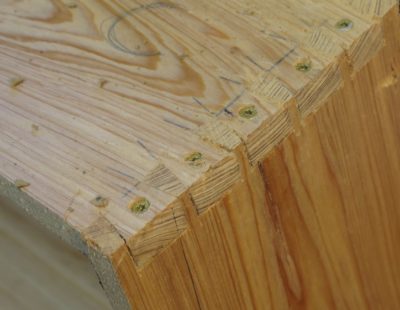
The dovetailed corners were screwed together with decking crews (pre-drilled and countersunk) since adhesive was not likely to perform permanently under water. With the screws and the swelling from the moisture I expect these joints to remain tight until forever. Even so, before installation I slathered the corners inside and out with tar, just to make sure.
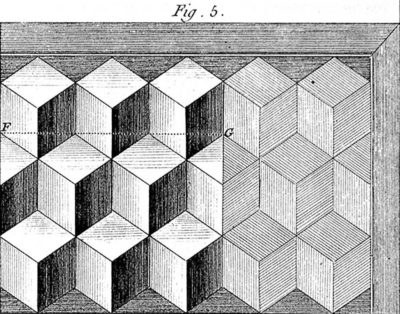
When discussing the layout of parquetry patterns, Roubo is adamant that the primary pattern must be either whole or half units of the geometric composition, that having a partial sequence of random width was low rent. With that in mind I began to layout the parquetry pattern I wanted for the shell of the tool cabinet.
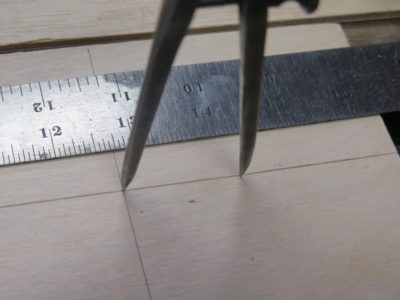
Using the literal dimensions of the cabinet width I began the process by shooting some guide lines then stepping off the fragments of the design using my 30-60-90 triangle and a set of dividers.
A la Roubo, my exact measurement was unimportant. What was important was that a primary east-west composition turned out to be exactly X number of full units wide, with the adjacent rows above and below that main row would comprise of X-1 units terminated with two half units.
Once this was accomplished I was able to lay out the sub-units of the of each parallelogram in the Roentgenesque fashion I was shooting for.
Now it was time to begin sawing the requisite veneers from the blocks of Roubo-era oak scraps, and from them to create the diamond patterns to see if the composition worked as well in reality as it was looking inside my imagination.
I am delighted that in the aftermath of being disinvited from the Winterthur conference on marquetry, the Blue Ridge Chapter of SAPFM immediately extended the invitation for me to make my presentation to their group on May 21 in Fredericksburg VA, at Woodworkers Workshop, 1104 Summit Street. I will be the afternoon speaker/demonstrator. It’s my first traveling presentation in more than two years and I am looking forward to it.
You can get any particular information you need through the SAPFM.org website if you are interested in attending, or you can let me know and I will forward your interest to our Chapter Coordinator. I think there is a $10 fee to cover coffee and lunch.
In related news, I will be one of the presenters (Historic Finishing) at the SAPFM Mid-Year Conference, coincidentally also in Fredericksburg, June 26.
With the box and doors constructed the slow task of arranging the interior of the tool cabinet interior will unfold over the next several months. I have at best a vague master plan other than to “compose” the interior space slowly and deliberately, with no doubt a detour or eight along the way.
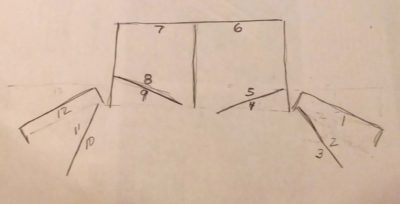
My overall scheme reflects the capacity. The drawing above demonstrates the plan of the tool cabinet with its four interior hinged panels, yielding 12 panels on which to mount tools. In addition, there will be eight drawers at the bottom of the case interior, four on each side.
At the moment my organizational strategy is as follows:
Panel 1 – carving chisels
Panel 2 – spokeshaves and other carving/shaping tools
Panel 3 – bench chisels and joinery mallets
Panel 4 – layout/measuring tools
Panel 5 – smaller planes
Panel 6 – larger planes
Panel 7 – larger saws
Panel 8 – smaller saws
Panel 9 – layout/measuring tools
Panel 10 – files and rasps
Panel 11 & 12 – don’t know yet
Check back in a year and we’ll see how close I stick with this plan.
In total, Panels 1, 2, 3, 6, 7, 10, 11 &12 combine to provide 48 square feet of hanging tool storage, and Panels 4, 5, 8 & 9 add up to another 18 square feet. We’ll see how much I can stuff in there.
In case you were wondering, and even if you were not, many of the tool fittings will be screwed from the outside of the case. Hence, I think the decorative parquetry is still a ways down the road even though I have already begun designing that as well.


Recent Comments