One of the truly exasperating aspects of the Gragg chair workshop was that my 10″ benchtop bandsaw was continuously malfunctioning, requiring us to go up and down two flights of stairs to the main floor with its two larger bandsaws instead of using the little beauty up on the fourth floor. Chairmaking does not require fancy band sawing but it is an important contributor toward making it an efficient process.
After much sturm-und-drang I discovered ex poste that the new 1/4″ bandsaw blades I’d had in the drawer for the 10″ unit were mismarked; instead of being the 56-1/8″ needed they were 59″. I could get them on the wheels and run true when turning freely but they would not stay there once battle commenced. I ordered new blades and they were the right size, so with a complete cleanup and adjustments, combined with new guide blocks cut from a rod of 1/8″ carbon fiber rod from my stash, the new blade installed and ran perfectly and now once agin the saw cuts superbly.
Meanwhile I decided to tune-up my 40+-year-old 14″ Delta bandsaw, a prize from a yard sale almost 20 years ago. I think it was $100 complete with rolling base. For a long time I had been contemplating adding a true rip fence to the saw, and finally made the plunge. Even though the Kreg fence is designed to be installed on the left side of the blade, with a little tweaking I installed it where I wanted it on the right side of the blade. Sweet. I also finally added a dust collection port in the lower wheel cover, which combined with a simple bent sheet metal cowl around the lower guide block unit, reduced the sawdust by roughly 95%.
I am contemplating but have not acted on purchasing a carbide tipped blade for the band saw; the ~$200 price tag is a bit stiff. If you have had any experience with carbide tipped blades for small bandsaws please let me know.
BTW here is an excellent short video on bandsaws that I discovered recently.
Ever since moving to Shagri-la my favorite trimming mower has been an ancient Craftsman mower that was given to us by our friend SM when she lived with us for a few months back in Mordor. This is about the most basic lawnmower I ever encountered. There are no controls, really. There is a primer to pump gas into the carburetor to make sure the unit starts when the cord is yanked. That’s about it. For years and years it did the job for those areas around the edge, areas too close to the house or garden or whatever for the lawn tractor to fit there.
Recently I noticed it began to perform oddly, then it ceased to perform altogether even though the engine was running just fine. On closer examination I saw that the twin alignment pins on the hub had sheared off, as had the bolt that affixed the blade/hub to the engine shaft. And, the bolt had sheared off below the surrounding surface of the shaft.
My next task is to see if I can drill out the center of the broken bolt inside the shaft and try removing the broken bolt rod with a screw extractor. I hope this works as I have not seen any new mowers on the market that meet my desires.
Going back many years I was an enthusiastic supporter of the concept of a vertical marquetry saw as an alternative to a horizontal chevalet, a machine I never got the hang of. I’m not sure if I was the first person to raise the concept to Knew Concepts but certainly I was in there early with encouragement and specific concept and design ideas. The development of the tool took many years and trips down many rabbit trails, not the least of which was the passing of our beloved friend Lee Marshall from Knew and the transition to Brian’s sole leadership and all the logistical and legal details that entailed.
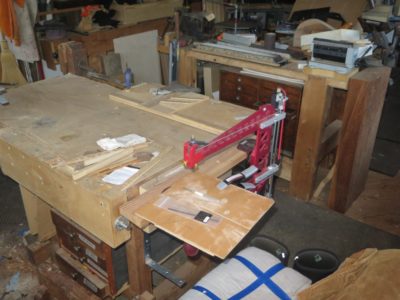
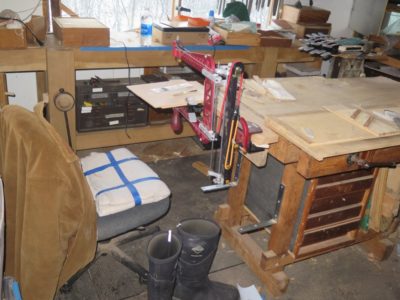
Then came the day several months ago when the very first unit rolled off the assembly line and shortly thereafter arrived on my doorstep. I assembled and used it just enough to get the sense of the tool, then put it away since I had so many other things in my pile of things to get done. Well, I am finally returning to the tool. The first thing was to find a permanent (?) home for it in the workshop. At the moment that location is the end of my oldest and dearest friend in the shop, my Emmert workbench.
Time will tell if this is the final resting place for this magnificent machine, but for now it is working just fine.
As our recent week of Ripplemania III proceeded we were both making progress, albeit not entirely unhampered by glitches along the way. John was very much involved in locking in his wave function (side-to-side) while I was dialing in my new swing-arm cutting head for narrow-ish ripple moldings.
Once I got the free weight on the pivoting head right it started producing some very nice moldings. The anvil weighed just the right amount and I could slide it back and forth to adjust the force on the cutting tool, heavy for the initial cuts then lighter for the finishing cuts.
I also wanted to standardize the workpiece-holding aspect of the platen and spent some time making new clamps from a piece of aluminum angle stock, This approach worked extremely well.
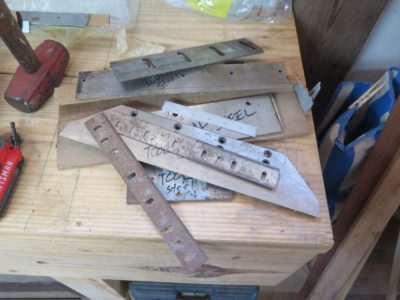
Another thing we did during the week was gather all the tool steel I had in my inventory to begin the work on making new cutters. I had already ordered a variety of tool steel bars over the years for one project or another, when combined with the “used” tool steel I also had resulted in quite a pile. Since I never throw away old planer blades there were a number of them, but the real treasure was the stack of hefty blades (~1/2″ thick) from a book producer’s guillotine that my pal Tom passed along to me. These massive chinks will yield a large number of cutters, probably more than I will ever need. I spent several hours working on a new cutter pattern for my machine but did not get that blade finished during the week.
Even before this week of prototyping John’s machine had ripple molding cutting nailed. So, he pretty much spent the week trying to do the same for the wave molding cutting function.
In working through the problems of wave molding cutting John kept running into the hurdles caused by the elegantly complex head he had created for his machine, one that could do either wave or ripple moldings, and ideally even both simultaneously. This was a really complex problem that expressed itself in a number of hiccups due to the lateral forces being exerted at the cutting edge. He definitely made progress but the problem of the lateral forces and their effect on the cutter-head were not fully solved.
My issues were much simpler, just get a cutter head and workpiece holding system suitable for scratching out a simple pattern. One of the things I decided almost immediately was that my machine was too low to the ground, especially when cranking the handle to drive the moving platen, so I just hoisted it onto a pair of low sawhorse. That helped my attitude immensely.
Last month my friend Ripplin’ John and I spent a week in the barn working on and brainstorming about our respective ripple molding machines, trying to get a model ready for the show-n-tell of Handworks 2020 (this is before we knew Handworks 2020 was being postponed by the Wuhan Virus). I had made a little progress on my machine since Ripplemania II but he had made great strides with his. During the week his main emphasis was on the lateral “wave” cutting function of his elegant machine while I was simply trying to get my newly designed cutting head to work properly.
Prior to our most recent week together I had also been working on the notion of improving the method and form of the ripple patterns themselves. I tried a number of different methods and jigs but wound up realizing that precision layout and careful workmanship was the key to producing a crisp, precise concave pattern. Throughout our week we discussed this issue and I am now thinking that concave is not the way to move forward, convex patterns may be the future.
As John was assembling his machine, a fairly lengthy process since it was totally disassembled to fit into hi vehicle, I was puttering on mine.
My new cutterhead was now configured with the cutter being positioned at the end of a long weighted swing arm rather than inside a spring-loaded modulating frame structure.
I reasoned that the swing arm was a simpler approach and determined to give it a try. Unlike John I narrowed the scope of my machine to do only one thing, namely cut ripple moldings of approximate 1-1/2″ stock width and 1/2″ thickness. No wider, no thicker. Thus my machine structure was much more restricted than his with approximately zero adaptability.
John had been working on two important evolutionary steps. First, the machine could cut but ripple moldings and wave moldings within the same overall machine structure. Second, that the machine could be mechanized and automated thus making it a more practical device for producing large quantities of moldings. As he recited a truth to me, “Turning the platen drive handle gets old after a surprisingly short time!”
During (another) recent pre-martial-law episode of basement workshop archaeology at my daughter’s house I rediscovered a successful “proof of concept” prototype, a phrase I learned from my pal Ripplin’ John and have come to use with great regularity. I cannot even recall the particular project at this point, but only vaguely remember that I needed to do a lot of sanding in the winter, hence it would be inside. I needed a dust control scheme so efficient that Mrs. Barn would not even notice a speck of the dust upstairs, the basement steps ending/beginning immediately off the kitchen.
I had designed a downdraft table for dust control during upholstery stripping decades before and it worked wonderfully for the furniture conservation group I designed it for. In the intervening years downdraft sanding tables had become more common, but I did not have the space or need for one of these big units, 24″ x 36″ or thereabouts was all I needed. Pus, it had to be a benchtop unit given the restricted footprint of my basement workshop.
Being someone who rarely throws away anything that could theoretically become useful in the future I had almost everything I needed to build the unit. The only thing I needed to buy was a 24″ 48″ piece of pegboard from the home improvement center.
I had some nice scraps of 1/2″ tempered foam core sheet and made the box walls from them, sawing them on the table saw. I glued them together into the frame using hot melt glue. Double- or triple-wall carboard would have worked just as well. (One of the reasons I did not use wood walls was my desire for the unit to be ultra light weight; wood would have increased the weight several fold.)
I knew that my small unit, unlike the large downdraft tables, would need to have the air drawn from one end rather than from underneath so the internal air-flow volume had to be tapered, fattest at the end where the fitting was inserted to draw the air and very shallow at the other end. This tapered plenum provided a more equal air flow over (and through) the work surface of the unit, much like reduced/increased ducting controls the evenness of air pressure within air conditioning and heating systems. I found in practice the unit performed admirably in this regard.
The taper was achieved by gluing parallel strips of wood to the insides of the box fame, then stapling on a bottom of corrugated plastic sheet. Again, all it had to do was direct air and not support anything but itself.
For the working surface of the unit I simply cut and glued on a piece of pegboard, with only one cross rib in the center since the dimensions preluded any severe sagging given the pieces I was working on.
When I first set up my tiny basement workshop I purchased a larger-than-necessary cyclone collector, a machine that served me magnificently for all those years and remains the cornerstone of shop cleaning in the barn to this day. I cut a hole in the fat end of the plenum to insert the 3-inch hose fitting from the collector and the unit was done.
I am really glad I rediscovered this accessory and have kept it in my barn workshop since I do everything I can there to keep airborne dust to a minimum. I was recently using it to do some sanding and it still works great.
All it took those many years ago was a bunch of scrap materials and about an hour’s time to make. It was the perfect solution to the problem I had, and if you have an indoor space with the same constraints you might give it a try.
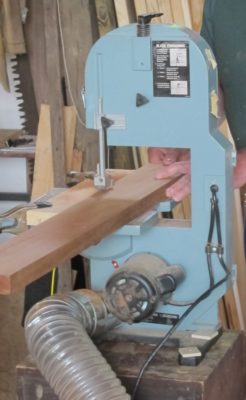
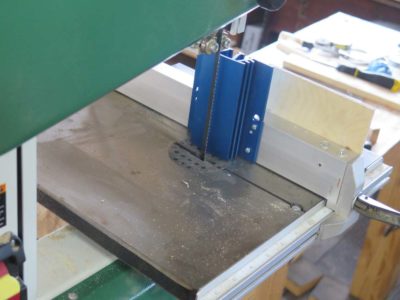
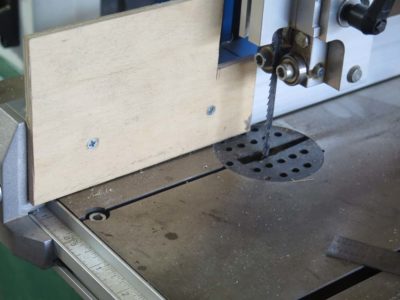
In addition to the earlier Rikon tune-up, consisting of a new lower tire, a new 1/4″ blade (although I am likely to supplant that with a 3/8″ blade) and tweaking the guides, I also recently re-installed the original rip fence augmented by a curved single-point resawing block. My own view of this setup is that a fixed rip fence is almost nonsensical on a bandsaw, given the almost inherent drift in the tool design. But, a band saw that is set up to rip and resaw well is a joy to behold.
Many, many articles and videos have been made about “truing” a bandsaw’s cut. Personally I find these a fool’s errand for the most part on a small-ish bandsaw if the end objective is to turn the bandsaw into a precision sawing machine. Sure, I stone both sides of the new blade when it is first running after being installed, to remove any distortion/excess at the weld joint. I also round the trailing edge of the blade with the stone while the blade is running. These two steps increase the performance considerably, but almost never result in a cut that is perfectly parallel to a fixed fence. One option in response to this, which I have used, demonstrated, and even included in a video, is to cant the fence to the degree of the run out.
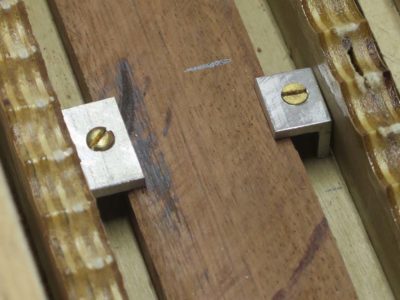
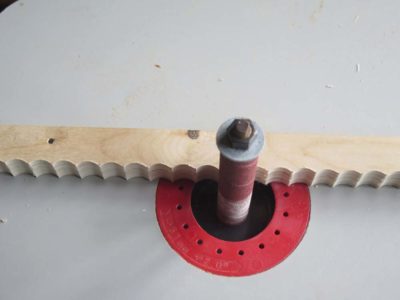
A single-point resawing block is a preferable solution, IMHO. Somewhere along the line I picked up a Kreg brand block and had it available to affix it to the original rip fence as illustrated.
The beauty of the Rikon fence design is that I can have one side outfitted with a curved single point block and leave the other side with a half fence, which is also pretty usable (I have found that anything longer is useless on a band saw). I do not mind using both sides of the fence and thus cutting in two different orientations, one on the right side of the fence and one on the left side.
BTW, I notice that both Woodcraft and Highland have these little beauties on sale right now.
Recently I was corresponding with a reader who asked my opinion about bench top bandsaws, a preferred option for him because his career led to frequent moves. I answered him that I have two benchtop bandsaws I use frequently, one a 9-inch Delta bandsaw that must be close to forty years old by now, and a 10-in Rikon I bought about fifteen years ago from either Highland or Woodcraft, I honestly cannot remember. Each bandsaw has a critical role to play in my work, the Delta is my tool for sawing veneers for parquetry and the Rikon for pretty much everything else of modest size. (I also have a free standing Delta 14″ and a Taiwanese 14″ with a riser block for resawing.)
In the back-and-forth of our correspondence once I understood his situation I recommended he look into the Rikon.
Some not-too-long-ago maintenance on the machine confirmed my overall impression formed several years ago that it is a superb tool. Last year during a workshop the saw broke a tire, and after setting it aside for the 9-inch Delta for the remaining days a new tire was on-hand and eventually I replaced the broken one.
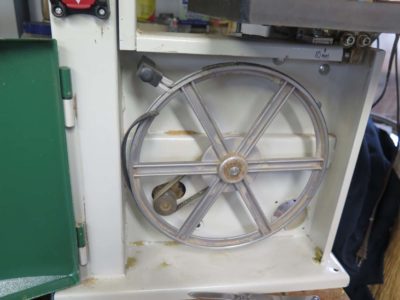
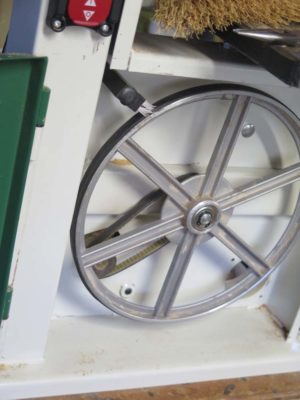
Swapping out the tire was the easiest time for that task ever. After removing the retaining ring on the axel of the wheel and cleaning off the detritus of the tire I started the new tire at one point on the wheel then placed that section of the wheel in my Emmert metalwork vise and was able to install the new tire in approximately one minute.
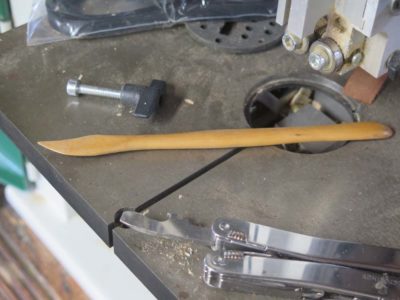
Since I had the wheel off I gave the lower section a through cleaning then did the same to the upper section including scraping the upper tire with a boxwood carving tool with a knife edge to remove the accreted crust but not cut into the tire, then put on a new blade and readjusted all the guides so that it ran perfectly. Unlike my other bandsaws I have found that the factory originals work just fine.
I know that in the coming decades this might be my only power machine (along with a drill press), and I am confident that the little Rikon will serve me well. Even now I cannot think of any recent project that it could not have completed. Perhaps not quite as fast as some ther machinery, but it would get the job done. I keep a variety of blades on hand to use whatever suits the task best, and find that a 3/8″ blade suits me 95% of the time.
I’ve have recently added a nice standard feature enhancing the machine’s utility immensely.
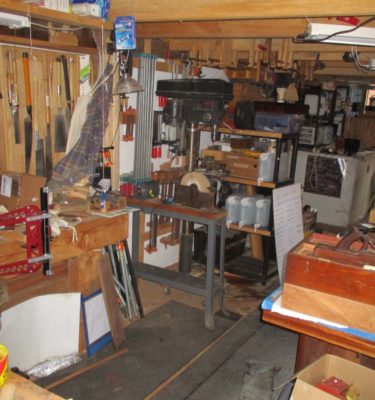
Like many (most?) of you I have a long list of things to do around the shop, usually memorialized by the phrase, “One of these days I’m going to (fill in the blank).” Given my lengthy hiatus from getting into the workshop over the past few months I have been reveling in a week-plus in the shop. On my return I was struck by the fact that the place looked like a tool bomb had gone off, the result of me swooping in for a minute or two to get something or other that I needed elsewhere on the homestead, and then failing to reestablish order in the aftermath of that particular moment. I greatly admire my friends MikeM and MartinO and SharonQ for whom order and tidiness simply flows out of their pores, but that is not the way I am wired, unfortunately.
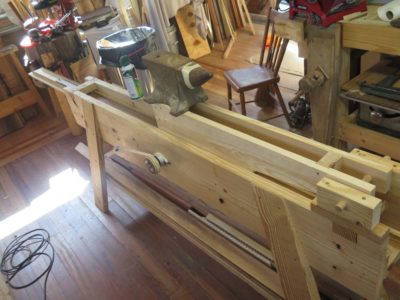
The impetus for the latest/current tidying of the shop is based on a number of things, the first being the general state of disorder as previously described. Add to that my desire to get the leg vise for my FORP bench installed and ready to work. Add to that the currently-in-gestation woodworking/musical instrument making club that will soon begin to convene on a weekly basis in my shop since I’m the one with the necessary space, workbenches, and heat. So, I need to clear out a bunch of stuff that is just taking up space in order to accommodate three other fellows with their projects. Then there is the always evolving strategy for tool storage. And lumber storage.
And, and and…
My first step in this ongoing adventure was to consolidate some boxes of wood scraps and removing a shelving unit of just plain stuff in order to move in my drill press and water wheel grinder. It’s funny how even by replacing one shelving unit with two machines the place seems more spacious already. It gives me instant gratification to keep moving forward.
You can find the background on this initial offering by Barn Attic Productions/Seed and Fruit Media here. I am working on getting an archive for all these videos on the site. Be patient with me, I am of an age and disposition that I still expect flames to shoot out of the compewder if I hit the wrong key.
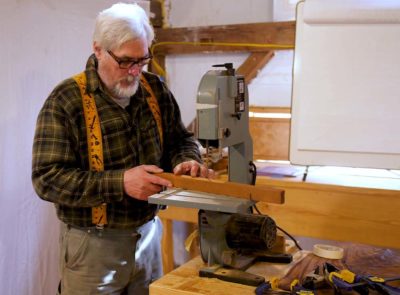
In this episode of my recitation and demonstration of the techniques I use to undertake sensitive veneer repairs — sensitive to the artifacts, not your feelings — such that the compensation (that’s museum-ese for “repair”) is visual harmonious while leaving the maximum of the artifact fabric intact, I demonstrate my low-intensity method for cutting my own veneers on a bench-top bandsaw. I use this method frequently for a variety of applications, whether I need that one special piece of figured veneer for a repair or if I am cranking out veneer strips for doing French parquetry.
If your conscience is pricked by viewing this for no cost feel free to click on the “Donate” button, any proceeds from which will go toward enhancing the rapidity of producing new videos. For those of you who have already shown that generous spirit, I am deeply appreciative.


Recent Comments