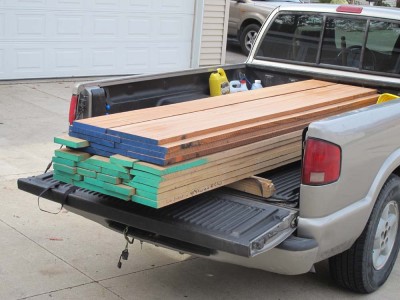
The time had come for me to render the truck load of lumber into the replica of Studley’s workbench top. For the base I am going to construct a (hopefully) mostly invisible stand for the exhibit, since I simply do not have the time to replicate the base that is part of the bench currently.
The first things I noticed when preparing the stock were 1) the white oak from Iowa is some of the hardest material I have ever seen. Even taking only 1/64″ cuts with my DeWalt planer, it was just about killing that machine. It is almost a shame to bury such magnificent lumber inside the core of a laminate slab, but that’s what I get for replicating the unit as precisely as I can determine. I should note that this construction is based on my many hours of examining the original; the owner would not let me cut up the original to confirm my premise. 2) by working character, density, and odor, I found the “African Mahogany” to be nearly identical to Spanish Cedar, and were it not for the interlocked ribbon grain I would have sworn that was what the lumber was.
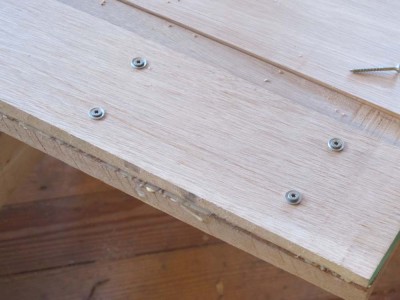
In assembling the slab I reverted to an old gluing technique from the pattern shop, where we often glued complex constructs together by clamping the pieces with nails or screws, then removing these fasteners when the glue had set. Not having enough clamps of the correct size, and not wanting to build a press to accomplish the task, I did the same this time. It didn’t really matter for the core or the underside of the slab, but gluing the top lamina was a bit more of a challenge as you will see in a coming post.
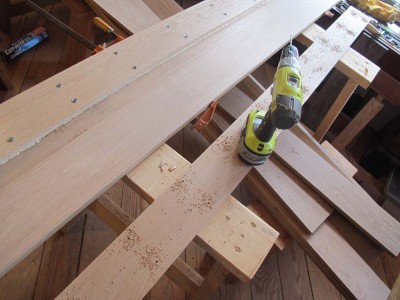
Using my planing beam I first cleaned up the edges of the oak core boards and started to glue them together with yellow glue. First I pre-drilled holes the size of the screw threads about six inches apart throughout the entire length of the boards, then screwed them together with deck screws and washers, The efficacy of the tactic was apparent with the fairly even glue squeeze-out.
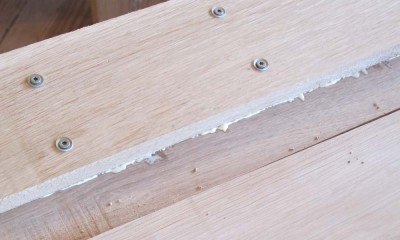
I made sure to make the boards off-set to add even more strength to the completed structure.
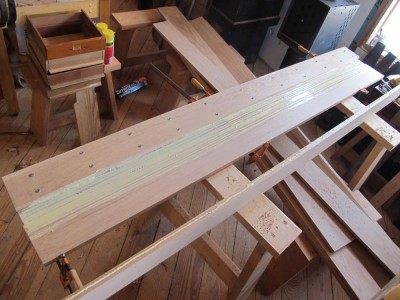
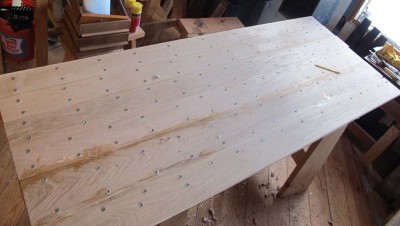
Once the two core lamina were assembled, the structure was exceedingly strong and heavy. Almost immediately I began with the underside face of the slab.
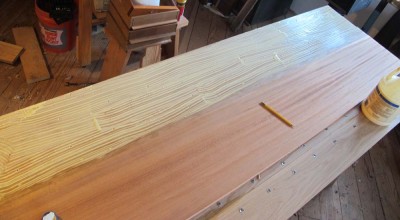
Repeating the same steps as before, after removing the screw-clamps I glued and screwed the African Mahogany boards in place, shooting the edges by hand first. It was long past dark when I headed down the hill for supper, but the first three of the four 3/4 inch layers were in place. Already it weighs a ton.
Sty tuned.
After almost two years of diminished activities in decorative arts conservation, I am now ramping up for a fertile period of activities with many new projects on the menu, and some already underway. Otherwise I don’t have much to do except finish the reviewing of the Studley book proofs as they emerge, reviewing the edits of the Roubo on Furniture Making manuscript, fabricating the elements for the Studley exhibit, a multitude of chores around the homestead, another year’s worth of organizing in the barn, etc.

Last weekend I picked up a nearly life-sized wooden sculpture attributed to 19th century sculptor Valentino Besarel. The details of the treatment, including the strategic thinking behind my decisions, and the execution of those decisions, will be recounted as the project unfolds over the coming months.
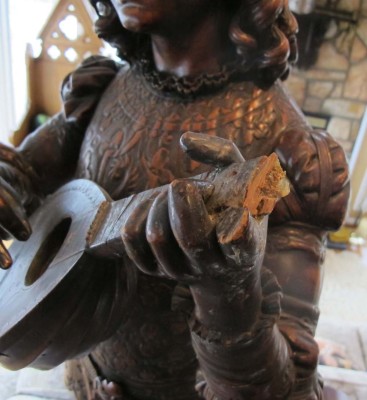
There is some disassembly/reassembly, some structural compensation, some flexible fills, some sculpting of missing elements, some visual integration…
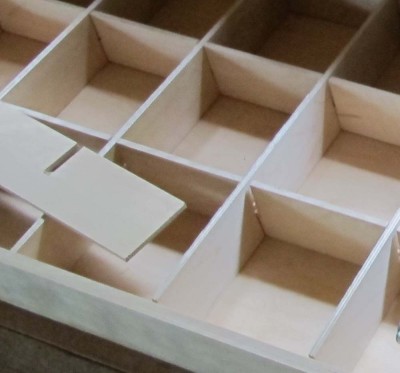
The core of the folding portable workbench functionality — light weight combined with high stiffness — calls for the “slab” to be in reality, a slab-like torsion box. To combine these two seemingly irreconcilable features, I constructed the torsion box from 1/4″ baltic birch plywood faces and grid, with 1/2″ baltic birch plywood perimeter.
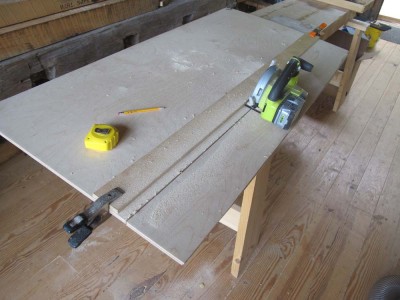
Using a power saw and a clamped-on rip fence I cut the 1/4″ faces to size, then cut the 1/4″ grid web elements and the 1/2″ perimeter exactly the same width so they would establish a planar surface when assembled. Once these strips were cut I clamped them together and planed them to be perfectly identical. The ultimate strength of the bench depends on it.
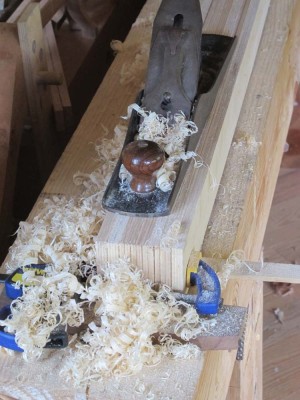
For the grid itself, I simply divided the spaces inside the torsion box into the units I desired, then cut sough of the grid web elements to that number. For example, since the torsion box top is 20″ x 60″ I used a roughly 5″ increment for the grid, meaning that I needed three long web elements and 11 short elements.
Laying out the grid to this number of units, I took the three long elements and clamped them together and marked out the spacing for the half-lap/slots that would allow for the perpendicular elements to cross over each other, then did the same thing for the eleven short elements.
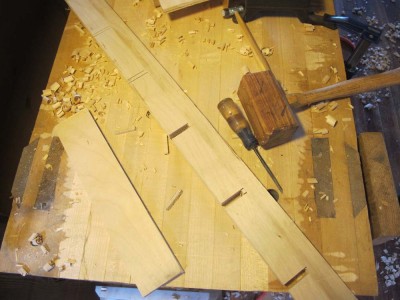
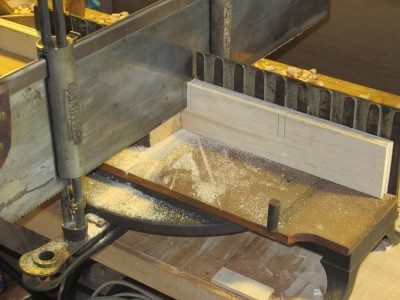
Since the “joinery” at the cross-point need not be joinery at all — the two elements simply need to fit past each other, as the true strength of the beam (torsion box bench top) is established only by the character of the glue line of the web element to the faces of the box — I used my recently acquired miter box and a 1/4″ chisel to quickly chop rough openings for the intersection.
Up next – laying out the screw holes for the vise and assembling the grid.
Thursday was a banner day in the Highlands as the first test pages for Virtuoso: The Tool Cabinet and Workbench of Henry O. Studley appeared in my email. It is an indescribable feeling to see the seemingly endless labors being expressed with such visual elegance.
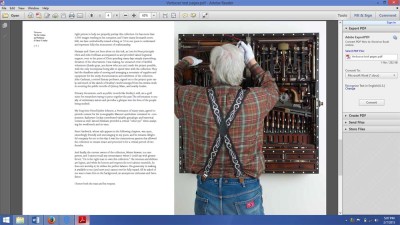
I look forward immensely to the coming days in anticipation of seeing Wesley Tanner’s magic bringing my words and our images to life. Especially if he continues to show my best side!
I am truly thankful to those of you who have offered encouragement over the past four years on this project, and expect your patience will be richly rewarded in only a few short weeks.
Increasingly I am turning my focus to crossing the “T”s and dotting the “I”s for the upcoming exhibit of both the tool cabinet AND the workbench, which has never before been seen in public. Given the concurrence with and proximity to Handworks, perhaps the greatest celebration of contemporary woodworking tool making ever, it will make for an unforgettable weekend.
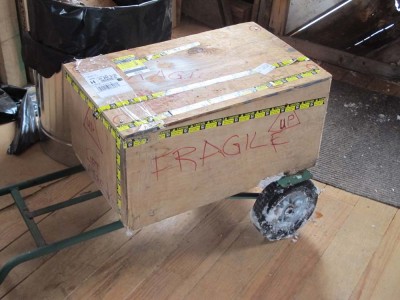
With the maneuvers for the upcoming exhibit of the HO Studley Tool Chest only three months away, the activities in the background are coming to a fever pitch. Just this week the last of the wheel vises I am borrowing for the exhibit arrived. I must admit I was a bit amused to see a 110 pound crate with a cast-iron vise marked “Fragile.”
(Actually there is one more vise I would like in the exhibit, but the owner has not responded to my repeated requests. I guess it won’t be there.)
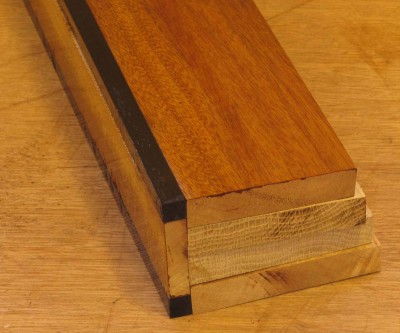
The setting for this collection of vises is my interpretation of Studley’s work bench top. I expect to finish assembling the slab of that top tomorrow. Here’s a small mock-up illustrating what I believe to be the construction of the bench top. Astonishingly, the owner of the Studley Collection would not let me chop up the original to see if my conclusion was correct!
Once the benchtop replica is finished I need to make an exhibit stand for it, then move on to the next of the 6, 487, 326 things on the exhibit check list.
============================================
There are still tickets left for the exhibit, but I see that some of the sections are beginning to close out. If you want to join me in this once-in-a-lifetime event, I would be delighted to share it with you and chat with you at the exhibit.
Not too long ago I wrote about the new antique lathe now residing on the main floor of the barn. My friend Jersey Jon took it on himself to get the beautiful unit tuned and running. It is good to have friends like that.
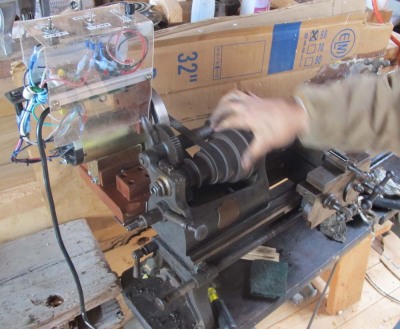
One of the things that Jon stressed was the value in using a new power source for the old lathe, and it is a sermon I have taken to heart. It causes reflection on the fundamentals: to power many kinds of machines, like lathes and milling machines, for example, you need a lot of torque and the ability to alter the speed of the cutting tool. Hmmm, where to get a simple system of high torque variable speed power source. Why clothes racks, a/k/a treadmills, of course.
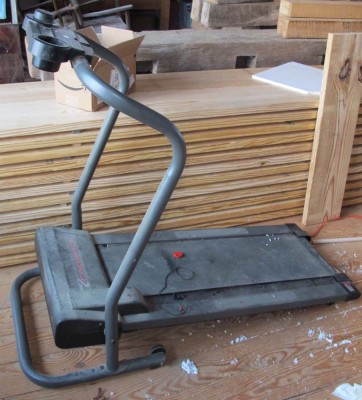
Last month I was downtown at the electronics store and walked by the thrift store for the animal shelter and there it was — an aged treadmill on the porch of the thrift shop. I asked, and they had no way of knowing whether or not it worked but they wanted it gone. I made that happen with a small donation.
Back in the shop I also had no way to know if it worked until I made a new key to replace the broken one for the unit, put new batteries in the control panel, and made sure that the breaker switch was set properly. I got all that done today and turned it on. Yes indeed, the thing works!
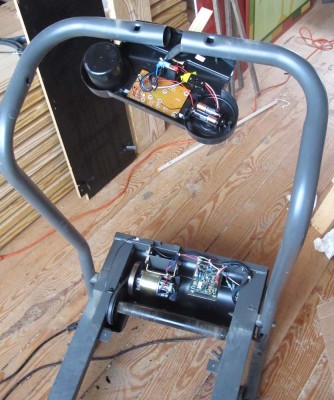
What prompted the precise timing on this was spending a couple of days working down in the machine room/foundry, trying to impose some semblance of order there, as it has been sitting essentially untouched for more than a year. I’ve got this wonderful Atlas machinist’s lathe, but the drive mechanism has this monstrously huge 3/4 HP motor (literally much larger than a basketball and about 50-60 lbs) and a whole set of pulleys and such that were such a pain to work with.
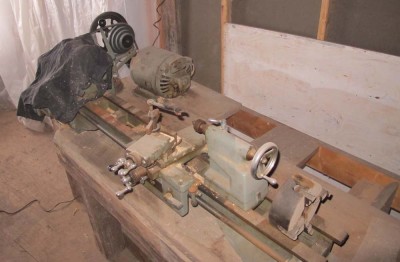
Depending on my schedule, I hope to swap out the old drive system for the new one by the end of the month (it is not the highest priority at the moment…). I dismantled and removed the old one this afternoon, so I have passed the tipping point. I suspect I may start scouring yard sales and thrift stores for more such clothes racks.
Stay tuned.
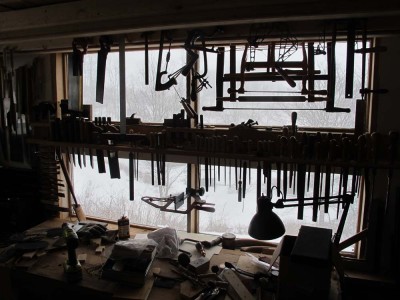
Many times I’ve been in weather that was blustery enough to blow the hat off my head. But today was the first time I have ever experienced that my spectacles were blown off my face. This weather has been the most schizophrenic I have seen. Tropical sunshine one minute, white-out the next. It makes for a dynamic view out the window, that is for sure.


Recent Comments