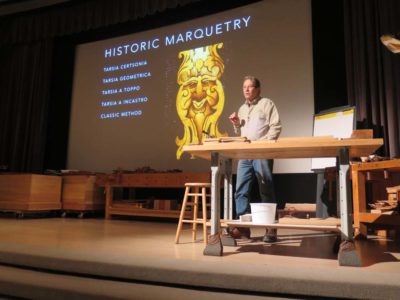
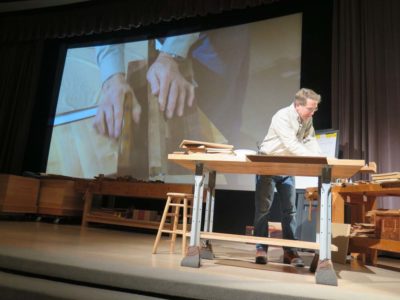
Like other presenters at this year’s confab Patrick Edwards had two sessions presenting his own topic of specialty, the techniques and compositions of marquetry. His first session revolved around his replication of the underside of the lid of Jane Rees’ tool chest lid, walking the audience through not only his conceptual approach but the bench-top manifestation of it. The second continued the theme of marquetry artistry, including making a blade for the chevalet.
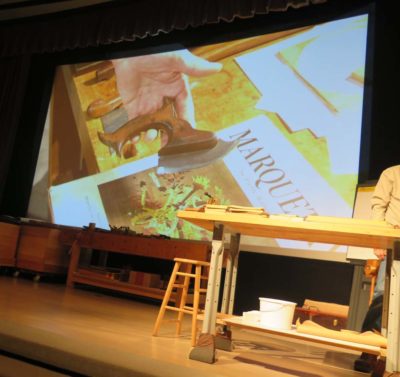

Of particular fascination to me were the vintage veneer saw and shooting plane he used. I took enough of both of them to make versions of them myself, and surely I will.
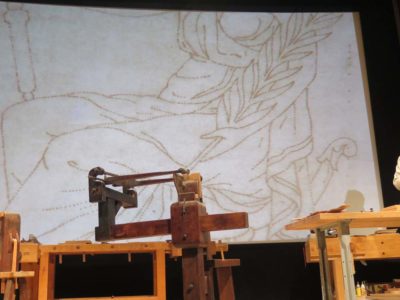
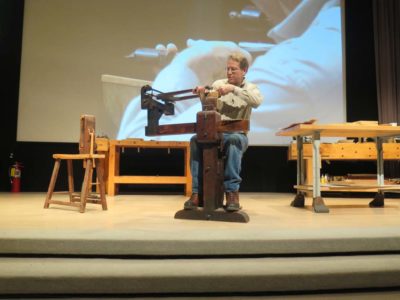
I’ve known Patrick for more than three decades and seen him present several times, and every instance is a learning experience for me even though I cut my teeth restoring French marquetry in the 1970s. Patrick’s demonstration of making templates with his vintage pricking machine and transferring the pattern to multiple sheets necessary for the undertaking for sawing on the chevalet was a choreography to be savored.
I’ll get back to my recounting of WW18thC 2018 tomorrow, but for today I wanted to pick up the thread of the project to interpret an early 19th century mahogany writing desk.
With the full-size prototype built in southern yellow pine from my pile of bench-building stock it was time to move on to the real thing in mahogany.
But first I had to break my hip and lose more than half a year of shop time. One of my favorite jokes of all time involves a Calvinist who trips and breaks his ankle. “Finally,” he says, “I am glad to get that over with.” There’s nothing like some predestination humor to get the day started right.

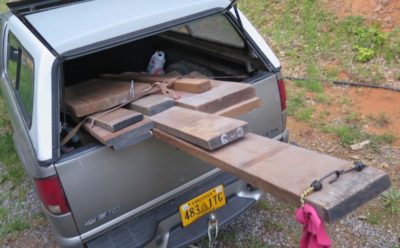
As I wrote many moons ago I wanted to not only build the early-19th century desk with period appropriate technology, using power equipment only for “apprentice work,” I also wanted to use the best vintage lumber I could find. Casting my net as widely as possible among my circle of woodworking friends I was able to acquire small amounts of spectacular sweitenia from more than a half dozen sources. No single source was enough to accomplish the project, but en toto I obtained enough to build several desks, which I eventually will in hopes there are clients out there who want one.

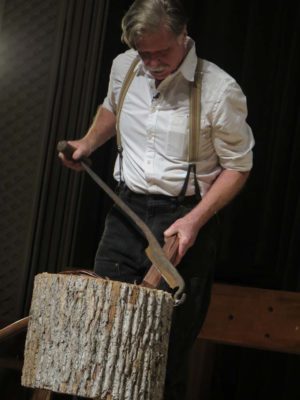
The most difficult piece to find was the single slab of 30″x 20″ 5/4 mahogany for the desk top. Three stalwart friends responded and soon I was getting quizzical looks from Rich the UPS driver as he pulled up with securely swathed slabs of wood. You can get a sense of the scale as I believe that is my #8 in the frame.
Perhaps the most surprising source for lumber was the orthopedic surgeon who repaired my hip. As we were meeting for my final “turn me loose” appointment he asked me what I was working on, and I told him about this desk project. Although I knew he was a decorative turner I had not known he was an enthusiastic furniture maker in years past, and he told me he had a storage unit filled with vintage lumber he had acquired over the years. A couple months later we got our calendars to intersect and I went to meet him there, and wound up buying all the mahogany he had. He told me that this stash could be traced back to pre-WWI sources and based on the quality of the lumber I believe it. Similar stories accompanied the rest of the acquisitions as the lineage of mahogany inventories lives on in perpetuity, it seems.
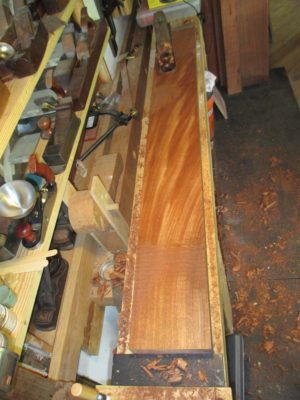
Since the writing box of the desk was veneered, having just the right board for for making those veneers was crucial. Fortunately that was one piece I had in-hand already, having acquired it perhaps forty years earlier at an estate sale for a woodworker who had no end of fabulous lumber. Alas I did not have the money to buy more than a few pieces, and this was one of them. I was saving it for just the right project, and this was it. This dense, hard, and spectacular Cuban mahogany was nothing but delightful to work with.

Ditto the flame veneers needed for the outside surfaces of the legs. I cannot even recall when I bought four slabs of crotch lumber, but they too were waiting for just the right project.
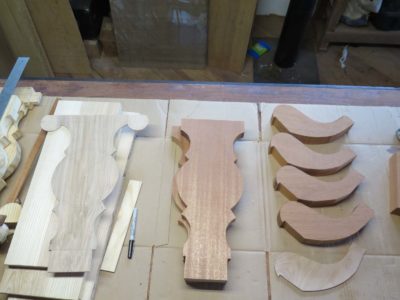
The structure of the desk was simple enough and I soon had all the pieces cut and ready for fitting assembling. But before final assembly could happen I needed to address all the hand-cut curvilinear moldings on the edges of the legs.
Stay tuned.
Renowned furniture maker Peter Follansbee presented two sessions at WW18thC, the first concentrating on the making of 17th century carved frame-and-panel chests, the second on making chairs. Peter looks like someone who planned on attending a Dead concert and found out he wandered into a woodworking shindig.


His comfort in front of an audience and well-deserved confidence in his ability is heartening. And his artistry with carving flows from his hands naturally, seemingly effortless.


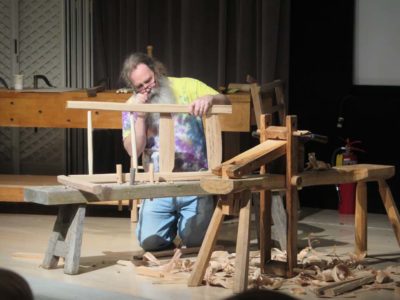
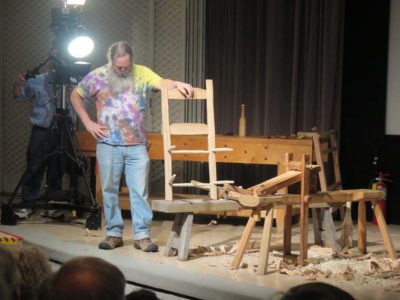
His second session was an ambitious attempt to make a green-wood chair in 90 minutes. He got close.

It took until the first weekend in February for us to get any decent snowfall, and it did look lovely here in Shangri-La. It closed everything down for a couple days, but we were snug as a bug in a rug. We’ve had plenty of frigid weather (coldest temp this winter thus far was about -15F, wind chills to about -40F) but only a few light snow falls up to now.
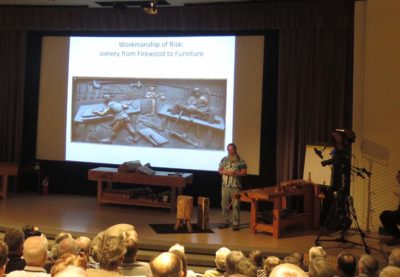
I’ve been to several of Colonial Williamsburg’s annual confab Working Wood in the 18th Century (WW18thC), a gathering that always has a central theme of some sort. This year’s organizing topic was “Workmanship of Risk: Exploring Period Tools and Shops,” and it was my favorite of these conferences (although previous topics of “Surface Decoration” and “Oriental Influences” come in a close second tie). And not just because I was a speaker; that actually makes the experience less for me because of all the preparation work that consumes crazy amount of time and energy for me.
The presenters for this year included the crew from the Anthony Hay Shop, and their interpretation of a decorated tool chest; the Colonial Williamsburg joiners, demonstrating the consruction of monumental/architectural moldings; Jane Rees, the scholar behind the magnificent decorated lid of said tool chest; Peter Follansbee, recounting the processes of his work in carved 17th century oak furniture; Patrick Edwards, demonstrating classical marquetry techniques; and the inestimable Roy Underhill, with his keynote lecture and moderation of a panel discussion on historical primary sources; and me (more about that in subsequent posts).
There is no way to summarize the richness of the conference content without re-living it with verisimilitude, which could be accomplished only with a literal transcript and live video feed. But the next few posts will encompass my compressed take on the event.

As is the norm for this event, which normally sells every seat within the first few hours of opening the registration, every seat in the house was filled plus perhaps a few more. I know that often the deciding factor of whether or not some guest may attend a particular presentation is the occupancy limit established by the Fire Marshall. All the presentations are in the front of the auditorium on a small theatrical stage, making it difficult if not impossible for anyone beyond the front few rows to see the details of the proceedings. To alleviate that hurdle and enhance the learning experience for the attendees the entire performance is projected onto a giant screen behind the stage. It sometimes sets up the weird dynamic of us performing for the cameras, turning away from the audience.
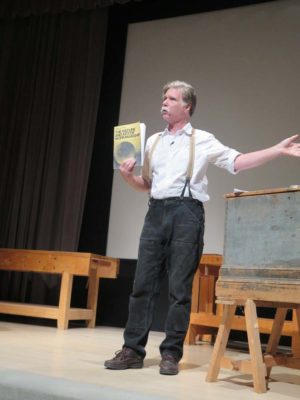
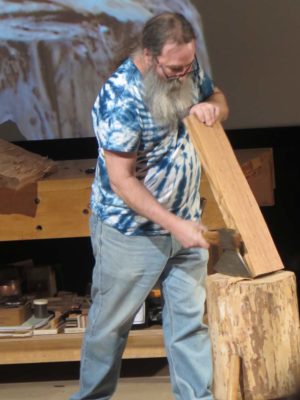
Our start on the first evening was RoyUnderhill, undertaking the unenviable task of decoding philosopher/craftsman David Pye’s influential book The Art and Nature of Workmanship, a book, which Roy avers, has been read by few if any artisans (I think he is correct in this; I ground my way through it some 40+ years ago and never felt the desire to return to it. It’s on my shelf if the impulse ever emerges).
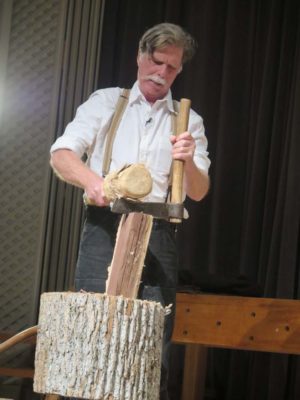

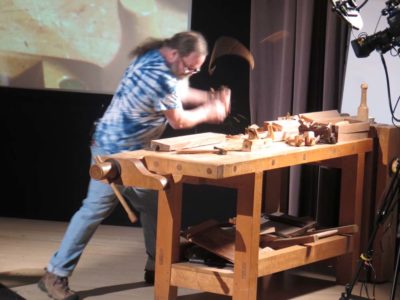
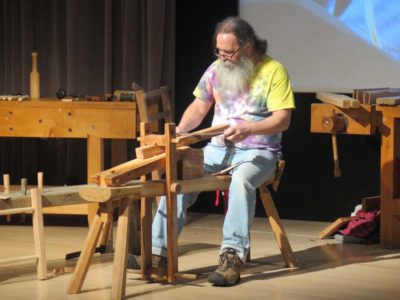
As always Roy was an engaging speaker even given the difficulty of the topic, and demonstrated some of the concepts contained within the risk vs. certainty discussion. Beginning with a mallet and froe to rive out some lumber workpieces, moving then to a hatchet, and finally to a sabot’s shave, he began the steps of workmanship that might not be “risky” in the hands of a skilled craftsman but certainly have a component of “uncertainty” to them, that uncertainly diminishing with each incremental step.

Roy ended up with an inventory of a complete tool box from ages past, using it and its contents as focal points for the soliloquy.
Returning from the regular Bible Study earlier this evening and reviewing the upcoming topics for the blog (I rarely do any work on Sunday, and generally aim for a couple dozen posts in the bullpen in varying states of development) I noticed that the blog had exceeded 800 posts last week without my even noticing. I guess I must have a lot of verbal effluent in me.
I used to host a regular monthly luncheon for think tank mavens and opinion columnists trying to influence the shenanigans in Mordor, and at one of these off-the-record soirees a columnist wailed about “writer’s block” and the impossibility of having to grind out 300-400 “interesting” words twice a week. I was unconvinced of the problem, and for the next year as an exercise I wrote that output just to show him it was not that tough. It really wasn’t.
Admittedly, I was assisted by the fact that was the year the nation’s Commander in Heat was hound-dogging his way through the intern pool and eventually committed perjury to escape accountability, with his political adversaries tripping over themselves like clowns. So, the 100 short essays almost wrote themselves.
I’m hoping that blogging continues the same easy path. If I could get the time to easily be at the laptop, I would probably post every day. When I don’t it just means that I am fully occupied with something, somewhere, or someone else.

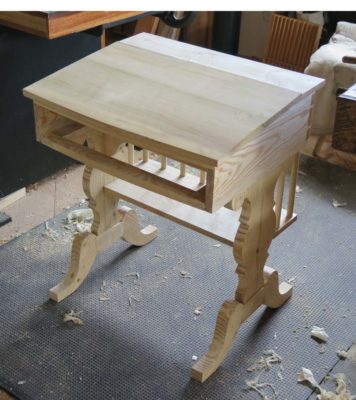
With the legs and writing box done it as time to assemble them and make the shelf that had to be fitted to them precisely not only for the structure as a whole but to provide the specs for the spindles that held them together.
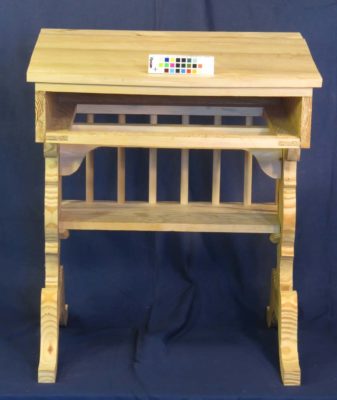
Not a whole lot of descriptive detail required here, the individual components were simply screwed together to make sure the pieces fit and allow for the layout of any remaining components.


It was certainly not a wasted effort as it allowed me to work out some of the minute details that could not be spatially resolved any other way.

It was finally time to move on to my pile of vintage true mahogany.
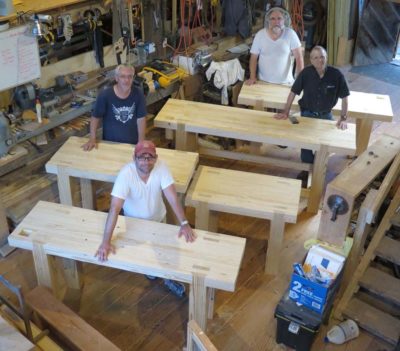
And speaking of workbenches, you’ll have the opportunity to work with me at The Barn building your own version of either a basic Roubo or Nicholson bench in Southern Yellow Pine. Thanks to my adapting David Barron’s innovative system for building laminated Roubo benches, and the elegant simplicity of the Nicholson bench, you can arrive empty handed (except for your tools) on Monday and depart at the end of the week with a bench fully ready to go. The only likely hindrance to this outcome is if you spend too much time simply looking at the mountain vista on the horizon.
The finished bench does not include holdfasts or vise mechanisms; if you want those you can supply your own or I can order them for you separately. And if you prefer a 5-1/2″ slab for the Roubo bench rather than the 3-3/4″ slab, there will be an additional $100 materials fee.
============================================
The complete 2018 Barn workshop schedule:
Historic Finishing April 26-28, $375
Making A Petite Dovetail Saw June 8-10, $400
Boullework Marquetry July 13-15, $375
Knotwork Banding Inlay August 10-12, $375
Build A Classic Workbench September 3-7, $950
contact me here if you are interested in any of these workshops.
With the bench “assembled” I turned it over halfway and rough trimmed the bottoms of the legs. Even though I was handling it by myself, wrestling with a 350-pound behemoth is fairly straightforward if I am careful and make sure I am actually handling half or less of the total weight, which is the case if I am rolling or spinning it. With the legs cut to rough length I rolled it the rest of the way over so I could work on flattening the top for a couple of hours.
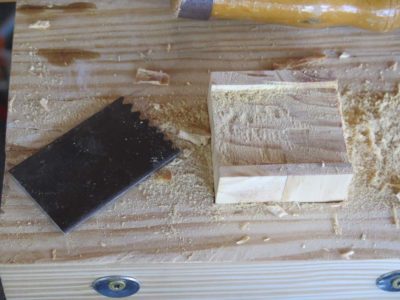
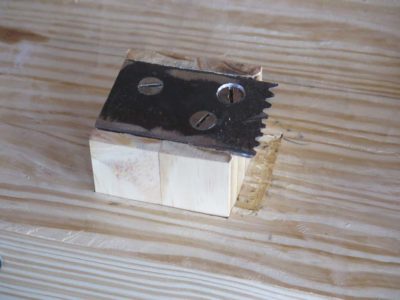

With the bench on its feet, but on a rolling cart so I could move it easily, I set about to installing the planing stop I had already glued up. I planed it such that the fit was very tight, counting on a few humidity cycles to induce ccompression fit on both the stop and the mortise in which it resides in the hopes of establishing a nice firm fit in the end. I’d wanted to put a full width (of the block) toothed tip on the stop but I did not have the piece of scrap steel in the drawer that could suffice so I just used what I had. I filed the teeth, drilled and countersunk the holes for some honkin’ big screws and assembled the stop. I also excavated the top of the bench so the entire assembly is flush.

photo courtesy of J. Rowe
photo courtesy of J. Hurn
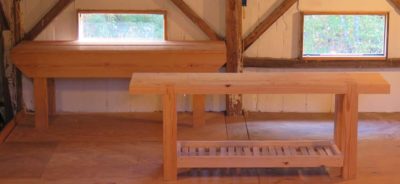
With that I cut and affixed temporary(?) stretchers to the legs to support the shelf, Kreg screw style (without the Kreg jig), which on a decently built Roubo or Nicholson bench is the only functional purpose for stretchers. If mortised stretchers are needed to stabilize the bench structure, it wasn’t built well enough. Using scraps from the pile I cut and laid the shelf boards and attached the vise and for now, it was done. Come summer I will flatten the top again and call it quits. As it was the bench served my needs perfectly in Williamsburg to give me both a perfectly functioning work station and a focus for my sermon on workbenches and holdfasts,

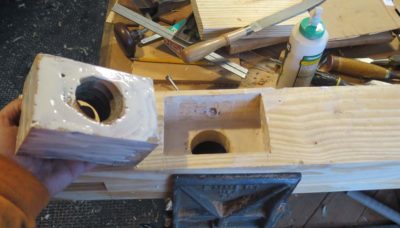
While the glue for the laminated slab was setting I turned my attention to the legs and their integral tenons. As in previous efforts the three laminae of the leg are glued up with the center lamina off-set from the outer two by a distance equal to the thickness of the slab plus a smidge, using decking screws and fender washers as the clamping mechanism. These are removed after they have done their duty.
If I did my layout and glue-up of the top slab correctly, and cut the dovetail pins accurately on the tops of the legs, the double tenons are a perfect fit for the mortises already created in the top slab so all that is needed to put them together is a gentle tap to drive them home. Since the bottoms of the legs need to be trimmed to matching lengths ex poste the protruding excess is no bother to me.

Before I do that, however, I de-clamp the slab after letting it sit overnight and spend an hour or so getting the underside flat enough to seat the legs evenly. I do not care about the underside being smooth, merely flat. A sharp scrub plane and fore plane make short work of it, as I said it was a little over an hour to get it to an acceptable point.

For this bench I did something I had not done before and remain unsure as to whether I would do it again. Since I was installing a vintage screw and nut from my stash I decided to inset the nut into the back side of the front left leg, where the leg vise would be installed since I am right handed (if you are left handed it goes at the other end). Doing this was no particular bother but I am unconvinced of its efficacy or necessity. I also cut the through-mortise on the lower leg for the pin bar of the movable chop/jaw.

Before long I was assembling the bench and as you can see the space was ridiculously tight with not only this bench but two ripple molding machines being tuned up for the conference. Since this is the only heated working space I have, everything that needed to be worked on for WW18thC was there. It got to be pretty chaotic for a while. I am not particularly tidy as a workman and that shortcoming becomes really evident at times like this.
At this point the bench was assembled and I was at the 12-hour mark for the project.

Recent Comments