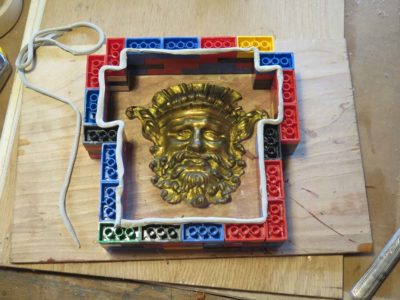
Last month I brought together all the new information I had derived from the initial gelatin molds exercises to see if I could nail it on a more complex application. For this project I used a pattern derived from a cast pot-metal satyr’s head mount from a 19th century pastiche of a 17th century French desk. The hardware on the desk was cheezy and poorly finished (I was only interested in the desk itself as it was the earliest intact example of “mastic tortoiseshell”; another tale for another time). This was probably a poor choice for a pattern because its level of “finishing” made it difficult to ascertain the ultimate success of the new mold and casting.
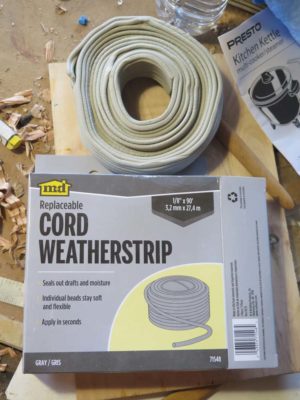
Just before this endeavor I was doing some winterizing and had a bolt-of-lightening stroke of inspiration. As I was affixing the shroud around the window air conditioner with rope caulk I suddenly noticed the similarity of the rope caulk to the gaskets I made from modeling clay for my molding and casting. Could it work the same way, but without the time involved in making the the initial gaskets?
I could hardly wait to get back home to try it out.
Fabulous!
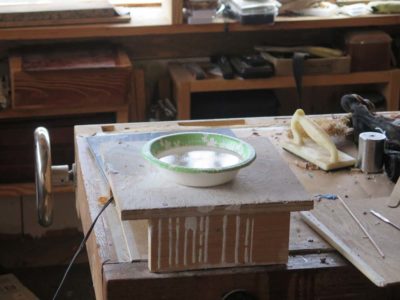
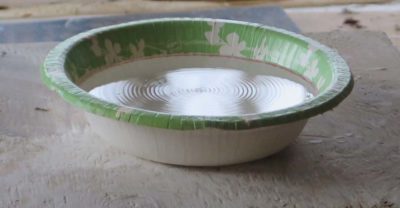
I built the form-fitted Lego casting dam for the pattern/mold and quickly laid in a bead of the rope caulk as the gasket on the inner edge of the underside, and pressed the assembly together. The adhesion and squeeze-out was basically perfect. Rope caulk is formulated to stick just enough to make it through the winter and then be peeled off with no residue in the spring. Cleaning off the squeeze-out required only a pass with a boxwood sculpting tool configured with a knife edge.
Suddenly I was in possession of a new technique to cut many minutes out of my pattern/casting dam set-up for the remainder of my working life.
It was now time to move forward with the modifications to the gelatin formulation and make the mold.
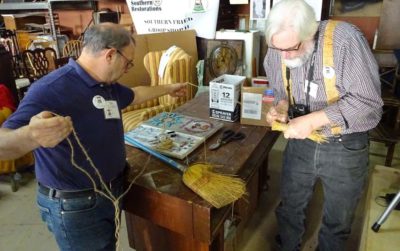
At the recent gathering of the Professional Refinisher’s Group one of the presenters was addressing a topic that would have fit seamlessly with the use of polissoirs. When I asked the host for his, I was informed it could not be found. I canvassed the group and none was to be found. Even I had not brought one with me! While I normally travel with my rolling Store for some reason this time I did not.
But with a little thrashing around and some yeoman’s help from TomD we made one that worked enough or the task.
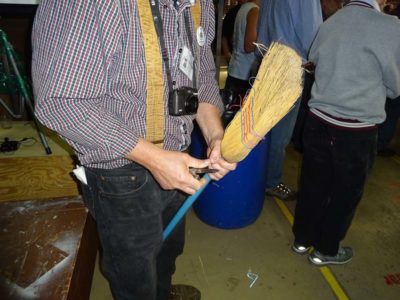
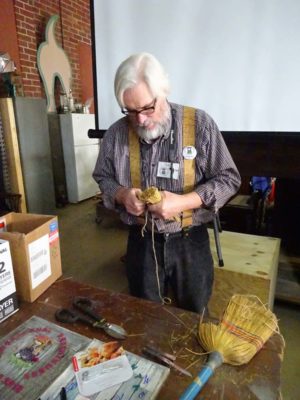
The starting point was the old shop broom, a roll of twine, and my dull Victorinox multi-tool knife (dull because I had cut some wire and had not sharpened it. My bad.)
After cutting of some broom fibers we set about trying to find the string necessary. We could not find anything really robust, what we found was some soft twine similar to macrame yarn. So we used what we could find. (I think the broom went back to hang on its nail, ready to go to work albeit a little less effectively).
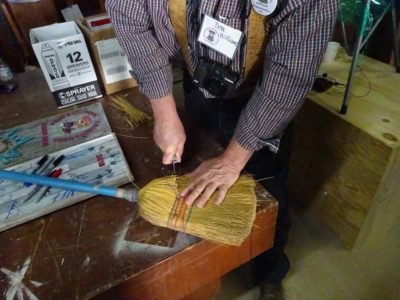
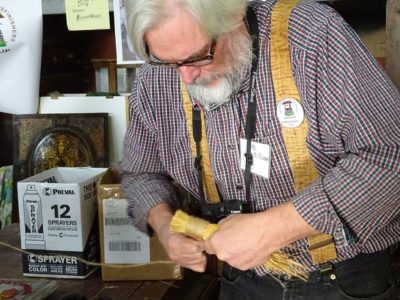
Working carefully, and celebrating the fact that my broken arm from two years ago has recovered almost all of its dexterity and strength, I started putting it together. My biggest challenge was trying to work right up to the limit of the tensile strength of our soft twine. Normally I use heavyweight waxed linen cord, which I literally cannot break by hand, resulting in a polissoir so tight it has a sharp sound when rapped against a hard surface. This undertaking did not yield such a result, but the polissoir was tight enough to serve well enough for the task at hand.
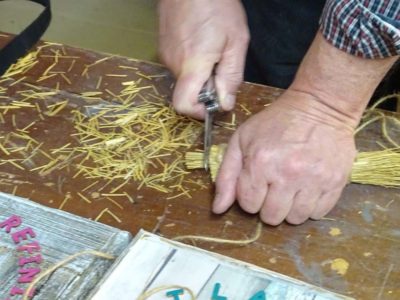
I trimmed one end and we put it to work.
I’ll know to never travel anywhere without a polissoir in the future. Note to self: when packing for a trip, it’s glaucoma meds, toothbrush, and a polissoir.
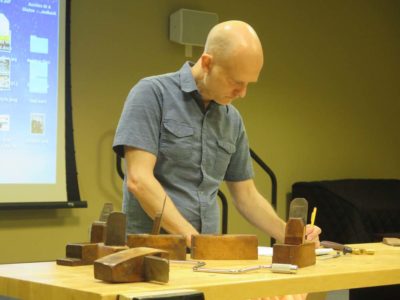
For the past several months I have been cheering on Steve Voigt in his quest to make brand new toothing planes in the style of his vintage-design plane line-up. A while ago he was speaking at the Washington Woodworker’s Guild and I brought a half dozen of my vintage toothers for him to examine and measure.
A couple weeks ago his first prototype arrive at the barn for me to test drive.
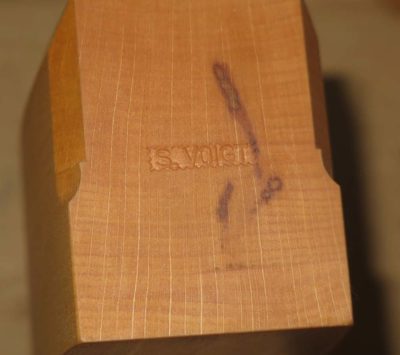
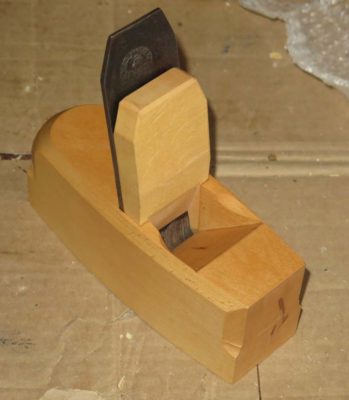
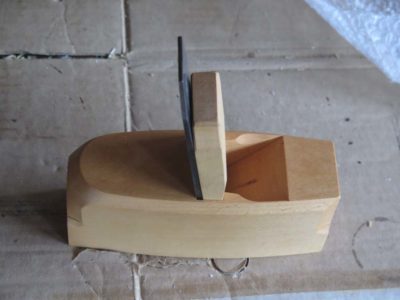
It is a lovely artifact as you would fully expect from Steve (or any of the other of our contemporary planemakers — none of them are making anything less than superb tools) and I delighted in getting it set up. It was a feast for the senses, beautiful visually in its proportions and craftsmanship, fitting my hands like and old, well-worn glove.
I know Steve is working on a plan to make his own irons but this one was a vintage one in remarkable condition.
Steve is definitely on the right track. I made a lot of the teeny toother shavings and found that it leaves the surface well-prepared for whatever you want to come next. I made notes on my observations and sent them back to Steve, and will return the tool itself for a couple of very minor modifications to transform it from merely excellent to exquisite. I cannot wait to get it back as a purchase, it will likely become my most heavily used preparation plane.
Many times in the studio I need to shake something, just a teeny bit.
For example, when casting plaster or plaster like materials, such as ceramic media for lost-wax casting investment, it is sometimes necessary to tap on the mold container to dislodge air bubbles that all too often get lodged against the surface. If they remain there the casting will be diminished, even ruined. Many years ago I looked into getting a vibration table for buzzing the molds while the medium was still liquid, loosening the bubbles to rise to the surface. After pricing the available devices I decided to go another route.
What could I use to cut the cost of a vibrating table down to near-zero?
Hearkening back 55 years to my times with Stan the Barber I recalled two things — Stan always had the latest comic books for the boys to read, a real treat for me because we were too poor to get them, and the tickle of the vibrating electric clippers on my neck when he was trimming up. Could electric hair clippers be part of the answer?
The next time I ran across some clippers at the thrift store I decided to roll the dice with a buck-and-a-half for the clipper. I combined the tool with some scraps of wood, two pieces of plumbing strap and a few screws.
Viola’. A vibrating table for a couple bucks and a couple minutes.
The main point of this bench was to replicate Studley’s construction of the top for display at the 2015 exhibit of the HO Studley collection in Cedar Rapids, concurrent with the 2015 Handworks event in nearby Amana IA. I had to guess at the details of the actual construction of the top since the owner of the Studley collection would not allow me to take a large core sample or cut a chunk out of the original workbench top.
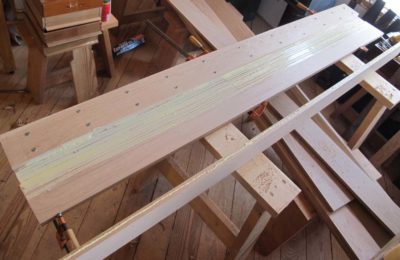
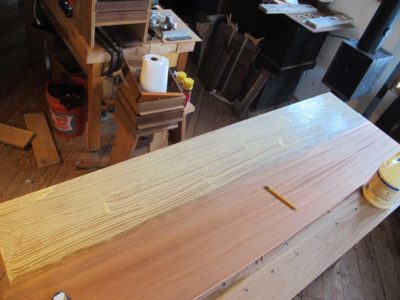
Being limited to the observations I noted last week I charged ahead The white oak I’d purchased from Jameel’s supplier was about the hardest stuff I have ever worked, it was rosewood hard. After coaxing it through my lunchbox planer I assembled the two core lamina using PVA glue and decking screws with washers. Assembling laminate structures in this manner was a technique from four decades ago during my time in the foundry pattern shop where we glued and screwed or nailed everything together so we didn’t have to use clamps. When it came time to sculpt the pattern for the molders on the foundry floor we went back and removed all the metal fasteners first.
I repeated the procedure for the underside face of the bench. C’mon, it was the underside. Who cares if there were dozens of screw holes? I know I certainly did not.
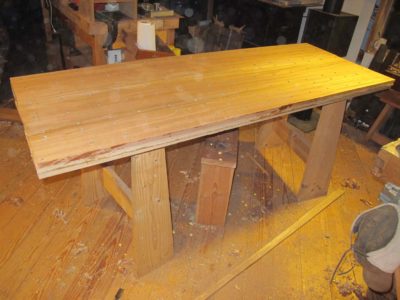
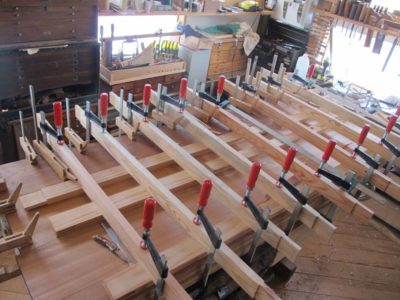
The show face consumed pretty much every clamp I owned in order to avoid the screw holes. In the end I had a terrific flat and stable slab, just like Ol’ Henry did. He was right about that, too.
My morning routine over the winter involves a light bit of attention to the wood/coal stove one morning and a more in-depth regimen the second day. Here is how my day usually begins for the heavy heating season from about the beginning of December through mid-March. I guess I could just rely on the propane wall furnace, but since propane is the very highest expense method I am disinclined to go that route. I’m guessing that would be somewhere north of $750/month even though my workshop is super-insulated (R43 XPS panels). I longingly note the falling prices of gasoline and the simultaneous rise of propane prices, the last fill-up was almost $4/gallon. So instead I rely on my triple combination of wood, coal, and kerosene.
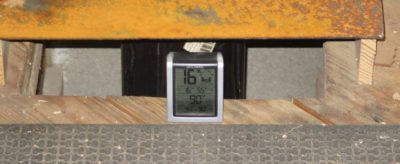
On half of the mornings I arrive to a half-clean firebox with a few glowing coals, keeping the space between 45-40 degrees requiring only a couple minutes of cleaning out some of the clinkers. All I have to do is fire it up again and it is ready to work all day and through the night.
On that second day, however, the residual pile of clinkers requires a pretty thorough cleaning of the firebox. I must say I am pretty disappointed at the mound of clinkers remaining after the fire, I’ve been buying what I thought was good quality anthracite but as you will see there is always a full bucket of clinkers to get rid of. If I had cleaner burning coal my clean out would take two minutes a day.
This is what the fire box looks like after two days of burning. The clinkers fill the bottom from the bottom horizontal grate, slightly below the bottom of the opening, up to the top of the removable fence grates in the front.
The front fence grates slide up and out, giving me full access to the bottom grate so I can shovel out the clinkers. (The ash falls down into the ash box below.)
It is now time to lay the foundation for the new fire to come. I put the bottom fence grate in place and fill the space behind it with coal to a depth of 2-3 inches.
It is now time to turn my attention to the ash box, which slides out like a drawer. Its contents join the clinkers in the ash bucket.
Unfortunately the ash box goes into a space that is larger than it is, so the areas outside the ash box need to be cleaned out too.
Once everything is cleaned out and swept the whole assembly goes back together.
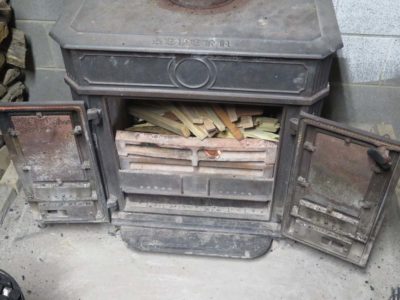
On top of the bed of coal I place a paper towel left over from its use as a wax filter, then pile kindling on top of that. I leave a little tail of the firestarter poling through the front fence to give me an easy place to light the fire. Which I do.
Before long I have crackling flames. This usually takes a minute or so.
After about three minutes I set the stove doors for maximum bast furnace effect.
About 5-7 minutes later the chimney is hot as a pistol. This is not the heat level I maintain, I normally operate the stove near the bottom of the operating range. I can now leave the stove on its own for an hour or so, then add another piece or two of firewood and another couple scoops of coal.
Meanwhile, upstairs at the floor level of the shop, I have created a heat stack vent by raising the chimney collar. This allows the hot air from both the stove and the chimney to more easily enter the shop.
Usually about the time I get back upstairs the stack is providing hot air for the space.
I augment this with a small fan blowing on the chimney to distribute even more heat into the space. I used to have a heat exchanger in-line in the chimney but have it currently removed because it requires constant power and in the winter I often power down my entire system at the end of the day.
I add additional scoops of coal a couple times throughout the day, but mostly I just get on with my day, loading it one final time when I close up for the evening.
I cannot pretend I am completely satisfied with this system. We are looking into upgrading the heat source for the cabin, and I just might do so for the barn too. I’m thinking about a Kimberly gasifier stove but am still gathering information.
My recent mysterious bout of vertigo (still ongoing but mild, I describe it as being “fuzzy around the edges”) limited my work in all phases, but in the latter part of the acute phase I could gently walk the driveway and putter in the barn. One of the techniques I used was employing a long walking stick held diagonally across my torso, planting it solidly on the ground with every step in order to be a sturdy hand-hold as I wobbled my way up the hill.
One thing I could do was tidy up, put stuff away and clean the shop. Since a hand-hold was never more than arm’s length away it went pretty well. One of the chores I attacked was organizing the west end of the shop, a space opened up this year to remain heated all winter long and serve as my place to mix and make wax/finishing products. I had an idea of the spatial configuration and it turned out to be terrific. I also moved an 8-foot workbench in there to go with my six-foot folding table and the huge map case so I have plenty of counter space for my work there.
I know, famous last words. Especially coming from my mouth.
Look at me being all science-y and stuff in my new lab coat. I am not certain that my LAP cap is laboratory-grade, though.
I spent a couple days working out some production details for Mel’s Wax (a big announcement due SOON).
You can find the background on this initial offering by Barn Attic Productions/Seed and Fruit Media here. I am working on getting an archive for all these videos on the site. Be patient with me, I am of an age and disposition that I still expect flames to shoot out of the compewder if I hit the wrong key.
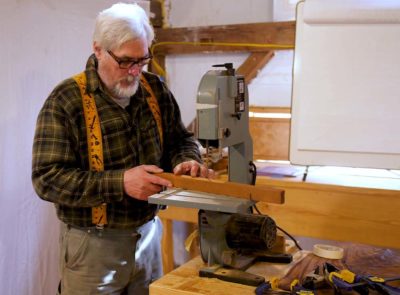
In this episode of my recitation and demonstration of the techniques I use to undertake sensitive veneer repairs — sensitive to the artifacts, not your feelings — such that the compensation (that’s museum-ese for “repair”) is visual harmonious while leaving the maximum of the artifact fabric intact, I demonstrate my low-intensity method for cutting my own veneers on a bench-top bandsaw. I use this method frequently for a variety of applications, whether I need that one special piece of figured veneer for a repair or if I am cranking out veneer strips for doing French parquetry.
If your conscience is pricked by viewing this for no cost feel free to click on the “Donate” button, any proceeds from which will go toward enhancing the rapidity of producing new videos. For those of you who have already shown that generous spirit, I am deeply appreciative.


Recent Comments