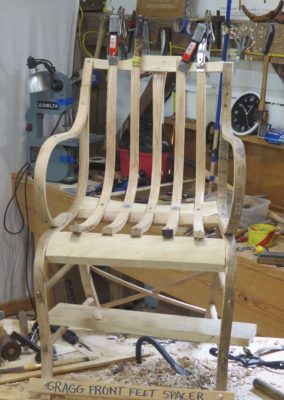
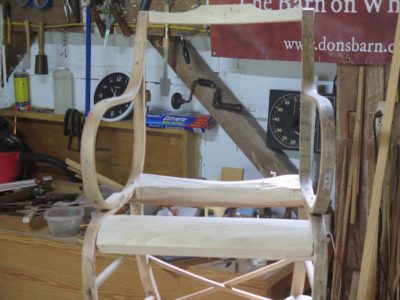
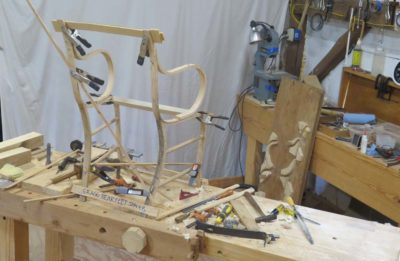
After completing the assembly of the chair structure I moved on to the sculpting of its elements with a variety of gouges, rasps, knives, spokeshaves, spoonshaves, and more, until it was elegant and comfortable (It is. Very.). In another eight hours or so I had it ready to begin painting with a shellac-based primer. This allowed me to see any lines that did not flow as I wanted, and to re-address them with my edge tools. Further, it identified any areas where fills were required.
I make my own fill putty similar to Gragg’s beginning with an oil-based primer and thickening approximately 1:1 with pulverized limestone from the garden center (he used lead white as the filler). Applying that into holes or joints as needed, I actually do not sand the fills, nor the shellac primer for that matter, until after I apply the subsequent heavy oil primer layer. This gives me plenty of body to cut into with sandpaper. My goal at that point is to yield a smooth-yet-faceted surface revealing the tool work that goes into making the chair.
Soon I hope this chair will be ready for me to deliver to my friend and colleague Daniela to paint the peacock feather. Then for me it will be on to new adventures in the World of Gragg.
Stay tuned.
If you are interested in participating in the August 2021 six-day workshop to fabricate a Gragg chair, drop me a line via the “Contact” or “Comments” sections of the web site. At this moment there is one spot remaining. If it is successful I will undoubtedly schedule another for August 2022, 2023, 2024, to infinity and beyond.
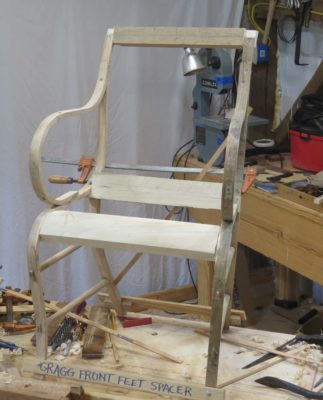
I reached the 40-hour mark of the Gragg Chair Challenge with the construction phase of the chair more than 99% completed. The only construction yet to address is the fabrication of the glue blocks at either end of the arms. These will take another 90 minutes or so as they are tightly fitted into the irregular curved shapes to fit the spaces where the top of the arm fits against the serpentine back-seat-leg element at the top, and underneath where the arm swoops around and is attached to the serpentine element at the seat rail.

So, I am going to call this experiment a success. Indeed there were steps I could have been a little more fussy about (read: slower) but there is the unmistakable structure in place.
This is not to say that the chair is a finished work of art, no where close. There are still the 10-15 hours of sculpting and shaping all the elements into their final elegant form. And the 10-15 hours of laying down the paint foundation for the decorative scheme that is one of Gragg’s hallmarks. After that comes the days of decorating, I would estimate the peacock feather and pinstriping will take about four days. Taking all that into consideration it is fair to say that the finished chair is a little more than 1/3 done. Nevertheless I was heartened to get to this particular finish line with “victory” in sight.
With that, I will confirm and announce a “Construct a Gragg Chair” workshop for late August of 2021. By then the heat of summer should be in the rearview mirror (there are no 80-degree days in the forecast even now, with the warmest day upcoming being today’s 78 degrees), so this six-day class should be one of cool mornings and warm afternoons. I can accommodate four students and together we will work alongside each other, each of us constructing a chair.
Now I just have to figure out how to get four workbenches up into the attic workshop.
And put together the tool list.
And combine all the time lapse segments into one whole video to post on youtube.
And figure out how to even post videos on youtube.
And, and, and…
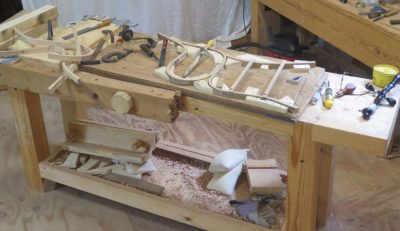
Things are progressing smoothly, at least in those moments when I am not distracted by and intriguing conversation via podcast. At the 32-hour mark I’m up to my eyeballs in dropping in the short seat slats. I should finish them in another few hours of work, and it is looking like the construction will wrap up around Hour 42.

I’ve hit the 24-hour mark of the Gragg Chair Challenge with completing the fitting of the uni-piece bent seat/back elements into the rear seat rail. I’m expecting to finish fitting these into the front seat rail and crest rail somewhere around hour 28, and then chop the mortises for the front and rear rungs. The next big step after that is to disassemble the chair and glue everything together stretchers. After that the only major elements to add are the short seat slats. Then the real sculpting begins.

I’m getting a very good feeling of optimism about a Gragg Chair Workshop in late August 2021. If this interests you, let me know.
I remind you that the goal for the workshop would be the basic construction of the chair. Completing the chair would take at least another week of time. Still, my goal a couple years ago was to get the time expended to complete a chair from raw sticks to delivery at under 150 hours. I’m pretty sure I can get there easily. My next goal will be 120 hours.

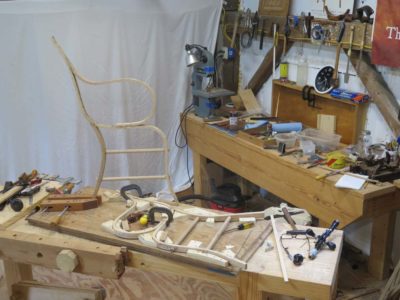
The front seat rail is the easiest so I start there. This is around Hour 9-1/2.
I spent the entirety of hours 8-16 roughing and fitting the cross elements of the chair; the front and rear seat rails and the crest rail. The front seat rail and crest rail are fairly straightforward as their “joinery” is simply shaped lap joints that need very little “fitting other than getting the dimensions correct and the joint faces aligned. Admittedly each presents its own minor challenge, in the case of the front seat rail the lap joint is curved at the frond frame bend, while the crest rail requires shaping in two axes but I accomplished that easy enough with my mni bandsaw. Sawing entirely by hand would have taken another 20 minutes or so.
The chair sometime around Hour 13.
Of this second eight-hour set I spent more than half of it making and fitting the rear seat sail, simultaneously the most important structural element of the chair and by far the most difficult to fabricate as its ends are beveled on two axes and the compound curve must be “just right” to fit the five single element back-slat-and-seat-bottom pieces.
@ Hour 16.
As the project proceeds I am growing cautiously optimistic that I can get a chair constructed in 40 hours. Not finished by any means as the final shaping, sculpting, and painting takes another 40 – 60 hours at least, but fashioned and assembled. If I can get to the 40-hour mark and have a completed chair sitting in front of my I will offer this as a six-day workshop next summer. I’ve already had two people reserve spots should it occur, and since there would only be four students for this event it just might happen. The cost would reflect the fact that I would have weeks of preparation for it, but I am enthused nevertheless.
PS – I was asked about my choice of adhesive for this project, and yes I am using PVA purely for convenience. When I build chairs for real I generally rely on hot animal hide glue. Cold hide glue just takes too long to set up for me to proceed at the pace I need for this exercise. In fact, given the temps in the barn attic at this time of year, hot hide glue would present a bit of the same problem since it is so hot up there as you might expect from the heat radiating down from the almost 3000 s.f. of asphalt panel roofing on a bright sunny day.
PPS – The time lapse video is working wonderfully thus far, and my projection of the completed video at a bit more than one hour’s total length seems to be about right. I have to set aside some time to learn how to post to youtube.
As I embark on the Gragg Chair Challenge I thought I would provide some background rationale for the undertaking.
I’ve never built a chair straight through from start to finish so my original thought was to do just that. I figured if I could get one assembled in five days, then I could with some confidence offer a six-day workshop in making Gragg chairs at the barn.
At issue in part was the starting point. Frankly there is absolutely no way a six day course could have any degree of success and satisfaction if the harvesting, processing and steam bending of the chair components was part of that syllabus. Given that, I decided to see what could be done if the starting point was a full compliment of all the chair parts including the steam bent pieces. Providing this complete set to each student would be a substantial undertaking but I am willing to go down this path provided my success this week.
That is not to say that the harvesting, processing and bending of the chair elements would not be included in the syllabus, just differently than a strictly linear content. If the class happens I will build into the schedule ~two-hour blocks for one-on-one time going through that entire process with each student so they will have the sense of how I got them to the starting point. What they will not have to endure is the two or three weeks it will take me to get them there.
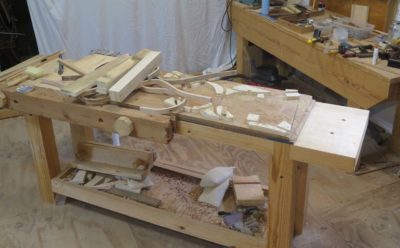
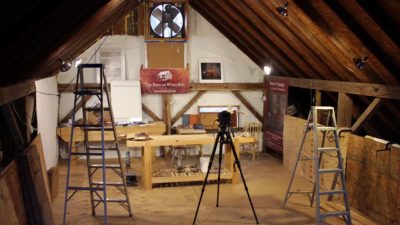
Like them, in this exercise I started with a pile of parts sitting on a workbench. As I proceed I am noting the tool list and also recording the event with my friend Kevin’s GoPro camera in time lapse mode. At this point I am guessing the finished time lapse video will be about an hour long.
The only hitch in my plan thus far was the realization that I will not be able to set aside 40 consecutive work hours for building the chair. Not to be daunted I will simply keep close track of my bench time and note the intervals so I can gauge the progress.
For the first eight hours, a/k/a Day 1, I fitted and assembled the steam bent parts and rungs into two identical side units. Fitting the steam bent parts together is straightforward and pretty quick as everything is simple or beveled butt joints, and at this point, just screwed together in a fitted assembly template (each student would have one). I would expect this process to be complete by lunch during a class.
The first slow-down in the pace is fabricating and joining the side rungs into this framework. I make the rungs first, cutting them to length and cutting the tenons on both ends.
The unit was disassembled and the mortises are chopped though the legs, a fairly quick task as the legs are relatively thin and the mortises only 1/4″ wide. When all the pieces for a side unit fit together it was re-assembled in its entirety then glued and screwed together. As soon as a side unit is complete I can pry it out of the assembly template and lay it flat for the glue (PVA) to set a little.
Once I had the two completed side units in hand I began to fix them in their correct relationship to each other, adjusting the splay angles and using spring clamps and spacing templates to get everything just-so. This takes a fair bit of time to get everything right and can be a vexing task as we are dealing with a lot of parts with no precise joinery to help us out. But getting this right is critical for fabricating and fitting the cross rails, which is what comes next.
I generally start with the front seat rail, mostly because I have direct access to that area while the chair is in its upright mode. I notched and placed it where it belonged, held overnight by a pair of spring clamps.
Thus endeth Day 1.
Two of the students from the recent workshop have posted photos on their Instagram pages.
LenR posted an impressive glamour shot, and JohnH posted an image of his entire collection, although just short of the finishing line. It was indeed a great weekend, and I look forward to actually getting my two sets finished next month. At the moment I am just swamped with other priorities.
I’m thinking of diving in to the Instagram swamp; I am so old fashioned that I think of “social media” being conversing or corresponding with an actual human. Silly me.
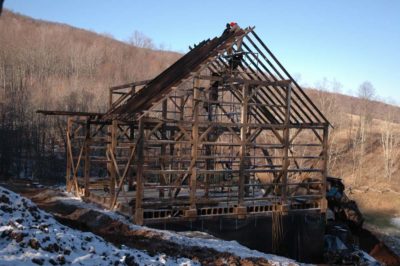
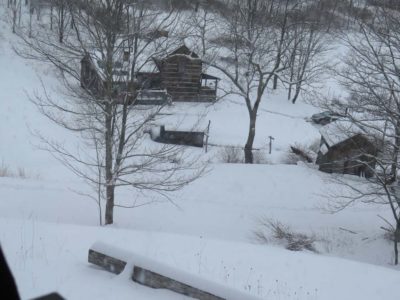
It’s been almost thirteen years since the skeleton of the barn was erected, nine years since it was outfitted with the first of more than a dozen workbenches, and over six years since the first blog post. Now safely ensconced in my 65th year, lately I’ve been contemplating the entire enterprise, reflecting on how blessed I have been and continue to be. Whether it is good news or bad news, after serious consideration I have no plans to change the fundamental structure of activity on the homestead for several more years, but at some point life in the mountains will simply become too physically taxing and the barn and cabin will be in my rear-view mirror. Until then, however, it is still full(?) speed ahead with a big smile on my face, albeit not necessarily in the exact same direction nor the exact same speed. I’m working just as hard as I did when I was 30, but the output is demonstrably less. My Mom is 102 and lucid so I’ve got to think about another forty years of engagement and productivity.
Here is a sketch of what future activities might look like. No telling if it is accurate.

Conservation Projects
Early on I maintained a fairly vibrant furniture and decorative arts conservation practice but have no plans to continue much of that except for specific projects and clients. Yes, I will continue to work with the private collection of tortoiseshell boxes that I’ve been working on for more than a decade. Recently I was approached to collaborate on a couple high profile on-site projects and if those move forward, fine. I love it but at this point I’ve got other things I want to do on the priority list. And I want to truly perfect my artificial tortoisehell. And I want to explore new uses of materials in furniture preservation. And invent new materials, or novel uses of existing materials. And, and, and…
Making Furniture
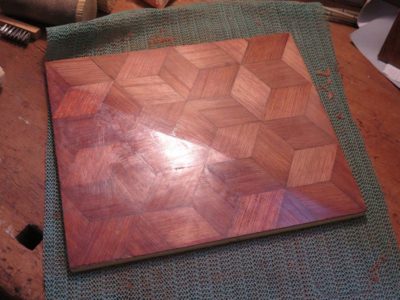
I make no claim as a furniture maker of any note, but I hope to concentrate on making more in the future. I would love to maintain a small output of Gragg chairs every year, and even modify them and take them in directions Samuel Gragg never went. I also have enough vintage mahogany for eight more Daniel Webster Desks, so perhaps there are some clients who might want one. Only time will tell. I’ve always had a hankering to make some furniture in the milieu of Charles Rennie Mackintosh or Alar Aalto, so maybe that becomes part of the equation. And I have these sketches for pieces representing a collision of Roubo and Krenov while they are sitting on the porch of a Japanese temple. And Mrs. Barn has a list of things she would like for the cabin. And exploring parquetry more intensely. And finally get pretty good at woodworking in general. And, and, and…

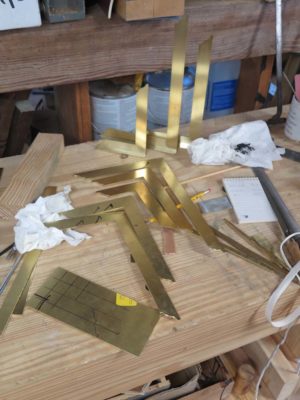
Metal Work
I’ve always had a interest in metalworking since my boyhood when I would spend time with my Dad in his shed, melting lead weights and doing a little brazing and welding. Many of those skills have grown fallow but I am trying to get them back and take them to new places. My love of tool making has been rearing its lovely head in recent times and I have every intention of bringing that focus closer to the bullseye. And part of that has to include getting my foundry back on-line. And tuning up all my machine tools like my machinists’ lathes and mill. And getting really good at brazing and silver soldering, maybe even welding. And, and, and…
Finishing Adventures
I remain committed to looking both backwards and forwards into the realm of finishing materials, ancient and super modern. I truly believe Mel’s Wax to be a transformative furniture care and preservation product for which I have not yet discovered the key to marketing. But I will keep at it because of my knowledge of its performance and my commitment to Mel’s vision for it. And as for beeswax and shellac wax? Finishing with them may be among the oldest and simplest methods, but they can be extremely difficult and I cannot pretend to have mastered them. And what about my fascination with urushi and its non-allergenic analogs and the beautiful things I want to make from them? And what about the fifty bazillion things I do not know about shellac?And, and and…

Writing
My plate of writing projects is full to overflowing, building on a strong foundation of completed works. Notwithstanding my current struggles with the manuscript for A Period Finisher’s Manual, due entirely to my having too much esoteric material to include in a reasonably consumable book (really, how much solvent thermodynamics does the typical woodworker need to know?), I enjoy every minute I am writing even when it is driving me crazy. I’d better because my collaborator Michele Pagan is one full book ahead of me in the Roubo Series. And there are two or three more volumes after that one. And some day I need to finish the almost-completed manuscript for A Furniture Conservation Primer created with a colleague while at the SI and thus will be necessarily distributed for free via the web site. And what about my treatise on the technology and preservation of ivory and tortoiseshell? And the dozen mystery/thriller novels I have already plotted out? And who knows how many short stories about the life of First Century craftsman Joshua BarJoseph? And, and, and…
Web
My first of almost 1,200 web posts went up six-and-a-half years ago, which I understand in the world of hobbyist blogging, where blogs come and go like the tides, puts me as some sort of Methuselah. But certainly not in the same class as The Accidental Woodworker, who has been blogging daily for even longer IIRC. Ralph, I tip my hat to you, sir.
I once thought the web site/blog would be a useful portal for soliloquies about my projects and things I’ve learned over a long and rewarding career, but now I am not so sure. A while back I decided to make a concerted effort to blog at least five times a week for a year, and I think I came pretty close. Surely this would increase my web traffic! Well, not so much. At the end of this effort my web traffic was 2% lower than when it began. Despite fairly consistent blogging my visitorship has dropped by almost half over the past four-plus years. So I just scratch my head. I’m not whining, but instead recognizing that the flock who is interested in my musings is shrinking, not growing. Oh well. This is not a good or bad thing, it is just a thing, helpful in me making decisions about priorities. I have no plans to really change anything about the blog, we’ll just wait and see where it goes. When I am not somewhere else, with someone else, or doing something else, I will blog.
Recently I was chatting with someone who informed me that web sites and blogs are now passe and the currency du jour is the unholy trio of Instagram, Facebook, and Twitter. Given that and my antipathy towards the latter two it is likely that I will undertake the former at some near date (yes, I know the relationship between Instagram and Stalkerbook) . Something inside me rebels at the notion of validating the post-literate world, however. Still, the economic treatise presented by Larry the Liquidator is not only dramatic but accurate. Even the Professional Refinisher’s Group is moving forward, transitioning from a moderated email forum to a private Facebook Group, which will leave me behind. But they will survive without me and I intend to maintain contact with that circle of fellowship regardless.
Trouble is, I am by temperament a bizarre mélange of buggy whip maker and hardline “emergent order” Hayekian. Hmmm. Not really sure how that works out.
Workshops
Integral to my vision for the barn was to have it be a place of learning. As the facility was coming together, whenever I spoke to any kind of woodworking gathering the verbal response was overwhelmingly enthusiastic. The reality that unfolded was anything but. I now realize that my vision was a faulty one and the enthusiasm was superficial. Quite bluntly, almost no one wants to come to such an isolated location where local amenities are practically nonexistent, to spend a few days engaging in subjects I want to teach. Fair enough, the barn is too remote and my topics are too arcane. Like I said before, this is not a good thing or a bad thing, but just an instructive thing to add to the equation.
As a result and in recognition of reality I plan to deemphasize workshops at the barn, perhaps even eliminating them altogether, notwithstanding that I created dedicated spaces for the undertaking. Should a small group of enthusiasts approach me with the request to teach them, I will do so. That is precisely what a quartet of guys have done for next June. And, I might do an occasional blockbuster-type workshop (a Gragg chair class would be such an example, if that ever occurs; I had thought a ripple molding machine class might be such an event, but with zero response…), or I might travel a bit to teach but otherwise that part of the portfolio is likely to close. Not definitely, but likely.
Videos
Hence my transition to teaching via video. If I cannot get folks to come here perhaps my best strategy is to go to them. I have a multitude of ideas (more than twenty full-length [>30 mins.]video concepts on the list) and a brilliant local collaborator to work with. I am committed to this path to the degree that I have the time, energy, and resources.
Further I have decided that making shorter, self-produced and thus less polished “shop technique videos” might be a useful undertaking to post on donsbarn.com, youtube or Vimeo. I will explore this avenue in the coming weeks and months.
The Homestead
With several buildings, several gardens, and a power system to maintain and improve there is never a shortage of things to do here on the homestead. I want to build/expand more garden capacity for Mrs. Barn to spend time doing the thing she loves best. And fruit and nut orchards. And I want to finish creating a rifle scope for shooters like me who have lost most of the vision in their dominant eye. And another hydro turbine downstream from the current one.
And, and, and that’s all I’ve got to say on the subject.
That is The State of the Barn Address, 2019. To quote one of Mel’s favorite songs, “The future’s so bright I gotta wear shades.” Yes it is. I am living the dream.
In one sense the learning velocity for Day 3 is the same as Day 1 and Day 2, but the psychological impact of everything coming together in a beautiful outcome is almost incalculable. One thing I am mindful of is that most Day 3s of workshops are structured to make sure any meaningful instruction occurs by mid-day, as the typical impetus is for folks to start heading back home sometime in the afternoon. Sometimes students will stay until evening, but in this case all three had lengthy drives home (two to central NC and one to CT) and headed out mid-afternoon to get home before dark.


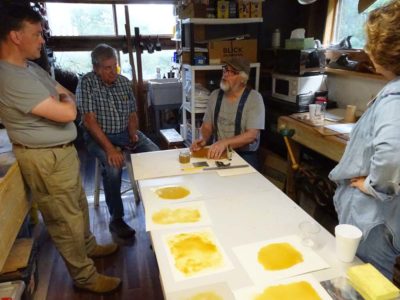
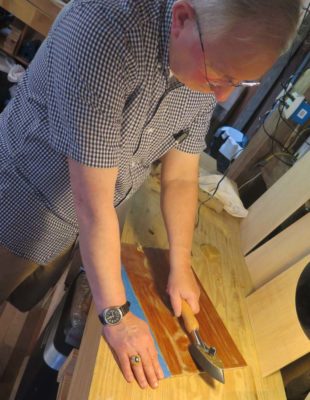
If I had to summarize the events of the third day it would be encapsulated in the word “rubbing.” The central focus of that action was the very large panels that had been varnished with brushed shellac the previous days. These panels were divided into four sections to be finished off with different rubbing protocols, including making and using abrasive pads for pumice and Tripoli/rottenstone, both with and without paste wax. Another section was burnished/abraded with Liberon 0000 steel wool and paste wax.


Though I knew the results in advance the students did not, and their excitement at seeing the results of their own hand work was most gratifying.

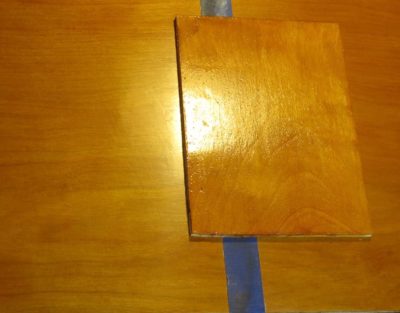
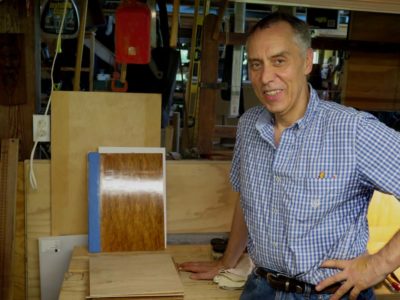
One student even brought a sample panel from his previous finish work and compared it to the panels we completed during the workshop. Needless to say the smile could not be wiped from his face. I didn’t quite get the camera angle perfect but you get the point between the almist gritty, brassy smaller panel and his new lustrous, almost glowing surface.
Our final chapter of the workshop was shellac spirit varnish pad polishing, a/k/a “French polishing.” As with the other pad-based processes, rubbing out with tripoli or pumice, they each made their own spirit varnishing pad. All these pads were made with vintage linen outer cloths and new cotton wadding inner cores, and all these were theirs to take home in a small sealed glass jar. These pads should serve them well for many years to come.

Spirit varnish pad polishing is very definitely a technique requiring an informed “feel” about how it is supposed to progress. Even though this was an introductory effort for all three students, they really took to it with enthusiasm and excellent outcomes being the result. It was delightful to see the smiles and satisfaction of accomplishment.
Though I failed to get a final photo of us all, along with their sample boards going home with them, I believe it was a woodworking-life-changing experience for them. As I told them at the outset, my primary goal was to give them confidence at the finishing bench and dispel any intimidation they might have in that regard. If their notes to me afterward were any indication, it was a success.
I want to thank for your “Historic Finishing Course” at the Barn last week. It was over the top in how it exceeded my expectations; by the end of the workshop I was seeing the process you taught working to a superb result under my own hand. A really cool result–and well worth three days of my time to learn it.
And,
I want to thank you for an awesome class! The fellowship was really great and I came away much more confident applying a lovely shellac finish.
[Yup, my compewder power cord arrived from South Carolina and I am back in bidnez. — DCW]
Day 2 included the continuation of previous exercises begun on Day 1 and the addition of some new ones to fill out the syllabus.
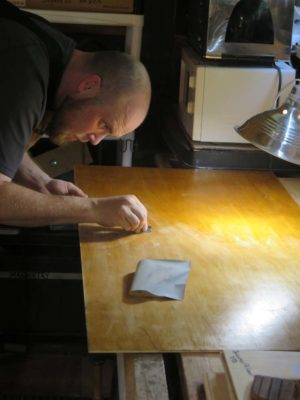

With the large panels having already been built with two innings of brushed finishing the preparation for the final application of brushed shellac was underway with the surface being scraped. I find scraping to be a “lost art” among contemporary finishers for the most part, although it was a very common weapon in the quiver of an 18th century craftsman. For convenience sake I/we used disposable single edged razors from the hardware store that I buy by the hundreds.

For the final application of the shellac varnish I had them switch from a 21st century nylon/sable blend watercolor brush to an oval bristle brush, much closer in style to that of 250 years ago. This gives the students a variety of experiences for similar tasks.
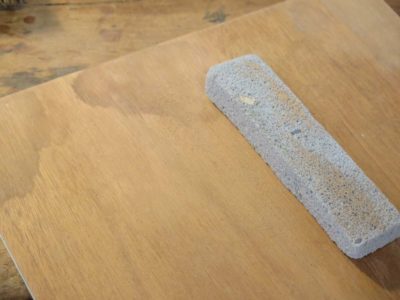
I presented a very brief demonstration of using a pumice block to prepare the raw wood, which yielded a surface that was surprisingly (to them) smooth.
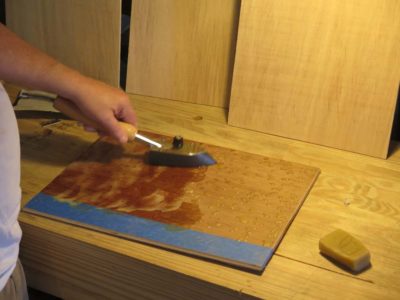
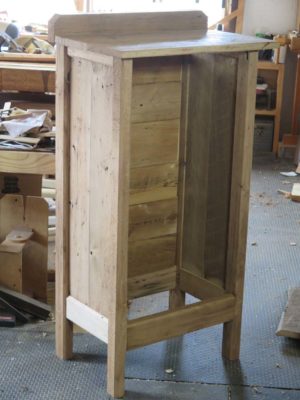
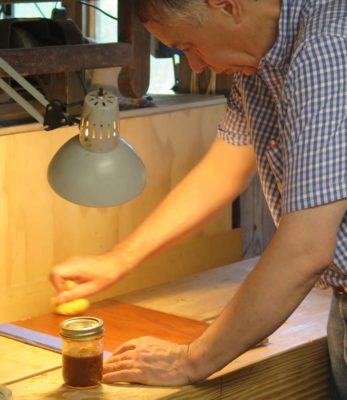
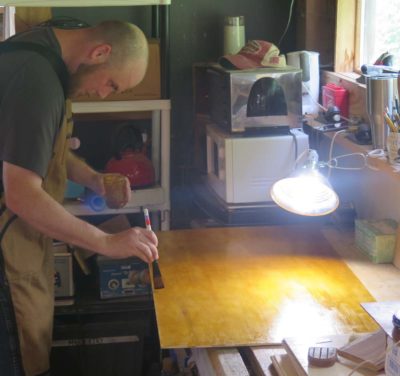
Then on to the molten wax portion of the program, wherein they prepared two sample boards for different purposes. The first was to create a “wax only” finish which I think is the most difficult finish to do well, and secondly to fill the grain for a panel to be pad polished tomorrow on Day3.
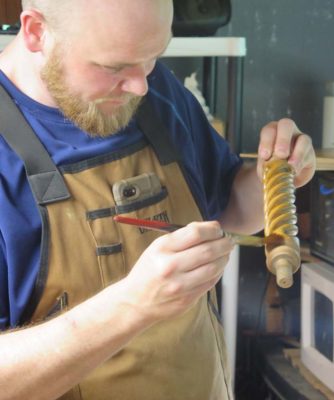
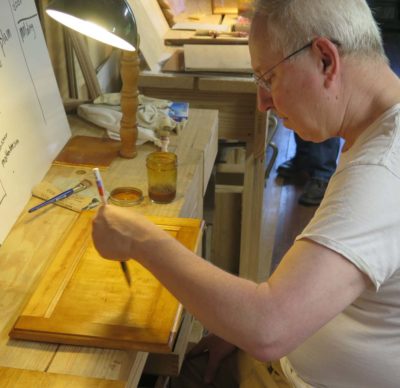
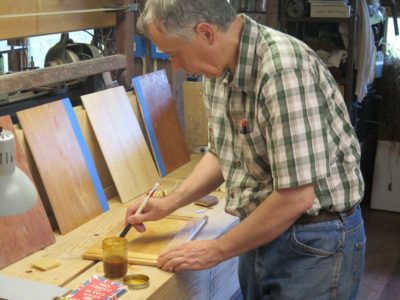
While the wax was cooling the students moved on to a pair of exercises designed to give them facility at complex surfaces. The first was to varnish a carved and turned spindle and the second a frame-and-panel door.
While they were doing that I was playing some more with molten wax finishes. Like I said, it is difficult to get perfect.

Late in the afternoon we saw this “meal on wheels” right outside the shop. Clearly they are terrified of human proximity.
Thus endeth Day 2.

Recent Comments