
Early on I had decided to incorporate demonstrations to the program at Handworks, and in order to have something on which to demonstrate I made a set of parquetry panels.


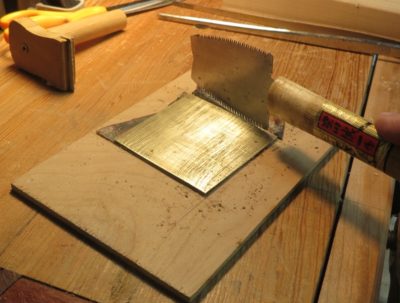
I’d begun these some weeks before, you can follow their development in my earlier post about Bandsaw Parquetry. One of the points I was trying to get across was the importance of surface preparation so I was going to start with some surfaces that REALLY needed preparations.
Finally, after two weeks of assembling stuff to go, two days of playing TETRAS loading, unloading, and reloading the truck full to the brim, off we were. After two long days of driving, we got to Cedar Rapids for a good night’s sleep before heading down to Amana for the Handworks set-up. I wish I could’ve said confidently that I prepped thoroughly and tied up all the loose ends but the odds were near 100% that several hours into the set-up or Handworks itself I would remember something I left behind.
John and I showed up bright and early for setting up, the building opened at 9AM and we were there around 9.15. I think we were the first booth to be completely set up
Here is a walk around the Festhalle during the set up time. Upcoming posts will document other spaces and activities for Handworks.


I was in my usual spot, on the center row near the Lie-Nielson booth up on the stage, and between Jeff Hamilton in front and Gary Blum to my rear, with Matt Bickford across the aisle on one side and Patrick Leach on the other. I took the picture of the main space from the stage, where L-N set up very late in the day. While they were working on their display Tom Lie-Nielson stopped by and we had a nice long chat.

My setup took only a couple hours, leaving lots of time to visit with friends from years past. I especially cherished the time with the Bickfords, folks who are definitely on my wavelength.

Across on aisle were Matt Bickford and a chairmaker I did not know (there were actually a lot of exhibitors and tool makers I did not know),

and across the other aisle was Patrick Leach’s seductive vintage tool emporium. Amazingly enough, I escaped the weekend without buying a single tool.

Immediately behind/adjacent to me was Gary Blum with his innovative workbenches and accessories, and hand planes.

Konrad Sauer was just down the way with his spectacularly high-performance planes,

then Lost Art Press. I think Gramercy Tools was between them but had not set up when I was walking about.

Benchcrafted was the booth greeting the visitors immediately on entry. It makes sense, they’re the ones who pulled the whole event together.

Back in the corner was innovative genius Jeff Miller who was showing off this device that hollowed out bowls. It was the coolest thing I saw at the event. Over his shoulders you can see the Lee Valley booth, but they had not begun setting up yet.

Rounding out the Festhalle setups from that time was Ron Brese, closest to Benchworks at the other end of the center row.
With the rest of the day free we had a chance to go visit all the other booths in the three other venues, although some of the booths were not ready until late in the day or even the next morning.
We were girding our loins for a wild couple of days starting at 10AM the next morning.
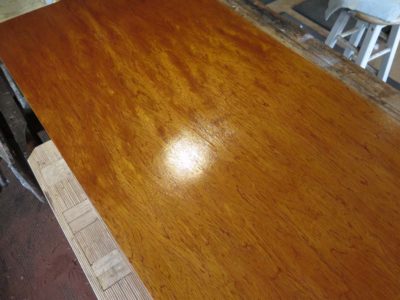
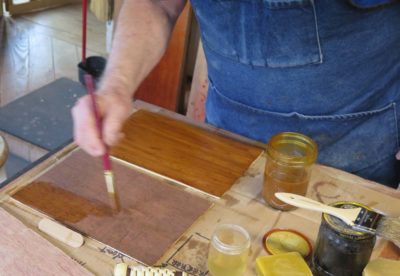
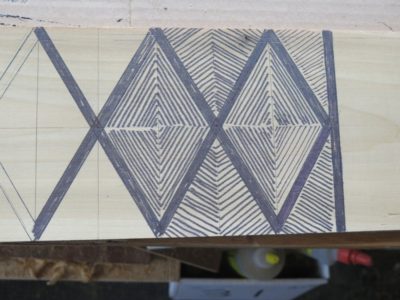
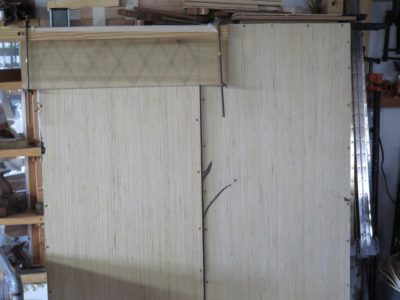
During my recent Introduction to Historic Woodfinishing workshop I used a parquetry panel to demonstrate the substrate preparation processes and found it so useful that I said to myself, “Self, you should do this demo at Handworks.” In the blink of an eye, I committed myself to cranking out six more parquetry panels in a very short time. I will do four (hopefully identical) demos of French wax finishing, at 11AM and 3PM both days. My plan is to take a panel from rough parquetry to gleaming in about 20-30 minutes using analogs to the tools, techniques, and materials available to a Parisian atelier.
With an audience looking over my shoulder.
Wish me luck.
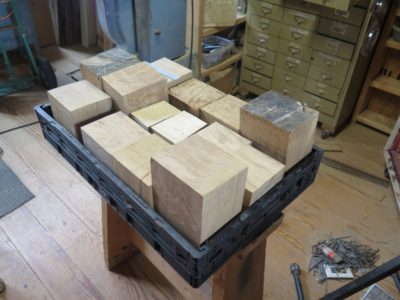
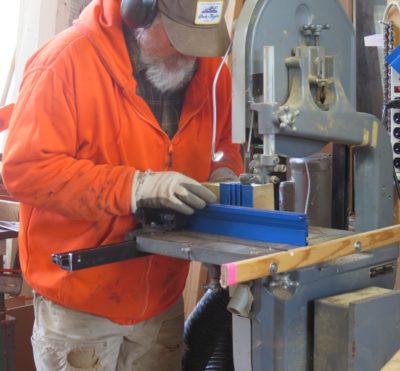
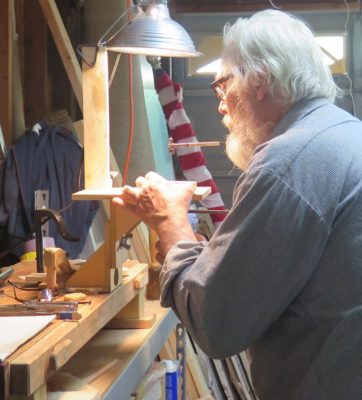
In the meantime I had to actually fabricate six parquetry panels; four for the demo sessions, one more to remain “raw” and a sixth to be completed in advance to use as a showpiece. The only ways I could conceive to finish such an undertaking were 1) cutting parquetry lozenges by hand for several days running, or 2) use my bandsaw or table saw to gang-cut stacks of lozenges. After initial trials I decided to follow path #2 with my little Delta benchtop bandsaw.
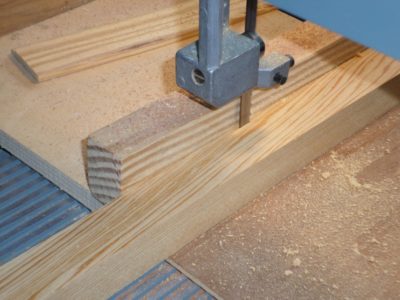
I’ve used my bandsaw for ripping parquetry and banding stock strips before, but could I tune the machine to actually create the diamond lozenges themselves? Let’s FAFO (Fool Around and Find Out). *Spoiler Alert!* – the result was so successful that it will likely be my standard procedure from now on. My days of hand cutting individual diamond lozenges may be over.

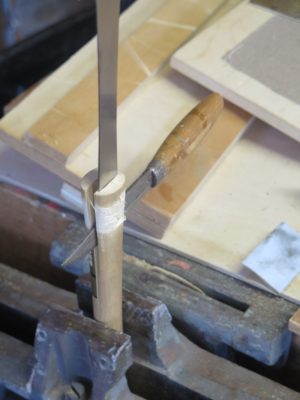
I first fabricated a crosscut sled for the bandsaw from some scraps of maple runners and mahogany plywood. I ran this through the saw approximately halfway, then inserted my thin 6″ machinists’ rule into the kerf to serve as the reference line.
Taping a 30-60-90 triangle in place against the reference line, to make sure nothing moved, I tacked a fence to the sled at 60-degrees to the kerf. I often use tacks rather than glue in cases like this because I can induce micro adjustments with a hammer when necessary.

Using the newly installed fence I cut a 60-degree stop block to use whenever I want to cut 60-120-60-120 lozenges. For any particular composition of parquetry I cut a slice of the veneer strip then rotate it and place it against the blade to establish the placement of the stop block against the fence. One good/bad feature of the little bandsaw is that the blades are very thin with almost zero tooth set. Not good when making rough cuts in irregular stock, excellent when making precision cuts in identically prepared stock strips.
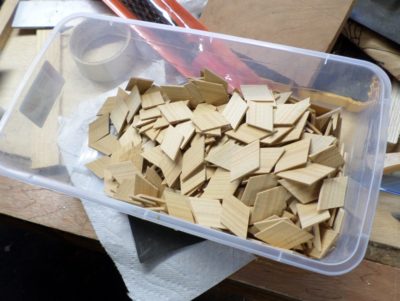
With the machine set up and the test cuts made to assure the angles and dimensions were spot-on I was able to saw five or six diamonds at a time and filled my shoebox-size bin in about 20 minutes.
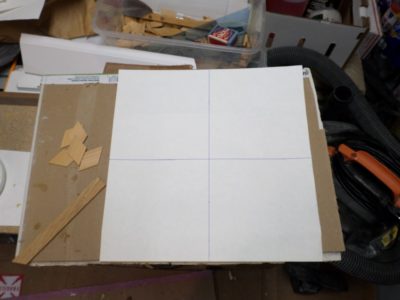
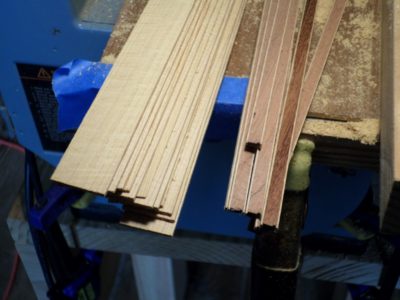
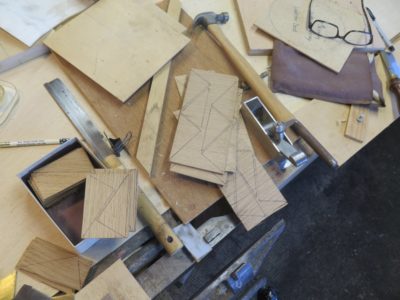
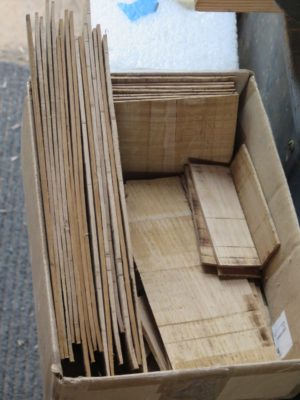
With the stock elements in-hand I laid out cross-lines on paper and got to work.


I find the cross-lines to be exceedingly helpful keeping myself on track as I glue down the diamond lozenges to the paper. Any irregularity, no matter how miniscule, compounds and amplifies. Hence the guidelines to keep me on track. With precise diamonds and the cross-lines I could compose a complete foot-square panel in a little over a half hour.
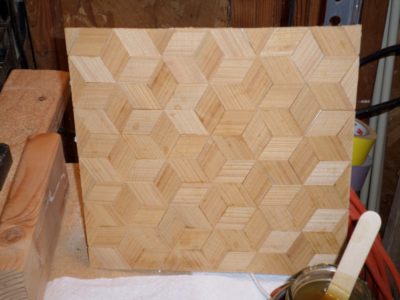
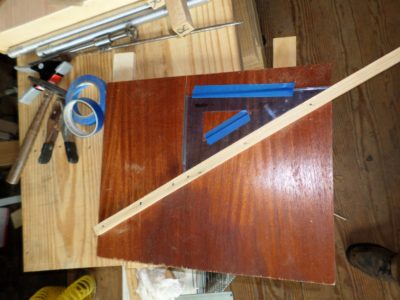
Trimming off the projecting elements with a veneer saw and Japanese knife the next morning I now had six compositions ready to glue down, in this case to 1/2″ Baltich birch plywood.

The irregularity of handsawn veneer (or bandsawn for us modernes), regardless of how carefully executed, is why the ancient ebenistes saw the toothing plane as the first woodfinishing tool to be employed.

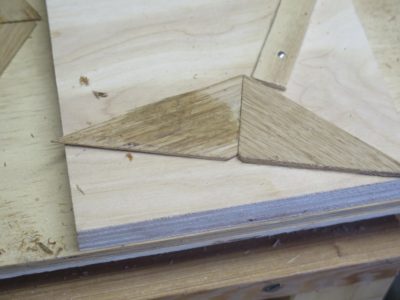
On to mounting the parquetry panels face down on the plywood. All the gluing for this project was done with 251 gws hot hide glue.

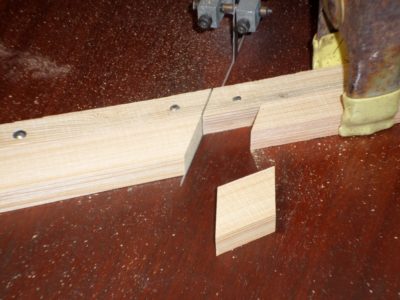
Final trimming in situ was followed by banding and perimeter strips. I work two sides at a time, trim the ends of those two sides at 45-degree angles, then cut and trimmed the remaining pair of sides. It took me a lot longer to do the banding and perimeter strips than to compose the original parquetry.

And with that I am now the proud possessor of six parquetry panels for showing-and-telling. If you are at Handworks stop by and take a look. I’ll be in the center aisle of the Festhalle.
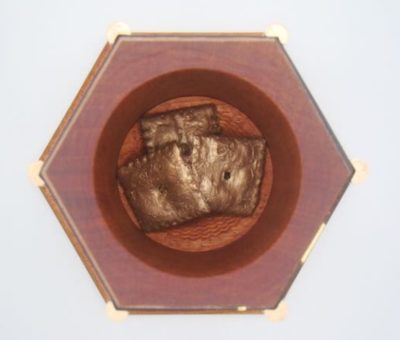
My longtime pal Ripplin’John sent me photos of his latest project en route to an MFA (at our age John, what were you thinkin’?). Seriously, I am immensely proud that we are friends, my circle of close friends is actually quite small, and of his artistic and technical accomplishments while exploring the realm of artistically integrating wood and metal. Some time ago I gave him a copy of the Matthew Boulton book and is now going to town.

This “lunch box” employs classic boullework techniques, right down to the engraving. In his own words,
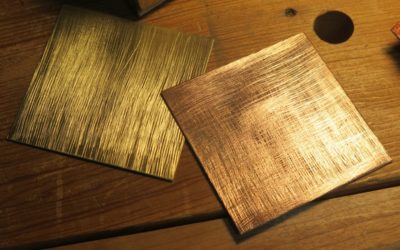
I changed the normal procedure somewhat. I printed the drawing on PNP paper and then transferred it to a brass blank slightly larger than the size of the sides. After engraving the brass, I assembled the packet with shop-made veneer and cut out the pieces as needed. Doing it this way meant that I was engraving much larger pieces of brass. Holding the very small pieces after cut out would have been pretty tough.
Each assembly was then glued to another piece of veneer before gluing to the box. This was done to ensure that a failure of the glue up on one side would not wreck the whole piece.
The corners, finial and cheese crackers are cast bronze.
Well done, sir. You can tell him so in person at Handworks where he will be helping me in my booth.
A couple weeks ago I had a terrific three days teaching “Shellac Finishing” to members of the Howard County (MD) Woodworker’s Guild. A good time was had by all, but alas I left my camera behind so I have no pics to chare.
My teaching calendar for the remainder of the year is as follows:
May 20 The H.O. Studley Tool Cabinet and Workbench banquet presentation for the Annual Meeting of the Early American Industries Association, Staunton VA
June 19-21 Historic Woodfinishing 3-day workshop for the regional chapter of the Society of American Period Furniture Makers, at the Barn

July 17-19 Historic Woodfinishing 3-day workshop at Wood & Shop, Earlysville VA

August 21-23 Introduction to Parquetry 3-day workshop at Wood & Shop, Earlysville VA
I hope to see you there.
After three years of near-drought conditions (twice last year, once the previous year) I am suddenly deluged with opportunities to teach and present this year. In addition to those I have previously mentioned, there will be a third Historic Woodfinishing workshop, this one at the Barn(!), commissioned by the regional chapter of the Society of American Period Furniture Makers. They’ve had a month to get their members into the class and now I can open it up to the general audience for the last couple of slots. My neighbor is coming over this afternoon to help me rearrange the classroom and move some workbenches down from the fourth floor.

I’m also going to be the banquet presenter for this year’s Annual Meeting of the Early American Industries Association, speaking on the topic of the incomparable Henry O. Studley tool cabinet and workbench.
I even declined a gracious invitation to teach out on the West Coast and another out in the Heartland, but my days of that kind of travel for teaching are over.
When it rains, it pours.
So, here’s what my upcoming teaching/presenting schedule looks like:
April 12-14 Historic Woodfinishing 3-day workshop for the Howard County Woodworkers Guild, Columbia MD
May 20 The H.O. Studley Tool Cabinet and Workbench banquet presentation for the Annual Meeting of the Early American Industries Association, Staunton VA
June 19-21 Historic Woodfinishing 3-day workshop for the regional chapter of the Society of American Period Furniture Makers, at the Barn
July 17-19 Historic Woodfinishing 3-day workshop at Wood & Shop, Earlysville VA
August 21-23 Introduction to Parquetry 3-day workshop at Wood & Shop, Earlysville VA
September 1&2 Handworks 2023, Amana IA (yes, I know this involves long-distance travel but I’ve been committed to this for several years)

I am delighted to be teaching a pair of classes for Joshua Farnsworth this summer, Historic Wood Finishing (July 17-19) and Introduction to Parquetry (August 21-23). The workshops will be held at Joshua’s place near Charlottesville VA. You can get the particulars here, and I believe he will be posting the course schedule imminently. I hope to see you there.

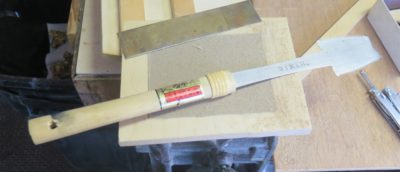
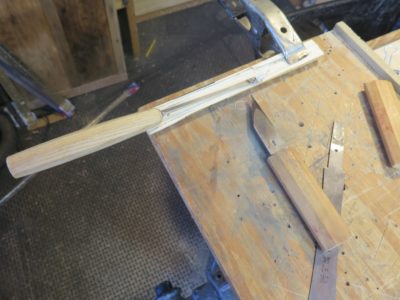
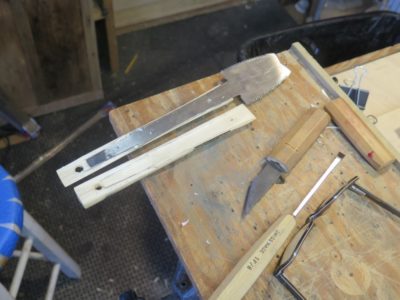
Remaking the Japanese mortising saw into a premium veneer saw was straightforward, but, as in the case of any instance where you must first break apart a perfectly functonal quality tool to do so, gave me pause. I thought about it long and hard, even going to the extreme of ordering a duplicate tool. In the unlikely case where the “remaking” went south I would still have the original capability.
The mortising saw business end did a great job at the cutting, but the long neck made the saw somewhat floppy and unwieldy for repeated and routine veneer work like the hundreds of cuts I will be making for the tool cabinet parquetry. Somehow that floppy neck had to be dispensed with. Once I settled on a simple strategy it was, like I said, straightforward.
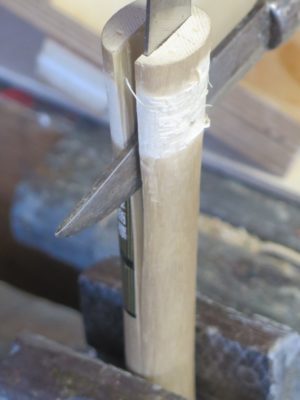
I began by removing the bindings and set screw from the handle, which I then split along the blade tang with a sharp rap on a Sloyd knife.

The handle, being paulownia, cleaved instantly and cleanly, releasing the entirety of the metal blade.
Re-housing the tang to “remove” most of the floppy neck was a piece of cake. Using the tang itself as the template I marked then excavated a pocket of the exact dimensions of it so the two halves of the handle could be reassembled to incorporate it. I cleaned the tang and abraded it lightly, then reassembled the unit in the new configuration with epoxy.

To hold things steady until the epoxy set I wrapped the handled with some elastic tape and left it for two days.
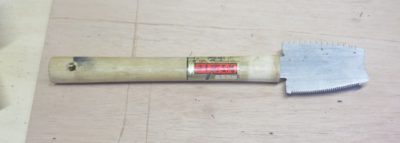

Removing the tape revealed a now-perfect parquetry cutting saw. Now all I need is a perfect set of sawing templates.
Stay tuned.
My parquetry design for the tool cabinet is a residual memory from the Roentgen Exhibit at the Metropolitan Museum in February 2013. Which itself makes for a somewhat amusing story.
I detest cities.
The bigger the city, the greater the animus.
It sorta explains why I live happily in a county of fewer than 2500 people, almost 200 miles from Ground Zero. That means I view NYC pretty much as a barbarian coven. During my career at the Institution I had to travel there several times to work at the national design museum, The Cooper Hewitt Museum, and near the end of my tenure to install the Chinese Pavilion exhibit in Queens. Mrs. Barn had to hear my griping about these trips and that fetid megalopolis for weeks before and after the fact (I never did get used to the stench of the place). I recall once riding the train with my pal MikeM to Manhattan for an editorial meeting at Simon&Schuster, and as we walked out on to the sidewalk from Grand Central station I instantly turned to him and said, “Okay, I’ve had enough. I’m ready to go home.” I may be twice his size but he is Sicilian, so he won the argument. That particular book in question never came to pass mostly because by the time push came to shove, I had lost interest.
A couple months after I retired, I announced to Mrs. Barn that we would be making a day trip to NYC to attend the mondo Roentgen furniture exhibit at the Met. Her dumfounded expression confirmed her suspicion that aliens had abducted her husband and replaced him with a metrosexual or some other life form. I was adamant that we would not stay overnight so we caught the 5AM train and arrived at Penn Station about 8.30. Rather than subject myself to the subway system or a cab ride I made her walk all the way to the Met. That’s 3-1/2 miles.
My friend M, a conservator at the Met, gave us a guided tour of the exhibit complete with a running commentary of some of the technical features of the pieces she had examined and conserved. It was a grand day, complete with lunch at the fancy schmancy Met restaurant and an afternoon session examining the contents of the Duncan Phyfe tool chest before a delicious meal at a restaurant en route back to Penn Station and heading home, arriving sometime around 2AM. The day was totally worth it, even for an urbaphobe like me.
Anyhow, even though the Roentgens were best known for their innovative veristic marquetry creations, I found greater resonance with their parquetry. Some of those parquetry expressions never left my consciousness and when it came time to start noodling this tool cabinet the visual memories came flooding back. Almost immediately I gravitated to an alternating diamond-and-stringing concept for the presentation surface. As I mentioned before I was using 18thC white oak for my veneers rather than the exotics favored by Roentgen patrons.
Equipped with my vision for segmented 60-120-60-120 parallelogram diamonds I started rough cutting the sawn veneers from which I could begin to assemble the diamonds which would then be sawn and trimmed en toto.
I recognized early on I had to devise a precise method to both saw the 30-60-90 triangle segments, and then to layout, saw and trim the completed diamonds perhaps even more precisely.
Stay tuned.
As I slowly move forward with my ultimate tool cabinet the reminders and memories of the Studley Tool Cabinet are ever operating in the background as I strive to integrate the maximum inventory of tools into the space. Fortunately (?) my tool cabinet will be five times more voluminous than Studley’s, which presents a multitude of opportunities and headaches. Sure, I can include five times as many tools, but like Studley the multi-layered layout must be accomplished by hand and trial-and-error. I expect that hugely time-consuming process will continue to infinity and beyond, or until I run out of tools to put inside.
Less problematic, at least in principle, is the decorative treatment of the presentation surfaces. There I have a starting premise and need only to fine tune the execution. My goal is to assemble a complex diamond-and-stringing parquetry surface evocative of the creative genius of Abraham and David Roentgen who, like many of the monumental French ebenistes, were Germanic. My parquetry surfaces will be based on some of their work, but without the over-the-top exuberance. As for decorating the interior surfaces, I have plenty of black dye, mother-of-pearl, and “bone,” both genuine and artificial.
Since beginning the project my efforts have vacillated between fitting the tools inside and mapping out the parquetry process. For the latter I needed to create a very rough proof-of-concept panel that could provide useful information about tinkering with the size and proportions, and the process of executing whatever/wherever I wound up.
One of my foundational starting points was to use wood from Roentgen’s era for the veneers. Fortunately I had a large inventory of leftover white oak scraps from the FORP gatherings in Georgia, which employed timbers that were literally growing at the time the Roentgens were active. While none of the wood pieces were sizable, they were certainly process-able.
With a newly tuned bandsaw and brand-new, variable spaced teeth bandsaw blade I set to work making enough sawn veneer to execute the sample panel.
Stay tuned, this project will consume dozens of blog posts over the coming months.
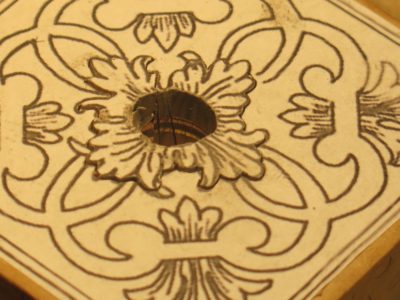
As I continued preparations leading up to last Saturday’s Boullework presentation to the SAPFM Blue Ridge Chapter I was able to make good progress once I discovered the cause of my earlier frustrations. Which was, as I realized once the initial center cut was completed and the material removed, that the first blade break resulted in a small fragment being embedded in the kerf. Every succeeding blade was damaged by encountering this fragment, continuing the sawing difficulties. When you’re talking 0000 blades it does not take much to throw them off.

Getting a little more sawing done and assembling the demo materials was pretty straightforward.

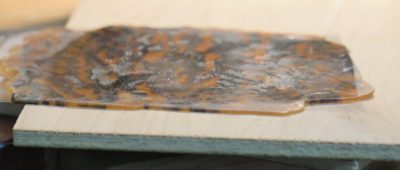
I even made a scute of tordonshell. Fun, fun, fun.
PS Since I am on the home stretch for reviewing the Gragg chair video (probably about a dozen finished half-hour-ish episodes plus a bonus episode or two) and creating the edit sheets for the project, I am casting my brain forward to next winter. I am thinking about a shorter series on Boullework, Don-stye. Or at least revising and updating my original monograph from my presentation in Amsterdam.

Recent Comments