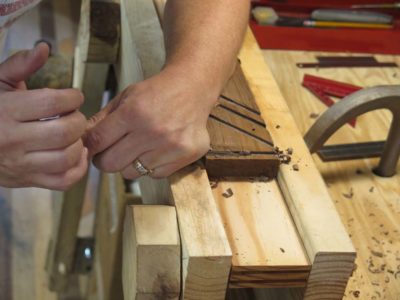
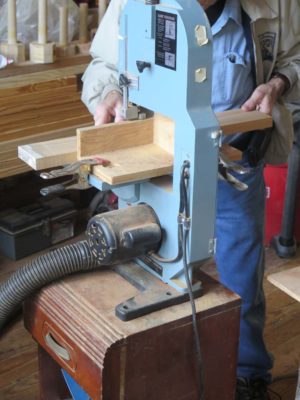
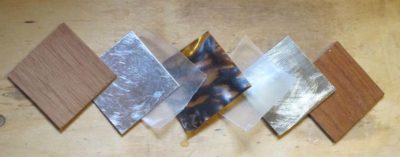
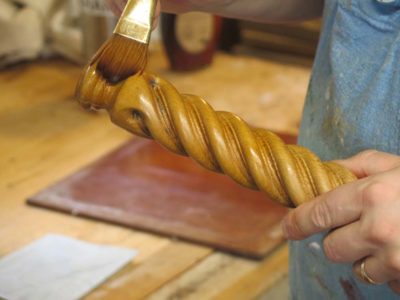
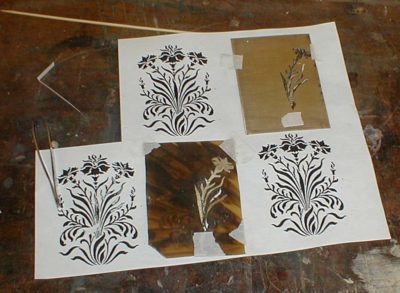
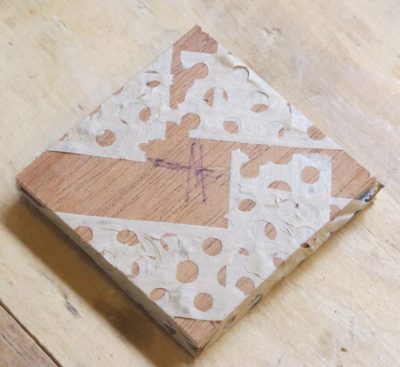
I spent part of the weekend getting ready for the upcoming Boullework Marquetry workshop at the barn. The main items were to cut and anneal the brass panels for the workshop exercises, and making some tordonshell.
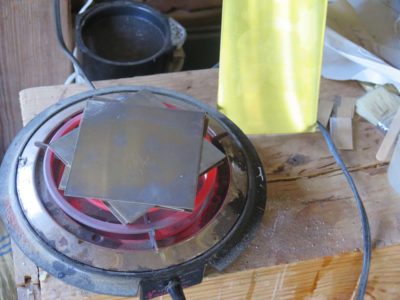
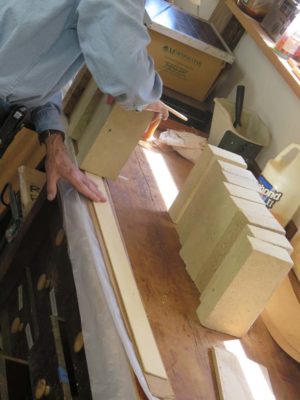
I anneal the brass sheet by placing the pieces on a hot plate and letting everything get as hot as it can get and leave it there for a couple hours. When it has turned from a bright brass color (upper right) to a dull purple/brown it is ready to work. This renders the material much softer and easier to saw with the near-microscopic blades we will be using.
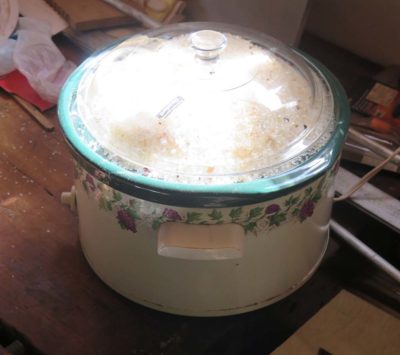
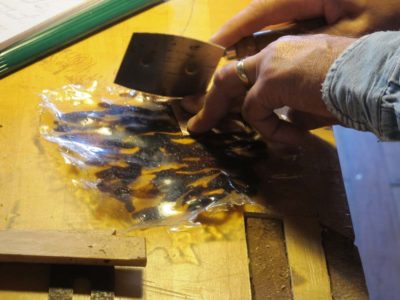
Actually the most time consuming thing (clock-wise, not me-wise) was reconditioning some silica gel to desiccate the tordonshell after making it. But all that took was digging out a slow cooker and the Gamma dog food container I use as a desiccation chamber for dealing with the tordonshell after it is made. I cooked the silica gel for about twelve hours to drive its RH down to about 10% so it should serve as a drying chamber nicely.
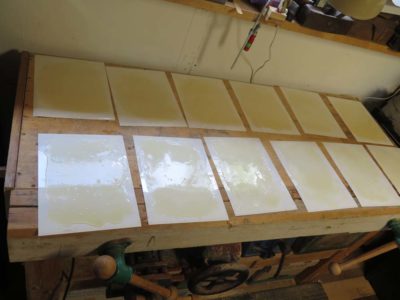
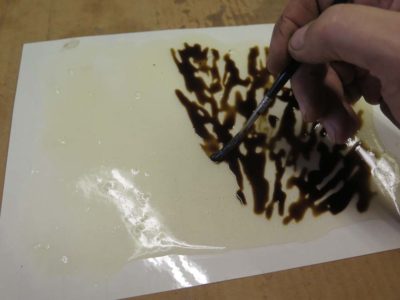
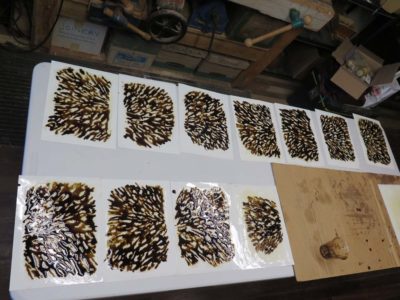
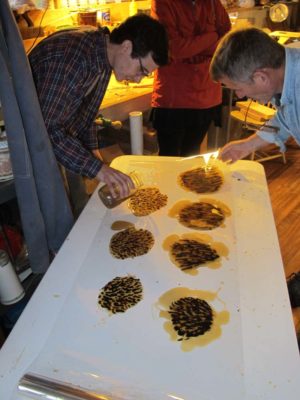
As for the tordonshell I cast and hand-painted several pieces of it, enough for everyone to have plenty for the class exercises. Since our first activity the morning of the first day is for everyone to make some for themselves to take home after the class, they will get the full experience of creating and working with artificial tortoiseshell and brass.
This topic is on my “make a video” list, perhaps for late next year.

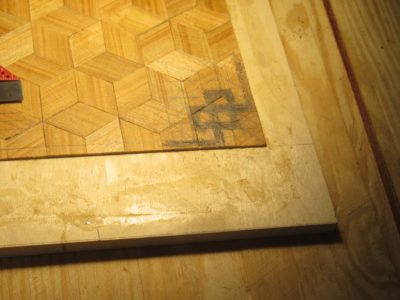
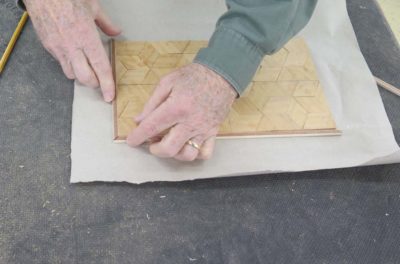
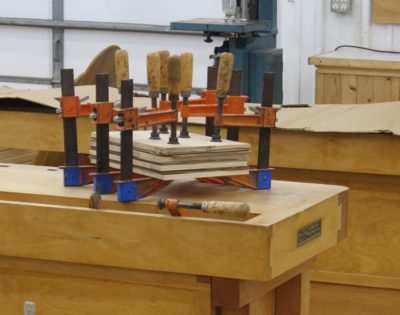
The day began with the unveiling of the parquetry backgrounds glued up just before stopping yesterday. A bit of water on a sponge allowed the paper backing to be removed easily and quickly. The hot hide glue had congealed nicely but was still pretty green so we placed them in front of a fan to help dry faster.
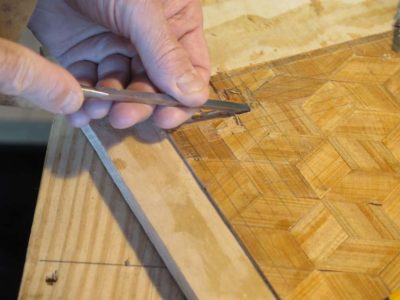

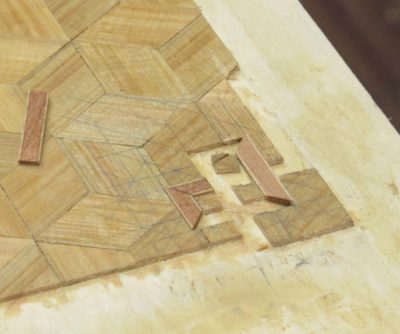
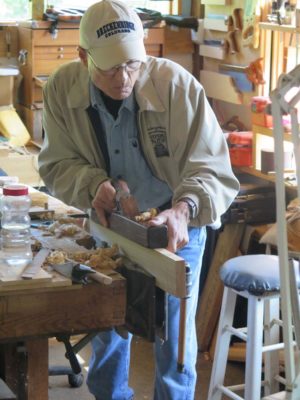
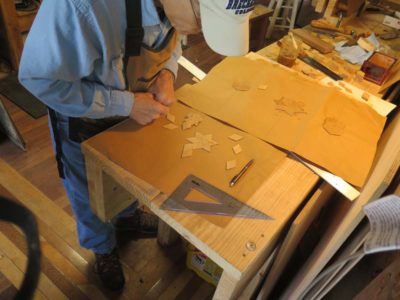
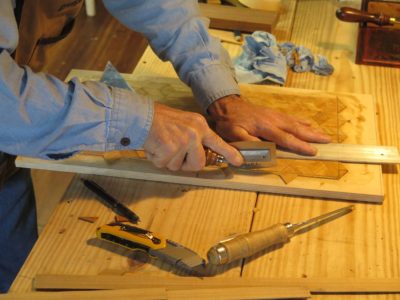
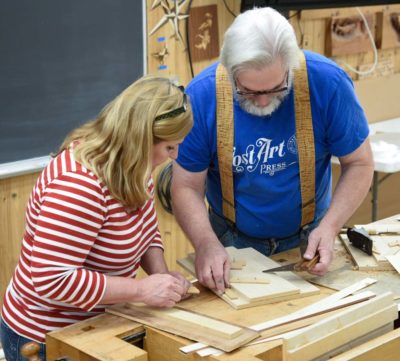
Then it was on to trimming edges, laying out the knotwork inlay and excavating the channels for the banding.

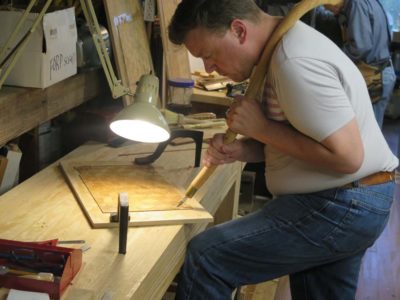
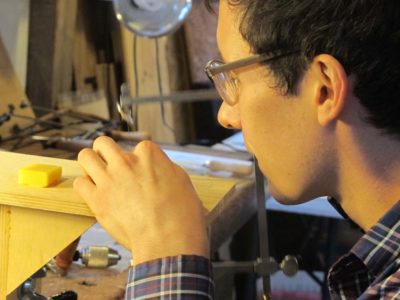
Much of the incising as done with utility knives, but Brint in particular took a liking to my shoulder knives. He gave both of them a long test drive and had definite preferences for them. So much so that he encouraged me to have a workshop next summer to allow the participants to make one (or two). We will get together over the winter to work out any bugs for that workshop.
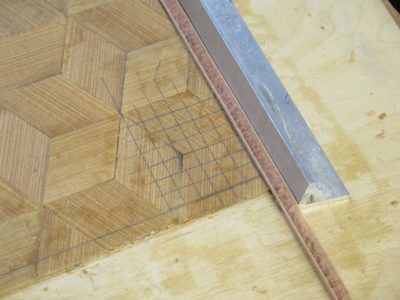
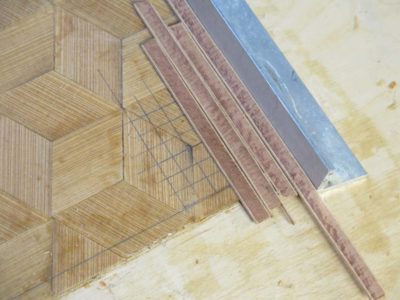
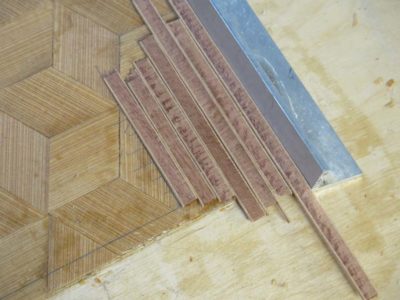
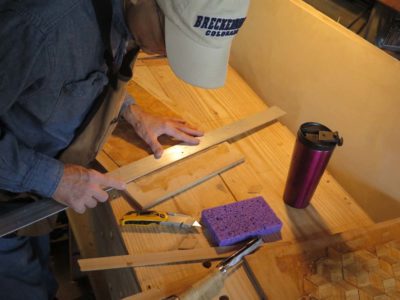
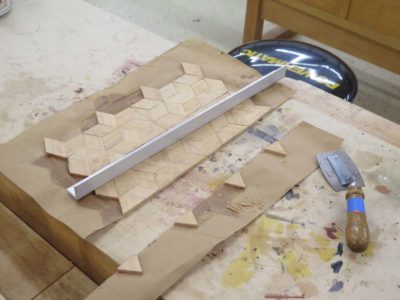
Meanwhile I was noodling around and found a donkey-dumb simple way to lay out the knotwork pattern with pieces of the banding itself as the measuring devices. Palm meet forehead.

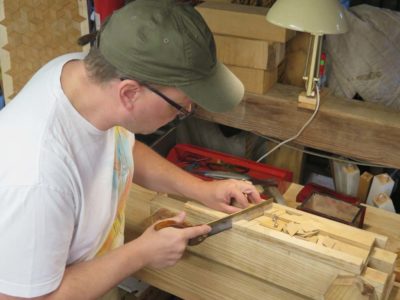
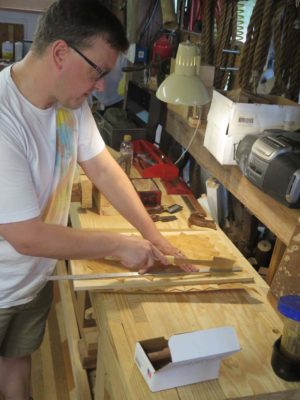
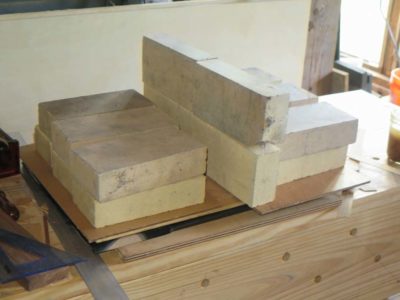
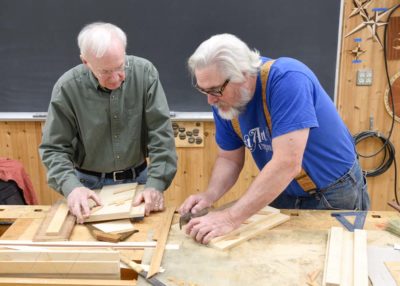
For Brint and John, once the excavations were far enough along it was time to create the template block for the individual pieces of the composition.

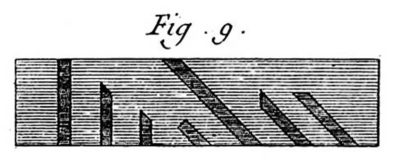
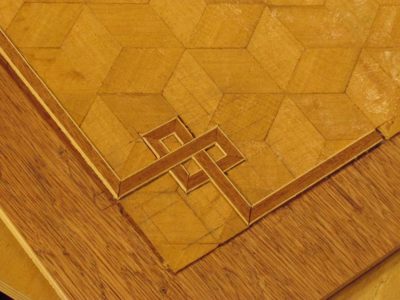
Following the guide of Roubo they took blocks of walnut and created right-angle and 45-degree channels for the banding to be sawn and planed, then placed pieces of the banding as stop blocks in the channels. This allows for limitless production of identical elements and very fast work in creating the knotwork pattern.


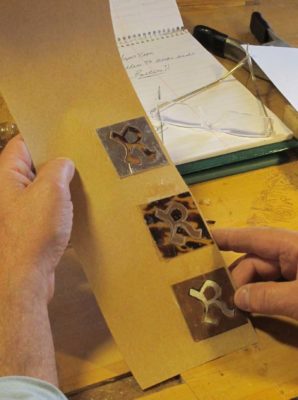
And knotwork corners became manifest on the boards.
Thus endeth Day 2.

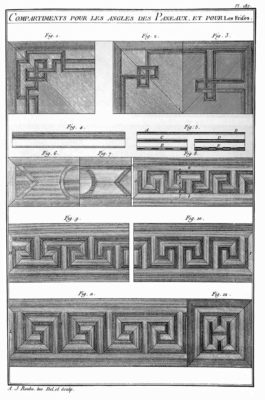
Three weekends ago I taught the workshop Knotwork Banded Inlays, based on Roubo’s Plate 287. This was the first time I had taught this particular subject, although I had shown it many times before. But, working it through from beginning to end with students was a challenge. Fortunately I had not only some of my previous exercises but also my print that had been removed from a mutilated First Edition of L’Art du Menuisier to use as guidance.
The only way I could figure out how to get all the way through the exercise for the students was to give them a head start, so even before they arrived I had fabricated panels with the backgrounds already made and glued down. With those ready to go I had the students begin at the beginning, creating their own parquetry backgrounds so they would have the full experience of the process.
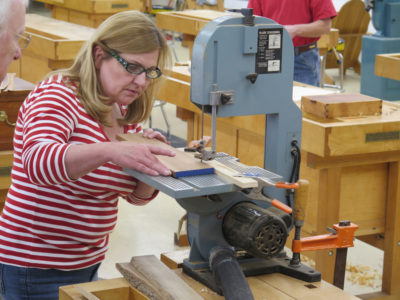
This started with cutting the veneer strips needed for the parallelogram lozenges that comprise the pattern. Once again my tiny band saw served us well, with each student making their own stock. After three or four passes on the band saw they shot the edge of the lumber and again returned to the saw until the had enough raw material to proceed.
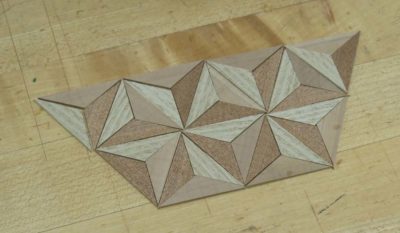
After that it was cutting 60-120-60-120 lozenges by the score.
While one was occupied with cutting their parquetry elements the other glued up the materials for making the banding slices for use later on.
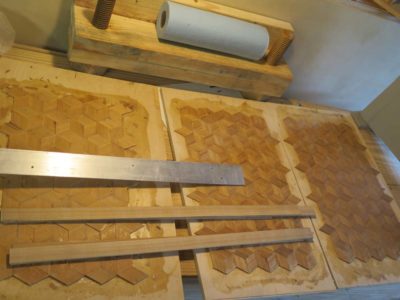
Then on to building the parquetry backgrounds in earnest, gluing down the elements to kraft paper backgrounds. Once those were complete they were set aside until the end of the day.

They then turned their attention to the already-prepared panels to trim them and begin the layout of the knotwork corner compositions. I had a number of veneer saws to try out, and the Japanese mortising saw and the Gramercy heavyweight French style veneer saw (the “King Kong” model) were much admired.

Soon the knotwork pattern layouts emerged.
We then glued the new parquetry backgrounds to plywood substrates for them to play with tomorrow and called it a day.
I was making some preparations for next month’s Boullework workshop (July 13-15) and noted that there is still space in it. If you would like to participate just drop me a note.
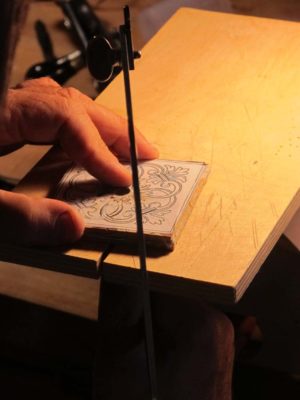
We’ll be making tordonshell from my own special process, and using already-cured tordonshell and brass sheet to cut a couple of tarsia a encastro designs using a jeweler’s saw and 6/0 blades!

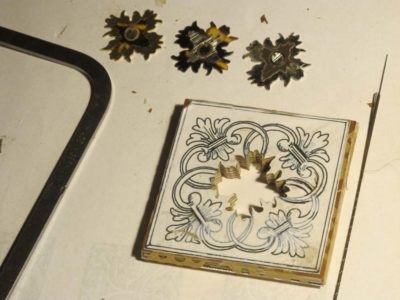
In this technique you will cut both the pattern and the background at the same time and thus create two complete compositions, one being the negative of the other. If we add pewter to the mix it will be three compositions.
I’ll be providing all the tools and supplies for the course.
Hope to see you there.
P.S. There is also still space in the knotwork banding class August 10-12.
The complete 2018 Barn workshop schedule, which I will post every couple of weeks to help folks remember the schedule.
************************************************
Historic Finishing April 26-28, $375

Making A Petite Dovetail Saw June 8-10, $400
Boullework Marquetry July 13-15, $375

Knotwork Banding Inlay August 10-12, $375
Build A Classic Workbench September 3-7, $950
contact me here if you are interested in any of these workshops.
Acknowledging three truths, namely that 1) folks have been generally resistant to coming to The Barn for workshops (I cancelled three workshops last summer due to lack of interest but am more optimistic for this year), 2) I think I have something to offer to an interested audience based on my 45 years of experience in woodworking and furniture preservation, and 3) I am comfortable and can work very efficiently when making presentations/demonstrations without a lot of wasted time. Given these three things I’ve decided to jump into the deep end of a pool already crowded with other swimmers.
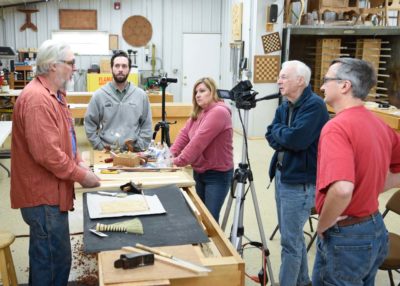
I’ve made a great many videos before with Popular Woodworking, Lost Art Press, C-SPAN, cable networks, and dozens of live interviews and such for broadcast television. I am fairly familiar with the process and recently have begun what I hope is a long-term collaboration with Chris Swecker, a gifted young videographer who has returned to the Virginia Highlands after college and some time served as a commercial videographer out in Realville, to create a number of videos ranging from 30-45 minutes to several hours. Obviously the longer videos can and probably will be cut into episodes.
In concert with this endeavor has been the ongoing rebuilding of the web site architecture to handle the demands of streaming video (and finally get The Store functional). I believe webmeister Tim is in the home stretch to get that completed.
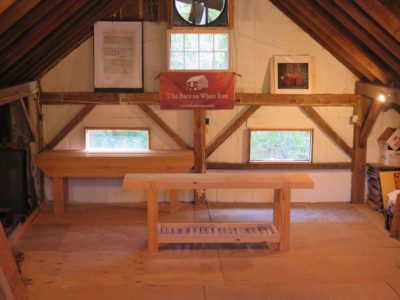
Beginning last autumn I turned the fourth floor of the barn into a big (mostly) empty room suitable for use as a filming studio. It is cleaned up, cleaned out, and painted with some new wiring to accommodate the needs but I have no desire to make it appear anything other than what it is, the attic of a late 19th century timber frame dairy barn. It is plenty big enough for almost anything I want to do.
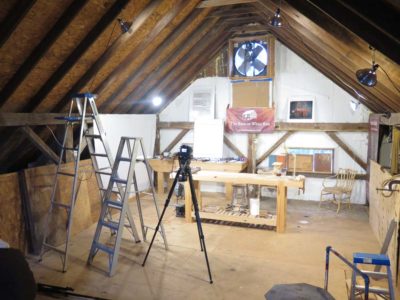

The only shortcoming is that the space is completely unheated and generally un-heatable, limiting somewhat our access to it. This issue came into play very much in our initial effort as our competing and complex calendars pushed the sessions back from early November into early December and the weather turned very cold during the scheduled filming. We had been hoping for temperatures in the mid-40s, which would have been just fine especially if the sun was warming the roof above us and that heat could radiate down toward us. It turned out to be cloudy and almost twenty degrees colder once the day arrived and we set up and got to work. We had to do our best to disguise the fog coming out of my mouth with every breath and I had to warm my hands frequently on a kerosene heater just to make sure they worked well so we could make the video. Yup, this will be a three-season working space for sure.
The first topic I am addressing via video is complex veneer repair. Based on my experience and observations this is a problem that flummoxes many, if not most, practitioners of the restoration arts. It was a challenge to demonstrate the techniques I use (many of which I developed or improved) in that this requires fairly exacting hand dexterity and use of hot hide glue, and the temperatures were in the 20s when were were shooting. It was brisk and oh so glamorous.
The electrons are all in the can and Chris is wrapping up the editing and post-production, so I am hoping to review the rough product in the next fortnight or so.
Paying for this undertaking remains a mystery and leap of faith. I will probably make this first video viewable for free with a “Donate” button nearby, but am still wrestling with the means to make this at least a break-even proposition. I do not necessarily need to derive substantial income from the undertaking (that would be great, however) but I cannot move forward at the pace I would like (5-10 videos a year) with it being a revenue-negative “hobby” either. I want to produce a first-class professional product, and that requires someone beside me to make it happen, and that someone has to be paid. As much as I am captivated by Maki Fushimori’s (probably) I-pad videos – I can and have watched them for hours at a time, learning immensely as I do – this is a different dynamic.
I continue to wrestle with the avenues for monetizing this just enough to pay for Chris’ time and expertise. I’ve thought about “subscriptions” to the video series but have set that aside as I have no interest in fielding daily emails from subscribers wanting to know where today’s video is. Based on my conversations with those in that particular lion’s den, subscription video is a beast that cannot be sated without working 80-100 hours a week. Maybe not even then.
Modestly priced pay-per-view downloads is another option that works for some viewers who are mature enough to comprehend the fact that nothing is free. For other viewers who have come to expect free stuff it does not work so well. I am ball-parking each complete “full-length”video at $10-ish, with individual segments within a completed video a $1. Just spitballing here, folks.
A third option is underwriting/advertising, but I find this unappealing as a consumer and thus unappealing as a provider. I have no quarrel with companies and providers who follow this path but it is not one I want for myself.
Finally there is always the direct sales of physical DVDs, which remains a viable consideration.
If none of these strategies work for me I will make videos only as often as I can scrape together enough money to pay for Chris.
At this point I have about 25 videos in mind, ranging from 30 minutes to several hours long. Our next one will require some “location” filming as I harvest some lumber up on the mountain.
Here is a potential list of topics for videos.
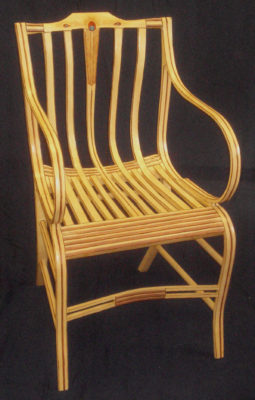
Making a Gragg Chair – this will no doubt be a series of several 30-45 minute episodes in the completed video as the project will take several months to complete, beginning with the harvesting of timber up on the mountain and ending with my dear friend Daniela demonstrating the creation of the gold and paint peacock feather on the center splat.

Roubo’s Workshop – L’art du Menuisier is in great part a treatise on guiding the craftsman toward creating beauty, beginning with the shop and accouterments to make it happen. I envision at least three or four threads to this undertaking, each of them with the potential of up to a dozen ~30(?) minute videos: the shop itself and its tools; individual parquetry treatments; running friezes, etc.
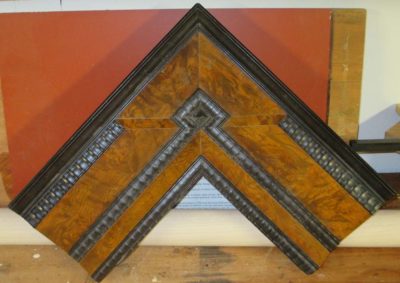
Making a Ripple Molding Cutter – A growing passion of mine is the creation of ripple moldings a la 17th century Netherlandish picture frames, and building the machine to make them. This topic is garnering a fair bit of interest everywhere I go and speak. I want this video (probably about two or three hours) to be compete and detailed enough in its content to allow you to literally follow along and build your own.
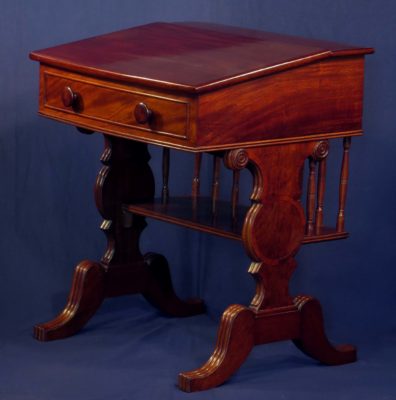
Building an Early 1800s Writing Desk – One of the most noteworthy pieces of public furniture is the last “original” c.1819 desk on the floor of the US Senate (home to a great many sanctimonious nitwits and unconvicted felons). All the remaining desks of this vintage have been extensively modified. This video will walk you through a step-by-step process of making one of these mahogany beauties using primarily period appropriate technology based on publicly available images and descriptions.

Oriental Lacquerwork (Without the Poison Sumac) – To me the absolute pinnacle of the finisher’s art is Oriental lacquerwork. It is created, unfortunately for me, from the refined polymer that makes poison ivy, poison oak, and poison sumac, well, poison. Driven by my love for the art form I am creating alternative materials employed in nearly identical work techniques. Tune in to see a step-by-step demonstration what can be done.
Boullework with Mastic Tordonshell – Very early in my career I loved to carve and gild, but that passion was re-directed more than thirty years ago to the techniques of Andre-Charles Boulle and his magnificent tarsia a encastro marquetry with tortoiseshell, brass, and pewter. Once I had invented a persuasive substitute for the now-forbidden tortoiseshell, a process demonstrated in exacting detail in the video, the sky was the limit.
Metalcasting/working for the Woodworker – This is the video topic I am most “iffy” about as many/most folks will be trepidatious of working with white-hot molten metal. But I just might give it a try to show creating furniture hardware and tool-making. It’s possible/probable I might make this a series of specific projects to make the topic more consumable.
Ten Exercises for Developing Skills in Traditional Furniture Making – Based on my banquet presentation at the 2017 Colonial Williamsburg Working Wood in the 18th Century conference this series of very approachable tasks for the shop will de-mystify a lot of historic furniture making for the novice in a very non-intimidating manner.
The Compleat Polissoir – starting at the point where Creating Historic Furniture Finishes left off this would be an in-depth exploration of the ancient finisher’s tool kit and will be expanded over the Popular Woodworking video (about which I am still very pleased) with a boatload of information gleaned from my in-the-home-stretch Period Finisher’s Manual for Lost Art Press.
I’m sure there will be more ideas popping into my fertile brain, or maybe that’s fertilizer brain.
As always, you can contact me with ideas here and once we get the new web site architecture in place, through the “Comments” feature that was disabled a lifetime ago to deal with the thousands of Russian and Chinese web bots offering to enhance my body or my wardrobe.
Stay tuned.
The complete 2018 Barn workshop schedule, which I will post every couple of weeks to help folks remember the schedule.
************************************************
Historic Finishing April 26-28, $375
Making A Petite Dovetail Saw June 8-10, $400
Boullework Marquetry July 13-15, $375
Knotwork Banding Inlay August 10-12, $375
Build A Classic Workbench September 3-7, $950
contact me here if you are interested in any of these workshops.
Since seeing my first piece of antique furniture decorated with tarsia a incastro, or “Boulle work,” I have been captivated by both the art form and the technique.
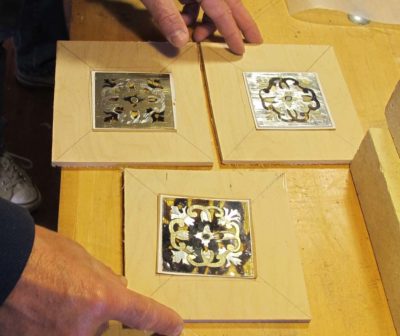
This ancient method of using a minuscule blade in a frame saw, usually a jeweler’s saw in our time, for cutting patterns in two or three layers of material comprised of the shell of a sea turtle, a sheet of brass, and sometimes a sheet of pewter, remains captivating to this day. The result is the same number of completed compositions as the original number of layers in the stack.
Due to the prohibition of trade in turtle shells I invented my own very convincing replacement material I call Tordonshell.

So these three days will comprise of making your own piece of Tordonshell (I will have some pieces made in advance for the workshop) and sawing patterns from packets we will assemble for cutting.
Though we will be cutting them vertically to begin, there is a chevalet in the classroom and anyone who wants to give it try is welcome to do so.
*********************************************************
The complete 2018 Barn workshop schedule:
Historic Finishing April 26-28, $375
Making A Petite Dovetail Saw June 8-10, $400
Boullework Marquetry July 13-15, $375
Knotwork Banding Inlay August 10-12, $375
Build A Classic Workbench September 3-7, $950
I recently spent a week at the Marc Adams School of Woodworking, teaching two three-day courses. I believe this was an experiment on Marc’s part, road testing some new scheduling concepts such as a three-day workshop during the week as opposed to only on weekends.
The Parquetry workshop had three enthusiastic attendees (plus a most excellent teaching assistant), a number the Marc told me precludes any repetition of the topic. This is an entirely fair conclusion on his part as he has a huge footprint to support. With several classrooms in simultaneous use I’m guessing he needs somewhere between 35-50 attendees every day for six months to make it work.
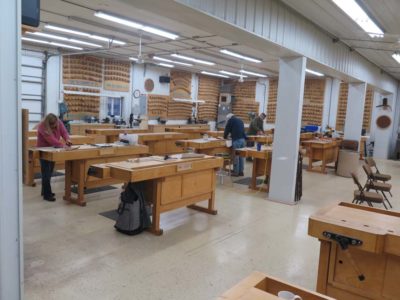
In fact our merry little band was in a huge, well equipped classroom with twenty (?) workbenches. The spaciousness was both unnerving and delightful as the students could spread their projects as widely as they wanted.
This workshop is somewhat unusual for me in that there was a finished project at the end, while I tend to prefer teaching a skill-set rather than a project.
But skills and processes were taught and practiced, including the making of sawing and planing jigs,
sawing veneer stock for making the patterns,

the assembly of the patterns,
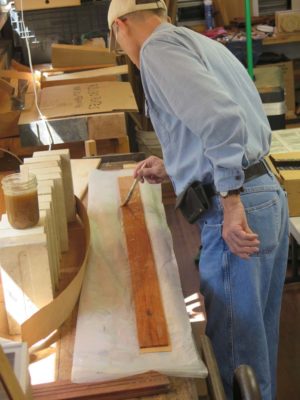
fabricating and integrating simple bandings,
and gluing them down to a substrate.


In the end they were cleaned up with toothing planes, files, and scrapers making them ready for the finishing process.
Though I will not be teaching this workshop again at MASW, I will not completely set the general topic aside. I am hoping to have a workshop on knot-work banding perimeters there in 2019.
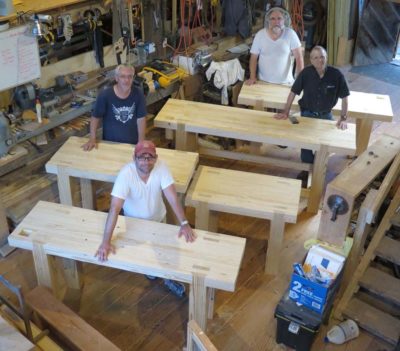
After long and careful consideration, I have concluded that I simply cannot host any workshops at The Barn this coming summer. The combination of the Studley book and exhibit, brutal winter aftermath with a mountain of things to do on the homestead, projects that have languished in the studio, and the need to wrap-up Roubo on Furniture Making (almost twice as large as Roubo on Marquetry) leaves me with no time nor energy to dedicate to workshops at the barn. I had planned on a historic finishing workshop in late June, but that will have to wait until net year. In September I will host a week-long workbench build for my friends of the Professional Refinishers Group web forum.
This is not to say I will be entering my long anticipated hermit phase. My presence and teaching elsewhere over the summer will be evident. Check these out.
Henry O. Studley Tool Cabinet and Workbench exhibit – May 15-17, Cedar Rapids IA
Making New Finishes Look Old – Society of American Period Furniture Makers Mid-Year Conference, June 11-15, Knoxville TN
Gold Leaf and its Analogs – Professional Refinisher’s Group Groopfest, June 24-26, Pontoon Beach IL
The Henry Studley Book and Exhibit (breakfast banquet address) and Roubo Parquetry (demo workshop) – Woodworking in America 2015, September 25-27, Kansas City MO

Recent Comments