Now THESE Are Marking Gauges!
Just like Henry Studley a century before, JimM fabricated solid ebony marking gauges for his Studley 2.0 Replica. Magnifique.


Just like Henry Studley a century before, JimM fabricated solid ebony marking gauges for his Studley 2.0 Replica. Magnifique.
Often while working in the shop I undertake some plexiglass (poly methyl methacrylate or PMMA) fabrication of one sort or another. In many of those instances I need to glue pieces of plexi together. Well, “glue” is probably not the right word as I found long ago that gluing plexi is a fool’s errand. “Weld” would certainly be the more correct word, as it involves the melting of plexi on the gluing margins and allowing the liquid surfaces to fuse and form a nearly indestructible bond when it dries.
Plexi welding adhesive is available on the market to accomplish this task, but living in the hinterboonies I had none available for a recent project. Instead I made my own.

I started with a pile of clean plexi shavings from the drill press, then placed them into a glass jar and covered them with methyl ethyl ketone (MEK) a pretty standard hardware store solvent. Pure dichloro methane (methyene chloride or MC) works even better, but the only MC-based paint remover I had on hand was laced with wax to retard the solvent drying, and in my case, interfere with the solvent action needed for the solvent welding to occur. So MEK it was.

Next morning I had a nicely viscous solution of MEK solvent with PMMA solute. I gave it a try on a couple pieces of scrap plexi and let them sit overnight. The next morning they would not come apart, and when I hit the assemblage with a hammer to test it, it broke but not along the glue line.

There you have it, home made high performance plexi welding solution/adhesive for just a few pennies.
Last autumn I blogged about some timbers my buddy Bob had obtained from his brother who works in a sawmill. Evidently they were discarded and Bob was going to cut them up for firewood, and he offered these three to me. They are oak, one of them 8′ x 10″ x 15″, and the other two 11′ x 10″ x 15″. I accepted as soon as I saw them, and a couple weeks ago we got together with our friend Tim and his tractor to get them loaded onto Bob’s trailer and hauled up to the barn.

They are now resting on skids and will be covered as soon as the weather settles down. In few years they might make some very nice workbenches.
I’ve agreed to write four articles for Popular Woodworking over the coming months, in addition to continuing work on my manuscript for The Period Finisher’s Manual for LAP which is targeted for some time in 2018. It’s probably just me but I think each of the four articles are work-life-changing; they certainly were for me.

First out of the gate will be a short article about making and using some terrific clamps for holding components of workpieces in place, especially useful in my restoration work. We haven’t even figured out a good title for these clamps just yet.
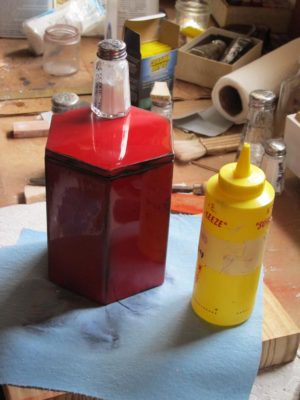
Second will be an article that I am perhaps more excited about than any I have written thus far, Faux Urushi. In it I will be chronicling my path to and my current practices for replicating this pinnacle of the finishing art, with lots of step-by-step instructions and illustrations.


Then comes my mea culpa to the jig-makers of the woodworking world (in the past I have often just rolled my eyes as wood machinists wax ecstatic about this or that jig that allows them to use their power machines to make what could be done much more simply by hand; I was wrong to do so, and I apologize for being a churl) as I address the creation of three of Roubo’s parquetry patterns. It’s all about precisely made sawing and planing jigs.

Finally this writing season will wrap up next Spring with a profile of Studley 2.0 and the remarkably accomplished artist who created it.
I’ve warned Megan that I’ve got a lot more ideas for articles and blog posts, but for now I’m going up the hill to execute the final reassembly of the lute maker’s hands.

As you know if you follow this blog, I do not post much of anything about the news of the day. The closest I come is to ridicule the buffoons and kleptocrats from the political class we have chosen to foster. What you do not know is that my friend, colleague, and protege Daniela is a native Ecuadoran, and that her husband’s parents are Ecuadoran. The worst of the earthquake damage was in the coastal town where she was a little girl. In addition, my dear friend and colleague of many decades DVR is married to a native Ecuadoran, so I feel strongly connected.

With that in mind I ask you to be attentive and prayerful in considering the immediate needs of the people of Ecuador in the aftermath of the massive earthquake there. This letter from the Ecuadoran Embassy is indicative of those needs, and if you can contribute I urge you to do so.
My nephew Martin just returned from Ecuador, and apparently met the President who was presumably offering his gratitude to the rescue-and-recovery and salvage workers there.
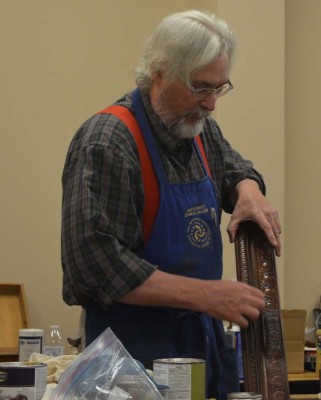
April 30-May 1. “Historic Finishes” Saturday Presentation and Sunday Workshop, Cumberland Furniture Guild, Nashville.
May 18 (tentative ) “Custom Blend Paste Wax: Make It Your Own Darned Self” for the Professional Refinisher’s Group meeting in Nashville. Demonstration.
June 20-22. “Historic Finishes,” hands-on workshop at The Barn. ***note date change***

July 10. “The HO Studley Tool Cabinet and Workbench,” presentation to PATINA, McLean VA.

July 25-29. “Workbench Building Workshop,” week-long hands-on workshop at The Barn. Participants can make either a laminated Roubo workbench or a Nicholson style workbench.
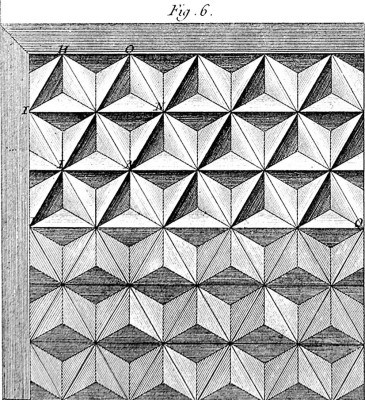
August 19-21. “Replicating Roubo’s Parquetry,” three-day hands-on workshop at The Barn.
If any of these events interest you, drop me a line here or click on the links.
My burgeoning commitment to pursue oriental urushi lacquerwork techniques (without the lacquer as I am exceedingly allergic to urushiol which serves as the foundation for true lacquerwork; NB urushiol is the toxin in poison ivy and poison sumac sap) has been spurred with the recent arrival of two additions to the library.

The first to show up on my doorstep was 10 pounds worth of Kurt Herberts’ long out-of-print 1960’s opus Oriental Lacquer: Art and Technique.

The book contains hundreds of illustrations of lacquer artworks going back many centuries, which was fine but not the real point for me. I already have several excellent picture books about lacquerwork artifacts. What I really wanted was the immense presentation of technique and technology of the artist and material. You see, from a materials science perspective it was absolutely critical that I understand the properties of the real deal in order to replicate most convincingly. My long time friend Joe Amaral has been attempting to persuade me to try real urushi at which he is becoming impressively facile. Ditto my recent email pen pal Wiebke Pandikow, a jeweler working in Finland who served an internship with a lacquer studio in Japan. But their efforts are likely to remain fruitless. I am just too concerned about the severe allergic reactions.
This led me to correspondence with my old acquaintance, renowned lacquer conservator and scholar Marianne Webb. One of my great regrets is that I did not buy her great book Lacquer: Technology and conservation. I was asleep at the switch, and now copies of that book are out of my price range and I am stuck with a photocopy. Anyhow, Marianne recommended wholeheartedly the boxed set Urushi No Waza by Gunther Heckmann, and translated from the original 2002 German edition.
Holy cow!

Several weeks after ordering a package arrived. I had never before received a book packed like high-value electronics.

It is nothing short of sublime; wall-to-wall materials science as art! I am still working my way through it the first time, but it is almost certainly a book that will become a fully integrated reference for future artistic endeavors. A foot square and between on and two inches thick, accompanied by reference materials this is a treat for the artistic impulse. Tools, materials, techniques, analysis, and conservation are all under one roof here.
Wowser.

On Saturday we drove to Virgilina, Virginia (so named because it is astride the Virginia-North Carolina border) and attended the Regional Chapter meeting of the Mid-West Tool Collector’s Association.

As is the usual regimen at such events the orders of business were 1) tool hawking and swapping, and 2) a presentation by a guest speaker. On the first point I managed to buy only one tool, a nicely fashioned mahogany chamfering plane, a form I had long wanted to add to my kit as I have a series of tables and cabinets that will require one.

As to the second point, Virgilina resident Barry Thompson presented the tool kit he uses for making Windsor chairs, of which he has fabricated and sold about 1,500 over the past twenty years or so. Barry is an affable, no-nonsense sorta guy who emphasized the nature and pace of work when what happens at the bench is how you derive your income.

I was very much impressed with Barry’s talk, ans look forward to learning more about his work. While lunch was getting ready we chatted at great length about tools and chairmaking.

If you have any interest in tools of all sorts, and if you are reading this I would guess that you are, make sure to join and participate in the meetings of MWTCA.
It wasn’t enough that JimM fabricated a spectacular tool cabinet in homage to Henry Studley, but like Studley he also fabricated a number of tools for the inventory. JimM even fabricated tools that Studley was able to purchase, like the St. Johnsbury bevels, but otherwise stuck mostly to making replicas of tools Studley made like the marking gauges and rosewood-handled bench chisels.


On a related note, I forwarded the pictures Jim had sent me of this project to Mister Stewart, wo promptly contacted JimM and invited him to visit the original in person later this year. I feel like a matchmaker.
© 2024 Don Williams

Recent Comments