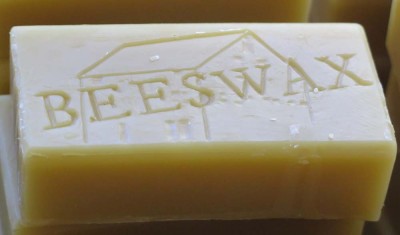
Around Thanksgiving I got a note from Chris Schwarz as he was assembling his annual list of a dozen Christmas gift recommendations for his legion of blog readers. His question to me concerned the availability of our hand-processed beeswax. Fortunately we had a large inventory on hand, probably 150 or 175 units. Good thing as those enthusiastic followers pretty near cleaned out the cupboard. In fact, they did clean out the inventory of polissoirs, but that’s another topic.
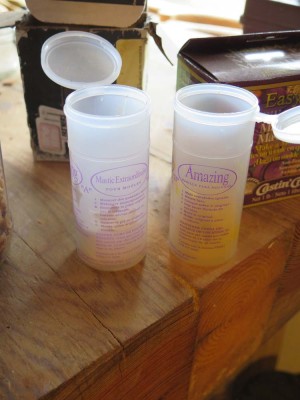
We received wonderful feedback on the beeswax, along with the questions about how we process it. I’ve blogged about it before, but this time I wanted to cover the topic in a fairly detailed manner. I could say that we rely on an expensive, state of the art “High Pressure Reverse Osmosis Turbo Encabulator” but that would be a falsehood. The highest tech component in the process is probably the pasta strainer.
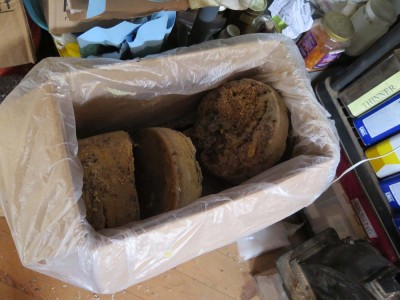
I order raw beeswax several hundred pounds at a time, directly from the honey processing plant. I want it raw as I can achieve the product I want, unmodified from the original bee product except for the removal of contaminants. As such, it comes pretty well infused with propolis, honey, and bee carcasses by the gazillion. Getting rid of this is the first step.

Since much of the contamination is water soluble I melt the raw beeswax into a large crock pot with water, with proportions about 1/3 water and 2/3 bulk beeswax. The heated water bath dissolves the honey out of the dirty molten mass.
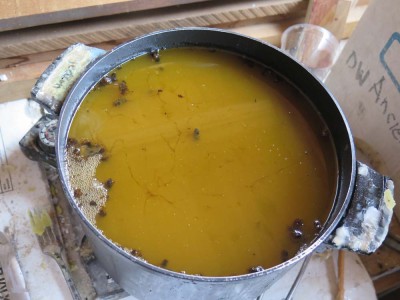
Also once the pot-full is completely liquid the bee carcasses float to the top of the stew, to be scraped off the top with a pasta screen.
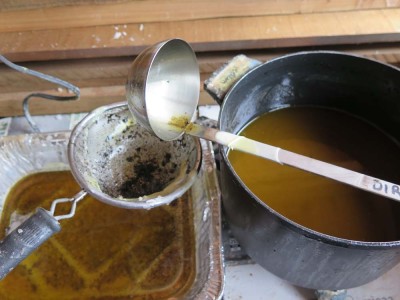
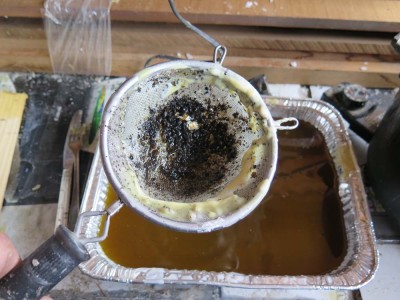
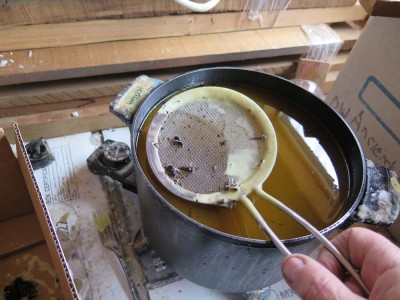
Once that is done I ladle the hot dirty wax/water stew through another pasta screen into an aluminum lasagna pan.
I make sure to not agitate the pan while the mess is cooling. I am counting on the water soluble contaminants remaining in the water phase that separates out underneath the wax as it cools and solidifies on top of the pan. In addition, the water-insoluble particulate contaminants settle to the bottom of the wax block.
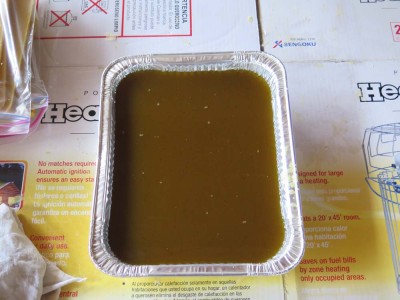
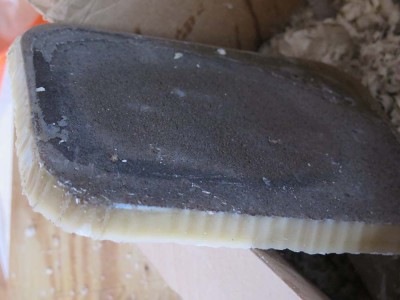
This simple approach results in several near-simultaneous accomplishments; it removes the bee carcasses, it dissolves and removes the honey and any other water soluble materials, and it separates the non-soluble particles.
Up next: yielding purified wax.
A review of 2015 is easy.
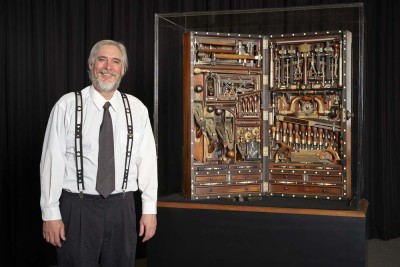
First half – all HO Studley book and exhibit, all the time. Turned 60, meaning I have only 40-45 good years of woodworking left. Better get cracking!
Second half – busted hip; Roubo on Furniture Making; conserving tortoiseshell
Lots of miles, lots of presentations.
2016 (and beyond) is destined to be different for many reasons, not the least of which are 1) my commitment to travel much, much less, and 2) for the first time in my life I will be concentrating on making furniture for an extended period. Up to now I’ve mostly been repairing and conserving furniture to the detriment of making it. My fascination with historic techniques of artistry and artisanry have yielded a fairly broad and deep vocabulary; the time has come to take that lexicon and transform it into real material culture, not simply a stack of sample boards and a library to die for.
When I read the woodworking blogs that interest me (I generally avoid woodworking discussion forums as I cannot spare any intelligence or knowledge, and I observe that these sites make you stupider and less knowledgeable by the minute, but I might not frequent the right ones), I am awestruck by the productive output of some woodworkers.
Take Joe McGlynn, whose apparently now-inactive blog McGlynn on Making made me wonder what in the world he was eating. It seemed that he was making a new piece every week. And the Accidental Woodworker? I am becoming convinced that Ralph is a zombie/vampire hybrid because he must never, ever sleep. No other explanation suffices for how he can get so much really good work done. And blog about it! How about Jonas Jensen? He makes more (and better) furniture with a hack saw in the machine shop of a ship bouncing around the North Sea, using wood salvaged from crates down in the cargo hold than 99% of woodworkers can accomplish in a perfect woodworking studio.
These will be my heroes on a daily basis as I have already begun a regimen of making perhaps as many as a dozen pieces this year.
The first clients in line were the two who commissioned Gragg chairs. I would like for this to become a yearly affair as I find these so challenging that I cannot imagine getting tired of them for many years. Especially since they are such fertile soil for adaptations.
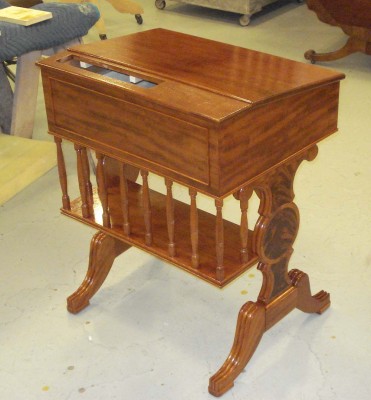
The next project is from a client who commissioned me to make a replica of an early 19th Century mahogany desk, similar to one I worked on a few years ago. The excellent mahogany has been obtained, the templates made, the turning has begun, and the first (full blind) dovetails will be undertaken in a fortnight or so.
Finally (last on this list, but not in the priority) comes several pieces commissioned by Mrs. Barn for the cabin. Most will be made from salvaged chestnut and white oak, beginning with a simple shelving cabinet for the kitchen to get warmed up, then some nicer book cases for the living room, moving on to a pair of modified Schwarzian Dutch tool chests as bedroom cabinets. And maybe a coffee table for the living room. And those four cherry chairs for the dining room suite…

This week I received a very special gift from my friend Derek; a titanium lag screw typical for hip reconstruction surgery.
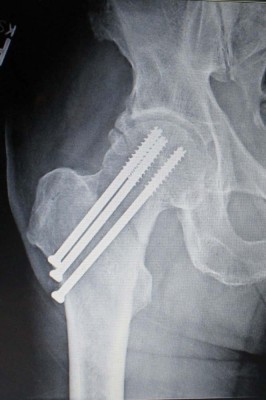
We suspect it is very close if not identical to the ones in my hip.
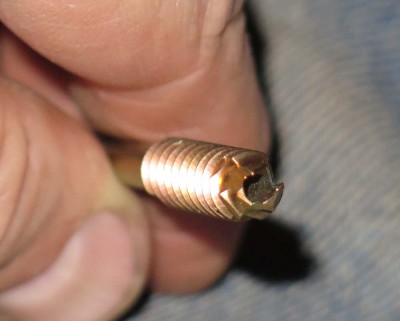
I was especially struck by the mean looking business-end of the screw, and the fact that it is hollow on it full length. At one time in my life I was a patternmaker for a foundry that manufactured dredging machines, and this looks strikingly similar to the cutterhead on a dredge excavator.
This baby is definitely going into my Hall of Fame and Shame.
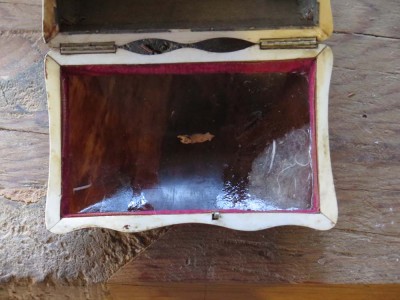
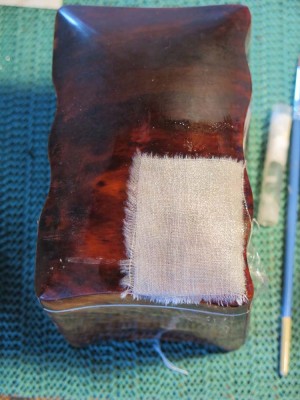
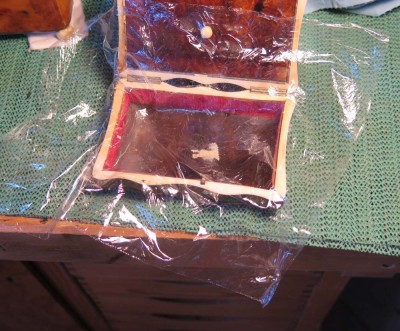
In recounting the progress of the conservation of the domed lid tortoiseshell box with a pair of cracks, I forgot to include the picture of the underside with the tissue paper backing. Sorry about that. The compewder undoubtedly did what I instructed it to do.
The backing in the lower left is a single layer of high-strength Japanese tissue paper fully encapsulated in hide glue. Since this fracture remained essentially “in plane” a single layer of backing support was adequate.
The lower right section is a double layer of tissue paper which needs a second saturating application to make it less visible. Since this fracture was not “in plane” the second lamina of the glue/tissue composite was necessary.
With the outer “cast” in place I could progress to adding an inner support behind the crack (it turned out there were two cracks; I dealt with them identically).
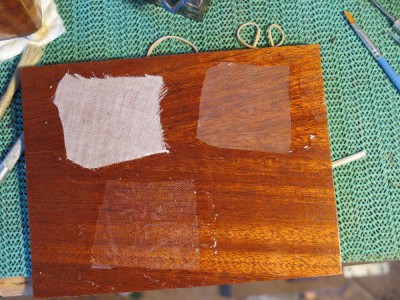
Three of the materials tested: fine linen (L), tight fine nylon (R), and loose nylon “sheer” (B).
I knew I would be using 192g hot animal hide glue for the support, and spent a little time testing several support fabrics to evaluate them for both performance and appearance. I had expected nylon sheer fabric to be the best, but it was not. In the end I went with Japanese tissue paper with variable fibers. Three layers of this affixed to an area slightly larger than the fracture ended this chapter of the treatment.
A quick note on using tissue paper for such a repair. It is much better to tear the edges of the patching paper rather than cutting them. This allows for a tapered edge on the patch, which both looks and performs better.
Up next: removing the outer “cast” and inpainting the inner support.
I might be the last guy to see this, but I found this video link while plowing through a mountain of old e-mail. It is a delightful little feature on Leonard and Robin Lee of Lee Valley Tools who have helped lighten my wallet immensely over the years. I have yet to meet Leonard, but consider Robin a friend and an aces guy.
http://ottawa.ctvnews.ca/video?clipId=744530
In fact, the contemporary world of woodworking tool makers and purveyors is densely populated with wonderful guys too numerous to mention individually here, with only the occasional stinker. (My 98-year-old mom, a devout woman who raised five devout children, is of such a sweet and Godly temperament that profane or even particularly critical utterances are simply beyond her. When she once described — with great verve — a co-worker as “a real stinker” I knew he must have been the Spawn of Satan.)
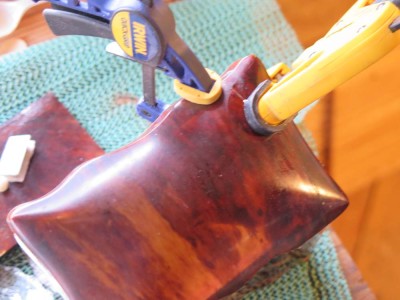
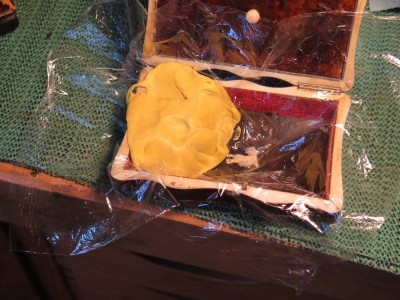
After creating a properly shaped caul for the domed lid, the next step was to bring the pieces of the top into the closest proper conformation I could. The end point for this process would be an applied backing support to the underside of the fractured area, but first I had to get the pieces in place with an outer “cast.” By placing the caul on the underside, with gentle clamping (pressing it with great force would in the end accomplish nothing beneficial; as it is working with tortoiseshell is risky enough), I was able to get the two sides of the cracked shell into very god conformity.
Knowing this, I cleaned the affected area and glued on a small piece of linen to the outer surface with hot hide glue. This step was hard to photograph but here is the final result; a very stiff, hard sheath on the outer surface to hold in in place while additional work progressed on the inside.
One exciting development in this step was the design and creation of some new clamps that fit the bill perfectly and will become an indispensable part of my conservation tool kit. I’ll blog about those in a few days.
Previously I have mentioned my mostly-antique lumber inventory, and adding to it via building demolition and salvage, lucky finds, and whatnot. Last Tuesday brought a figurative and literal tipping point in my “management” of this mass of lignen-cellulose composite macromolecules.
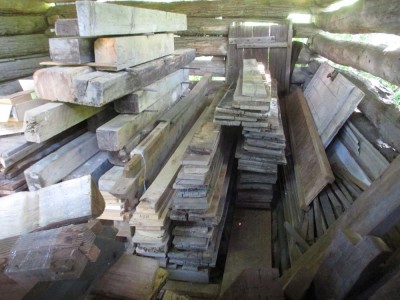

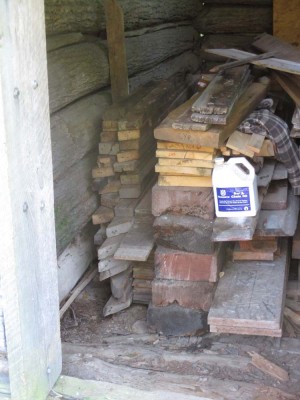
A view of the stash about three months ago; it had grown considerably in the time since.
About two weeks ago I visited my friends Mr. & Mrs. C about ninety minutes away. Mr. C had been harvesting and lumbering trees on his farm for some time, and I had arranged to acquire a truck load of mostly white oak and butternut from him. And I did. Shoehorning the purchase into the vintage chestnut log barn was a chore, but I got it done.
Then I went back to our old home and loaded another full pickup load to bring back with me, again destined for the storage barn. As I was progressing with the transfer, one of the stacks started moving. Then the one next to it also moved in response to the movement of the first one. Before long every stack in the storage barn was tilted westward at a 45 degree decline.
The result was a full week of work to get it fixed.
I first spent two days pulling out the inventory from the barn and stacking it out in the yard. Once that was done I began building a proper lumber rack similar to those I see in lumber yards, that is, back in the day when lumber yards stored and sold lumber properly rather than stacked out in open weather.
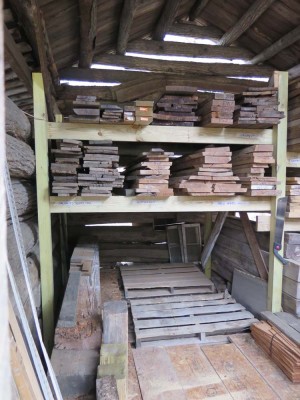
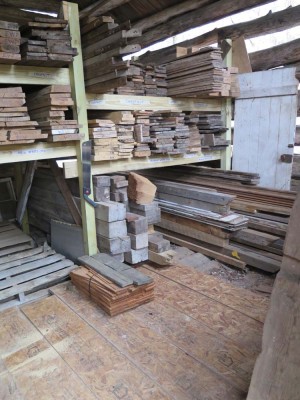
Four days later I had accomplished as much as I could. The space, being less disorderly, has much greater capacity for storage. I was pretty surprised at the amount of vintage and salvaged chestnut I own, but learned a critical fact. Last weekend when dining with my daughter and her boyfriend I mentioned that I really did not care for chestnut and had no desire to make anything with it. To which Mrs. Barn replied somewhat tartly something like, “Well, some people who live in the cabin really like chestnut and would like some furniture to be made from it!” I’ve now got five or eight pieces of furniture on the list for this coming year.
I was also surprised to find a fine lot of lumber underneath the pile that pre-dated my time here. The best discovery was several hundred linear feet of 8-inch eastern white cedar ship-lap siding.
Now I have to make sure I have enough room for the remaining six truck loads of lumber still back in Maryland. If not, I may have to sell some lumber.
Nah, that’s just crazy talk.
Given that the cracked domed lid was essentially two problems, the first being the loss of structural integrity as a result of the fracture, the second being that the two adjacent sectors on either side of the fracture were no longer aligned with each other, I had to approach the problem from two routes to address the two problems.
The first route, and the theme of this post, was to create a means by which the two sectors could be brought into alignment. To accomplish this required a form that could be used as a caul to force the two misaligned parts into alignment. There were in turn a number of material techniques to creating the form, including most commonly employing plaster, auto body filler, and silicone putty. I selected the last one.
Silicone molding rubbers can be used to create the most intricate molds that reflect the character of the surface at a microscopic level. I didn’t need that, all I needed was a wad of reacted silicone putty that was in the right shape.
So, I made the form by first draping the exact opposite corner of the lid with cling wrap, not worrying too much about getting a smooth fit without folds and creases. All I wanted was something that could protect the substrate from the silicone, and the putty could assume the general shape of the domed lid.
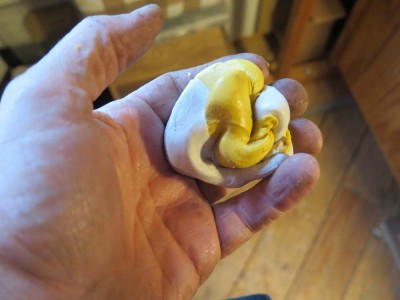
Using the two-part silicone putty, I kneaded a wad the right size and pressed it against the cling wrap firmly enough so that I could leave it in place with a perfect support form as the result.
I worked. I trimmed it a bit after it cured, but I was left with a form I could use going forward.
Next time, repairing the crack in the right profile.
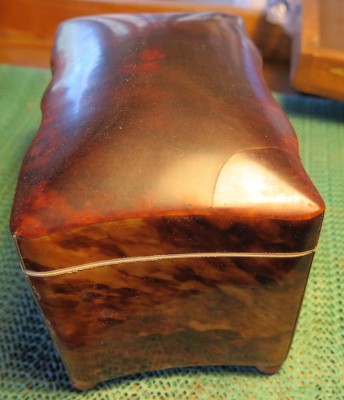
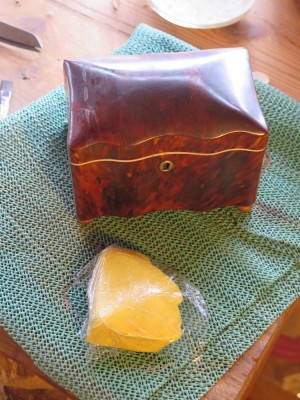
One of the more problematic considerations from tortoiseshell objects is found when the shell itself has been formed under heat, moisture, and pressure to a desired configuration for the object. As a plastic polymeric material — and in the English language the word “plastic” is ambiguous, although in this context I am speaking in the materials science lexicon meaning the material can be deformed by thermoplastic forces and will retain that new shape once the forces are removed — tortoiseshell remains susceptible to fracture and other entropic phenomena.
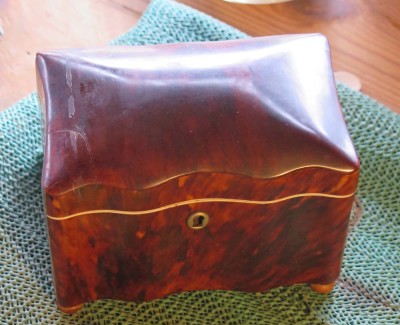
This box has a lid that was made from a prepared tortoiseshell scute (plate) had been steamed then pressed between heated cauls (or dies) to establish its shape. As a protein macromolecule the crosslinking bonds in the protein network has be reoriented by heat and moisture, and then reform once the heat and moisture are removed. Thus once the pressed scute cools in the die-press and dries/hardens into its desired shape permanently. The stresses from the forming process remain at bay for a while, but like I said is subject to cracking and distortion.
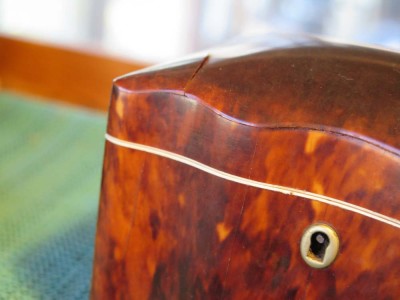
And that is what happened with this exquisite little box. Stay tuned as I walk you through my treatment of it.

Recent Comments