In the lexicon of contemporary furniture manufacturing, the identifier “KD” means “knock down,” or basically furniture that comes shipped disassembled so as to take up less space in transport. This is fairly common, perhaps even dominant, in case pieces like shelving and entertainment centers, etc. Until recently I was unaware how deeply this concept had become ingrained in the industry to the point that it even has become manifest in seating, even upholstered seating furniture.
Recently we were visiting our daughter for Thanksgiving and went to the thrift store to find a sofa, which we did, but even better found a swivel rocking chair that demonstrated some amazing (to me) innovations that actually worked well!
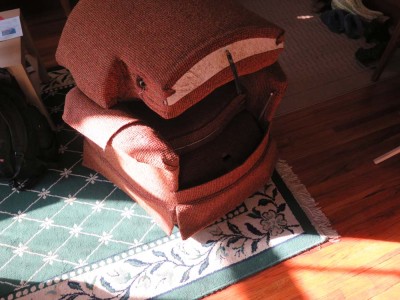
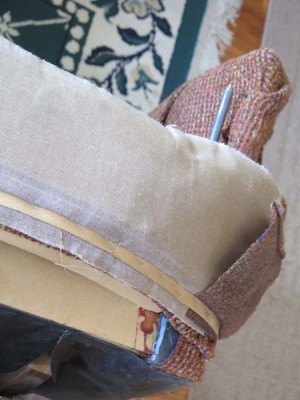
The first of these was the feature that the back of the upholstered chair was detachable and installed via a pair of vertical steel rods onto which the back was installed by lining up some round mortises in the back with the steel rods projecting upwards from the primary seat rail onto which the seating platform was constructed.

The fitting was smooth and tight, and even imparted a tiny bit of springy-ness to the back when the chair was in use. It was, truly, among the most comfortable chairs I’ve ever occupied.
A second feature that impressed me was that the swivel and rocking functions of the chair were not active until there was adequate weight on the sitting platform to compress some mechanism inside the chair. This means that the chair was stable and robust when setting unoccupied, and could be handled and leaned on when passing by. Given my slight instability, diminishing over time but still present some times, it made for a more pleasant landscape when navigating around the living room.
The chair was not marked with any tags or stamps anywhere, but whoever made made it really impressed me.
One of my favorite occasional threads in the Professional Refinishers Group exchanges is called “High Points of Low-Tech” wherein the members of this amazingly creative assembly show new and innovative uses for mundane materials in the shop. I often do not have the time to peruse all the threads on “Groop” but I make a point to go through the HPLT postings.
Recently I have come across three new tools incorporated into tortoiseshell box conservation projects in The Barn. Two of them definitely fit the previous description.
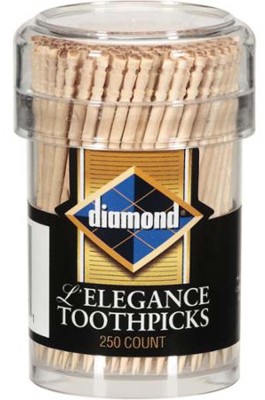
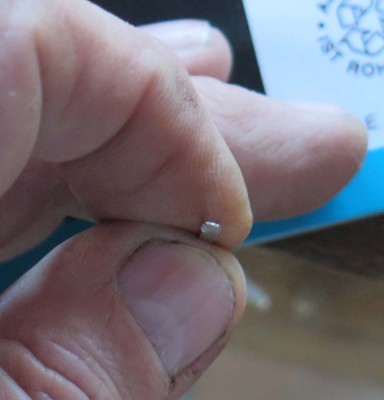
The first was these fancy toothpicks I got. I think, at Wally World. I was trying to find something on the shelf in the grocery section and saw these.
Since toothpicks are such a valuable tool for my work, as spacers, wedges, adhesives dispensers and spreaders, etc., I am always on the lookout for a better toothpick. Well, I have found them. They bear a premium price, and by that they are one penny a piece, but I still bought enough that I have a container of them at every work station in the shop.
Also while working on some little tortoiseshell boxes I kept needing a small elevated platform for some of the processes. A hard surface would not work, as it would mar the polished surface. A soft/squishy surface would notwork as I could not bring any pressure to the task at hand. And ideally the work platform could be variable in size.
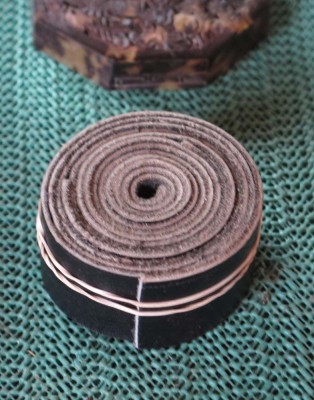
While looking in a drawer for something else, the lightning bolt struck. I have several rolled bundles of leather strapping and one of these turned out to be the perfect solution. It was firm but not marring, and could be configured to whatever size I needed. So, if you have an old belt you already possess a perfect elevated work platform for delicate tasks.
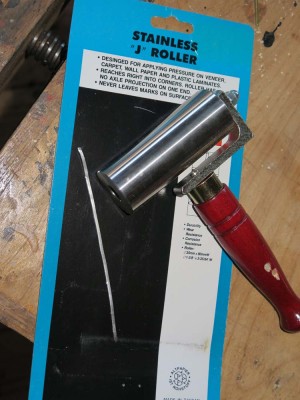
Finally, one of the things I often must do for TTS boxes is to fabricate and inlay pewter stringing. I used to pound and polish it flat, but while at the hardware store I saw this veneering roller. The heavy steel cylinder works perfectly for flattening the fine gauge solder (solder is simply pewter in a coiled roll) into a thin stringing for inlay. Viola!
My friend RichardB steered me to this. My mouth was hanging open the whole time.
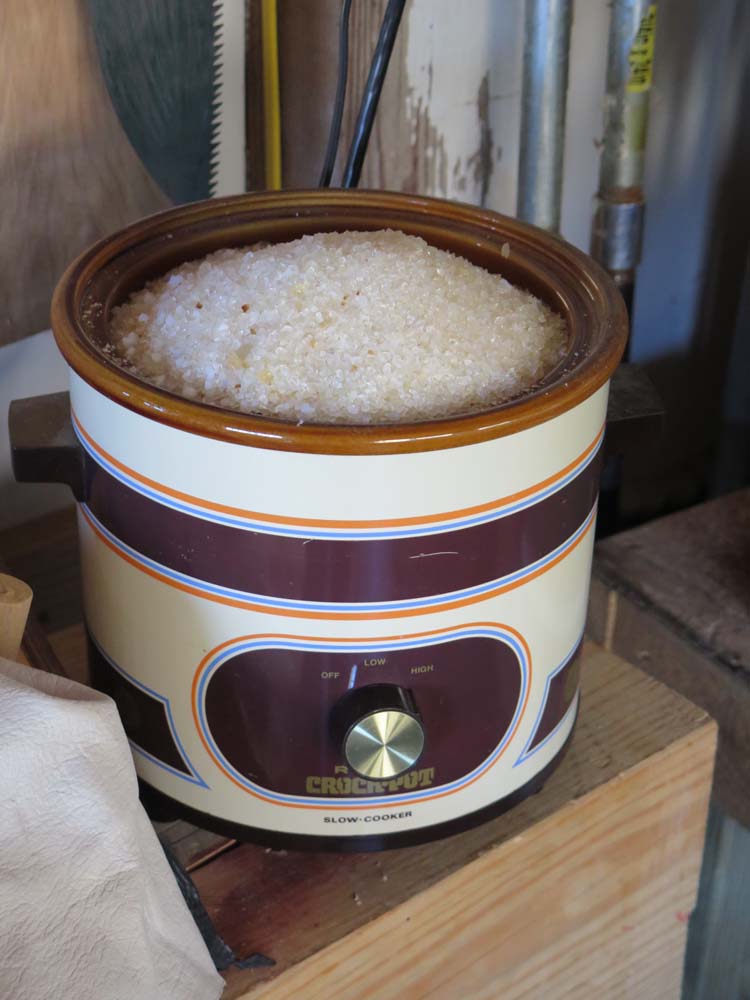
Since I work a lot on tortoiseshell objects d’art, and in due course must make some of my artificial tortoiseshell, I have to deal with the fact that both true sea turtle shell and my vaguely pseudomorphic replica are both polymerized proteins (keratin or its counterfeit) and thus hygroscopic. Moving moisture into and out of the tortoiseshell scutes or the newly fabricated tordonshell is simply part of the equation. To address these concerns is the reason I keep a couple hundred pounds of silica gel in the barn, taking what I need from storage and conditioning it, then using it. For the most part I need desiccated silica gel to pull moisture out of the newly minted replica material.

Over the years I have adopted the following stoopid simple and cheep technique to acquire a sizable quantity of the desiccant needed. Silica gel can be conditioned to almost any specific moisture content by simply placing it in the relative humidity atmosphere desired, then allowing it to acclimate. Since what I want mostly is silica gel with a moisture content as close to zero as it practicable, I rely on simple techniques.
First I fill a clean slow cooking pot with silica gel and turn it on the highest temperature setting to cook off any bound moisture. (Between making tordonshell and processing beeswax I am using slow cookers a lot, and purchase them at yard sales and thrift stores.) I generally cover about 3/4 of the pot opening with a scrap of plywood to conserve heat and to allow the offgassing of the water vapor. It takes about ten hours to get it as dry as it is going to get, which at this altitude during the dead of winter is about 3-5%.
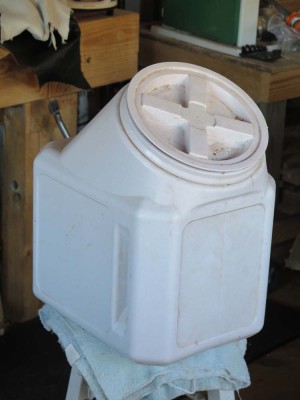
Once the gel is conditioned it goes directly into a Gamma dog food container which with its seal-able huge opening makes a darned near perfect desiccation chamber. When I use it long enough to pull out moisture to the point where the gel is too moist, I just cook it in the pot again. It can be reconditioned repeatedly.
I’ll be using this chamber a fair bit in the immediate future as I need to make some tordonshell within the week.
My friend DrDan is a man consumed with interests as broad and idiosyncratic as my own, which I guess is one reason we have become friends in recent years. He’s also a pretty amazing furniture maker with a passion for preserving the knowledge and materials of the past.
One of the hurdles he recognizes about replicating historically important furniture making is the scarcity of many of the woods consumed in generations and centuries past. To address this matter, and frankly in great part to assuage his own curiosity, he has begun to sprout and nurture seedlings for trees long passed from our marketplace.
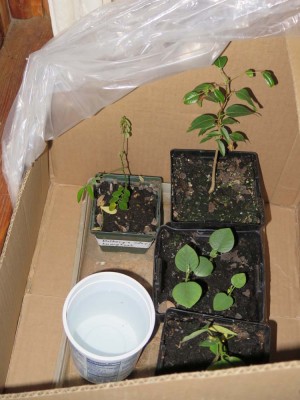
Last summer some of these seedlings arrived on my porch. So, I now have a makeshift greenhouse sitting adjacent to the south-facing dining room windows. It contains four seedlings DrDan sprouted, including Santo Doming mahogany, Brazilian rosewood, and Red Sandalwood. We’ll see how long I can keep them alive, as I’m not the gardener in the family. I’m probably closer to Chauncy Gardner than tree gardener, but I will give it a yeoman’s effort.
DrDan is even trying to sprout and nurture some diospyros, so we await those developments anxiously. That’s Gabon ebony to youse.
Today confirmed my opinion of the general veracity of all things Google. I made a round trip to the Maryland panhandle to return some of the tortoiseshell artifacts I’ve been conserving to their owner. Since I had not made this trip before I got directions from Google Maps. They gave me a route and an estimated travel time of 3 hours and 16 minutes. Despite leaving an hour before sunrise and driving at or above the speed limit the whole time, the trip took 3 hours and 48 minutes. Sheesh. Makes me glad I will be eliminating all the travel I can for the next two years.
I returned home from FORP 2015 to find my old friend Jersey Jon (accompanied by the lovely C, Mistress of Toolism) parked in the driveway, having just deposited a 14″ chop saw on the doorstep of The Barn. This mega tool had fallen into disuse at Jon’s place and he was loaning it to me in anticipation of its use for next Spring’s bench build.
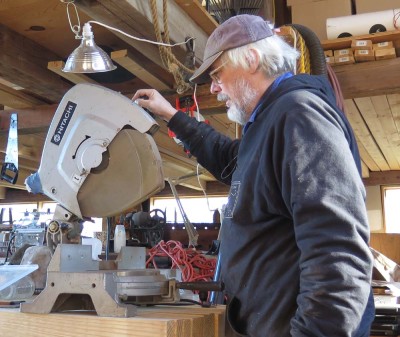
Jon indicated that the saw would cleave a 6×6 in a single stroke, so it ought to handle our work load. I’ll touch up the blade and it will be ready for work.
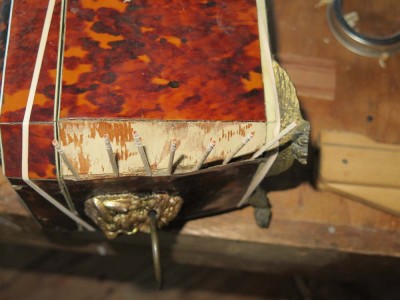
This particular box needed no meaningful repair, but rather a good cleaning and polishing. The tortoiseshell surface had a slightly cloudy appearance due to abrasions typically imparted through the nearly two centuries of use. Given that chemically tortoiseshell is nearly identical to your fingernails as high density keratin fiber plates, it can easily be scratched and polished.
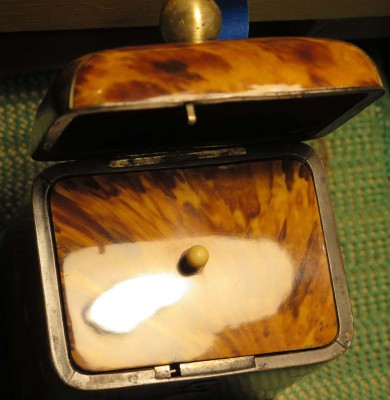
Polishing the surfaces was a straightforward process I have described here previously, and the results were not disappointing.
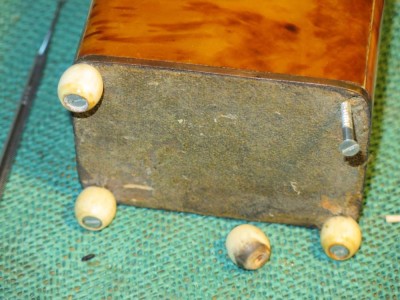
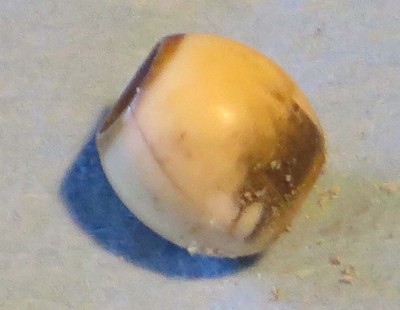
The larger component of the treatment revolved around the cleaning and polishing of the ivory feet. In short, I became a postmortem elephant dentist.
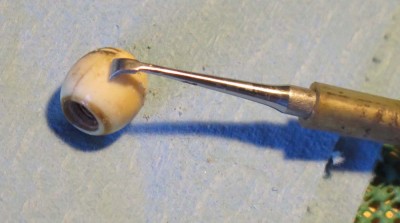
Diving into my tool kit of dental tools I withdrew my favorite cleaning scraper. If I could ever find another one like this I would snap it up. I recall this tool being a vintage SS White piece from an old military dental kit.
A half hour of dental hygiene cleaned each foot.
The cleaning/scraping was followed by a few minuted of dry polishing, using a cloth I made from chamois rubbed with 1 micron agglomerated microalumina metallography abrasive.
Like the polishing of the tortoiseshell, the treatment of the ivory yielded a satisfactory result.
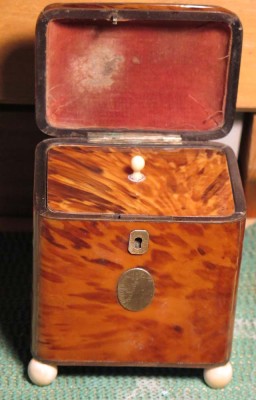
With most decorative objects I treat, my objective is to conclude with a piece that appears “old, but well-cared for.”
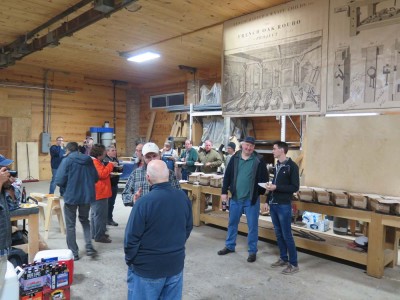
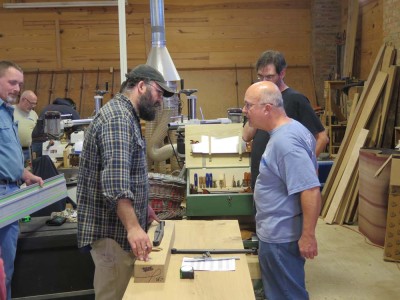
The week of fellowship began immediately with the “get acquainted” barbeque and social hour preceding the orientation lectures Sunday night.
There is no doubt that the highlight of the week was the many levels and contexts for the fellowship of the instructors and participants. FORP 2015 reconvened a core of FORP 2013 fanboys for another run at the prize, and my time spent strengthening friendships and just having plain old fun with Jameel Abraham, Bo Childs, Jeff Miller, Will Myers, Raney Nelson, and Chris Schwarz goes straight into the memory book.
Narayan recorded the events of the week with his camera and his unerring eye.
This posse was augmented by John Hoffman and my Virtuoso collaborator Narayan Nayar, making the company of companionship darned near perfect. At one point in the week Jameel asked us all at dinner whether anyone would be willing to participate if it ever happened again. Every hand at the table was raised.
Jameel was around all the time, especially when help was needed with the design and layout of the criss-cross and Benchcrafted end vises.
Equally delightful was the time spent with the subscribers, coming from all around the continent, with the closest being only a few miles from his Atlanta home, and the farthest from home having driven from the Pacific Northwest. Of course the fellowship for a remarkable endeavor was the drawing card; any one of the participants could have probably built exactly the same bench at home alone or with some buddies to help with moving the mass. But to engage in the same activities with two dozen other fanatics was irresistible.

During the week Chris and John Hoffman were at the south end of the room building a bench and helping any and all who called; I was on the north end of the room ensconced between Steve, Walter, and Joe. The grouping was representative of the gathering; one retired guy with a bum hip, one software developer, one facilities manager, and one anesthesiologist.
Raney, Will, and Jeff were peripatetic throughout the week, doing whatever needed to be done, helping whoever asked for it. Jameel and Bo ran the endeavor from behind the scenes such that it appeared to be smooth running flawless operation, but we all knew how much effort it took to make it seem effortless. Since I was limited in my strength and mobility I was mostly a cheerleader and adviser, providing instruction and demonstration as needed. One thing I could do without hindrance was sharpen, so I set up my sharpening station and invited anyone who needed something sharpened to drop it off. I’m not sure how many plane irons of chisels I sharpened, but it was a bunch.
Rick especially appreciated my timber framing chisel when it came time to get his bench top ready for the Bechcrafted end vise.
I was also able to loan out many of my tools when there was a need. I brought my timber framing tool box, and the scale of the work was more akin to that skilled trade than furniture making.

The bull session at Ron’s plane making shop.

Ron took the opportunity to deliver this new plane to Ted, one of our company.
During the week there were two scheduled social events, the first being a group dinner at Ron Brese’s house, the second being a barbecue in the Wyatt Childs workshop we were occupying for the week. The former allowed us to have a great meal under the faithful hospitality ministrations of the Breses, a bull session in Ron’s pane-making studio, and the opportunity to help out one of the company who inadvertently maneuvered his rental car into the ditch.
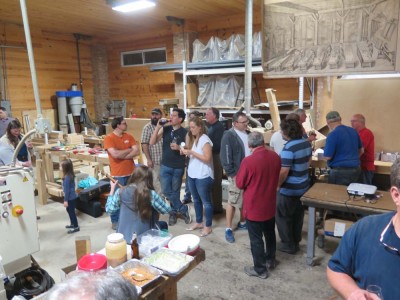
Joe’s daughter making music for us while we are all blending and yakking.
At Thursday’s social Chris chats with FORP 2013 alum Krishen, while Marty’s new bride checks her phone in the background.
At the second we were able to visit with a FORP 2013 alumnus and listen to the musical interludes provided by Joe’s lovely daughter, and to make the acquaintance of many family and friends of the group.
I think this was Pete’s rig, heading back to NYC.
Chris and John headed back to Cincy with this new bench hanging out the back end, with the tailgate mostly open. Good thing there was no rain in the forecast.
By Friday lunch the work was winding down, and the vans and trucks started getting in the queue to load up. Once again this was a group effort as the task of loading a 450 pound bench and the accompanying hundreds of pound of tools for each person was not inconsiderable. As the crowd thinned out I departed late Friday afternoon, needing to get home and resume many projects in the barn. A few hearty souls stayed to work on their benches on Saturday, and then the event was concluded.
One of the delightful occurrances of the week was our daily catered lunches, served on the c.1900 Forge Royal Rouboesque bench.

I saw many captivating tool boxes and tools during the week, but my favorite just might be Francis’ hand made boxwood rule. Were it for sale I would buy it in a heartbeat.
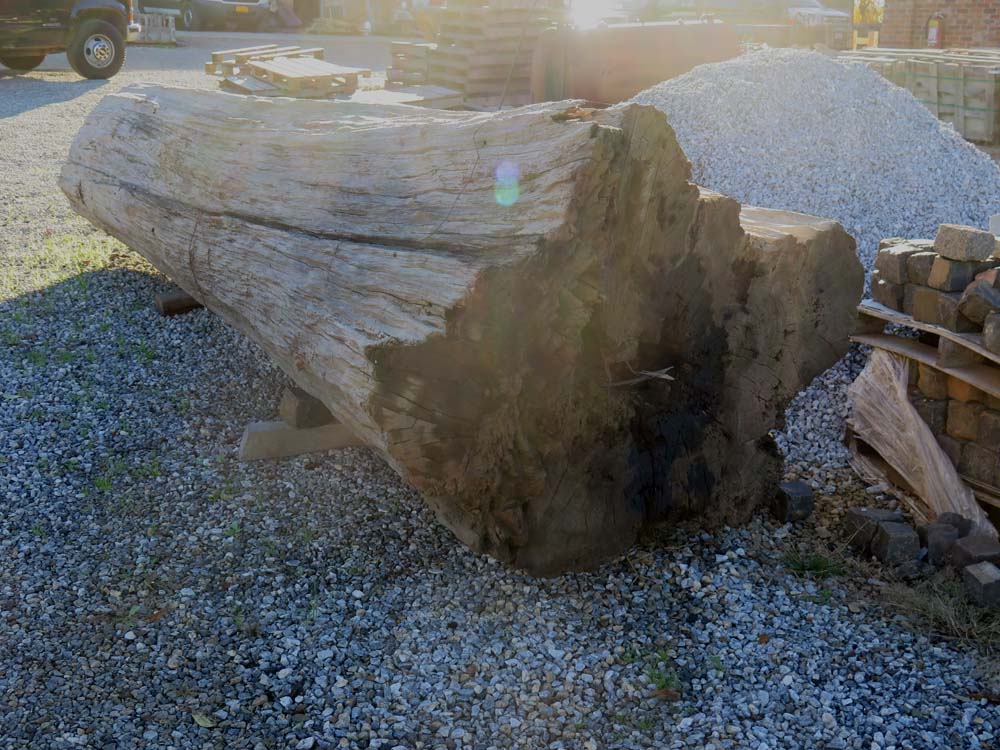
Wandering through the Wyatt Childs’ inventory of mostly architectural antiquities yielded some surprising discoveries.

This mighty cypress log was scheduled to be milled the week following FORP 2015. The widest point at the base of the bole was over four feet.
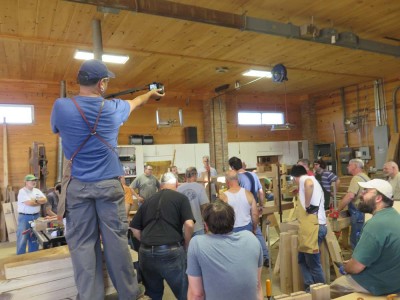
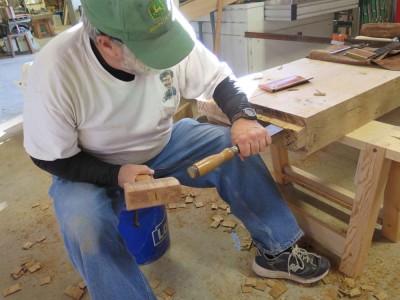
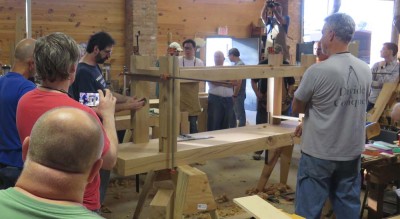
When building a Roubo Plate 11 workbench nothing is more important than getting the complex joinery of the leg top protruding through the slab bench top. I’m not 100% certain, but it might be the only important thing. As such, the layout and execution of the double tenon and mortise joint consumes more time and energy than all the other parts of the bench fabrication combined.
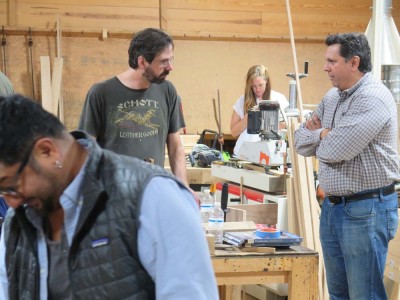
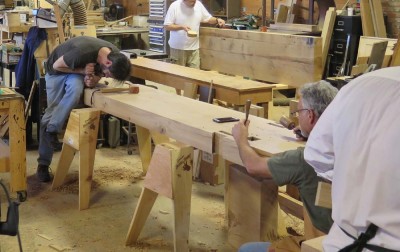
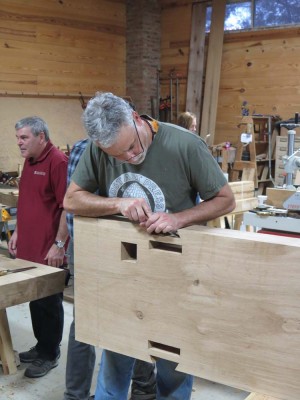
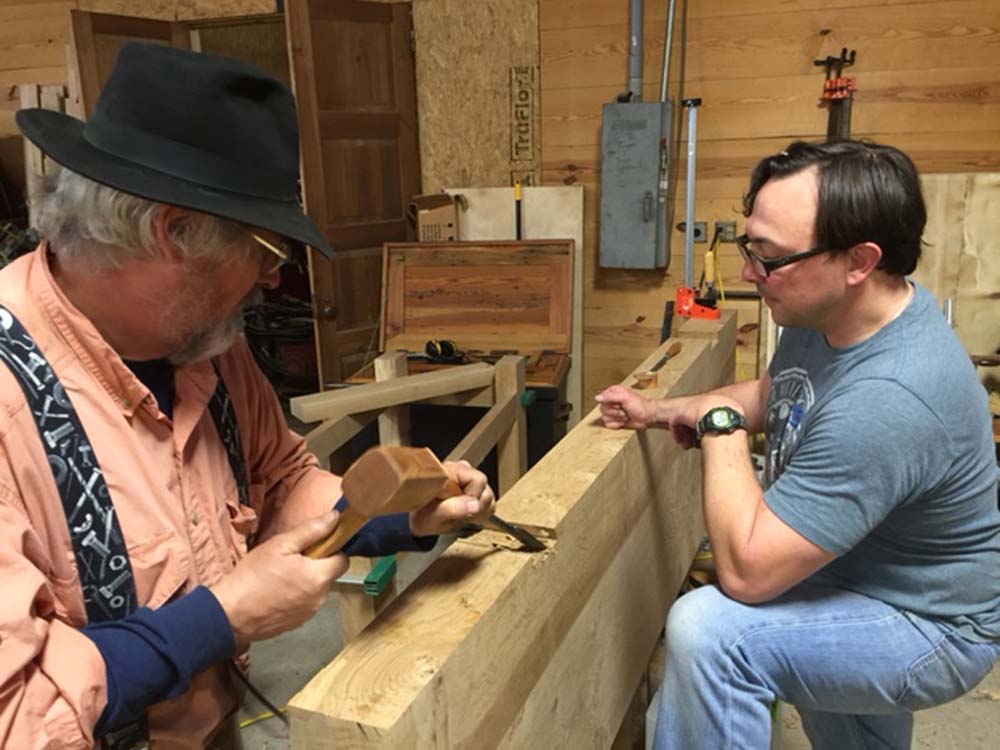
Jeff and Walter consult on the layout and execution of the joints in Walter’s bench.

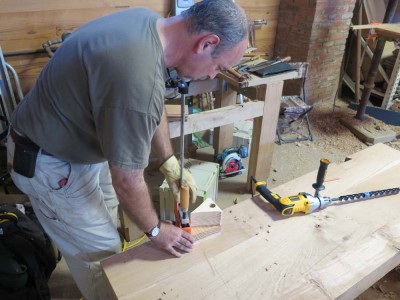
I’m demonstrating on Joe’s bench one way to finish off the inside corners of the dovetailed mortise.
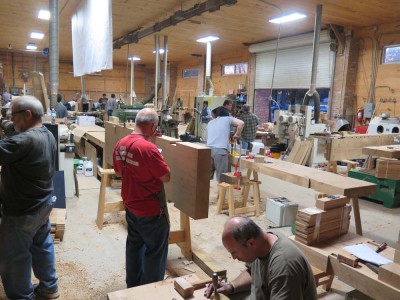
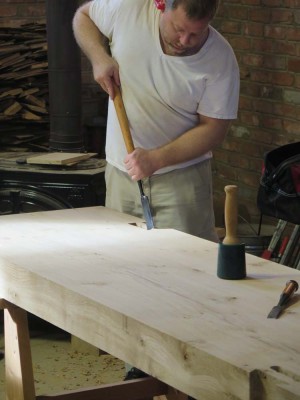
Not too surprisingly the hours of initiating this process brought about the most intense interactions between the “enthusiasts” and the students. At the beginning, Chris briefed the assembled throng on the assembly of the legs and stretchers, then inverted onto the underside of the bench top slab to provide for precise layout of the joinery for which there is no room for error.

Once again Francis charged in with only hand tools.
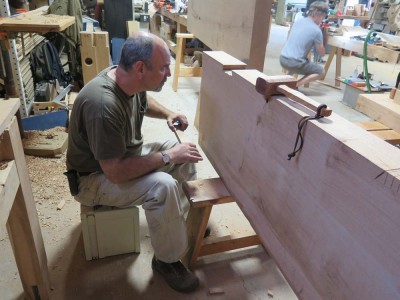
Steve’s concentration was entirely typical for the work of the week.
The following hours featured innumerable moments illustrating the intense concentration of the makers imposing the joinery on the slabs.
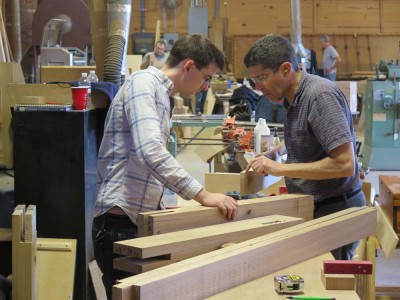
Karl is using the superb jig and tool combo brought by Devon. I think pretty much everyone in attendance made note of the combination and will try to replicate it.
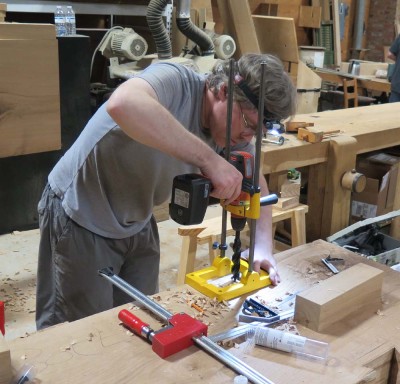
I cannot recall who fabricated this particular drilling guide that Steve is setting up, but it certainly got a solid workout on our end of the room.

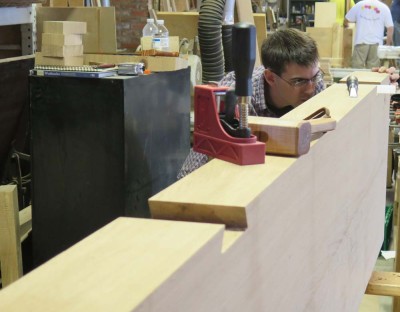
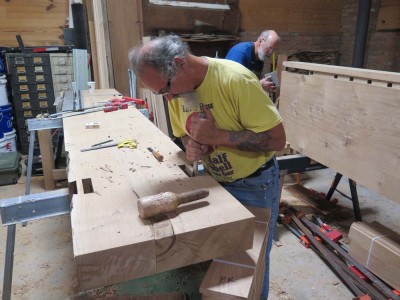
Joe took the effort to the max, working from on top of the bench top slab.
Once the dovetail mortises were done the energies turned to the inner rectangular mortises, where accurate drilling for waste removal was paramount.
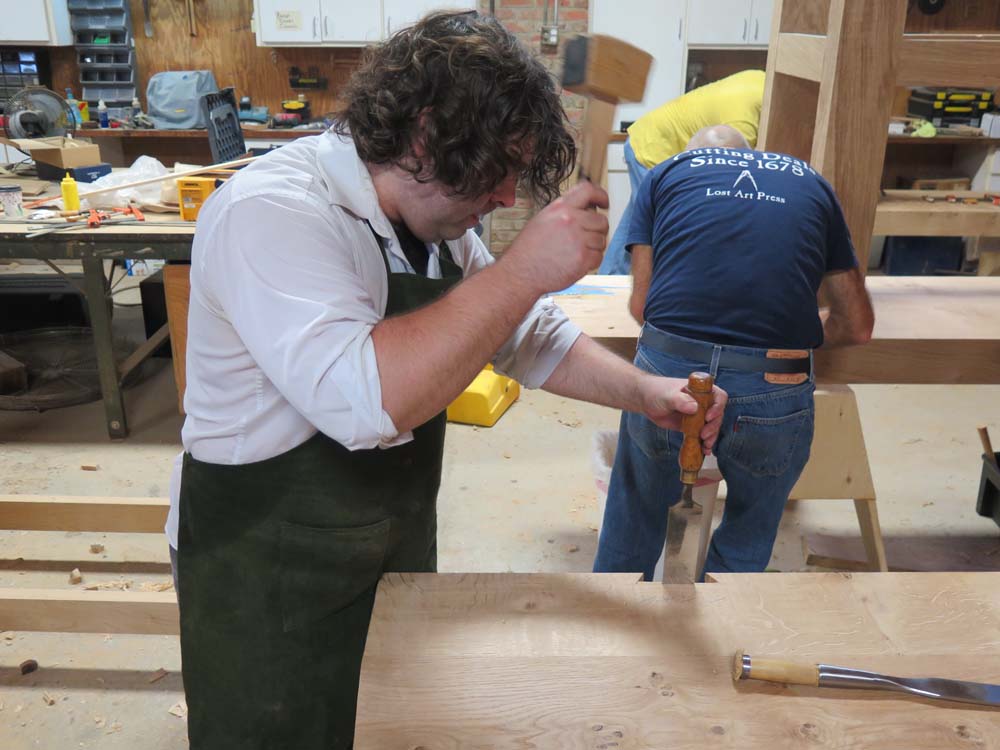
Once the holes were drilled and the waste removed, the most serious hand-work of the week was underway.
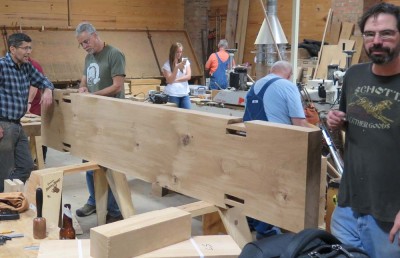
Being the most experienced maker in the crowd, it came as no surprise that Chris got done first.


Recent Comments