In recounting the progress of the conservation of the domed lid tortoiseshell box with a pair of cracks, I forgot to include the picture of the underside with the tissue paper backing. Sorry about that. The compewder undoubtedly did what I instructed it to do.
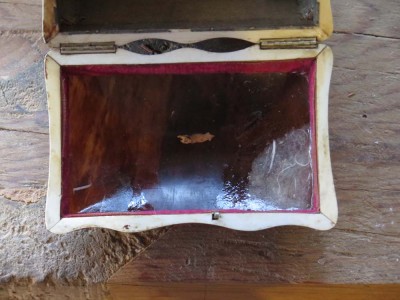
The backing in the lower left is a single layer of high-strength Japanese tissue paper fully encapsulated in hide glue. Since this fracture remained essentially “in plane” a single layer of backing support was adequate.
The lower right section is a double layer of tissue paper which needs a second saturating application to make it less visible. Since this fracture was not “in plane” the second lamina of the glue/tissue composite was necessary.
With the outer “cast” in place I could progress to adding an inner support behind the crack (it turned out there were two cracks; I dealt with them identically).
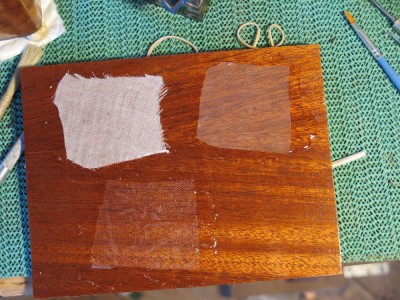
Three of the materials tested: fine linen (L), tight fine nylon (R), and loose nylon “sheer” (B).
I knew I would be using 192g hot animal hide glue for the support, and spent a little time testing several support fabrics to evaluate them for both performance and appearance. I had expected nylon sheer fabric to be the best, but it was not. In the end I went with Japanese tissue paper with variable fibers. Three layers of this affixed to an area slightly larger than the fracture ended this chapter of the treatment.
A quick note on using tissue paper for such a repair. It is much better to tear the edges of the patching paper rather than cutting them. This allows for a tapered edge on the patch, which both looks and performs better.
Up next: removing the outer “cast” and inpainting the inner support.
I might be the last guy to see this, but I found this video link while plowing through a mountain of old e-mail. It is a delightful little feature on Leonard and Robin Lee of Lee Valley Tools who have helped lighten my wallet immensely over the years. I have yet to meet Leonard, but consider Robin a friend and an aces guy.
http://ottawa.ctvnews.ca/video?clipId=744530
In fact, the contemporary world of woodworking tool makers and purveyors is densely populated with wonderful guys too numerous to mention individually here, with only the occasional stinker. (My 98-year-old mom, a devout woman who raised five devout children, is of such a sweet and Godly temperament that profane or even particularly critical utterances are simply beyond her. When she once described — with great verve — a co-worker as “a real stinker” I knew he must have been the Spawn of Satan.)
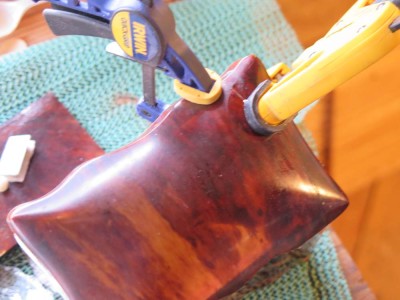
After creating a properly shaped caul for the domed lid, the next step was to bring the pieces of the top into the closest proper conformation I could. The end point for this process would be an applied backing support to the underside of the fractured area, but first I had to get the pieces in place with an outer “cast.” By placing the caul on the underside, with gentle clamping (pressing it with great force would in the end accomplish nothing beneficial; as it is working with tortoiseshell is risky enough), I was able to get the two sides of the cracked shell into very god conformity.
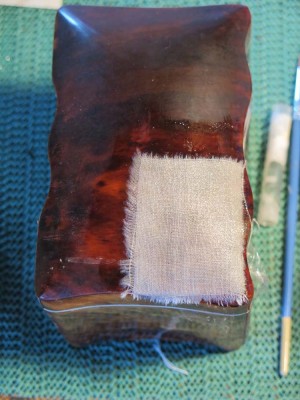
Knowing this, I cleaned the affected area and glued on a small piece of linen to the outer surface with hot hide glue. This step was hard to photograph but here is the final result; a very stiff, hard sheath on the outer surface to hold in in place while additional work progressed on the inside.
One exciting development in this step was the design and creation of some new clamps that fit the bill perfectly and will become an indispensable part of my conservation tool kit. I’ll blog about those in a few days.
Previously I have mentioned my mostly-antique lumber inventory, and adding to it via building demolition and salvage, lucky finds, and whatnot. Last Tuesday brought a figurative and literal tipping point in my “management” of this mass of lignen-cellulose composite macromolecules.
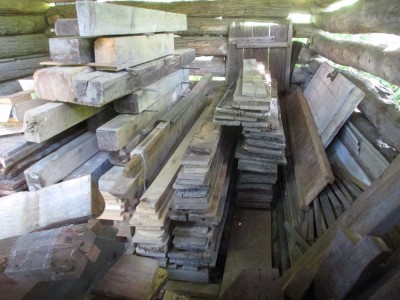
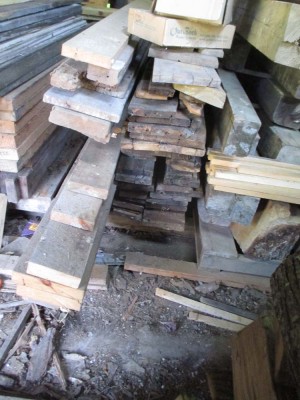
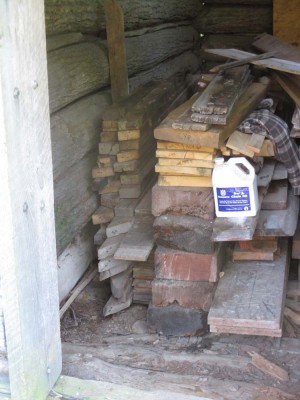
A view of the stash about three months ago; it had grown considerably in the time since.
About two weeks ago I visited my friends Mr. & Mrs. C about ninety minutes away. Mr. C had been harvesting and lumbering trees on his farm for some time, and I had arranged to acquire a truck load of mostly white oak and butternut from him. And I did. Shoehorning the purchase into the vintage chestnut log barn was a chore, but I got it done.
Then I went back to our old home and loaded another full pickup load to bring back with me, again destined for the storage barn. As I was progressing with the transfer, one of the stacks started moving. Then the one next to it also moved in response to the movement of the first one. Before long every stack in the storage barn was tilted westward at a 45 degree decline.
The result was a full week of work to get it fixed.
I first spent two days pulling out the inventory from the barn and stacking it out in the yard. Once that was done I began building a proper lumber rack similar to those I see in lumber yards, that is, back in the day when lumber yards stored and sold lumber properly rather than stacked out in open weather.
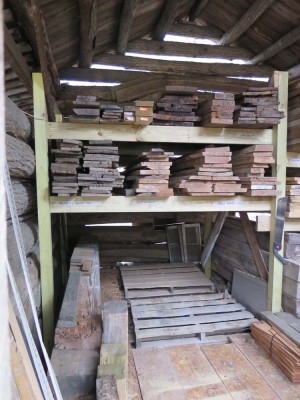
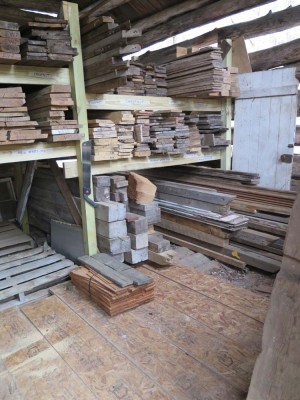
Four days later I had accomplished as much as I could. The space, being less disorderly, has much greater capacity for storage. I was pretty surprised at the amount of vintage and salvaged chestnut I own, but learned a critical fact. Last weekend when dining with my daughter and her boyfriend I mentioned that I really did not care for chestnut and had no desire to make anything with it. To which Mrs. Barn replied somewhat tartly something like, “Well, some people who live in the cabin really like chestnut and would like some furniture to be made from it!” I’ve now got five or eight pieces of furniture on the list for this coming year.
I was also surprised to find a fine lot of lumber underneath the pile that pre-dated my time here. The best discovery was several hundred linear feet of 8-inch eastern white cedar ship-lap siding.
Now I have to make sure I have enough room for the remaining six truck loads of lumber still back in Maryland. If not, I may have to sell some lumber.
Nah, that’s just crazy talk.
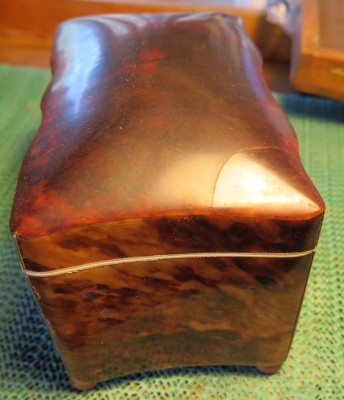
Given that the cracked domed lid was essentially two problems, the first being the loss of structural integrity as a result of the fracture, the second being that the two adjacent sectors on either side of the fracture were no longer aligned with each other, I had to approach the problem from two routes to address the two problems.
The first route, and the theme of this post, was to create a means by which the two sectors could be brought into alignment. To accomplish this required a form that could be used as a caul to force the two misaligned parts into alignment. There were in turn a number of material techniques to creating the form, including most commonly employing plaster, auto body filler, and silicone putty. I selected the last one.
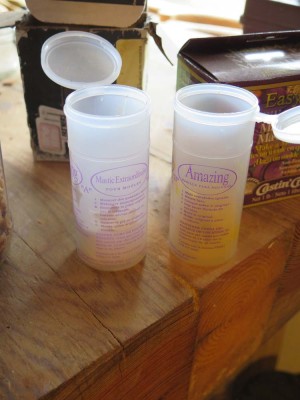
Silicone molding rubbers can be used to create the most intricate molds that reflect the character of the surface at a microscopic level. I didn’t need that, all I needed was a wad of reacted silicone putty that was in the right shape.
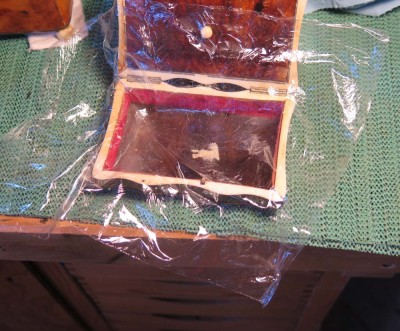
So, I made the form by first draping the exact opposite corner of the lid with cling wrap, not worrying too much about getting a smooth fit without folds and creases. All I wanted was something that could protect the substrate from the silicone, and the putty could assume the general shape of the domed lid.
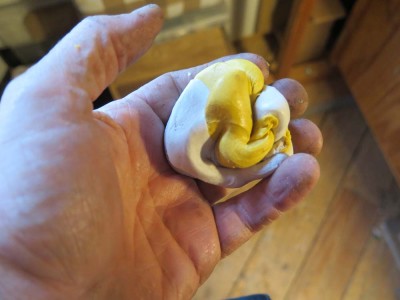
Using the two-part silicone putty, I kneaded a wad the right size and pressed it against the cling wrap firmly enough so that I could leave it in place with a perfect support form as the result.
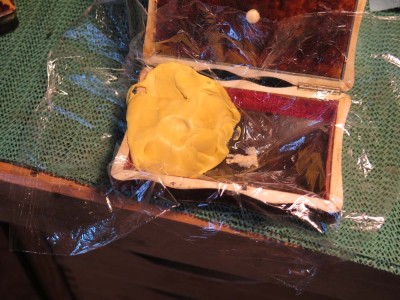
I worked. I trimmed it a bit after it cured, but I was left with a form I could use going forward.
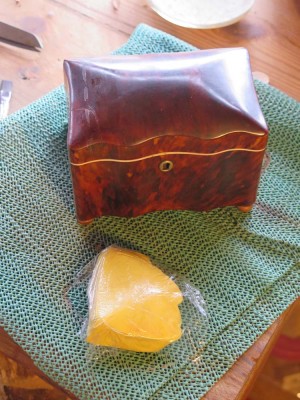
Next time, repairing the crack in the right profile.
One of the more problematic considerations from tortoiseshell objects is found when the shell itself has been formed under heat, moisture, and pressure to a desired configuration for the object. As a plastic polymeric material — and in the English language the word “plastic” is ambiguous, although in this context I am speaking in the materials science lexicon meaning the material can be deformed by thermoplastic forces and will retain that new shape once the forces are removed — tortoiseshell remains susceptible to fracture and other entropic phenomena.
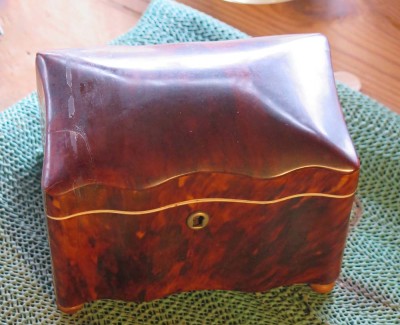
This box has a lid that was made from a prepared tortoiseshell scute (plate) had been steamed then pressed between heated cauls (or dies) to establish its shape. As a protein macromolecule the crosslinking bonds in the protein network has be reoriented by heat and moisture, and then reform once the heat and moisture are removed. Thus once the pressed scute cools in the die-press and dries/hardens into its desired shape permanently. The stresses from the forming process remain at bay for a while, but like I said is subject to cracking and distortion.
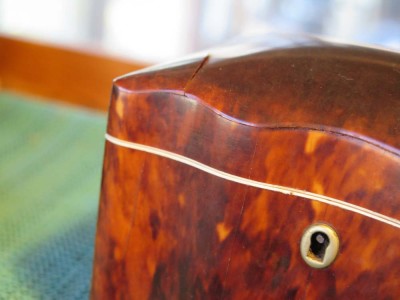
And that is what happened with this exquisite little box. Stay tuned as I walk you through my treatment of it.
In the lexicon of contemporary furniture manufacturing, the identifier “KD” means “knock down,” or basically furniture that comes shipped disassembled so as to take up less space in transport. This is fairly common, perhaps even dominant, in case pieces like shelving and entertainment centers, etc. Until recently I was unaware how deeply this concept had become ingrained in the industry to the point that it even has become manifest in seating, even upholstered seating furniture.
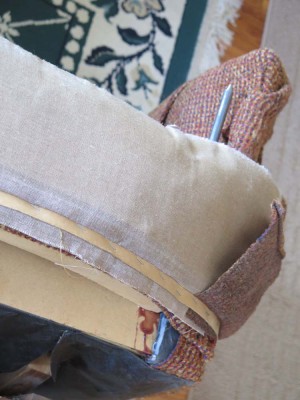
Recently we were visiting our daughter for Thanksgiving and went to the thrift store to find a sofa, which we did, but even better found a swivel rocking chair that demonstrated some amazing (to me) innovations that actually worked well!
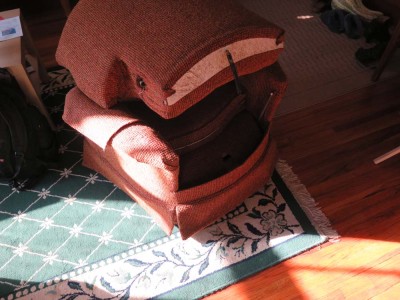
The first of these was the feature that the back of the upholstered chair was detachable and installed via a pair of vertical steel rods onto which the back was installed by lining up some round mortises in the back with the steel rods projecting upwards from the primary seat rail onto which the seating platform was constructed.
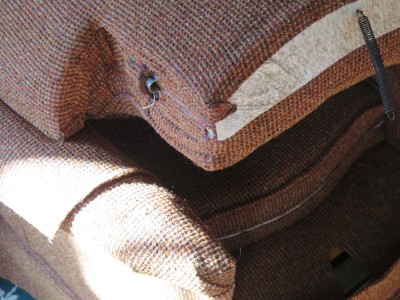
The fitting was smooth and tight, and even imparted a tiny bit of springy-ness to the back when the chair was in use. It was, truly, among the most comfortable chairs I’ve ever occupied.
A second feature that impressed me was that the swivel and rocking functions of the chair were not active until there was adequate weight on the sitting platform to compress some mechanism inside the chair. This means that the chair was stable and robust when setting unoccupied, and could be handled and leaned on when passing by. Given my slight instability, diminishing over time but still present some times, it made for a more pleasant landscape when navigating around the living room.
The chair was not marked with any tags or stamps anywhere, but whoever made made it really impressed me.
One of my favorite occasional threads in the Professional Refinishers Group exchanges is called “High Points of Low-Tech” wherein the members of this amazingly creative assembly show new and innovative uses for mundane materials in the shop. I often do not have the time to peruse all the threads on “Groop” but I make a point to go through the HPLT postings.
Recently I have come across three new tools incorporated into tortoiseshell box conservation projects in The Barn. Two of them definitely fit the previous description.
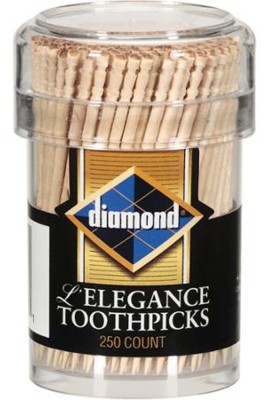
The first was these fancy toothpicks I got. I think, at Wally World. I was trying to find something on the shelf in the grocery section and saw these.
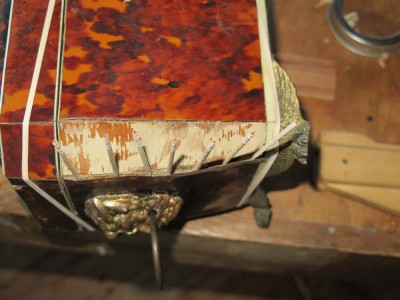
Since toothpicks are such a valuable tool for my work, as spacers, wedges, adhesives dispensers and spreaders, etc., I am always on the lookout for a better toothpick. Well, I have found them. They bear a premium price, and by that they are one penny a piece, but I still bought enough that I have a container of them at every work station in the shop.
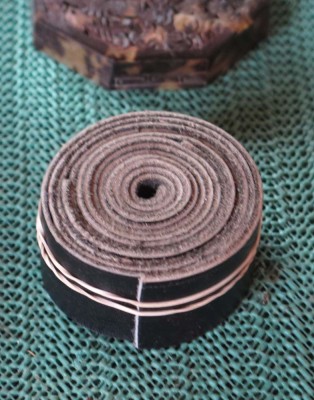
Also while working on some little tortoiseshell boxes I kept needing a small elevated platform for some of the processes. A hard surface would not work, as it would mar the polished surface. A soft/squishy surface would notwork as I could not bring any pressure to the task at hand. And ideally the work platform could be variable in size.
While looking in a drawer for something else, the lightning bolt struck. I have several rolled bundles of leather strapping and one of these turned out to be the perfect solution. It was firm but not marring, and could be configured to whatever size I needed. So, if you have an old belt you already possess a perfect elevated work platform for delicate tasks.
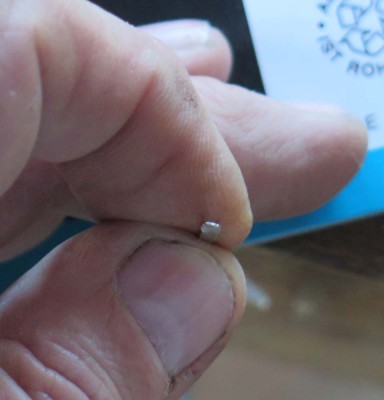
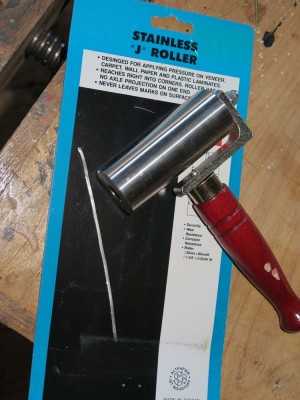
Finally, one of the things I often must do for TTS boxes is to fabricate and inlay pewter stringing. I used to pound and polish it flat, but while at the hardware store I saw this veneering roller. The heavy steel cylinder works perfectly for flattening the fine gauge solder (solder is simply pewter in a coiled roll) into a thin stringing for inlay. Viola!
My friend RichardB steered me to this. My mouth was hanging open the whole time.


Recent Comments