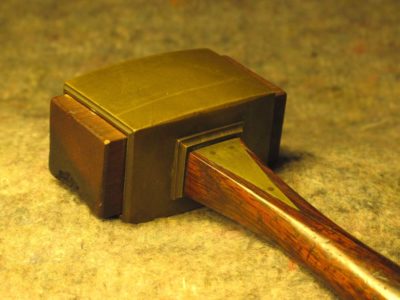
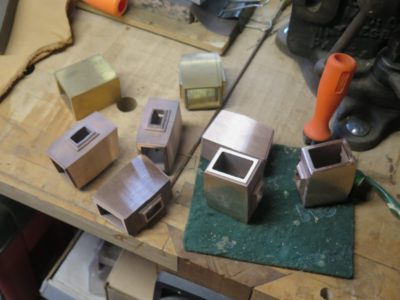
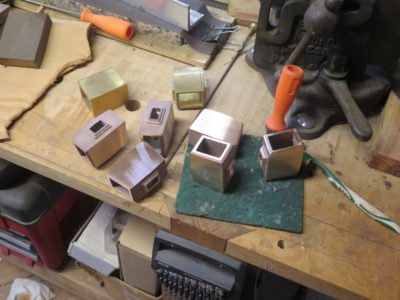
I was recently alerted to the ongoing project by foundryman Bill Martley to replicate the shell castings for the beloved mallet of Henry O. Studley. Well, beloved to me at least. Bill and I corresponded and I ordered the raw castings in his original alloy, a red-ish bronze. You can tell the coloration difference between Bill’s castings and the brass shells I have worked on in the past.
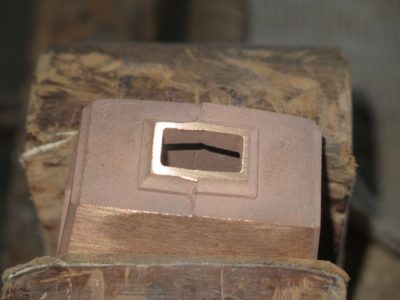
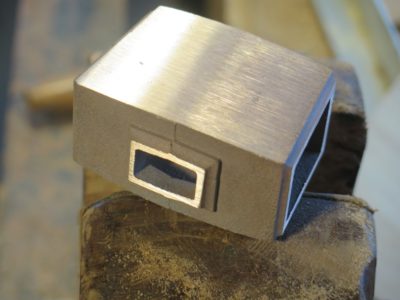
The castings are quite nice and I am working through finishing them to make myself a mallet or six. The amazing thing is that Bill got the pattern really close to the original, without even having access to the Studley book! He said he was relying on pictures I posted on this blog. I sent him a copy of the book as part of our transaction, so he can move forward with the definitive information in-hand.
Bill has been selling these rough castings through his Instagram page, mystic_pickers. If you are interested in acquiring one of the rough castings from Bill you can contact him directly through the Instagram page. If there are hiccups let me know and I will check with him to see if he wants me to post his contact information here.
Since the color of the alloy is wrong for me I have ordered two addition sets of castings from Bill with yellower alloys to see how they look and work.
At the same time I have been tinkering with my patterns for casting the mallet shells myself, just because. (I am determined that 2021 will be a year of metal casting at The Barn with several projects in the pipeline) Once I get the patterns to a point where I am satisfied I will cast them in both silicon bronze and brass in the barn. Since I have the detailed information based on my many examinations and with the blessing of Mister Stewart I am confident that the end point will be successfully achieved. (Let’s just keep it between ourselves, but my ultimate goal is to have finished “authorized” mallet replicas for sale at Handworks 2021.)
I’ll be recounting the project from my end as things proceed and I hope you will enjoy the ride.
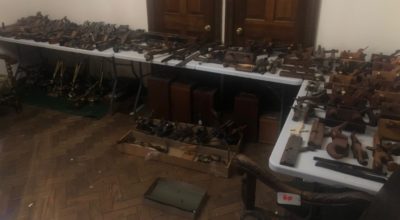
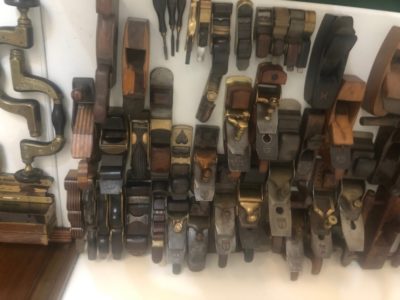
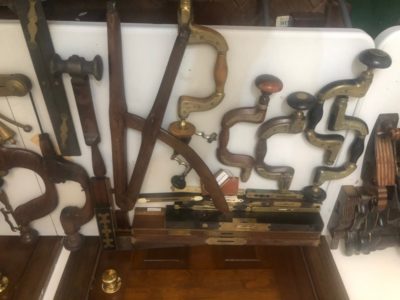
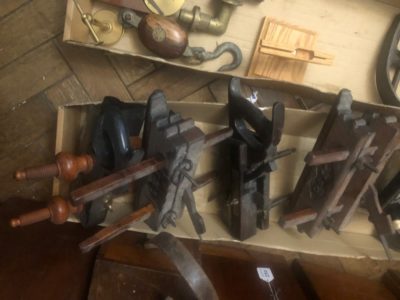
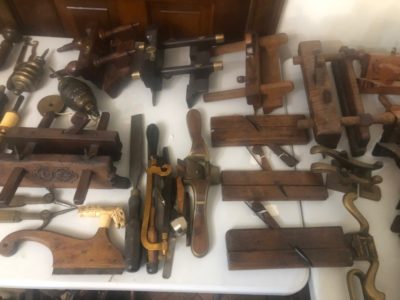
I was contacted by a long-time friend in Atlanta, who had a tool-collector friend who died recently. He sent me these pictures of some of the tools for sale.
He told me yesterday that there is also a large quantity of vintage Honduras Mahogany lumber, some of which is oversized, and a quantity of veneers old and new. My friend IS NOT a woodworker so he could not provide detailed information or assessment. If you have any interest in pursuing this acquisition please drop me either an email or a Comment and I will pas your information along to my friend or get his permission for you to contact him.
Decades ago I discovered the benefits of keeping a stash of emory boards at-hand in the shop. Bought at the local pharmacy I found these little tools to be a magnificent solution to any number ot abrading and shaping problems. Unfortunately, like a great many products over the years these have become too cheezy to really be the workhorses they used to be.
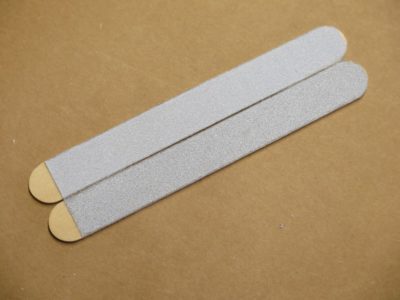
So, as I have posted previously, I make my own. One of my beginning-of-year habits is to make a new set of abrasive sticks, gluing sheets of sandpaper to tongue depressors with a spray adhesive and then cutting them apart into a pile of useful tools. (I really don’t need any posts about my New Year’s regimen of sharpening routine edge tools, do I?)
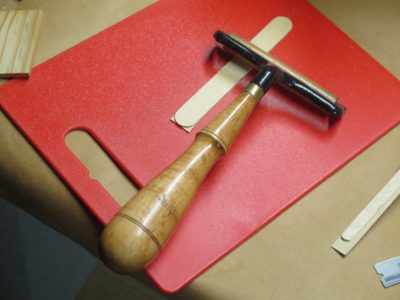
This year I did something a little different and expanded the variety of sticks. In addition to the typical pairing I’ve been using for a long time, a coarse side and a medium side of aluminum oxide abrasive, I added finer stearated silicon carbide papers into the mix. These options created their own issues, as I found the adhesion to be not as robust as with the AlOx paper. Using a small roller, made by and given to me many years ago by my pal MikeM, I found that pressing the edges worked well, plus I discovered the need to embed the sticks while the spray adhesive was still soaking wet.
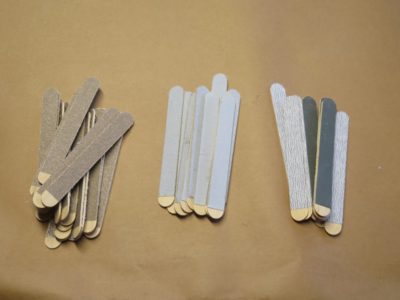
I wound up making three different sets of abrasive sticks. The specs for each was detrmined by the abrasive sheets I had on the shelf.
The first set was pretty similar to ones I’ve made the past, this time with 60-grit and 100-grit sandpaper. I think that the 60-grit side will be less useful than I originally thought, but that could be because the product itself is pretty cheap and the abrasive particles spall off with first contact to the substrate. Next time I will aim for 80 and 120-grits.
Next up are the sticks using SiC papers, 150-grit and 220-grit papers. I’ve not made this combination before and think it will be a very satisfactory one.
Finally I went utra fine, with 400-grit and 600-grit together. We’ll see how useful these are in the coming days.
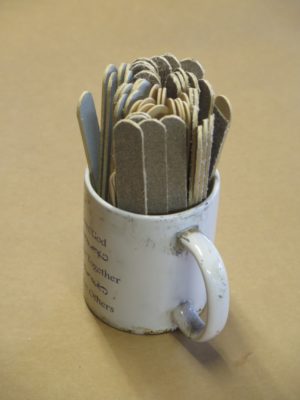
I’m now set up with this year’s inventory of abrasive sticks. Well, we’ll see if this lasts my usual full year since there are now so many different options.
I believe that in some (many?) craft cultures it is a New Year’s tradition to bring all of the components of the tool kit up to snuff. For the past several years, at least since relocating to Shangri-la, I have been dong some of the same thing and will spend this week so engaged. Throughout the year I toss everything that needs major rehab into a box on the shelf awaiting the beginning of the year for attention. Obviously this would not include anything truly critical to ongoing activities, that would be dealt with immediately by necessity.
This year there is an equal proportion of tools-to-be-made compared to tools needing a tune-up. This includes a batch of infill mallet heads I sourced recently, another plow plane iron re-purposing, a new (to me) iron to be fitted into my infill smoother and a new wedge made for it, a new tool holder for my patternmakers’ gouges, and some tools being transformed from one thing into another like some gouges I bought for the explicit intent of turning them from out-cannel into in-cannel, etc.
And of course, this is a week that gives freedom to my “re-arrangeritis” impulses, not that I have much restraint in that area to start with..
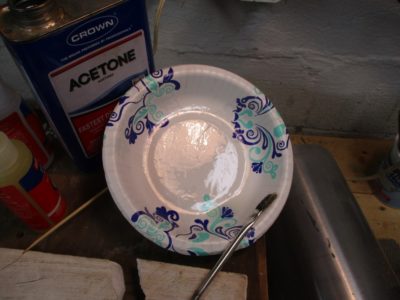
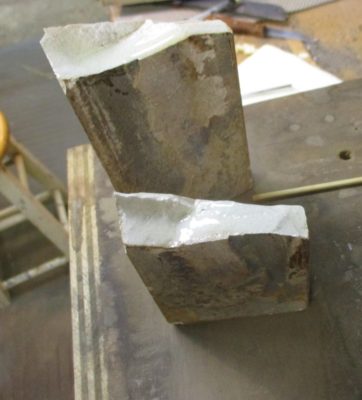
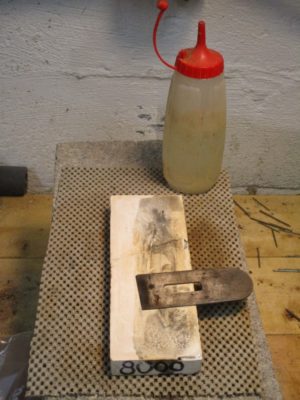
Among my inventory of sharpening implements is an old 8000-grit ceramic water stone that I bought perhaps 35 years ago. I recently dropped it on a concrete floor with the resulting carnage you might have predicted — it snapped in two. Rather than toss it out I tried to salvage it and put it back to work.
Based on the character of ceramic sharpening stones, namely that by nature they are comparatively porous, the foundation existed for adhering the two pieces back together. In fact, since ceramic stones tend to be fairly soft and friable (fracturable) when adhering pieces of these ceramics together you have to pay attention to the adhesive-adherend margin, making sure that the density and hardness of the adhesive is congenial to the density of the adherend. While I cannot modify the character of the cured adhesive film, I can use other methods to modify its performance.
In this case I followed my longstanding practice of using dilute adhesive to size the gluing margin (the surface of the adherend), thus rendering something more hardened-sponge-like than a block of hard plastic in direct contact with the soft ceramic. The latter construct is much more likely to fail in somewhat short order as the harder, denser, and more cohesive adhesive breaks off some of the softer ceramic block, resulting in the failure. In this case I used an epoxy I had on hand.
I mixed the two parts thoroughly, then diluted it immediately with with acetone to yield a watery solution. This was applied directly to the broken stone surface, and soaked in to yield a fairly parched-looking surface. This results in an adhesive/adherent region perhaps ten or twenty of fifty times wider than that accomplished by full-strength epoxy alone. After a few minutes I added another application of the dilute epoxy, then set it aside until the epoxy was almost tack-free.
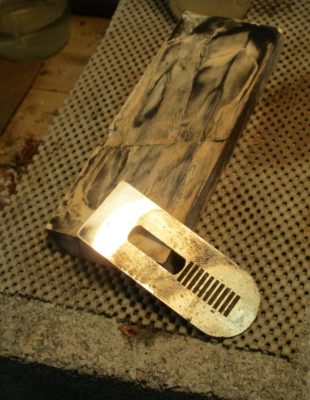
The it was ready for a bead of the full strength epoxy, which I applied to the lower half of the joint to make sure none of the full-strength epoxy would squeeze out the top glue line to excess.
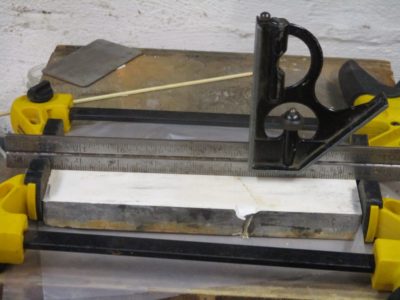
Once the gluing surfaces were coated with the epoxy I placed the two halves together and applied very gentle clamping pressure, mostly to hold the two halves in correct alignment rather than drawing them together. Their fit was wonderfully tight from the git-go. There was a tiny bit of epoxy squeeze out on the top line, and I wiped that off immediately with a paper towel sodden with acetone.
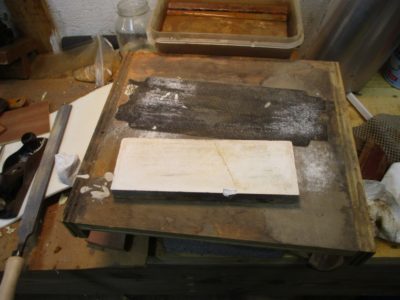
I let the assembly sit until the epoxy was fully hardened, then re-trued the surface, first with a sheetrock screen and then with sandpaper over a flat surface. Since it is an ultra-fine polishing stone it does not need much water; to make sure the epoxy is not challenged I simply wet it on the surface instead of soaking the stone in the water bath.
In use there is a little click as the steel is passed over the fracture line, but the stone still works just fine.
While browsing around the interwebz over the weekend I noticed that Rex Krueger featured Roubo’s winding-winding-sticks-on-stilts from our Roubo on Furniture volume. He is to be commended for bringing the message of hand-tool woodworking to a new audience.
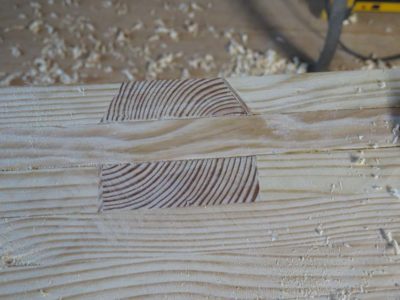
One of my fond memories from my formative years as a woodworker was the period of three years hen I was a patternmaker in a foundry, which is where I learned what “precision woodworking” was all about. To be truthful it is a standard applicable to very little of my work ever since, but it was elucidative nonetheless. Most of our work was pretty heavy machine-oriented, but we did have a selection of hand tools for shaping the forms. Because, another lesson from the patternmaking days was that we were, in essence, fabricating sculpture, most of it being sculpture based on blueprints, but sculpture just the same. But for most of our work we relied on stack lamination and shaping components with large disk sanders, working to the center of a knife strike line.
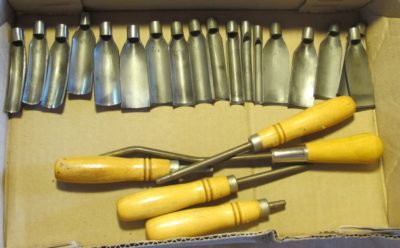
Every so often we had to really sculpt pieces by hand, hence the inclusion in our tool kits of tiny spokeshaves that I find so integral to Gragg chair work. Another peculiar tool set for sculpting foundry patterns was the interchangeable thin-walled gouge set made by Buck. For many years after leaving the patternmaking shop I searched for a set of these gouges, and then all of a sudden I found myself with three complete sets. I still use these tools in the shop with regularity although I am down to two sets. When my dear-friend-I-have-never-met Rob Hanson related the tale of losing his house and shop during the California fires two summers ago, I began sending him “care” packages full of tools to get him re-started, concluding recently with a barely used Record 52-1/2 vise. Somewhere along that trek I decided I did not really need three sets of these gouges and sent one to him. I have not yet figured out how to integrate these tools into Gragg, but I will.
The small spokeshaves are fine for convex surfaces and larger concave shapes, but for concave surfaces with smaller radii we relied on a set of tools we called draw-spoons. For shaping the rear seat rail and wallowing out the seating deck of the Gragg chair tools like scorps, travishers, and inshaves do not work for me but the drawspoon fits the bill perfectly. There were a range of drawspoons in the patternmaking shop, but there was only one set and I never had the opportunity to make another. The larger of my tools came from Garret Wade back in the day, now I think they are available from Woodcraft as a spoon plane. I have a smaller set that came from AMT back in the Stone Age, I do not know if they are available anywhere any more. Lee Valley makes a drawspoon but it is too large for the purposes I need.
I have found that I simply could not make Gragg chairs in any meaningful way without the drawspoon, and if you want to make them you will need at least one as well.
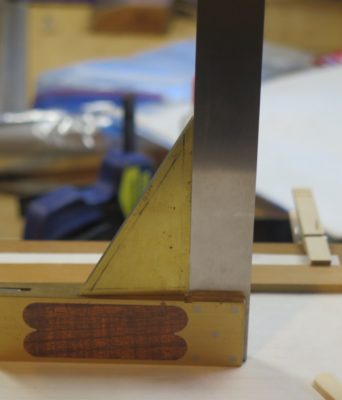
To judge and tune the angles of the square I first establish the right angle to be as perfect as possible with my Vesper square, which is the reference I use for anything 90-degrees in the shop.
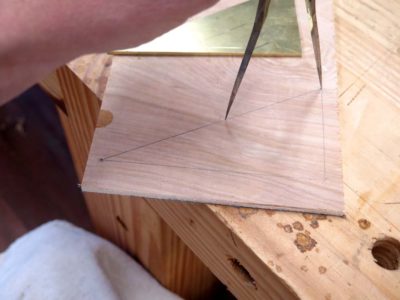
With with my brass triangle laid out as closely as possible to the geometric model of the base being exactly 1/2 of the hypotenuse, I begin to mark the 30-degree angles cumulatively to form a half circle or even an entire 360-degree construct. I have found that simply marking the angle with a pencil and building the angle construct from that is not accurate enough to get it exactly 30-degrees.
When I am creating the sawing and shooting jigs for parquetry I have to keep in mind that in order for the assembly to be perfect the pieces have to fit tightly together by incorporating twelve lines — six starburst pieces with two sides each. For every fraction of a degree of angle the triangle square is off, that error will be magnified twelve times in the final assembly.
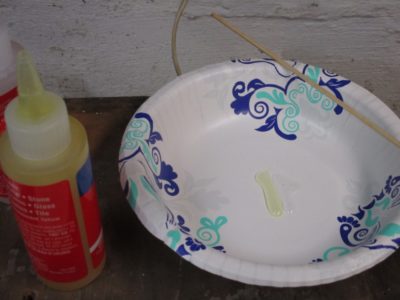
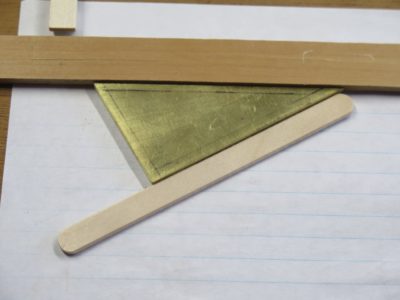
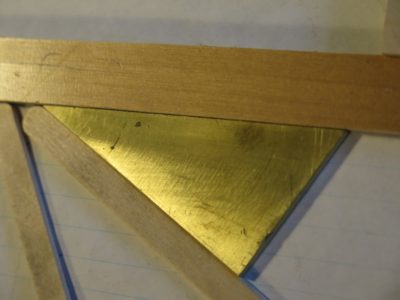
Once that is accomplished I set the square down against a line, then lay a popsicle stick along the angled line.
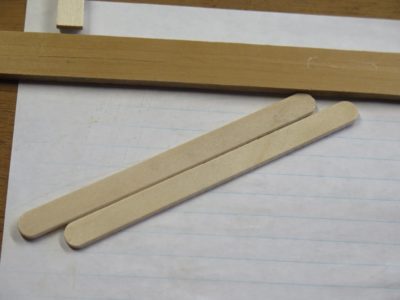
Removing the square and placing a second stick as the mating surface I now have the reference line to establish the second 30-degree angle. I continue this process until I get to the stage where, if perfect, the first line and the last line are perfectly in accord.
This never happens, the aggregate is always off by a tiny bit and the hypotenuse needs a bit of adjusting, in this case less than 1/64th”.
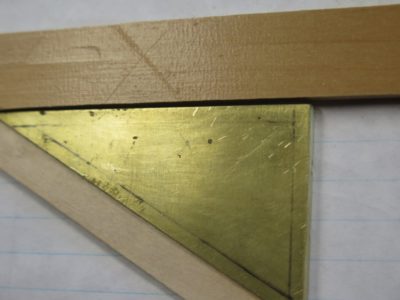
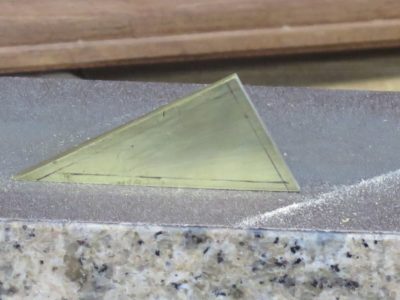
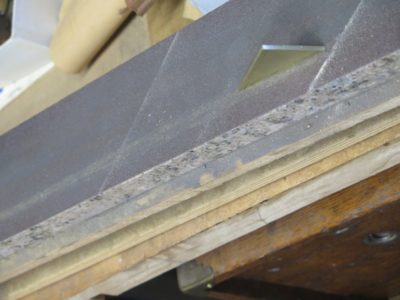
I do this on my granite block with a roll of 60-grit sanding medium, gently pressing the toe or the heel of the hypotenuse to kiss the angle a teensy bit one way or the other.
It usually takes me a few brief sessions at the granite-and-sandpaper before I am satisfied with the six-angle exercise.
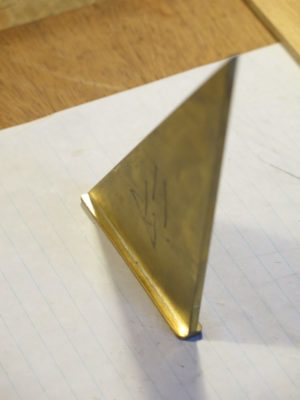
Once I get to that point I can solder the shoe on the short leg of the square and finish it off, calling it “done.” This example is the bigger sibling of the current one, made during the workshop two summers ago. I trued this square the exact same way, and it is a joy to hold and use.
In many instances, cutting dovetailed open mortises through a Roubo bench top for example, a 30-60-90 layout gauge only has to be “close enough,” however you define that term. All one layout line has to do is match another layout line, and as long the two lines are struck with the same tool off the same reference plane all is well.
During last year’s workshop we all made one or two of these triangles, and like I said above, they work just fine. Laying out the hypotenuse with dividers was all that really needed to accomplish (the hypotenuse of a 30-60-90 triangle is exactly twice the length of the short leg), using my Chris Vesper sublime refence square for the 90-degree corner.
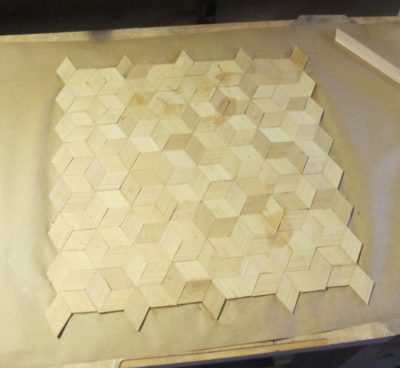
But what happens when you have to create a series of lines coming from different places, and they establish the perimeters of pieces that must match each other precisely? That is exactly the case of laying out a basic “starburst” or “dice” pattern parquetry composition. I used to be content with simply laying out a sawing jig using a small plastic triangle from a middle school geometry class set, but since I have moved to shooting the edges of all the lozenges to minimize the joints even more, I needed to make myself a truly precise triangle square to set the fence for the shooting board.
Starting with one of the brass triangles left over from the workshop two summer ago I determined to make a 30-60-90 square that fit the bill. Once I had the angles perfect I could then solder on the shoe to the short leg of the triangle.
Tomorrow I will show how I did just that with a bench top geometry version of a Covid/PCR test, using a piece of paper and two popsicle sticks.
Over the coming weeks I will be posting periodically about the tools I use to make a Gragg chair in order to help next August’s class attendees begin to assemble their tool kits. I will emphasize the peculiar tools and perhaps describe how they are used in the process. The tools will be presented in no particular order, merely in the sequence they pop into my head.
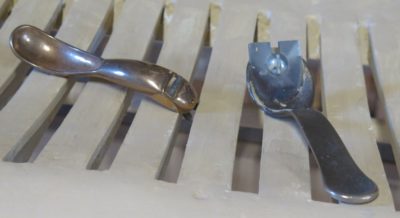
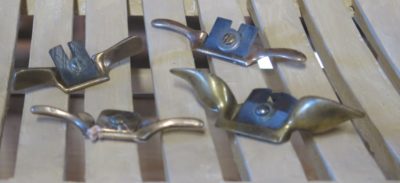
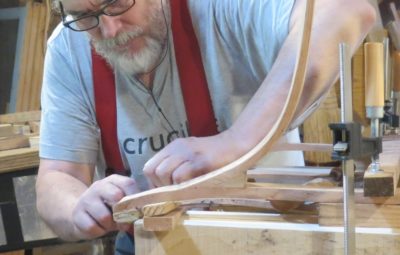
I will say that tool #1, the spokeshave, or more particularly brass mini-spokeshave(s) is integral to establishing the lines of the curved contours and thus spends a lot of time in my hand. I use about a dozen different small spokeshaves, but that is because that’s what my inventory of spokeshaves consists of. Petite wooden spokeshaves are also fine, but I only have one of these and have not been able to find many more. Certainly my favorite (upper right) is one we made when I was working as a patternmaker in a foundry and cast our own tools. As I recall the iron for the tool was made from an old saw blade. Its sole is shallow enough that it can work on concave, convex, flat, and chamfered surfaces.
The spokeshave on the upper left might be the one most familiar to you as it was sold in a three piece set, one flat, one convex, and one rounded, from a number of tool purveyors back in the day. I am pretty sure I bought four sets of them at the time and there are still large numbers of these floating around the interwebz and tool swap meets. The two spokeshaves on the bottom were picked up along the journey over the past 40 years, the one on the left very similar to the one I had from the pattern shop and the one on the right is from a pair of “lamb’s ear” spokeshaves from some auction somewhere.
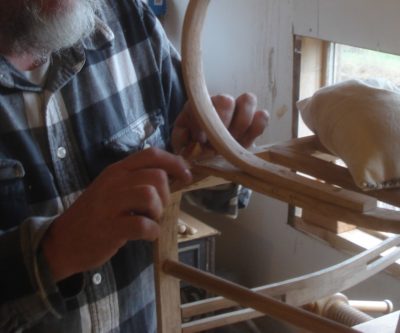
Given that the ultimate elegance of the Gragg chair is only partly due to the sinuous bent elements, much of the remaining contribution is through the further shaping of those elements via spokeshaving. Once the chair is assembled from the steam bent pieces, almost each of those pieces gets sculpted in place with the spokeshaves to present the unified whole. I have tried to shape all these elements prior to assembly but found that even then I had to go back and harmonize them all, so now I just do almost all of the shaping of those cross sections after the chair is all together. This requires very small spokeshaves to get the job done.


Recent Comments