Acknowledging three truths, namely that 1) folks have been generally resistant to coming to The Barn for workshops (I cancelled three workshops last summer due to lack of interest but am more optimistic for this year), 2) I think I have something to offer to an interested audience based on my 45 years of experience in woodworking and furniture preservation, and 3) I am comfortable and can work very efficiently when making presentations/demonstrations without a lot of wasted time. Given these three things I’ve decided to jump into the deep end of a pool already crowded with other swimmers.
I’ve made a great many videos before with Popular Woodworking, Lost Art Press, C-SPAN, cable networks, and dozens of live interviews and such for broadcast television. I am fairly familiar with the process and recently have begun what I hope is a long-term collaboration with Chris Swecker, a gifted young videographer who has returned to the Virginia Highlands after college and some time served as a commercial videographer out in Realville, to create a number of videos ranging from 30-45 minutes to several hours. Obviously the longer videos can and probably will be cut into episodes.
In concert with this endeavor has been the ongoing rebuilding of the web site architecture to handle the demands of streaming video (and finally get The Store functional). I believe webmeister Tim is in the home stretch to get that completed.
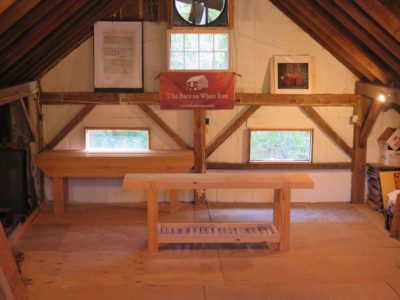
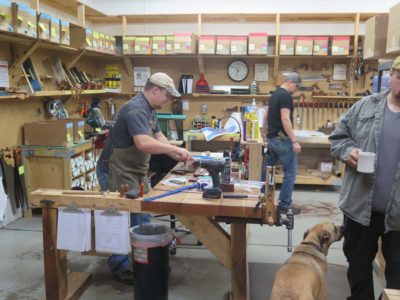
Beginning last autumn I turned the fourth floor of the barn into a big (mostly) empty room suitable for use as a filming studio. It is cleaned up, cleaned out, and painted with some new wiring to accommodate the needs but I have no desire to make it appear anything other than what it is, the attic of a late 19th century timber frame dairy barn. It is plenty big enough for almost anything I want to do.
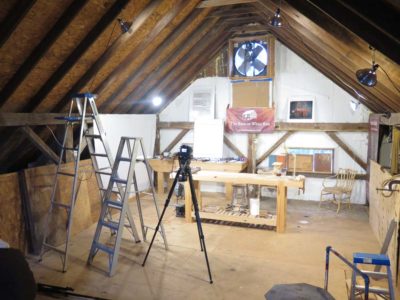

The only shortcoming is that the space is completely unheated and generally un-heatable, limiting somewhat our access to it. This issue came into play very much in our initial effort as our competing and complex calendars pushed the sessions back from early November into early December and the weather turned very cold during the scheduled filming. We had been hoping for temperatures in the mid-40s, which would have been just fine especially if the sun was warming the roof above us and that heat could radiate down toward us. It turned out to be cloudy and almost twenty degrees colder once the day arrived and we set up and got to work. We had to do our best to disguise the fog coming out of my mouth with every breath and I had to warm my hands frequently on a kerosene heater just to make sure they worked well so we could make the video. Yup, this will be a three-season working space for sure.
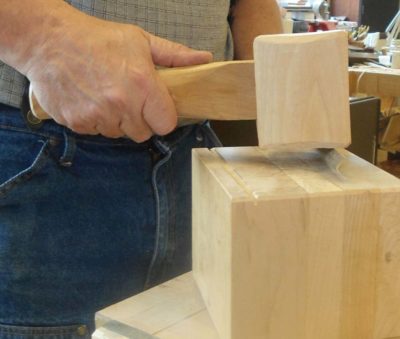
The first topic I am addressing via video is complex veneer repair. Based on my experience and observations this is a problem that flummoxes many, if not most, practitioners of the restoration arts. It was a challenge to demonstrate the techniques I use (many of which I developed or improved) in that this requires fairly exacting hand dexterity and use of hot hide glue, and the temperatures were in the 20s when were were shooting. It was brisk and oh so glamorous.
The electrons are all in the can and Chris is wrapping up the editing and post-production, so I am hoping to review the rough product in the next fortnight or so.
Paying for this undertaking remains a mystery and leap of faith. I will probably make this first video viewable for free with a “Donate” button nearby, but am still wrestling with the means to make this at least a break-even proposition. I do not necessarily need to derive substantial income from the undertaking (that would be great, however) but I cannot move forward at the pace I would like (5-10 videos a year) with it being a revenue-negative “hobby” either. I want to produce a first-class professional product, and that requires someone beside me to make it happen, and that someone has to be paid. As much as I am captivated by Maki Fushimori’s (probably) I-pad videos – I can and have watched them for hours at a time, learning immensely as I do – this is a different dynamic.
I continue to wrestle with the avenues for monetizing this just enough to pay for Chris’ time and expertise. I’ve thought about “subscriptions” to the video series but have set that aside as I have no interest in fielding daily emails from subscribers wanting to know where today’s video is. Based on my conversations with those in that particular lion’s den, subscription video is a beast that cannot be sated without working 80-100 hours a week. Maybe not even then.
Modestly priced pay-per-view downloads is another option that works for some viewers who are mature enough to comprehend the fact that nothing is free. For other viewers who have come to expect free stuff it does not work so well. I am ball-parking each complete “full-length”video at $10-ish, with individual segments within a completed video a $1. Just spitballing here, folks.
A third option is underwriting/advertising, but I find this unappealing as a consumer and thus unappealing as a provider. I have no quarrel with companies and providers who follow this path but it is not one I want for myself.
Finally there is always the direct sales of physical DVDs, which remains a viable consideration.
If none of these strategies work for me I will make videos only as often as I can scrape together enough money to pay for Chris.
At this point I have about 25 videos in mind, ranging from 30 minutes to several hours long. Our next one will require some “location” filming as I harvest some lumber up on the mountain.
Here is a potential list of topics for videos.
Making a Gragg Chair – this will no doubt be a series of several 30-45 minute episodes in the completed video as the project will take several months to complete, beginning with the harvesting of timber up on the mountain and ending with my dear friend Daniela demonstrating the creation of the gold and paint peacock feather on the center splat.

Roubo’s Workshop – L’art du Menuisier is in great part a treatise on guiding the craftsman toward creating beauty, beginning with the shop and accouterments to make it happen. I envision at least three or four threads to this undertaking, each of them with the potential of up to a dozen ~30(?) minute videos: the shop itself and its tools; individual parquetry treatments; running friezes, etc.
Making a Ripple Molding Cutter – A growing passion of mine is the creation of ripple moldings a la 17th century Netherlandish picture frames, and building the machine to make them. This topic is garnering a fair bit of interest everywhere I go and speak. I want this video (probably about two or three hours) to be compete and detailed enough in its content to allow you to literally follow along and build your own.
Building an Early 1800s Writing Desk – One of the most noteworthy pieces of public furniture is the last “original” c.1819 desk on the floor of the US Senate (home to a great many sanctimonious nitwits and unconvicted felons). All the remaining desks of this vintage have been extensively modified. This video will walk you through a step-by-step process of making one of these mahogany beauties using primarily period appropriate technology based on publicly available images and descriptions.

Oriental Lacquerwork (Without the Poison Sumac) – To me the absolute pinnacle of the finisher’s art is Oriental lacquerwork. It is created, unfortunately for me, from the refined polymer that makes poison ivy, poison oak, and poison sumac, well, poison. Driven by my love for the art form I am creating alternative materials employed in nearly identical work techniques. Tune in to see a step-by-step demonstration what can be done.
Boullework with Mastic Tordonshell – Very early in my career I loved to carve and gild, but that passion was re-directed more than thirty years ago to the techniques of Andre-Charles Boulle and his magnificent tarsia a encastro marquetry with tortoiseshell, brass, and pewter. Once I had invented a persuasive substitute for the now-forbidden tortoiseshell, a process demonstrated in exacting detail in the video, the sky was the limit.
Metalcasting/working for the Woodworker – This is the video topic I am most “iffy” about as many/most folks will be trepidatious of working with white-hot molten metal. But I just might give it a try to show creating furniture hardware and tool-making. It’s possible/probable I might make this a series of specific projects to make the topic more consumable.
Ten Exercises for Developing Skills in Traditional Furniture Making – Based on my banquet presentation at the 2017 Colonial Williamsburg Working Wood in the 18th Century conference this series of very approachable tasks for the shop will de-mystify a lot of historic furniture making for the novice in a very non-intimidating manner.
The Compleat Polissoir – starting at the point where Creating Historic Furniture Finishes left off this would be an in-depth exploration of the ancient finisher’s tool kit and will be expanded over the Popular Woodworking video (about which I am still very pleased) with a boatload of information gleaned from my in-the-home-stretch Period Finisher’s Manual for Lost Art Press.
I’m sure there will be more ideas popping into my fertile brain, or maybe that’s fertilizer brain.
As always, you can contact me with ideas here and once we get the new web site architecture in place, through the “Comments” feature that was disabled a lifetime ago to deal with the thousands of Russian and Chinese web bots offering to enhance my body or my wardrobe.
Stay tuned.
The complete 2018 Barn workshop schedule, which I will post every couple of weeks to help folks remember the schedule.
************************************************
Historic Finishing April 26-28, $375

Making A Petite Dovetail Saw June 8-10, $400
Boullework Marquetry July 13-15, $375

Knotwork Banding Inlay August 10-12, $375
Build A Classic Workbench September 3-7, $950
contact me here if you are interested in any of these workshops.
With the bench “assembled” I turned it over halfway and rough trimmed the bottoms of the legs. Even though I was handling it by myself, wrestling with a 350-pound behemoth is fairly straightforward if I am careful and make sure I am actually handling half or less of the total weight, which is the case if I am rolling or spinning it. With the legs cut to rough length I rolled it the rest of the way over so I could work on flattening the top for a couple of hours.
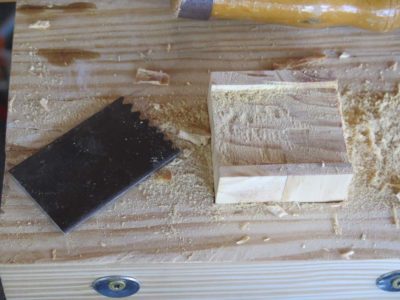
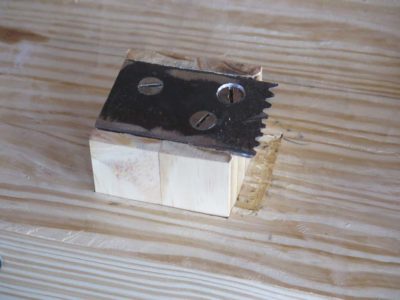

With the bench on its feet, but on a rolling cart so I could move it easily, I set about to installing the planing stop I had already glued up. I planed it such that the fit was very tight, counting on a few humidity cycles to induce ccompression fit on both the stop and the mortise in which it resides in the hopes of establishing a nice firm fit in the end. I’d wanted to put a full width (of the block) toothed tip on the stop but I did not have the piece of scrap steel in the drawer that could suffice so I just used what I had. I filed the teeth, drilled and countersunk the holes for some honkin’ big screws and assembled the stop. I also excavated the top of the bench so the entire assembly is flush.

photo courtesy of J. Rowe
photo courtesy of J. Hurn
With that I cut and affixed temporary(?) stretchers to the legs to support the shelf, Kreg screw style (without the Kreg jig), which on a decently built Roubo or Nicholson bench is the only functional purpose for stretchers. If mortised stretchers are needed to stabilize the bench structure, it wasn’t built well enough. Using scraps from the pile I cut and laid the shelf boards and attached the vise and for now, it was done. Come summer I will flatten the top again and call it quits. As it was the bench served my needs perfectly in Williamsburg to give me both a perfectly functioning work station and a focus for my sermon on workbenches and holdfasts,

While the glue for the laminated slab was setting I turned my attention to the legs and their integral tenons. As in previous efforts the three laminae of the leg are glued up with the center lamina off-set from the outer two by a distance equal to the thickness of the slab plus a smidge, using decking screws and fender washers as the clamping mechanism. These are removed after they have done their duty.
If I did my layout and glue-up of the top slab correctly, and cut the dovetail pins accurately on the tops of the legs, the double tenons are a perfect fit for the mortises already created in the top slab so all that is needed to put them together is a gentle tap to drive them home. Since the bottoms of the legs need to be trimmed to matching lengths ex poste the protruding excess is no bother to me.

Before I do that, however, I de-clamp the slab after letting it sit overnight and spend an hour or so getting the underside flat enough to seat the legs evenly. I do not care about the underside being smooth, merely flat. A sharp scrub plane and fore plane make short work of it, as I said it was a little over an hour to get it to an acceptable point.
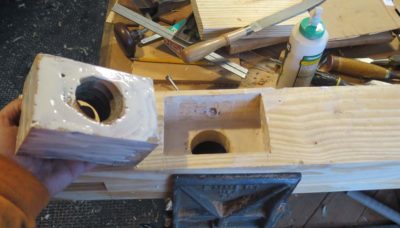

For this bench I did something I had not done before and remain unsure as to whether I would do it again. Since I was installing a vintage screw and nut from my stash I decided to inset the nut into the back side of the front left leg, where the leg vise would be installed since I am right handed (if you are left handed it goes at the other end). Doing this was no particular bother but I am unconvinced of its efficacy or necessity. I also cut the through-mortise on the lower leg for the pin bar of the movable chop/jaw.

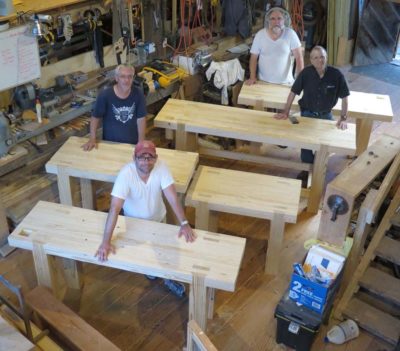
Before long I was assembling the bench and as you can see the space was ridiculously tight with not only this bench but two ripple molding machines being tuned up for the conference. Since this is the only heated working space I have, everything that needed to be worked on for WW18thC was there. It got to be pretty chaotic for a while. I am not particularly tidy as a workman and that shortcoming becomes really evident at times like this.
At this point the bench was assembled and I was at the 12-hour mark for the project.

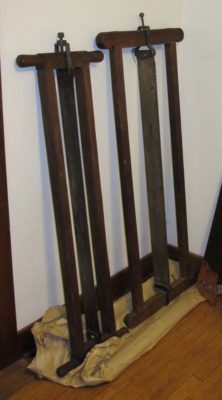
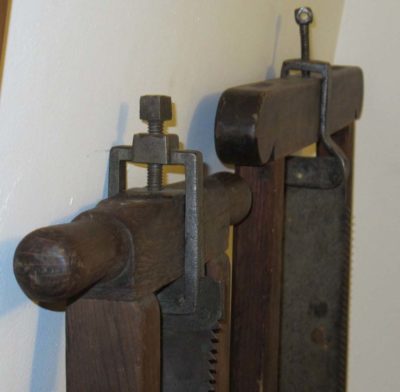
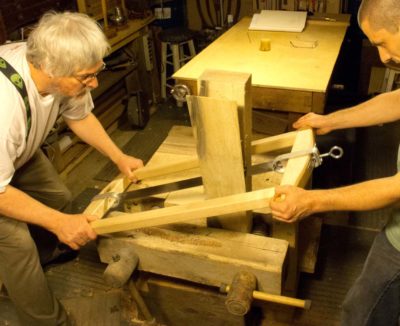
In recent years my projects and inclinations have guided me towards more diminutive work in thinner stock. This makes cutting dovetails somewhat of a challenge when using a standard saw, which is often too aggressive and thus harder to control effortlessly. As a result of that I began exploring the prospect of fabricating my own petite dovetail saw. I wound up making several with good-to-excellent results. We will replicate that process and send you home with your own.

If you have a particular piece of wood to use for the handle (tote) feel free to bring it to work with. Otherwise I will provide all the materials for this workshop. We’ll aim to fold and finish the back, taper and insert the plate/blade, fit and fashion the handle to your hand, and file the teeth.
The tool list for the workshop is a short one and will be sent to attendees well before the event.
****************************************************
The complete 2018 Barn workshop schedule:
Historic Finishing April 26-28, $375
Making A Petite Dovetail Saw June 8-10, $400
Boullework Marquetry July 13-15, $375
Knotwork Banding Inlay August 10-12, $375
Build A Classic Workbench September 3-7, $950

While visiting Mark Harrell recently our conversation returned to a topic we had engaged in previously, namely that of the repertoire of saws in an 18th century Parisian workshop. Whatever they had, Mark wants to try to make it.
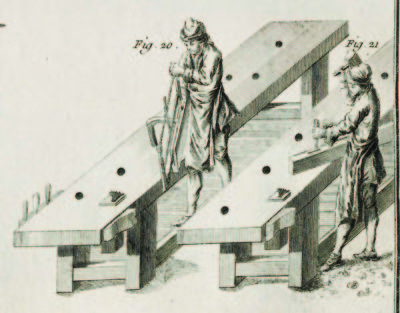
The literary evidence is pretty clear that the workhorse saws in these shops were frame saws for much of the heavy dimensioning (ripping) work and bow saws for the rest, including joinery. (Roubo makes no references to back saws) We might tend to see bow saws as a northern implement, coming from Scandinavian and Germanic traditions, but Roubo places inordinate emphasis on their use and utility in the Paris of his time.


The variations within this theme are many, but at present I am trying to brainstorm about adapting Roubo’s images and descriptions to the tasks of a workshop in 2018. I am starting from the premise that the saw plate Mark developed for the frame saw should serve equally well in a bow saw with the plate fixed parallel to the plane of the frame. With that in mind I have been noodling the designs and begun replicating at least one of a pair of Roubo bowsaws (the other being a compass or “turning” saw, so noted as having a shallow blade that can both follow a curved cut and be rotated in the bow handle for greater facility) in time for demonstrating at CW next week.
Hoping for success. Wish me luck.
My recent trek around Flyover Country included an intersection between my path to my home town in southern Minnesota (the tropical part) and LaCrosse, Wisconsin, home to Mark Harrell and his ambitious enterprise Bad Axe Tool Works. I’ve been collaborating with Mark for some time on the development of a frame saw/sash saw with the promise that he would put one in my hands.
As the owner of two c. 1800 four-foot frame saws I was delighted to share the particulars about them with anyone who wanted to know. Their details are spectacular, from the hand forged hardware to the forged plates in near-perfect condition. (by that I mean there are no kinks or missing teeth, there was plenty of surface rust and the teeth needed touching up)
Like other saw makers, Mark contacted me some time ago and I took the time to talk with him at length about the vintage saws I have, in addition to the diminutive version I made for myself. Mark was particularly interested in a model halfway between my vintage big ones and my new smaller one, and we worked out the details over many emails and phone calls, an interchange I welcome from any tool maker who wants my two cents worth. To this point my only fee is that I get one of the tools in question if they ever go into production. I think Bad Axe might have had this model at Handworks 2017, but I was so busy I could never get to their station once they got set up, so this was my chance.
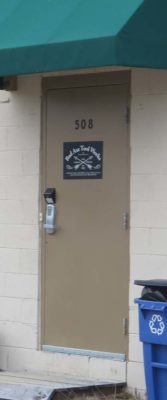
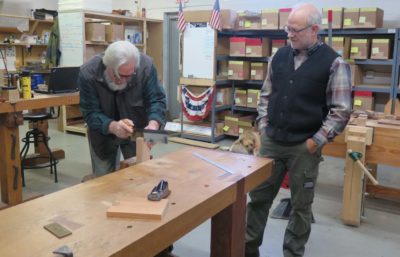
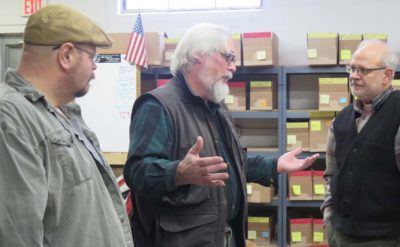
Accompanied by The Oldwolf, Derek Olsen, we arrived late-morning. And the saw geek-dom commenced. Behind this modest door and awning is a buzzing hive of saw making.
Mrs. Barn and I got a quick tour of the facility, getting the opportunity to meet and greet each of the the sawmaking elves there.
I was especially impressed with the classroom they have set up there for saw making and sharpening workshops. Mark definitely has the leads for mondo saw sharpening vises and setters.
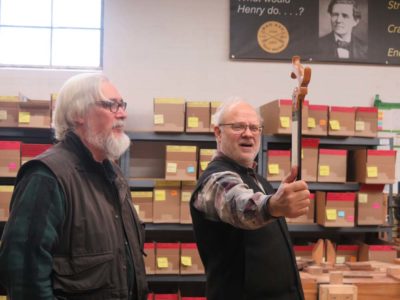
Then we got down to the real fun as Mark brought out several models of saws for me to play with. I already own two Bad Axe saws, including a custom made dovetail saw I commissioned and that has now become ensconced in their product line. Under Mark’s watchful eye the playing commenced, and it was glorious!
Our exploration of the topic continued almost non-stop and we were torn between talking about saws, and sawing.
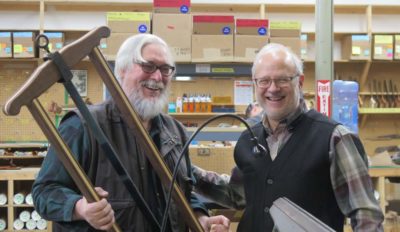
Then came the “official” purpose of the visit, taking delivery of my own Bad Axe frame saw based on Roubo, my old saws, and my new one, with a bit of Bad Axe special sauce tossed in for good measure.

It performed perfectly right out of the box and will be integrated into my shop work as soon as it gets home.
More about the visit in the next post.
Notwithstanding the fact that I believe we are living in The Golden Age Of Woodworking Tools, the precipitous decline and apparent imminent demise of Sears/Craftsman is a cautionary tale, although I remain uncertain of its ultimate meaning. As a devotee of Joseph Schumpeter’s “creative destruction” premise, I do not mourn Sears/Craftsman’s passing as much as I celebrate the role going to the Sears tool department played in my early life. The tool department was large, the shelves fully stocked with high quality products, and the sales folks knew what they had and how to use it. Really. That is probably incomprehensible to anyone going to Sears now, but it was true in 1970.
The trips there with my Dad were too numerous to recall, and were equal parts utilitarian errands and incalculable treasure hunts. Our bond of toolism and tinkering was foundational, continuing until the day he took his final breath and we parted with no unfinished business. In fact that bond remains as after his funeral my brothers and I divvied up his tools, some of which get used in my shop now.
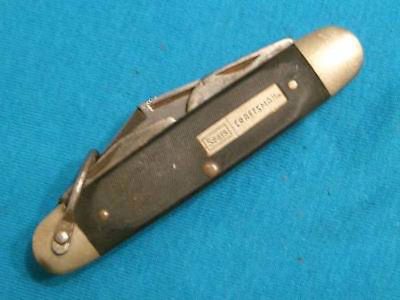
The first tool I ever bought with my own lawn-mowing money was this pocket knife, still in use 49 years after its purchase. (full disclosure — I could not lay my hands on mine at the moment, it is probably in a pair of pants or overalls that I have hanging on some hook in some closet. This is an identical one I saw on ebay.)
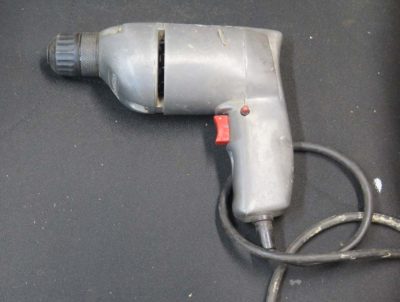
My first power tool was this 3/8″ Craftsman drill, still going strong after 47 years. It’s a low-speed, high torque unit that can just as easily spin you around if used carelessly. The only changes from the day I bought it are a new power cord and Jorgensen chuck.
I still have many other wrenches, sockets, and screwdrivers from the same store bought around the same time. None has ever given me a lick of trouble.
But recently my mondo Craftsman Shop Vac gave up the ghost, after only 44 years of faithful service. Or at least I inferred that it was dead based on the acrid smoke shooting out of the motor casing moments after it ceased operating with a snap, crackle, and pop. I did not even bother with an autopsy, merely cutting off the power cord and taking the canister lid to the dump (I never throw away a good power cord). I saved the rolling base, it still serves as a receptacle for scraps.
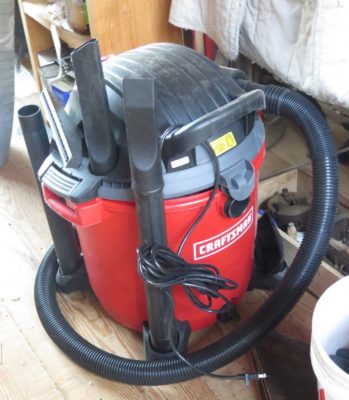
On the way home from the dump I stopped at our local farm coop and hardware store and bought a successor model. Given the current state of Craftsman products, I guess I will only get 30 years or so from it. I can only imagine how cranky I will be shopping for a new one at 92.
Some time last year I wrote an honorific on behalf of the clothespin, an integral tool in my workshop.

I’ve overlooked another vital function of this remarkable tool — if you get better-quality pins, as I do, they can be used as wonderful little shimming wedges for leveling something as heavy as a work bench or as a clamping wedge for something as delicate as carved tortoiseshell. I recently moved my workbench a foot or so and it wobbled just the slightest bit. I probably could have worked with it, but alas a wobbly workbench is one of my craziness-inducing hot buttons. So I just grabbed a maple clothespin, took one half as the quick and high-performing wedge shim, and tossed the other half back into the container with its mates for the next time I need another tapered shim.
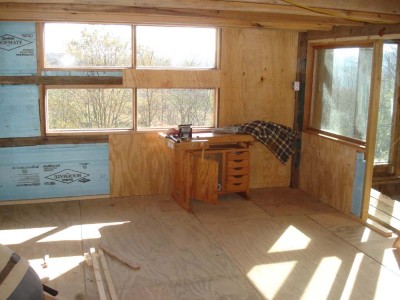
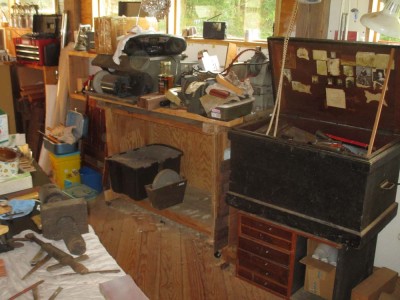
My studio space in the barn is a work in progress. It has been so since the first day I put a single, raggedy workbench in there several years ago even before all the walls were up, and the process will continue as long as I work there.
I find that the fluid nature of shop organization is one of the threads binding craftsmen together, and a source of celebration when we gather together. Fortunately for me, I do not have the urgent requirement for maximized cash flow velocity generation from my work space, since my primary source of income these days is in the crafting of words while sitting on my recliner.
And, since I have been limited in the scope of my activities recently I have been reflecting on, and to some degree changing, the spatial flow for the studio. One of the advantages of this long lead time of several years of working there is to evolve a better sense of what the space should be to best serve my needs. And now I am making those changes, albeit slowly as there is only so much you can do on one leg.
I’ve already written about the reconfiguration of one corner to more optimally serve as my bench for doing the “fussy” work I encounter frequently in the conservation and restoration of decorative artifacts, and increasingly the repair of vintage gun stocks.
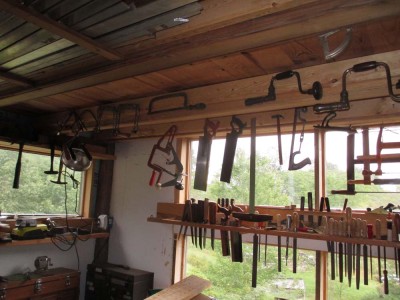
Other issues have nagged me, and are now in the process of being resolved. The first of these was my inadequate space in a single location for the residence of my hand planes. I liked the space I had chosen, directly over the planing beam, but I needed to consolidate all my inventory, which involved several steps.
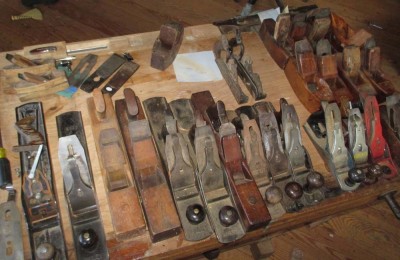
First, I started undertaking a serious evaluation of many of the planes marginal to my work, deciding what to keep and then tossing aside planes that took up space but were not part of my working regimen. Down they came and out they will go.
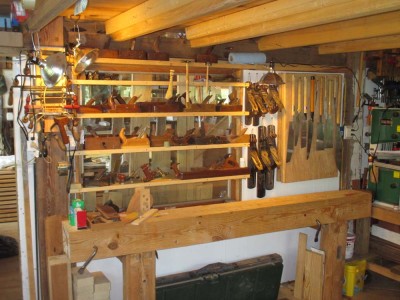
That cleared some space, but not enough. So, I added more shelving without adding more shelves. How? By simply doubling the depth of the shelves in situ. Why I did not do this from the git go remains a mystery. Then I removed the silly brackets holding my Stanley/Bailey planes and hung them on the wall.
Presto! The result is twice as many planes in the same visual space.
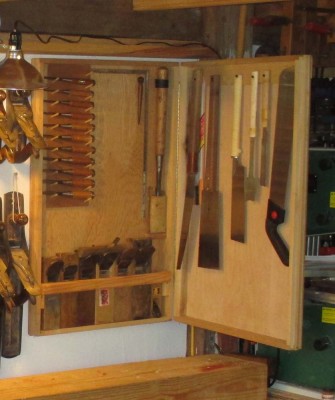
The next move was the consolidation and moving of my Japanese tools from a nearly inaccessible place on the east wall to a cabinet in the remaining niche over the planing beam. With saws on the outside and more saws, chisels, planes (and space for more on the inside) I am pleased with the result. (You needn’t scold me that I have the planes upside down in storage — I do not care)
Two final (?) issues to be resolved are the rat’s nest of a space halfway down the long north wall, which had become nothing more than a pile of stuff, some good, some less so, but all in the wrong place. This hodgepodge will be replaced in October when I build my Nicholson bench prototype for the rescheduled Refinisher’s Group bench-build (probably May 2016). This can serve as another work bench and my sharpening station.
And I keep asking myself: with such a wealth of windows, why do I keep covering them up with stuff? Without a good answer other than, “Because you are an undisciplined slob,” I have begun to deliberately move many of the tools that were blocking the view to somewhere else, like alongside the overhead beams. That one will take a fair bit of trial and error to bring to fruition.
But I am determined to travel much less in the coming year or more, and pouring my time and creative energies into the barn and homestead. This will allow much in the way of improvements and I am anxious for them to unfold.


Recent Comments