
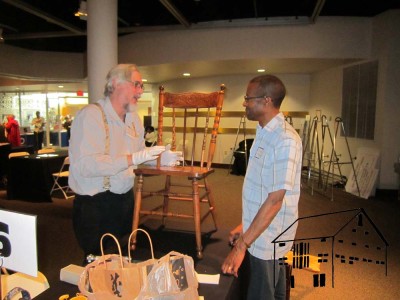
This past weekend I was in Ft. Lauderdale, Florida, participating for the eighth time (over five years) as an artifact reviewer for the “Saving Our Treasures” program” of the Smithsonian’s National Museum of African American Heritage and Culture. Even though I am retired from SI they asked me to come back as a contributor, and since I have always enjoyed working with those colleagues I asked my wife about it. I am not especially a “people person” and do not like to travel, so I was somewhat ambivalent. Her response was enthusiastic. “Are you kidding? A trip to South Florida in January? I’d say ‘Yes’!” So off we went.
In these events local residents are encouraged to bring in a few of their family treasures to get preservation and historical information about them. We did not provide any value assessments or appraisals, with only one exception this weekend when we advised one guest to insure a painting for substantially more value than he was considering.
My fellow reviewers and I always enjoy these teaching opportunities, helping folks understand their artifacts, and the histories around them. This appears to be also true for both the guests and the younger museum staff, many of whom are just beginning their careers and seem to enjoy listening in on the conversations between the visitors and the old coots like me who have in some cases been looking at artifacts for most of a half century. My role is to provide whatever technical information about the artifacts I can discern using my standard toolkit of a headloop or surgical binocular , ruler, and a UV-vis flashlight – what they are and what they are made of, what their general manufacturing technology was, what condition they are in, and how to best preserve them.
The line-up of fellow artifactualists makes for a delightful weekend of artifact-looking and interactions, and I am pretty much assigned almost any kind of three-dimensional artifacts to examine. Coins, china, icons, dolls, cameras, furniture, paintings, ivories, plastics, jewelry, lamps, clocks, etc. One of the most unusual things I saw this weekend was an early electric iron, not in itself especially compelling. But, get this – the iron was a 250-volt unit! I’d never even heard of a 250-volt electrical grid, and could provide little if any historical-technological context for it. But there it was.
The furniture for the weekend was pretty scarce, but in this instance the very best was saved for last as a guest has two pieces of handmade furniture from Jamaica that had passed down through many generations. One chair was a hand-made side chair fashioned to mimic a standard c.1900 mail-order-catalog purchase, complete with detailed hand carved designs to imitate die-stamped embossing. It was peculiar to find a chair that from every gross feature could have come from the Sears catalog of 1890, yet was indisputably hand made.
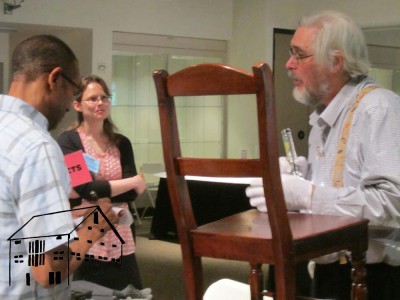
A second chair from the same guest was a simple, true mahogany “church chair” containing all the marks of hand-making rendered by every step of the making process; saw kerf chatter on the underside of the seat slab from the original timbering, layout lines for the off-set tenons and mortises, draw pins, scratch beading, the whole works.
It put a terrific exclamation point to the whole experience. Thanks NMAAHC folks for the invite.
As an aside, we found an amazing restaurant near the beach in Deerfield Beach, Florida. If you are in the neighborhood and have a hankering for the best Mexican food ever, go to the Casa Maya Grill. You will not be sorry.
Many of you have gone through something like the Autumn of 1987, perhaps with similar results.
In my case I had settled nicely into my job as Senior Furniture Conservator at the Smithsonian Institution. Daughter number 1 was flourishing as a toddler, daughter number 2 was on the way. Most of the structural work for a second expansion of the house was underway and needing to be completed and closed in. (I remain astonished at the level of energy I must have had to work a full time job all day and work until midnight for months on end to eventually triple the size of the house) But, the finishing of the interior spaces had hit a hitch. We needed new square footage more urgently than we needed window trim.
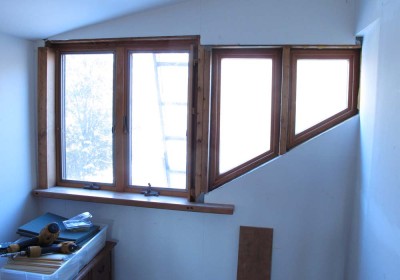
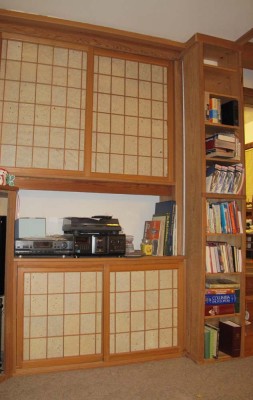
Flash forward to 2014. We are continuing the struggle to get ourselves moved out of a house after almost thirty years. And there is that one corner in the back of the master bedroom that had been behind three bookcases, a desk, and a large filing cabinet for all those years, windows installed but never trimmed out. As the bookcases were emptied and moved out, the space was accessible for the first time in decades. Fortunately all that vintage cherry for the window trim had also become uncovered in the basement shop with the recent move of most of its contents last month. (Virtually all the trim in the house is vintage woods from the mid-19th century – living room with shoji with mulberry bark ,paper and the bedroom above it trimmed with exquisite c.1840 cypress from a railroad water tower, the dining room, library, and music room in black walnut, the master bedroom and bath in black cherry, etc.)
Finally after almost thirty years I am completing that long-unfinished task of trimming out the windows in the corner. In so doing, I have had the opportunity to reflect on the long and winding road of my own growth as a woodworker.
Stay tuned.

I posted this update on the Roubo and Studley projects.over at Chris Schwarz’ Lost Art Press Blog. Please drop by there and give it a look.
Today was a moving celebration in our clan as we attended the graduation of our older daughter, receiving her PhD diploma in Physics (Non-Linear Dynamics) along with her doctoral hood. I cannot deny the presence of moistened eyes in our company. Parenting is for ever but today we saw a result of our years of child rearing.

After being a high school valedictorian (as was her younger sister) she attended a rigorous small college and flourished there as well (ditto). For grad school she wanted to go a much bigger university, so she went where the Physics Department was larger than her entire undergraduate class. It was a culture shock but she excelled again, and is now an assistant professor at a prestigious smallish university.
My wife is among the smartest and wisest people I have ever met, and this apple does not fall far from that particular tree.
Congratulations, my beloved daughter.
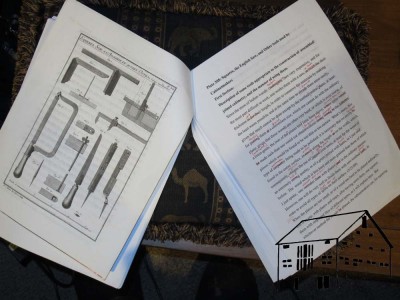
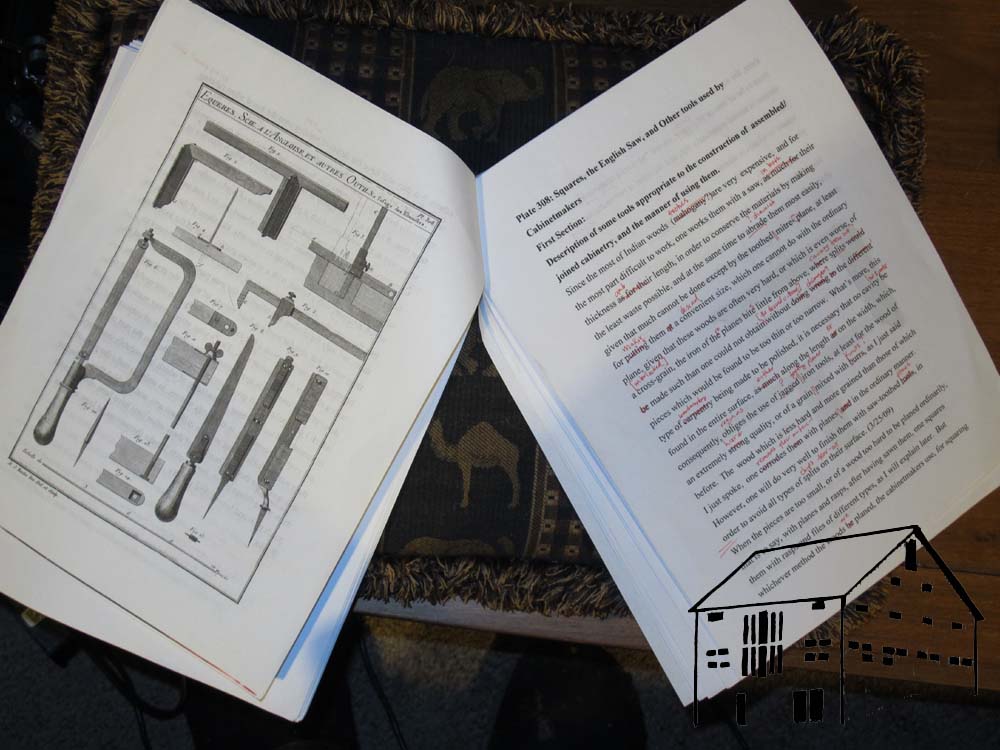
With Christmas less than a week away the most intense period of editing, revising and annotating for To Make As Perfectly As Possible: Roubo On Furniture Making is drawing to a close. I have spent nearly every spare waking moment working on it since about July.
I am making my way through the 250-page-printout behemoth that is the final chapter of our book (84 12×18 text pages and over a dozen very complex illustrated plates in the original). This chapter, Volume III, Section 3, Chapter 13, “Of Solid Cabinetry or Assembly in General” is in some respects the most fascinating chapter of the treatise in that it presents turning, screw cutting, locksmithing, metalworking, flute cutting and wave-molding machines, all esoteric and fascinating stuff. It resided, awkwardly in my opinion, in the middle of the sections on marquetry that comprised our first volume of TMAPAP, so I took editorial license and moved it to this volume.
Depending on familial, seasonal, and travel activities I expect to wrap this up in less than a week.
The vigorous badminton match wherein we launch manuscript pieces back and forth over the (inter) net has begun in earnest.
While getting ready for the big move of shop machinery this coming weekend — packing, sorting, throwing out, and disassembling — while packing I was reminded of this snazzy little ultra low-tech air scrubber I built for the basement shop several years ago. Since my shop is directly under the living space of the house, and I am a varnish and glue sorta guy, my need for odor control was pretty prominent. I came up with several solutions, ranging from dealing with small amounts of fumes through the need for spray finishing when the need arises.

This little beauty is one I built for the control of the nuisance fumes attendant to using hot hide glue and solvent based coatings systems. It took about fifteen minutes to make, and works so well that I have never received a complaint about basement stink.
Here is all you need to make this air scrubber, which can perform flawlessly for pretty much the rest of your life.
1 recycled computer fan
1 cardboard box about the size of a cube slightly larger than the fan frame
1 salvaged power cord (I routinely snip and salvage the power cords from EVERYTHING that gets tossed around here, it’s a circle of life thing)
1 piece of scrap plywood the size of the box
a jar of clean activated charcoal aquarium filter medium
a hot melt glue gun and a few screws and bolts, etc.
some scraps of metal window screen
First place the fan against the top or bottom of the box, mark and cut a hole the size of the fan blade.
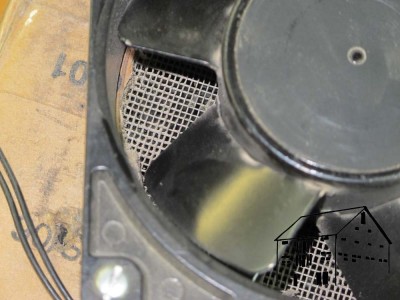
Cut a piece of the metal window screen to fit over this opening, and glue it in place with the hot melt adhesive.
Since I wanted a down draft unit, I attached the fan to the box to cover the opening such that the fan is blowing into the box. I used small nuts-and-bolts from the box of miscellaneous fastners. Using a recycled power cord I wired it up. (my fan is a bit askew because I dropped the unit several years ago and the bolts pulled out, and I did not have another box the right size at the moment, hence the new orientation with new bolt holes)

Cut the scrap plywood to fit the opening of the box, and drill a series of holes to allow air flow. Glue a piece of the window screen to one side of the plywood so that all the holes are covered.
As my scrubbing medium I used aquarium filter activated charcoal purchased at a local pet store. I poured some of this into a pasta screen to allow the littlest pieces to fall out. The remaining charcoal, beginning with the size of rice grains and larger will be used as my air-scrubbing medium.

I turned the box over so that the fan was on the bottom and filled it with the activated charcoal. After shaking it gently a bit, I dropped the plywood square into place and pinned it there with some small screws. I cut out some openings to make four legs and four air channels for the downdraft flow, and the unit was finished.

The unit works well at scrubbing nuisance odors out of the air 24/7/365. this one has been providing yeoman’s service for almost ten years, although I swap out the charcoal every year or so. I especially like the fact that at about 1 pound I can pick it up and move it to wherever I am working with small amounts of solvents or the like. for example, when I am polishing metals or tortoiseshell I simply place the scrubber on the bench right next to where I am working, and don’t even need a fume mask.
Will it keep the living room from stinking if you are using gallons of paint remover in the basement? I’m guessing the answer would be a NO! But for ongoing odors from shellacking, gluing, polishing, and a little spot spraying with aerosol, it works fine for me. More intensive applications require a larger unit I will write about soon.
These days I am spending far more time slogging than blogging as I work my way through the 125,000 words of To Make As Perfectly As Possible: Roubo on Furniture Making. Deadlines, even self imposed ones (I am determined to get through the manuscript with a complete first pass by mid-December) do have a way of reducing the whimsical charm of a project. But there are moments…
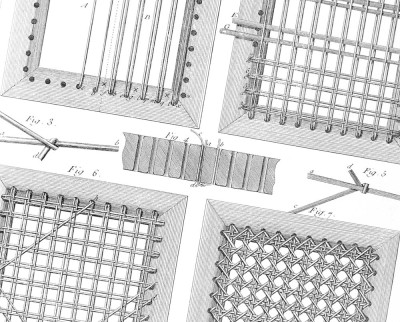
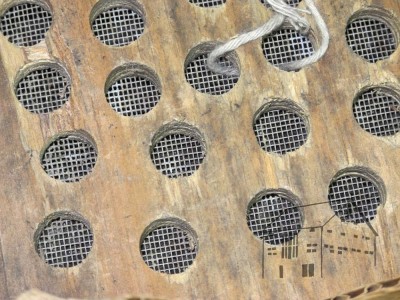
This evening was one of those times that reinforces the delight of beginning and reaffirms my commitment to the Roubo annotation. I was wrapping up the general chapter on the making of seating furniture. The description of upholstery techniques was grand (as soon as I finish the following chapter in the next couple of days I will forward them to one of my readers for confirmation of the descriptions), but the last fifteen pages of the chapter wherein Roubo describes the material technology and techniques of cane preparation and weaving was simply elegant, eloquent even. The wordsmithing of Andre-Jacob as transmitted by Michele melded into something approaching the sublime for those pages. I was honestly sad to see them go.
Simply breathtaking.
It made me ever so grateful for the ability to read, to understand and appreciate words and the information and ideas they convey. I simply cannot comprehend the widespread desire for willful illiteracy, which is all about me outside these walls. Heck, only a dozen miles away are a legion of belligerent flaks and flunkies whose duty is the eradication of words, or worse, their meanings, surrounded by a populace that apparently welcomes the relief from being responsible for learning, knowing, understanding, and acting.
Down off the soap box now.
A week of travel, during which I was mostly without connectivity, and the final push to get through the first round of edits and annotations for “To Make As Perfectly As Possible: Roubo on Furniture Making” (T minus about 15 days and counting…) has taken a toll on these missives at Musings at The Barn on White Run.
Still, I wanted to wrap up the project on the gargantuan picture frame featured last time.
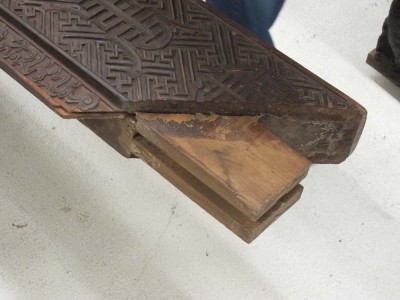

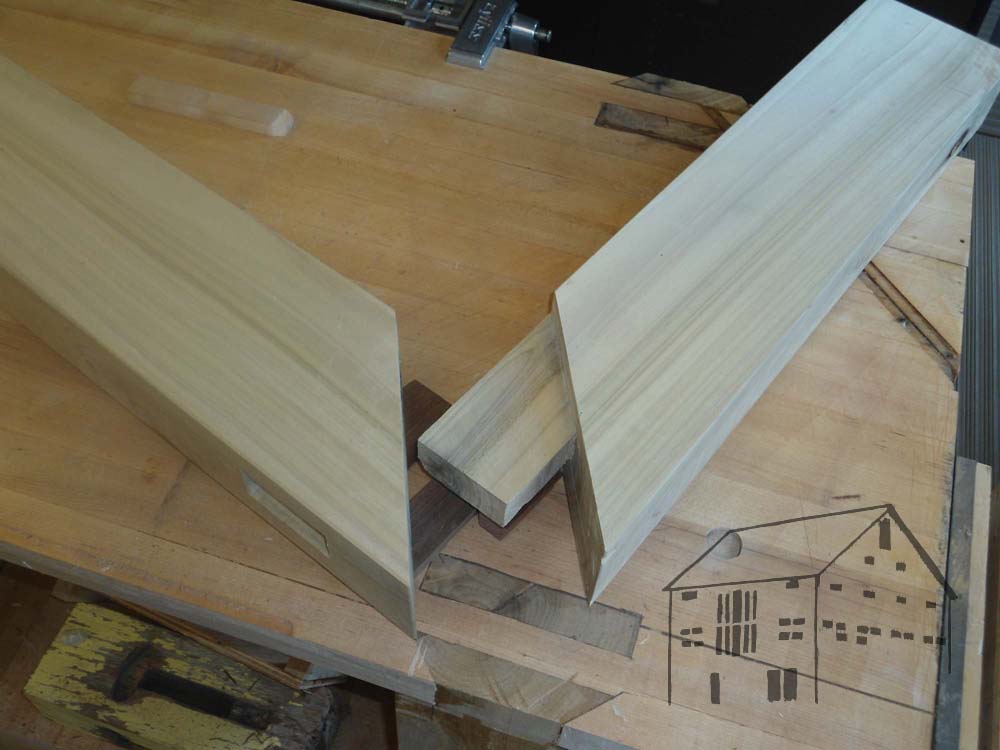
One of the critical things about a frame that large is that is must conform to the painting inside, and even the smallest deviation will result in calamity when projected out over ten or twelve feet. The sub-assembly that houses the painting was assembled with mitered double mortise and tenon joinery at each corner, and the joints were not tight. Originally they were glued together with hot hide glue, but for this project the desire was to prepare the ensemble for traveling exhibit, mandating as a result that the entire unit be disassemble-able. Glue was out, so the joints had to be assembled and left friction-fit. This allows for just enough wracking that the fit of the painting could not be assured.
Another solution was called f0r.
When first presented the problem I chewed on it for a great while, then proposed and devised an “after market” locking cleat assembly for each of the four corners, to be applied on the verso of the corners once the painting was installed and the configuration of the frame was established.

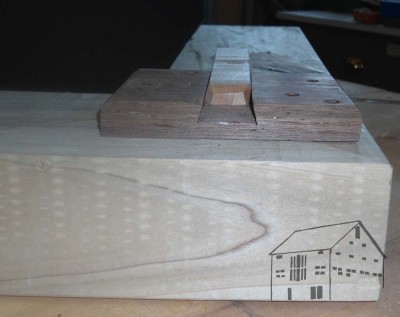
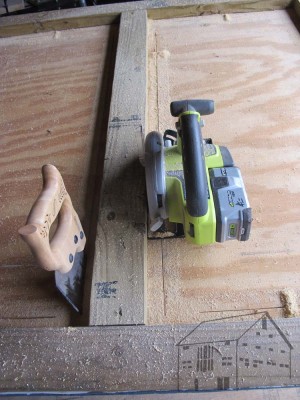
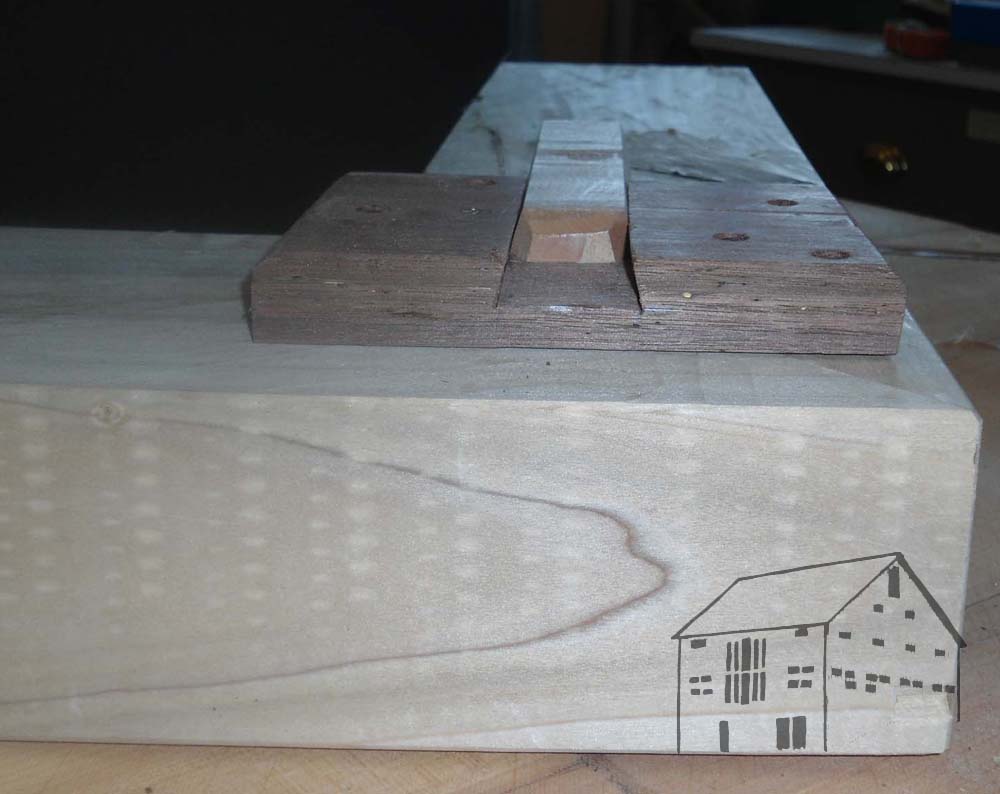
Using some 4×6 tulip poplar stock I had laying around I fabricated an analogous corner at about 2/3 scale,
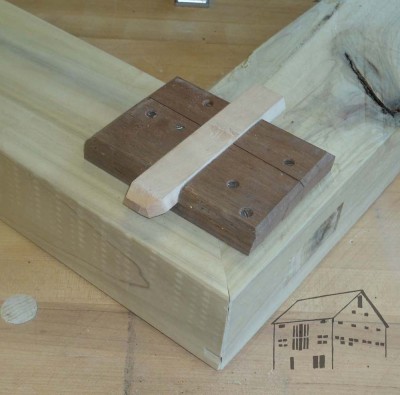
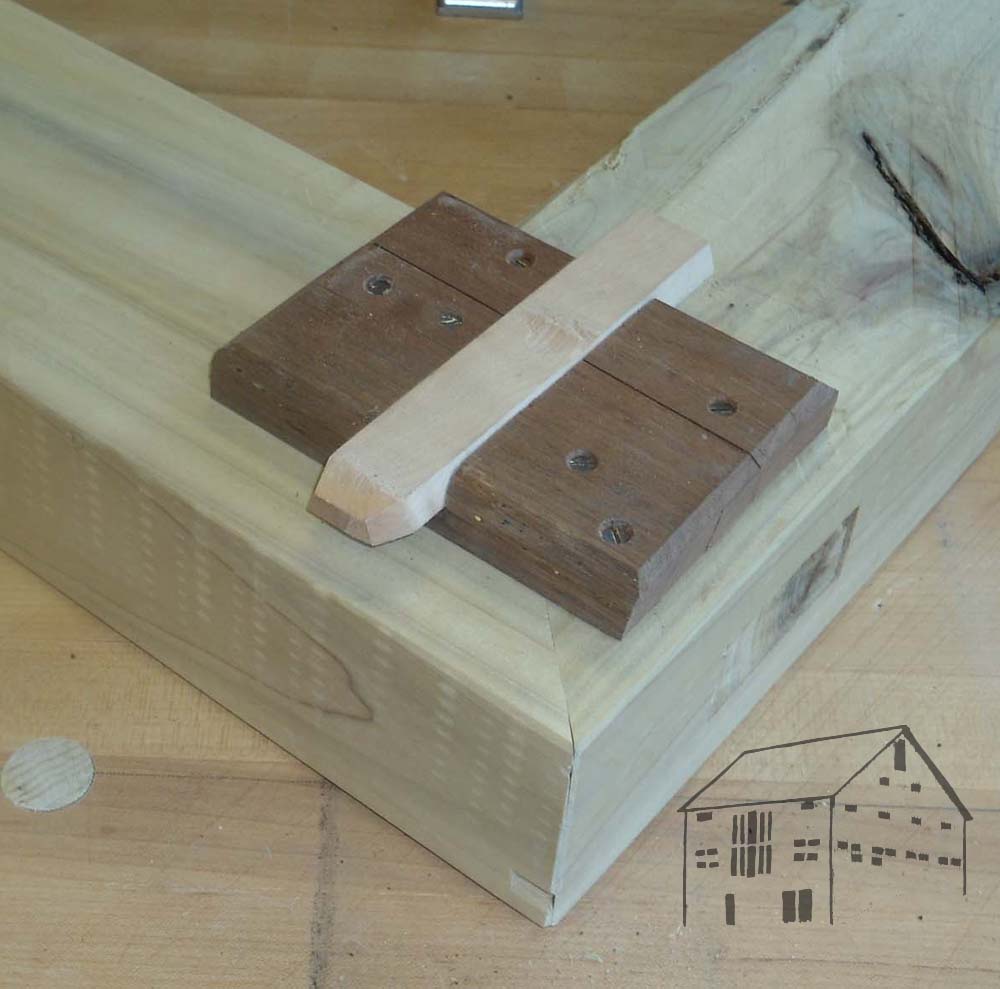
then designed, fabricated, and installed a quadruple dovetailed cleat-and-lock system to be affixed to the corner. It worked perfectly, and when presented to the curator and project conservator from the museum who owns the artifact, approval was enthusiastic and immediate. Earlier this month I fabricated the four corner units, mostly on my table saw at home. Each piece is tapered and beveled at 5 degrees.
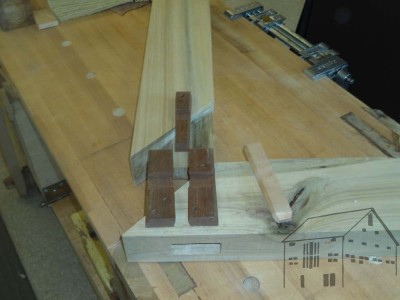
A double-taper set of cleats is first attached to the assembled corner,

positioned so that when the mortises are seated, the cleat is perfectly aligned.
Then a double tapered locking pin is driven in to a double tapered sliding dovetail, rendering the entire assembly immobile.
The status of the project is that we will be installing the painting some time in the new year, and once the painting is fitted perfectly in the currently sorta-loose frame I will attached the new cleats, and the assembling process will be finished.
.
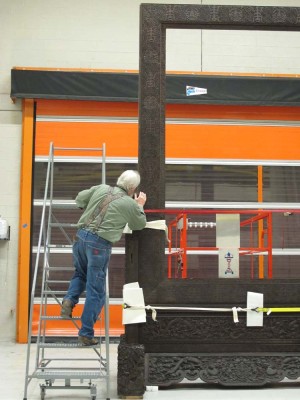
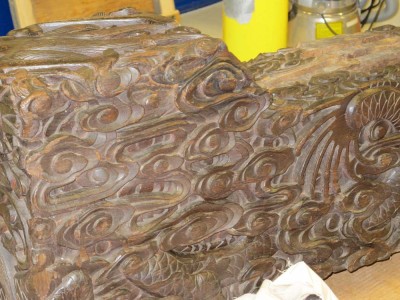
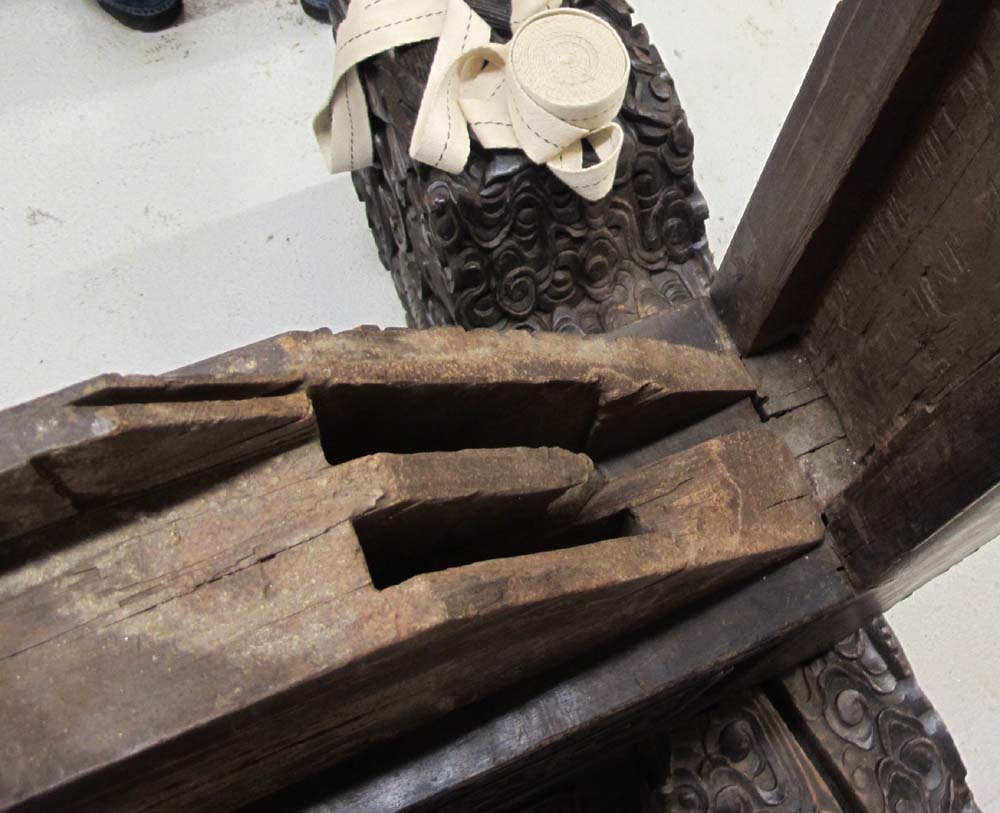
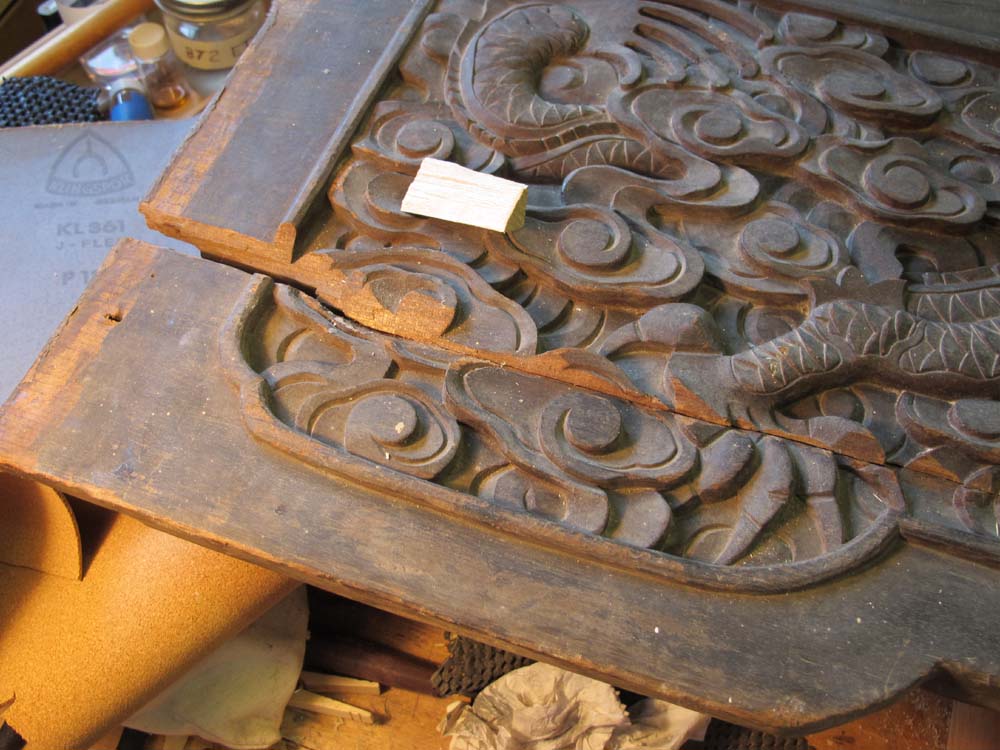
In the closing months of 2012, as I was approaching departure from the Smithsonian’s Museum Conservation Institute after almost three decades, my major project was the conservation of an ornately carved monumental picture frame. By monumental I am not talking about merely big, I am referring to an assemblage weighing just under 3/4 ton and standing eighteen feet high! In form the frame is akin conceptually to a Federal-style shaving mirror that you might find on top of a dresser.
Over the past two weeks I have gone back in to my former work place to finish off the project, which had been sitting idle for the past eleven months.
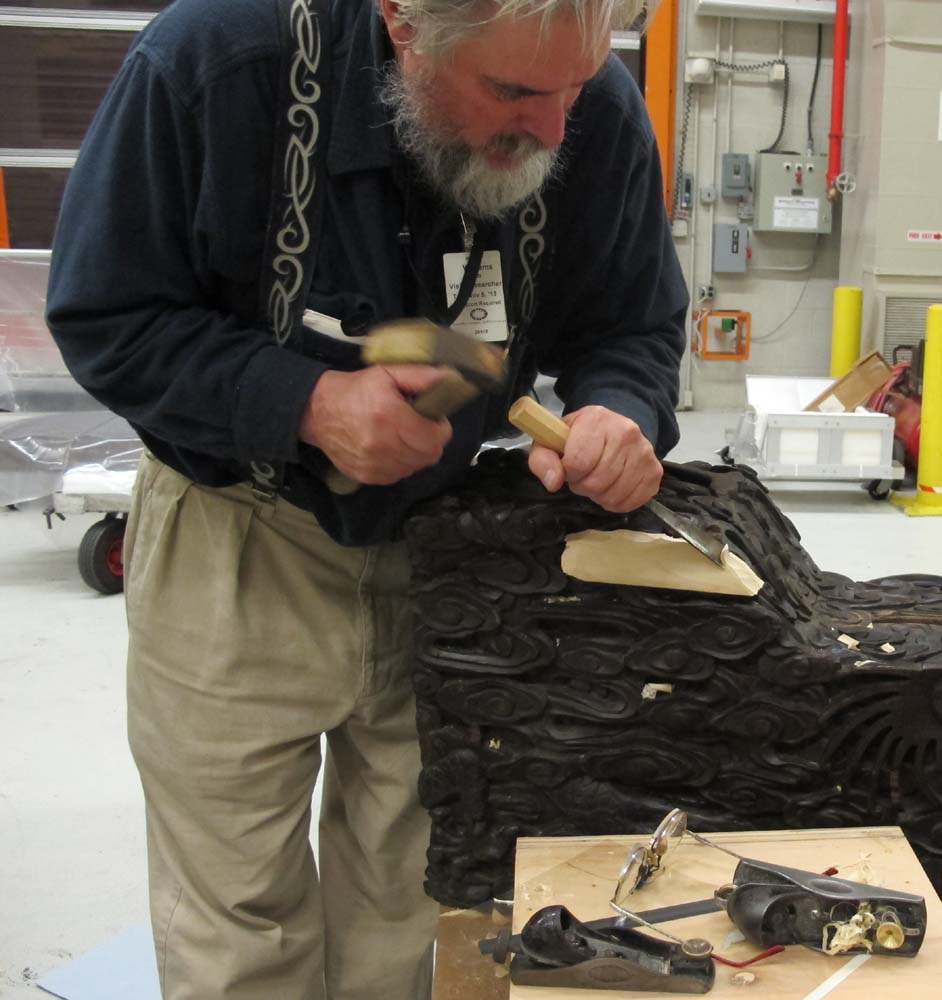
The main focus for my days of work has been the carving of missing elements and the completion of the presentation surface.

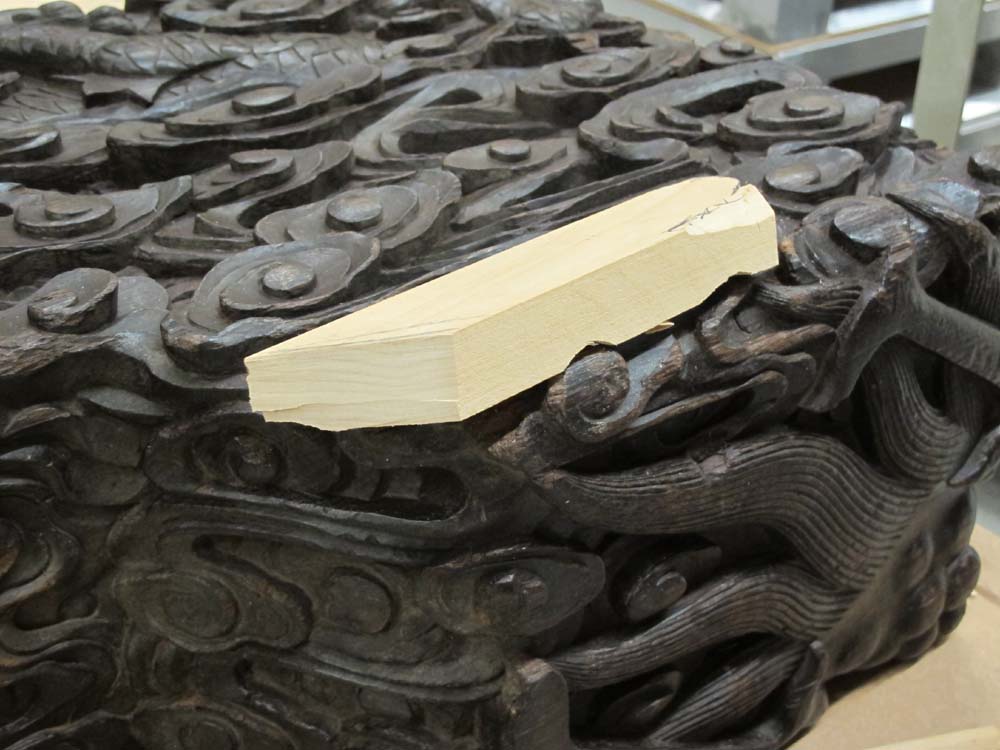
One corner of one of the bases was pretty much gone, so I had to graft in a chunk of cotton wood and EVA filling adhesive (a general process I published in this paper) and get out the carving chisels. While we did not conduct scientific wood analysis on the frame, the character of the wood suggests it was fabricated from paulownia or something very similar, so my options for grafting in new material to carve resided in the cottonwood-paulownia-tulip poplar nexus.


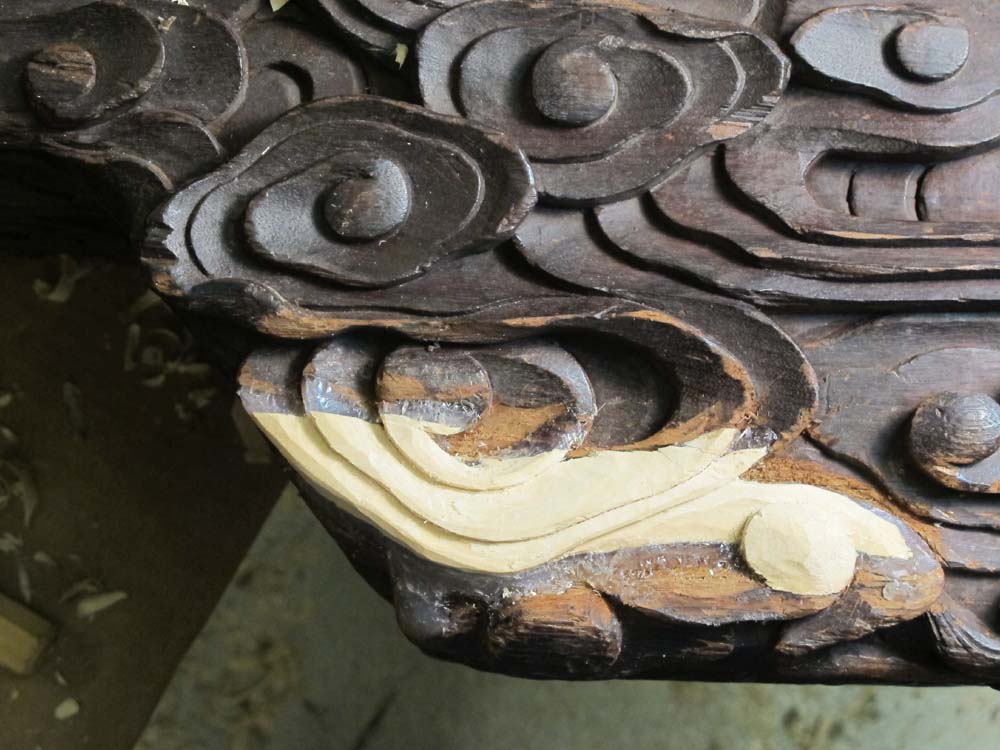
Since the loss was enough that I was uncertain of the design element, I had to make it up as best I could.
The final result was not displeasing.

Other areas, mostly opened splits, needed to be filled and carved as well. Some of this had started a year ago, but was not yet done.
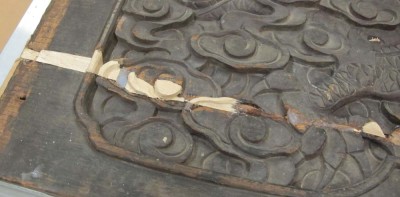
Again, I used cottonwood as the primary wood fill material with gap-filling, flexible but carveable EVA as my adhesive.
Once all the carving was complete I lightly toned the new wood with gouache then sealed the entire area with Mel’s Wax followed by pigmented paste wax to provide a unified appearance.
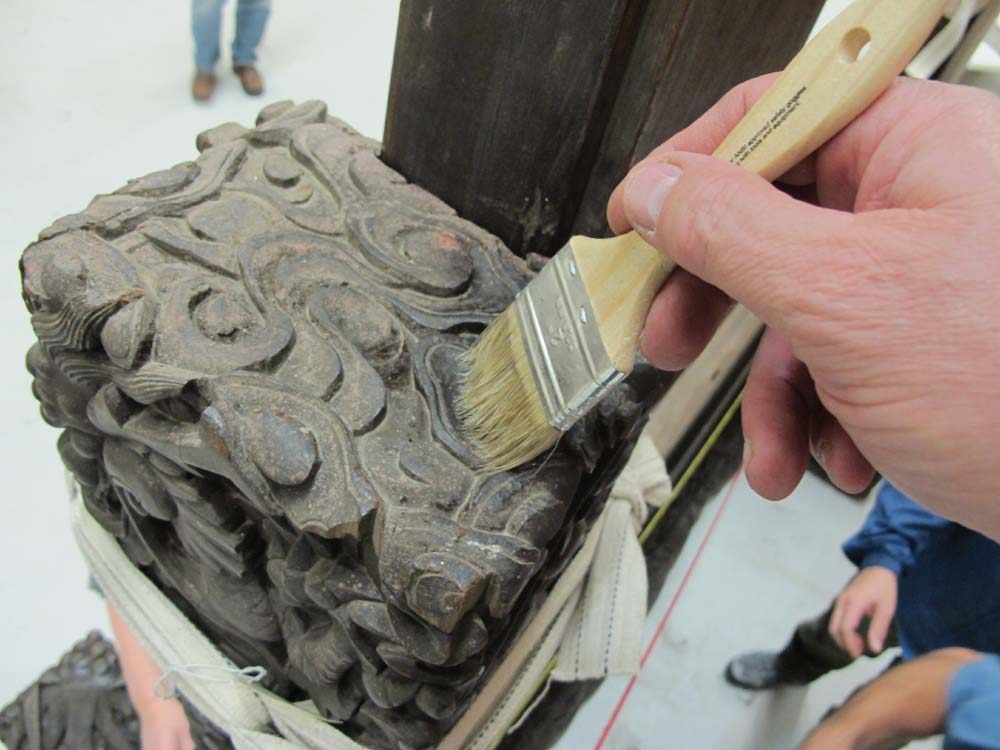
When the frame components arrived in the furniture conservation studio more than a year ago the first task was to assess the pieces and begin to clean every square millimeter of surface. Since the surface was sensitive to most cleaning methods we wound up rolling Groomstick — an archival, specially formulated non-sticking putty used for cleaning sensitive artifacts — over the entire ornately carved surface, a process that took over a dozen volunteer interns more than three months.

Once cleaned, since the surface was sensitive to most of the typical coating systems we might use in treatment, I determined a protocol that worked magnificently: a light application of Mel’s Wax (a high-performance, easy-to-use archival furniture maintenance coating invented by my colleague in the studio — production of this product has begun and it will be available from me very shortly) to provide a stable, high-performance, easy-to-remove foundation sealant.
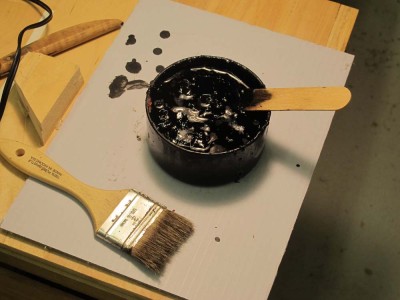
This was followed by a “dry brush” application of pigmented paste wax, essentially a formulation I derived based on shoe polish technology.
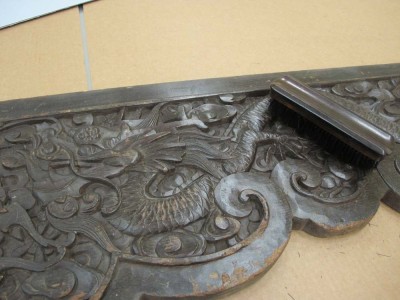
This area has been partially completed, with the right side having been buffed with a shoe polishing brush after the pigmented paste wax was completely dry. I made no attempt to disguise every single scrape and loss on the surface, it was an old and well-worn artifact, and its nature is readily evident.
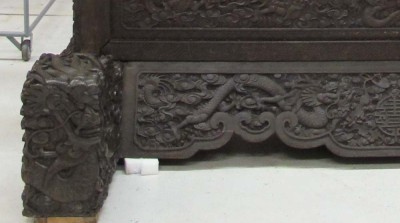
So yeah, “shoe polish” saved the day in creating a homogenous presentation of the frame, into which the gigantic painting will be installed fairly soon.
Next time I will describe the quadruple dovetail locking corner cleats I designed anf fabricated to lock the double mortised mitered corners in place, so that the frame configuration matched precisely that of the painting.
After laying down the new ¾” plywood flooring over floating 2×4 sleepers the next step in preparing the machine room for the actual arrival of the machines was to finish the doorway to allow entry into the space. For the past seven years I just had plywood fastened over the garage-door opening there, removing the sheathing only under very unusual circumstances, which had not occurred often. I had always intended to build some nice, simple doors and now was the time.
The finished doors are absurdly simple units of plywood and 2x4s, roughly 48” wide by 81” high. I started by cutting the plywood to the right size, then all the 2×4 framing pieces, and assembling the whole with decking screws. Each door of the pair includes two 20” x 40” thermal window panels, left over from building the dozens of windows in The Barn. I originally purchased almost a hundred of these glass units from a salvage yard in Toledo, who had purchased the contents of a defunct window factory who-knows-when.
I made the openings for the windows by simply cutting the voids mostly with my circular saw following the frames, then finishing off the cuts with a hand saw. I laid down a bead of transparent silicone calk and dropped the glass panels in place, followed by molding strips to lock the panels in place. No framing, no joinery, just quick and dirty.
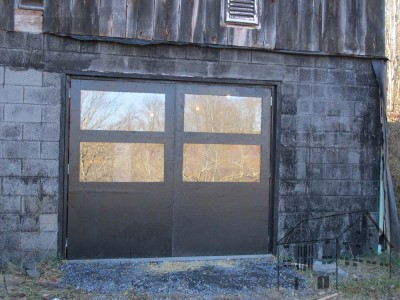
I did not get the doors all trimmed and weatherstripped this trip, but at least they are up and functional. There are no door knobs as the doors will only be opened from the inside when the barrel bolt latches at the top and bottom are released.
They are inelegant, but I am content with them. Some day I may make some exquisite doors of mortised frame-and-panel, but for now the screw gun assemblage does the trick.

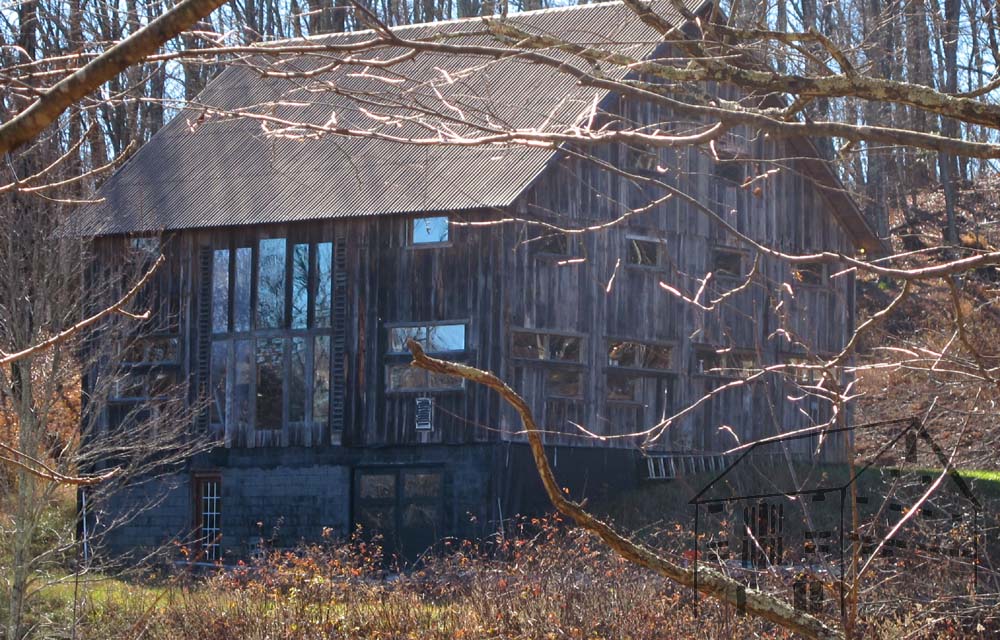
I am especially pleased with how well they blend in to the barn overall, but could not help but notice that the concrete block wall around the doors need painting, pronto.


Recent Comments