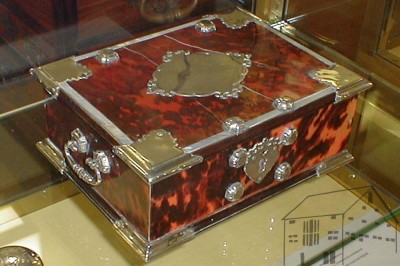
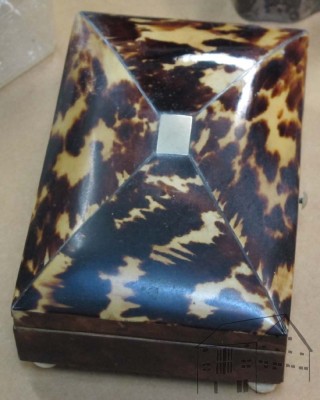
I have long held that tortoiseshell is one of the most fascinating non-shellac materials available to decorative artists. This South African silver and tortoiseshell writing box from the 1700s I saw in a Dutch museum some years ago is nothing short of captivating. Over the past decades I have developed an appreciation for not only the material but its use as veneer in historic furniture and decorative objects like pill boxes and tea caddies.
My interest is such that I even invented an imitation tortoiseshell that I use in my ongoing restoration of numerous artifacts. Here is a small gallery of some of my “tordonshell” examples. Attendees for my upcoming course “Introduction to Boullework” will get a chance to make some tordonshell for themselves (tentatively August 2014 — stay tuned).
Over the past few years I have been treating a collection of exquisite tortoiseshell objects belonging to a long-term client, mostly cleaning and polishing them along with the occasional in-depth repair of substantial deterioration. Recently while working on some beautiful little boxes I had time to consider the way in which many “restorers” and certainly dealers abuse tortoiseshell objects in their care.
The occasion of my contemplation was the hand-polishing of several small boxes, and the recollection of a conversation I had once with a dealer at an antique show. The artifacts for sale in his booth were nearly devoid of the surface character that should grace most tortoiseshell. In conversation he revealed with glee that he used power buffers to bring his pieces up to a kitschy glaring shine (my description, not his) turning gloriously fabricated items into something more akin to extruded or molded plastic from Target.
I would have gladly instructed this dealer on how I polish tortoiseshell (the right way), but after seeing what I have seen in numerous antiques shows, it would have no doubt been a wasted effort. But you gentle reader might be more fertile territory.
Here’s how I do it.
First, I gently clean the surface with lint free cotton cosmetics pads dampened with a few drops of naphtha to remove any greasy accretions from furniture polish concoctions. If the surface is especially grimy, I might mix up a water-in-oil emulsion, but that is a rare requirement. I avoid using other water based cleaners most of the time as the proteins comprising tortoiseshell are water sensitive. Probably not sensitive enough to be damaged by a quick and careful swabbing, but I avoid this virtually all of the time.
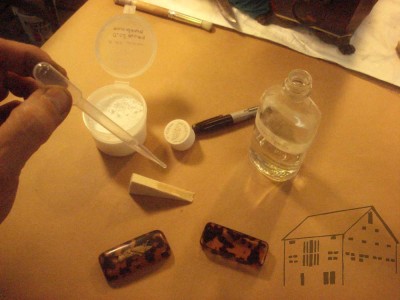
Next I move on to the actual polishing, which in this case requires the gentle application of powdered abrasives, the kinds used for preparing metallography specimens for analytical microscopy. I have long used 1 micron agglomerated micro-alumina abrasive from Beuhler, but there are no doubt other sources. I find that a thimble full would almost last for a life time. Not really, but I am still on the original stash of powdered polishes I have been using for decades (I have several grades for different kinds of polishing processes).
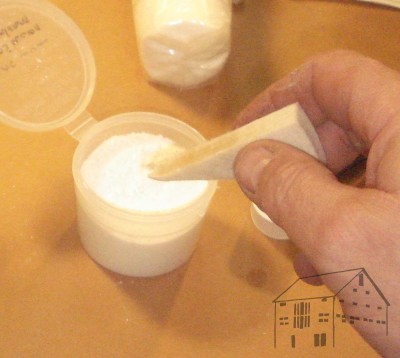
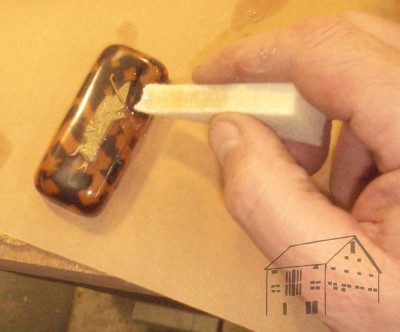
In some instances I place a little mineral spirits in the watch glass holding the powder and dip a piece of worn cotton flannel or felt block into the slurry to charge the pad, and gently but vigorously rub the tortoiseshell surface. Other times I drip some of the solvent onto the felt block and dip the moistened block into a container of the abrasive. Just as often once the pad or block is charged I simply use the pad or block dry.
In most cases the results are evident in a couple minutes of careful work on a very small area, and a small object takes an hour to carefully hand polish, more or less. It is important to avoid rubbing hard enough to heat the surface or erase the character of the tortoiseshell. This is where the power-polishers take a wrong turn. By buffing on a power wheel, they heat the shell and often deform it (the chemistry and properties of tortoiseshell are very similar to your fingernails, and are thus very sensitive to heat and moisture) and damage the shell, and polish away all the magnificent character of the material leaving it like gaudy synthetic plastic.
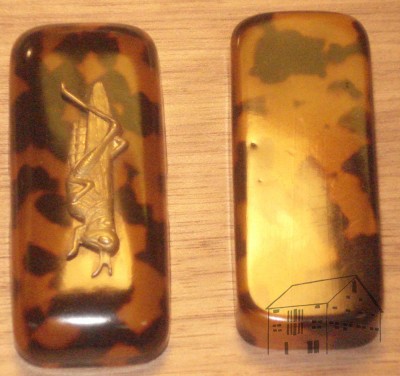
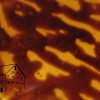
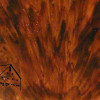
The ideal for cleaning and polishing tortoiseshell is to both recover the appropriate glossy aesthetic but retain the “water mark” moiré pattern inherent in the material.
Since tortoiseshell scutes, or plates, are formed in laminar depositions on the carapace of the sea turtle, when the material is processed in creating art, the layers of the deposition are cut through leaving a “Tide-line” pattern. When the shell has been very well preserved this pattern is nearly invisible to the untrained eye, but on appropriately aged shell it is well evident.
Thjis image demonstrates perfectly to progress of moving from a heavily oxidized and cloudy surface (bottom) to the glistening, beautifully nuanced texture of the finished surface (top).
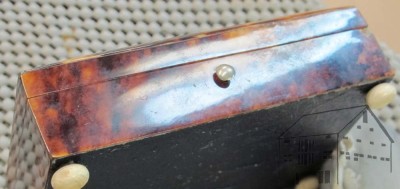
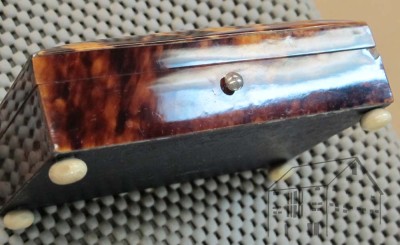
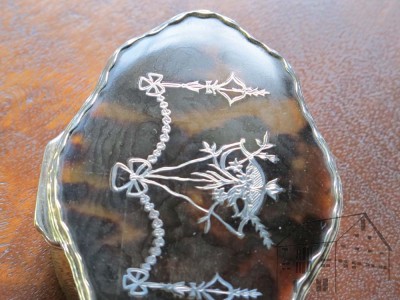
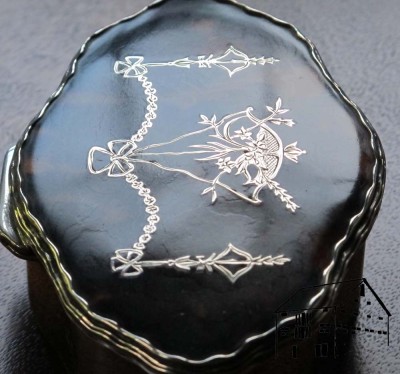
The transformation of a properly polished object is dramatic.
My final step is the application of an archival maintenance surface, in this case a light coat of Mel’s Wax, a ultra-high performance easy-to-use maintenance coating invented in our labs during my previous employment (going into production and coming soon from the store at donsbarn.com) did the trick.
My process allows for the pleasing aesthetic result while preserving the appealing texture of the shell surface.
For more information about tortoiseshell artistry and technology check out my new book, to Make As Perfectly As Possible: Roubo On Marquetry, where Roubo expounds on the subject of Boullework and I add my own two cents. Also on my plate for the future is to write The Technology and Preservation of Ivory and Tortoiseshell, probably some time around 2015 or 2016.
Mark your calendar for July 24-26, 2014, and note the location of Avoca NY. It’s never too early to plan or set the date aside.
We are living in a golden age of tools. New woodworking tools, from the legion of gifted makers ranging from comparatively large concerns like Lee Valley or Lie-Nielsen to small makers like Raney Nelson or Lee Marshall or The Brothers Abraham, with scores of others populating the toolism landscape, are widely available for a fair price. And vintage tools? I don’t have to look too hard there, either, with wallet-vampires Patrick Leach and Martin J. Donnelly hovering in my consciousness on a nearly perpetual basis.
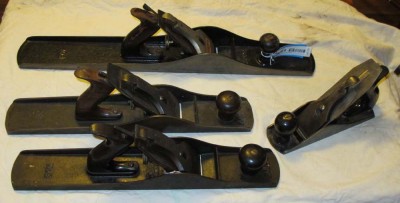
One of the year’s highlights is Martin’s “warehouse clearance” auction in July, where everything that has not been in the past year’s scheduled auctions gets sold off in three days, usually with about 3,000 lots. One advantage to this sale is the higher proportion of “user tools” vs. “collector tools.” There’s plenty of both, and sometimes startlingly good deals can be found.
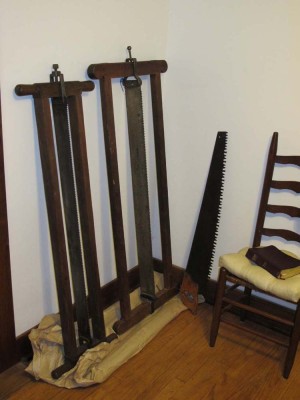
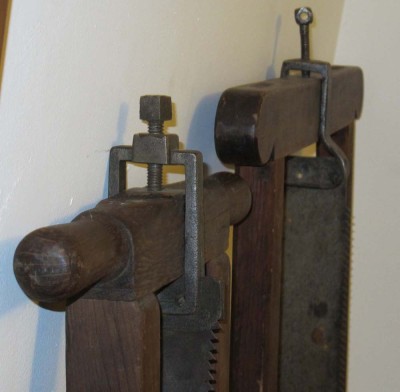
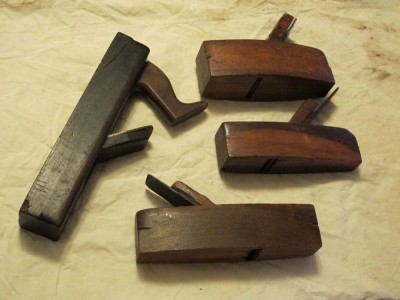
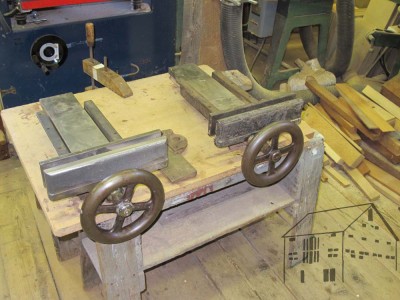
Here is part of my haul from the last time I went, including two magnificent four-foot hand-forged-blade veneer frame saws. The large one was the only tool I was determined to bid on, the second was as surprise I had overlooked in the listing. Given the final hammer price, apparently everyone else overlooked it also.
Even if you do not buy anything, a great time of fellowship and tool-gawking awaits you. See you there.
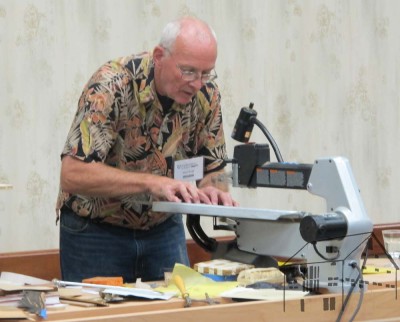
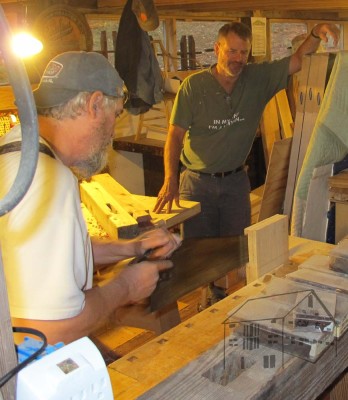
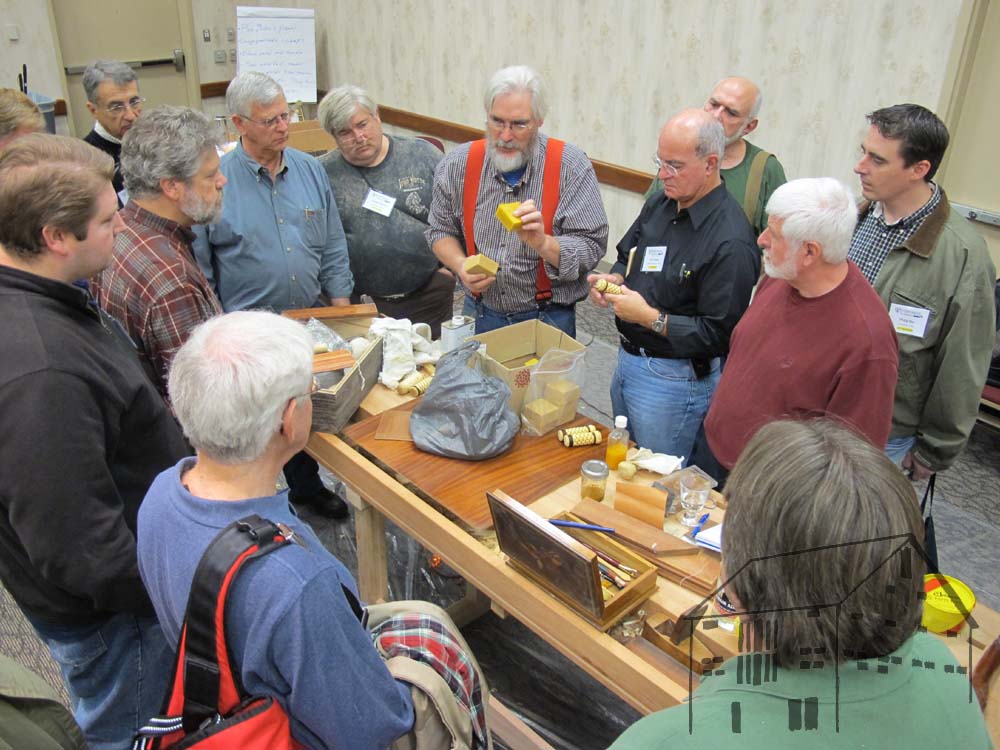
When I walked into the room Sunday morning fifteen minutes before my 9AM starting time it was already almost full, and folks were bringing more chairs from somewhere else, and a ring of people standing began to form around the perimeter of the space.
Now this is standing room! 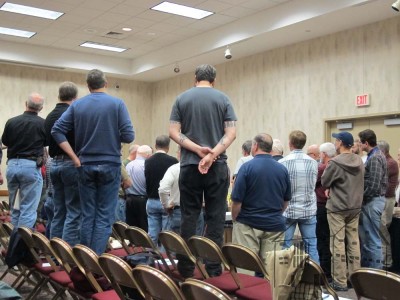
Who says woodworkers don’t want to learn finishing?

It is a personal quirk but every time I prepare for a talk when I have been granted a generous time slot, invariably I say to myself, “There’s just no way I have anything to say for that long.”
But once I get started, and I really enjoy demonstrating up close and personal, coiffure be damned, and on occasion a spectator gets splashed with something. I guess I should warn them to dress like I do, then they would not have anything to worry about.
After running over the allotted time by almost an hour I packed up, said goodbye to friends, and headed down the road for another week of photography and study of the H.O. Studley tool cabinet.
The first day of WIA on Friday was somewhat unusual for me as I was able to swim anonymously in the sea of woodworking as just another fish in the school.
Given my decades-long interest in and practice of marquetry it is surprising that I had never met marquetry maestro Silas Kopf before, but I rectified that shortcoming at the conclusion of his first session that day. Silas is a true artist with veneers, and it was fascinating to see and listen as he composed and constructed a floral marquetry pattern. His approach is nearly opposite of my own so it was a fertile learning experience for me.
I next attended Peter Follansbee’s “Spoon Carving” session, enjoying immensely his folksy, occasionally caustic, sense of humor interspersed with demonstrating a well-tuned skill set. His workmanship and creativity are inspiring, and I will surely try to emulate him on some long winter nights in the holler back in the mountains. As he pointed out, spoon carving has a near-zero raw materials cost, making many of his spoons from shrub branches and discarded wood.
I completed my day of classes with Peter Ross’ truly engaging exposition on historic woodworking tools, particularly the Benjamin Seaton tool chest and its contents, often comparing historical attitudes of excellent to our modern “Obsessive Precision Disorder.” It was enlightening to say the least and the attendees provided an active period of questioning and discussion afterwards.
I spent quite a while wandering through The Marketplace, visiting with attendees and exhibitors, gawking at tools and giving a number of them a test drive.
The day concluded with the conference banquet, dining with friends old and new followed by a quick trip to the airport to pick up Philippe Lafargue for our big book-signing-day on Saturday. Despite being friends for twenty-five years and collaborating on To Make As Perfectly As Possible for the past several, we had not actually seen each other in person for over a decade.
A few tweaks to my Saturday morning talk and it was off to sleep.
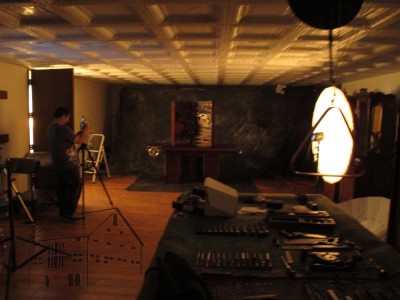
A behind-the-scenes look at how I spent my day today, working with Narayan Nayar and Chris Schwarz wrapping up our penultimate day of photography for my book VIRTUOSO: The Tool Cabinet and Workbench of Henry O. Studley.
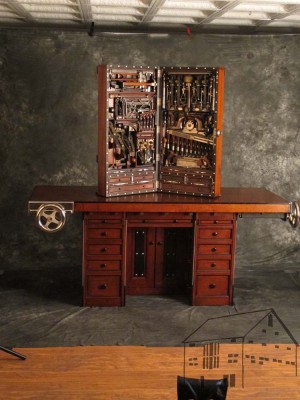
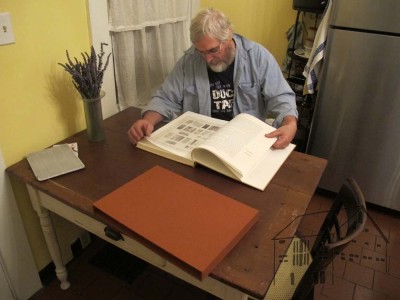
The glazed look of someone who has just driven nine hours and has their first encounter with the real, live, Deluxe Edition of “To Make As Perfectly As Possible: Roubo On Marquetry.”
Almost overwhelming.
Publisher Christopher Schwarz and Editrix Megan Fitzpatrick say it may be the nicest contemporary volume they have ever seen.
They are not wrong.
It’s hard to believe that Sgt. Don’s Bench Boot Camp convened a week ago! Dave returned home Sunday, dragging but elated, and with my schedule of upcoming event preparations I am not sure how much more will get done on Jason’s bench when we head back to “civilization” in a couple days (one great thing about time in the hinterboonies is that we pay less attention to the activities out in the asylum).
Jason has been plagued by a misbehaving back all week, so it has been a constant challenge for him.
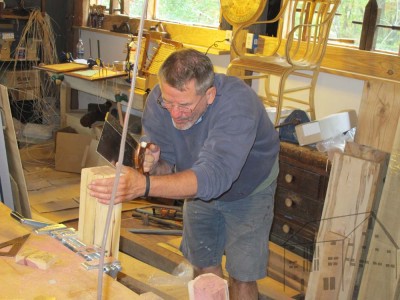
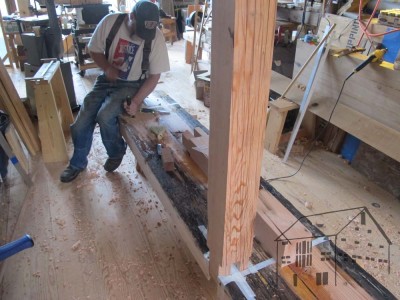
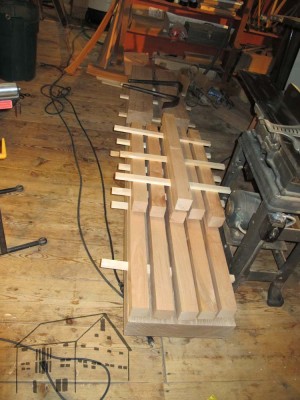
As the week continued there was a lot of sawing and pounding as the pieces of the benches were formed and fitted. Dave made great strides as this project was the first of its kind for him, or for Jason for that matter. As with intense projects, even with regular housekeeping the place devolved into near-chaos on a regular basis.
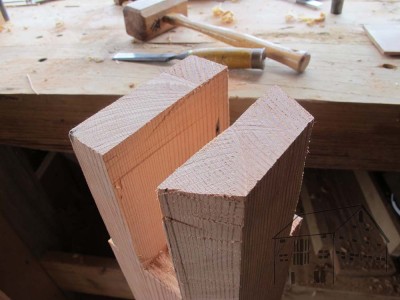
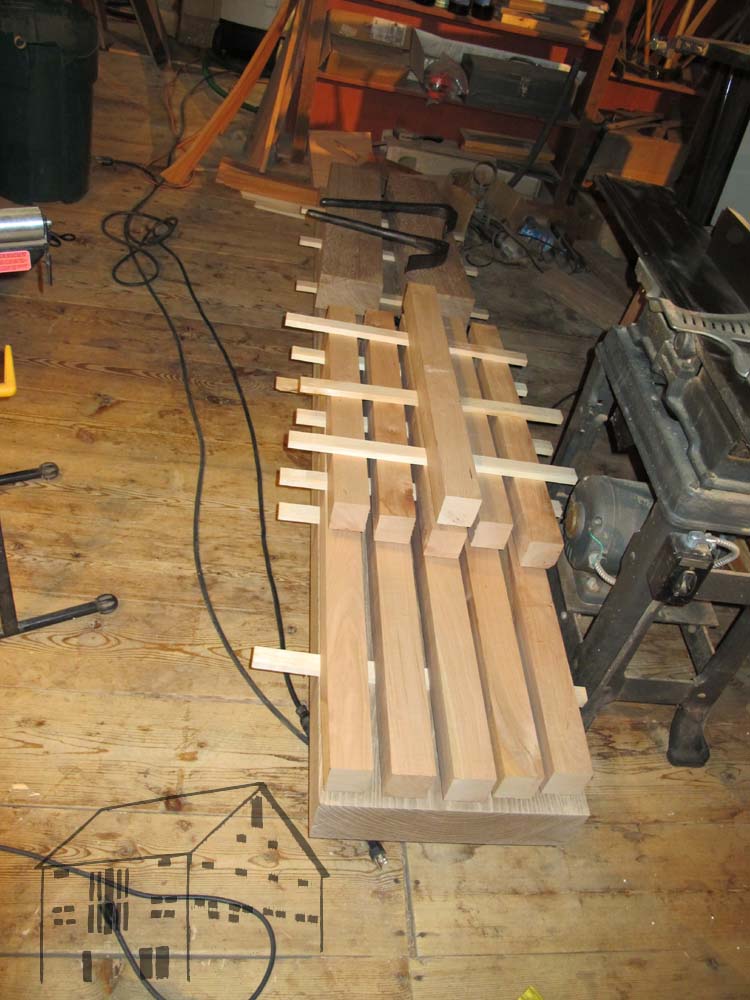
In short order Dave got his double tenons layed out,
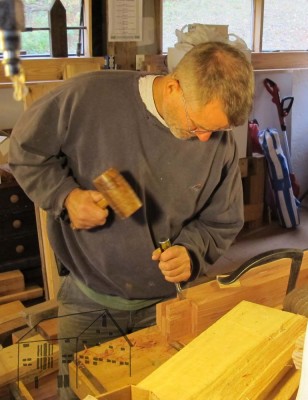
the mortises cut and chopped,
and much to his joy their first test fitting was very positive. Given the top of hackberry and the legs of aromatic red cedar, both sorta spongy, I knew we could whack it all together in the end.
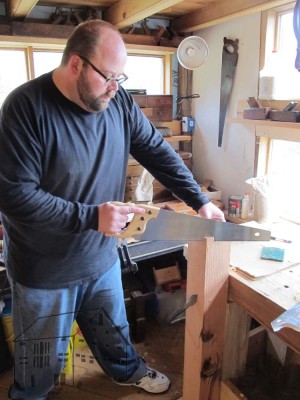
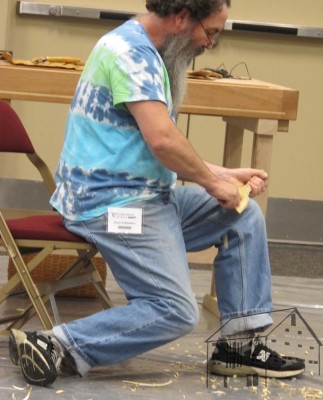
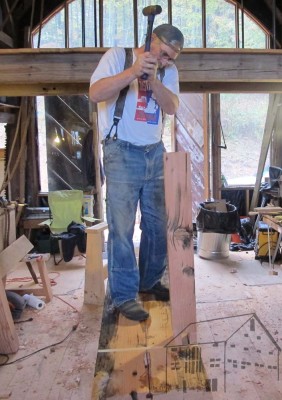
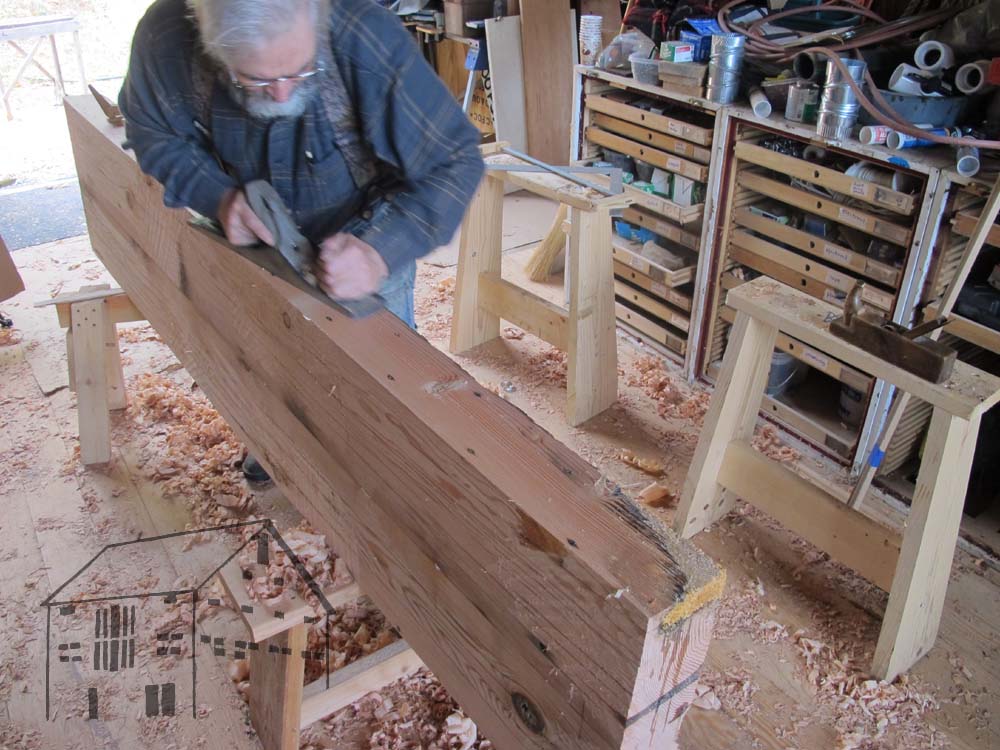
Not to be undone, even though he could stand for only short periods of time, Jason lit into his two Douglas Fir front legs with gusto.
Unfortunately the Douglas Fir stock set aside for the rear legs were just too punky to be useful.
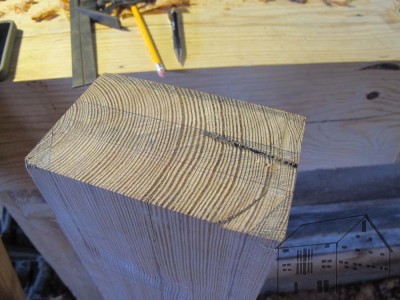
Fortunately I had a pile of 125-year-old superb Southern Yellow Pine timbers and he prepped and made the rear legs from this. Given the age of the wood, it is not surprising that Jason found out how hard and tough vintage SYP can be.
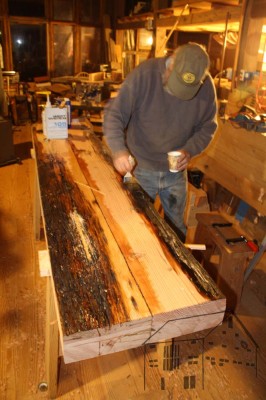
The punkiness of the legs was evident on the underside of the top as well, always a hazard when repurposing salvaged wood. If we removed all of the damage to get down to sound wood we would have had to remove at least an inch, but we liked the nearly 5 inches we had for the top thickness so I chose another route. Instead, I brushed an application of diluted epoxy (~20% acetone) onto the affected areas, and that worked like a charm. It took two days to harden sufficiently. But it consolidated the damaged cellular structure enough to make it firm and sound without turning it into a block of solid brittle plastic.
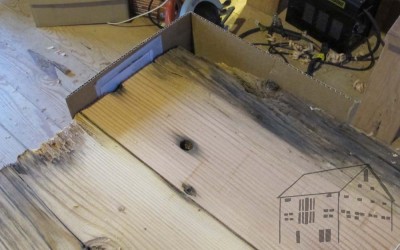
I exploited the properties of epoxy to make a repair at one corner as well, which had a chunk missing due to the same previous deterioration. To cut this off would have cost us nearly a foot of overall length, so we used a technique I have employed with great success when dealing with damaged timbers.
I made a form from a cardboard box and stapled it to the corner, then packed it tightly with wood shavings,
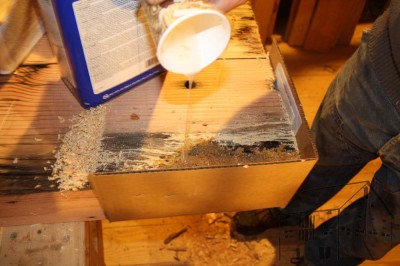
and poured in slightly thinned epoxy (less than 10% acetone) to fill the entire void.
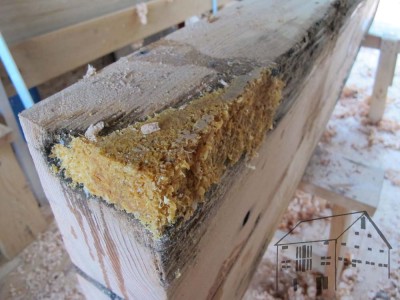
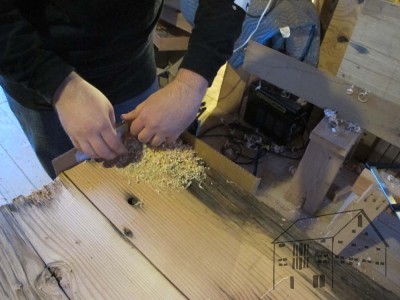
The combination of the wood shavings and the exothermic phenomenon of the epoxy boiling in place aerated the fill, rendering a rigid, well-adhered fill that can be worked with typical woodworking tools.

While it does not render a “finished” surface it is easily planed and rasped, certainly adequate for this function and location.
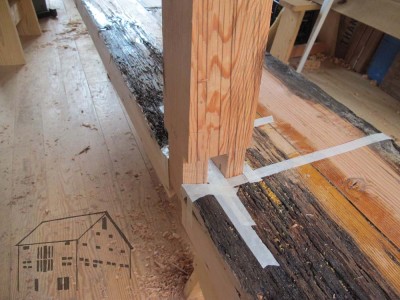
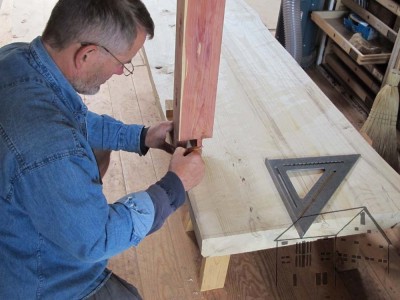
I also employed a technique I’ve used with great success when restoring old timber structures by using tape as my layout lines for cutting joinery. With care it is exceedingly quick and stupid easy.
It was here, too, as the cut joints were snug and tight when placed in the mortises.
With Jason’s mobility limited I gladly pitched in to get his joinery moving forward wrapped up.
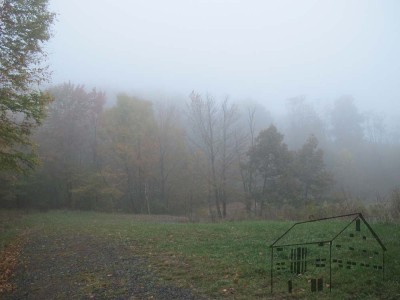
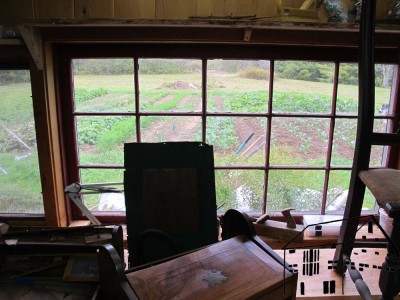
Apropos almost nothing, here are two pictures summarizing the week. The weather was uniformly grim, with heavy misty fog blanketing the valley for several days.
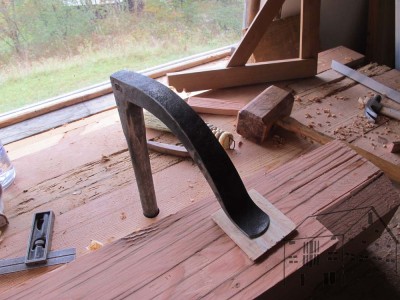
This picture of Peter Ross’ holdfast is just cool.
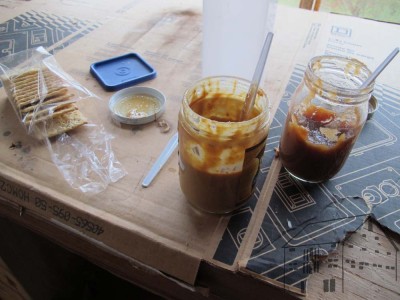
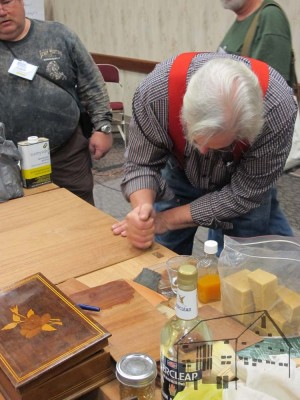
One special treat for Saturday was my checking out for an hour or so to visit our local Sheriff ‘s farm (a woodworker) where they were making fresh apple butter. I returned to the barn with a jar of still-hot preserves and a sleeve of crackers along with a jar of organic peanut butter. This late afternoon snack was all we needed for dinner that night.
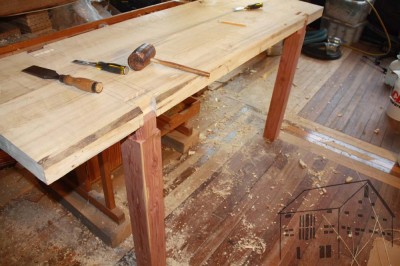
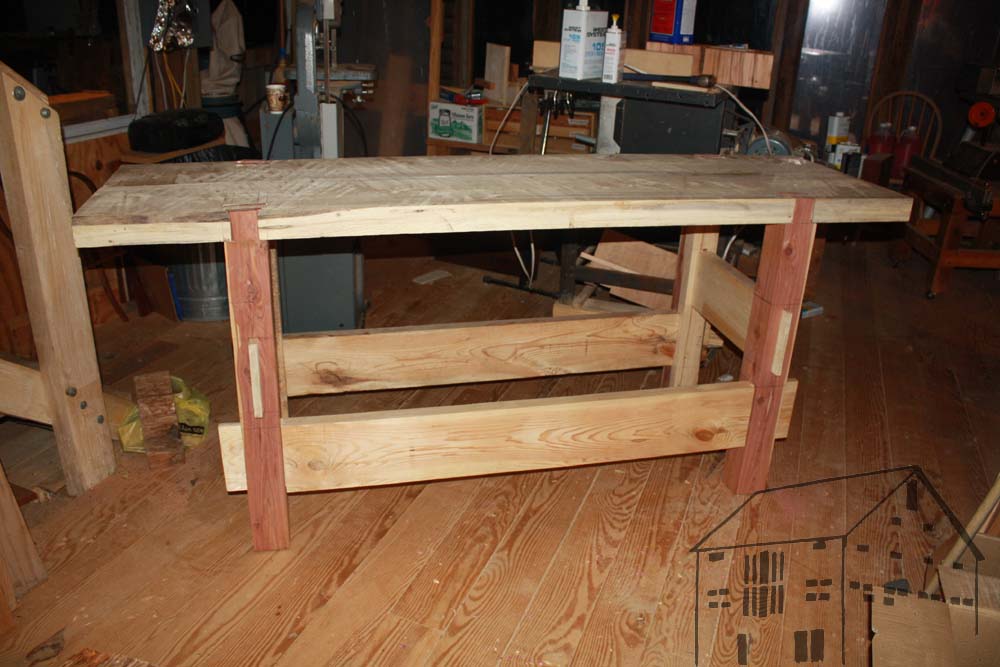
As dusk fell Saturday night we were oh-so-close to assembling Dave’s bench that the two of us drove on even after Jason’s back forced him to retire for the night.
I jumped in to help with the side stretchers, and some time around nine o’clock we fitted, cajoled, clamped, and sledged-hammered the whole thing together.

Even dry and untrimmed, the bench was unwavering in its beefy rigidity. Dave was rightly pleased with the accomplishments of the week as it both stretched his abilities and resulted in a project that has already changed the way he works, and will continue to refine and expand his work from this point forward. I have asked him to contribute an occasional blog post here to recount the new chapter in his artisanry.
Sunday morning we loaded Dave up and I departed first heading off to worship. Jason had a slate of assignments while I was gone, and when I returned later that afternoon he had made good progress. Seriously, having your back acting up robs you of so much power and stamina but he was a trooper.
Tonight frustrated me as one of the legs simply would not go into its mortises, and I cannot yet see any reason why that would be so. I will noodle it in the morning when my brain is more alive and see what I can figure out.
My final day on The Grand Tour began with a drive down through the heart of Boston from Andover to Quincy for a delightful three-hour sessions with JohnC, a retired historian who is doing some really heavy lifting for this project. I assure you that his fingerprints will be all over the Studley history section of VIRTUOSO:The Tool Cabinet and Workbench of Henry O. Studley.
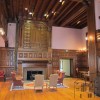
We started with an hour long discussion of the project and research directions for the future, allowing ourselves free reign when it comes to rabid speculation about Studley the man and his life and tools. With that out of the way John drove us to the site of the home Studley shared with his wife and the Stetson family. That site is now the home of the Crane Library, a stunningly beautiful public building.
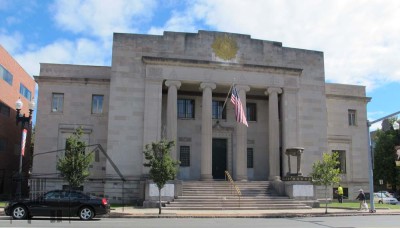
We followed that with an extended walk around the outside of the Quincy Masonic Temple. Studley was a member of that Rural Lodge housed in that building, but we do not believe that he ever saw the current building which was dedicated shortly after his death. The building appeared to be completely unoccupied, and we had no luck trying to call (the phone number had been disconnected), emailing, or knocking. There was nobody home.
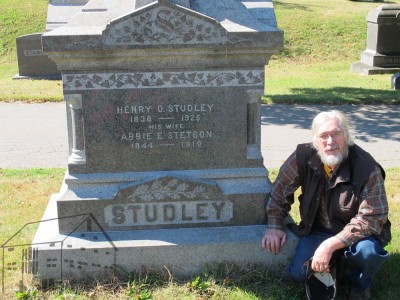
A short stop at the Studley grave site and the Quincy Historical Society wrapped up the business portion of the day, and John took us to his favorite burger joint where I ate a hunk of bison. We parted shortly, and I drove non-stop ten hours to home base. Or should I say, I drove stop-and-go, and stop-and-go, and stop-and-go. I have been told that New England has two seasons – winter and road construction – and I am now a believer.
Four days after my return I received from John the astounding news of a catastrophic fire at the Quincy Masonic Temple, apparently destroying much of the interior and all of the Masonic memorabilia and Lodge records. Thus what we hoped would be a rich resource for John’s research will remain lost forever.
The final big day of vise-gawking took me to southern New Hampshire in the morning and Boxford MA in the evening.
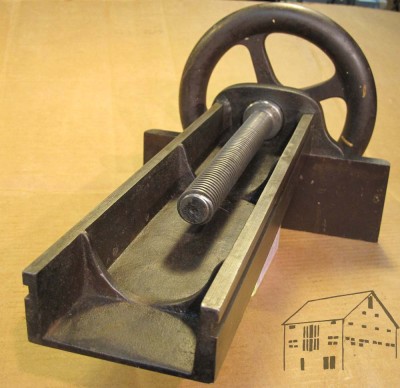
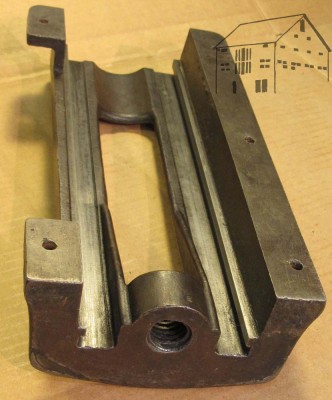
After making my way from Nashua NH heading west to the shop of BillT I encountered two nearly identical yet dramatically-different-from-the-rest vises, which were not connected to benches just yet.
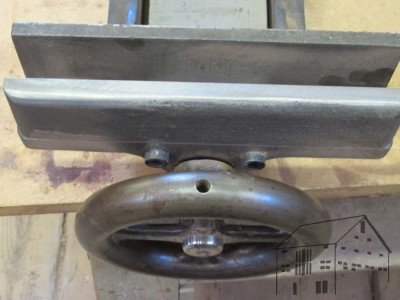
The truly fascinating thing about these vises was that while their general configuration matched the rest, the moveable jaw and the moving platen were not a unified casting, but rather the jaw was attached to the platen with bolts.
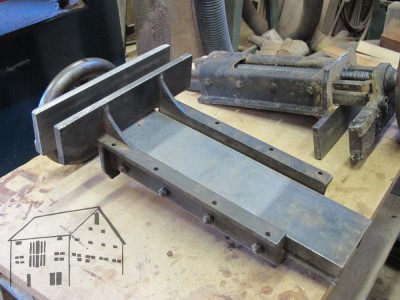
In addition, there was a fixed rear jaw, whereas each of the other vises used a metal plate screwed to the bench itself. It was a thunderbolt, a thunderbolt I tell you! This manner of construction is technically immensely easier than casting the movable unit as an integral whole, and I had been noodling this design in my fertile (or is it fertilizer-filled?) brain for some time yet is the first hint I have seen of this design being manifest in iron.
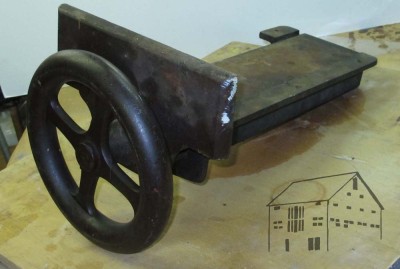
Like others on this quest these vises were beasts, with the wheel cross-section of 1-1/2” pushing the total weight up to the 85 pound region.
Again, these vises have a probable lineage to a piano factory in Peterborough NH, even though they were purchased when an old box factory closed some years ago.
On leaving Bill’s shop I was so energized at the possibilities that I barely noticed the drive to Boxford. There I met up with Freddy Roman to visit the shop and home (and vise) of DanD, whose glorious wife prepared a meal that had us waddling for the rest of the night and into the next day.
Dan’s vise was very similar to Philip’s, and due to time constraints I did not have time to photograph it properly. We also spent probably too much time touring his homestead and shop, ogling his pile of superb oak lumber for an upcoming Roubo bench, and picking up a great many inspirations and good ideas during our visit. Instead Dan volunteered to let me bring his vise back home with me on loan to study further, which I will do over the coming months. Even better, he volunteered to carry it to my truck for the ride home. Now that’s a classy guy!
My fifth day of the Grand Tour took me to Bangor, Maine, where I met Tim Cottle for breakfast. He said that I had to experience the local flavor of Dysart’s, a famed local eatery at a truckstop just south of town. He was right. The artery-clogging breakfast was fantastic! Good thing I am fan of Gary Taubes.
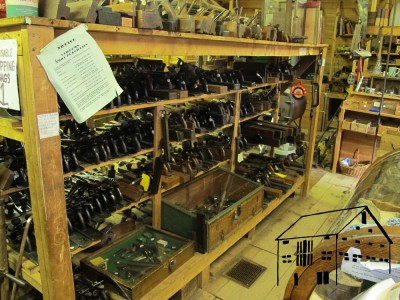
After breakfast we headed into town to visit a friend of Tim’s, tool collector and maker Tom Christenson, whose showroom and tool-making shop were surely the envy of all who have seen it.
Tim’s generosity last winter in loaning me his version of the piano-maker’s vise was a huge catalyst in starting me down this road. It was the first time I got to REALLY look closely at the form, and I spent hours cleaning it, taking it apart on my bench, and photographing it. Tim’s vise is and end vise unit, missing the dog shuttle or “collar” used for the movable dog (see the previous post on Alan’s vise from Day 1). These pictures are from last spring, but my time with Tim was again a delightful interlude.
Thanks Tim.
Following my time in Bangor I headed south to the coast where I was to spend two days with new-old-friend Joshua Klein and his family on their newly emerging homestead. While I doubt my wife and I could live in Maine, if we had to it would be at a place like Joshua’s. Pond, gardens, greenhouse, chickens, and goats. And, a building site where the new timber-frame shop is going up as we speak. His current shop space is small, tidy, quaint, and a home to excellent craftsmanship and problem solving on a daily basis.
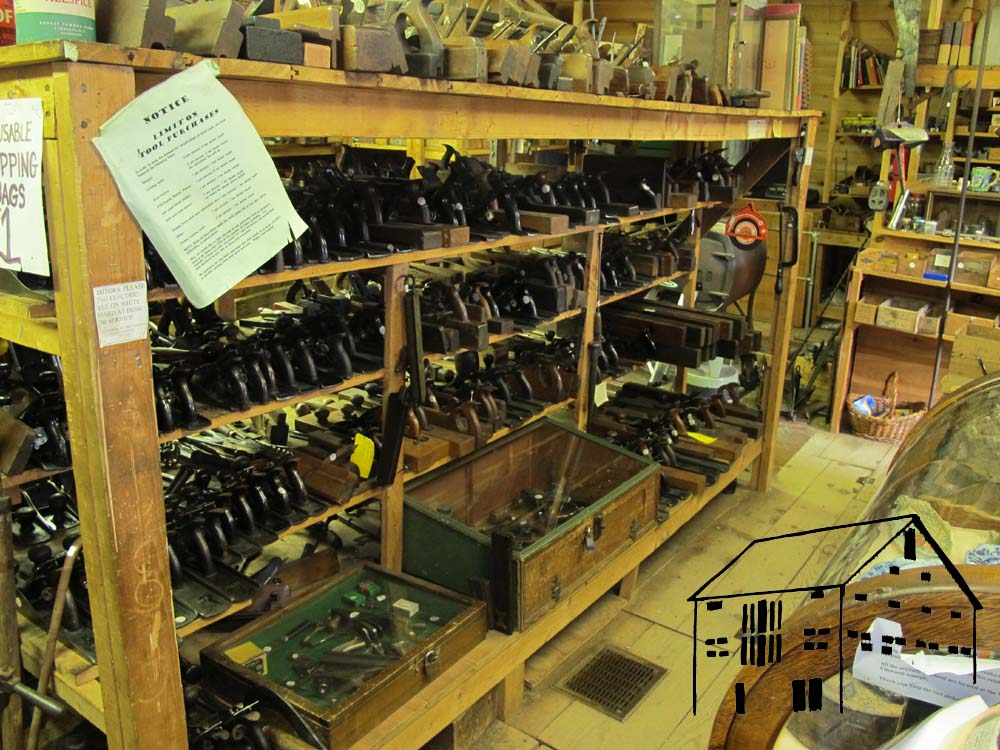
In addition to talking about all the “forbidden” subjects – religion, politics, tails-first vs. pins-first, shellac vs. polyurinate, etc. – we visited both of the Liberty Tool establishments, where I was somewhat frustrated by their lack of having stuff I wanted to buy. Either their inventory was low or their prices high, I am not sure, but I did pick up a few vintage hand saws to practice on.

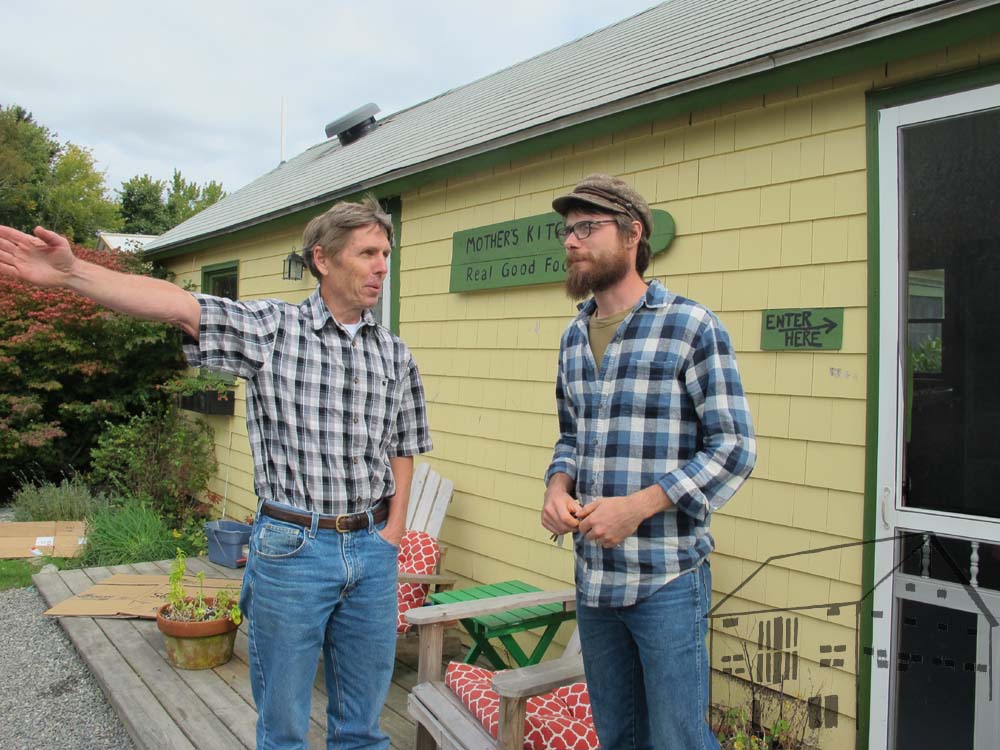
At the first Tool Barn we had arranged to cross paths with my former student Jon Brandon (on the left, Joshua is on the right) whose furniture conservation practice is also in southern Maine. For two hours we caught up and projected forward. We think we had not seen each other since Jon graduated from the Smithsonian’s Furniture Conservation Training Program more than ten years earlier. Shame on us.
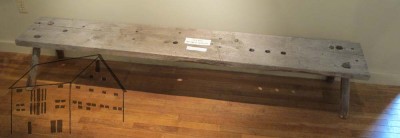
The next day included a trip to the Liberty Tools home base, where I was equally frustrated for the same reasons. On our way there we stopped at the Jonathan Fisher House, a museum dedicated to a pretty amazing guy. What caught my eye, among other things, was this “Roman” workbench that Fisher presumably used. Chris Schwarz blogged about these benches, and I was pleased to see one from the early 19th century Maine frontier. I hope Joshua is able to conduct some deeper research into Fisher’s furniture making exploits.
All in all I had a terrific time of fellowship and learning in Maine, with the opportunity to spend several days with like-minded souls. I had such a grand time that another trip is scheduled for next autumn.
On my way out of town I stopped at the Lie-Nielsen mother ship. If Martin Donnelly is the Spawn of Satan, Thomas Lie-Nielson must at least be Wormwood ;-). Both gentlemen empty my wallet far too much. And I remain eternally grateful to them for their contributions to the ongoing Woodworking Renaissance.


Recent Comments