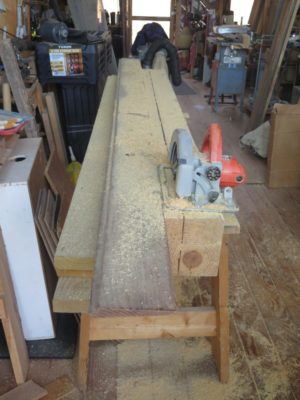
With my former planing beam cut almost all the way through using my trusty 10-inch circular saw I was left with sawing the last inch of thickness by hand. Grabbing my equally trusty ancient 3-1/2 t.p.i. handsaw I made short work of the separation, getting almost 1-1/2 inches of cut per stroke.
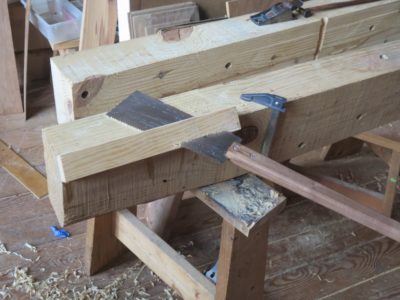
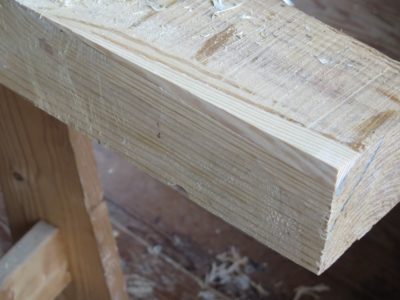
I then made a nuisance mistake by cutting off the wrong end of the timbers I was only going to make a six-foot bench). I should have cut of the end with the wainey edges, but instead I cut off the nice crisp end. So now I had to take a few minutes to plane flat the rounded edge and glue on a new piece in order to make it square.
That I accomplished by just sawing off and hand planing the excess.
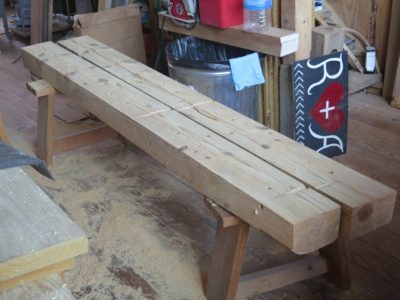
With the pieces separated I dove in with my scrub plane to get everything more or less planar by eye. The beam had a bit of wind in it which became exaggerated (doubled) by the splitting. Once the mating surfaces were flat-ish, or at least fitted each other nicely, I got out my fave toothing plane and got it mated for real, ready for the, er, mating. In this instance I used PVA, in part because I did not know the final environment for the bench but really because I had not prepared hot hide glue in advance and thus had none ready to go when I was determined to execute the glue-up.
It is really comforting and confirming when the squeeze-out is uniform through the length and breadth of the joint.
In recent years Mrs. Barn had been traveling to the West Coast several times a year to attend to her dad in his failing health. Normally she would not even carry any luggage beyond a small carry-on bag, so she left her laptop at home and just took her small Kindle. After making my prototype Kindle case last year I decided she needed a nice case to protect her smaller Kindle during her travels, so it was on my agenda for Christmas. I got it done just in time, but then we had to postpone our family Christmas for three months due to a variety of circumstances, not the least were my mother’s funeral, my father-in-law’s death and funeral, my son-in-law’s inadvertent exposure to someone with the ‘Rona, my daughter’s need for self-quarantining for work travel…
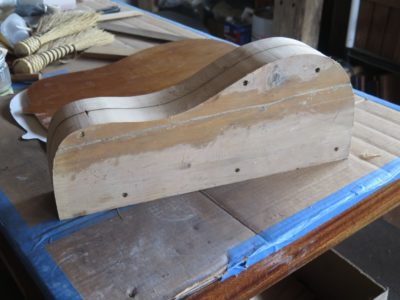
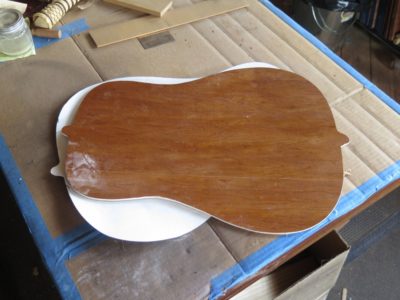
As with the first case I started by making my own veneer-core plywood using the abundant ash veneer from my stash using West System epoxy as the binder, under the dead weight of a stack of fire bricks. I am becoming even more smitten with this type of sheet good and may try to figure out how to make larger panels to employ in other projects. I have used Baltic birch plywood as my “go to” for years, and still rely on it a fair bit. But the veneer-core plywood is just something special. I guess I’m gong to have to make a large veneer press to make it happen.
The process for excavating the inside of the ladle continued as previously described — saturated with dilute epoxy followed by hollowing with curved gouges until soft wood is hit, followed by more epoxy impregnation followed by more sculpting… — until I arrived at the shape I wanted. Unfortunately I failed to take any photos of these subsequent dozen or more sessions.
Interspersed with those sessions were exercises in refining the outer shape of both the handle and the bowl, mostly using rasps since the wood was so squirrelly. Once the shapes were close to finished I needed to thin the bowl so that it would be a somewhat elegant piece.
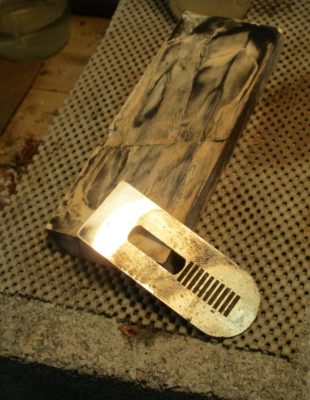
To protect the inner bowl and support the bowl wall while working towards the wall thinness I wanted I needed to devise some way for an almost form fitting support. To accomplish this I looked throughout the barn for things that were the right size and shape, and the closest thing I found was this doming hardie from my collection of metalworking tools. By draping the dome with several layers of drawer liner I got the fit pretty near perfect, the finished bowl shape slipped right into place and stayed put while I was working it with fine rasps and floats.
As with shaping the inside of the bowl, the protocol for working outside the bowl was epoxy >>>toolwork>>>epoxy>>>toolwork, etc. With a gentle touch I slowly worked towards the final wall thickness of about a shy 1/8″.
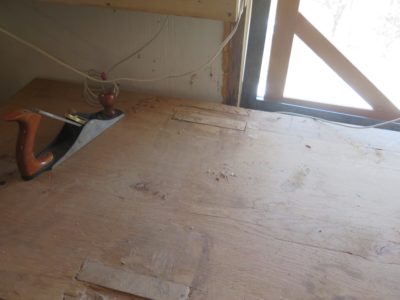
One of my quirks is that I usually like to lay a piece of sacrificial sheeting on top of my workbench most of the time, and today was my day to swap out the old one for a new one on the FORP Roubo bench. As I was making the swap I noted that it was also time to address one of the two main manifestations of Seasonal Affected Disorder that afflicts (?) wood in the natural course of events, sometimes called hysteresis, sometimes called rheological cycling, but generally known to us folks at the workbench as “wood expands, wood contracts.” One of the consequences is that when there are pieces of wood assembled with different grain orientations eventually they get out of sync dimensionally. In a Roubo workbench this become manifest as the tops of the leg tenons eventually protruding past the top of the slab.
As I was fitting new pieces of luan plywood to lay on the bench top I noticed that the tenons were quite proud of the slab, perhaps 1/16″. I only assembled the bench a couple years go and did not notice the issue when I laid the initial sacrificial covering at the time, but it was there now.
You might have thought that since the bench was initially fabricated eight years ago it should be fully settled into its new environment. Maybe, maybe not. If the old adage that wood seasons at the rate of “one year for every inch of thickness” is true then the answer would be “yes.” Since I moved to the hinterlands and talked to some of the local wood guys I have come to appreciate their view of seasoning woods, especially dense hardwoods. To them “one year per inch” does not hold true; instead they use a formula of “one year for the first inch, two additional years for the second inch, three additional years for the third inch,” and so on. By that metric my five-inch-thick bench top will pretty active for 1 year + 2 years + 3 years +4 years + 5 years, for a total of 15 years.
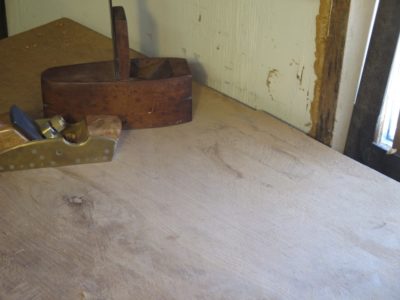
I dealt with the tenon ends directly in about an hour this morning, and will address the slight crown of the overall bench perhaps at the end of summer.
It might be worth reiterating that once I get a slab bench top flat I prefer to hit it with a toothing plane to give it a little texture. I lose none of the planarity but gain a lot of grip on the workpiece.
My original strategy for sculpting a lovely kitchen accessory for Mrs. Barn’s Christmas was to gently work both the inside and outside of the workpiece until something beautiful and functional could be obtained.
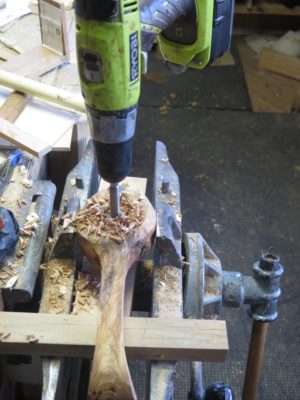
As I mentioned earlier I knew right away that cheating via drilled excavation was the way to proceed with the inside of the bowl. The nature of the piece’s morphology would constrain me to slow and gentle work, no wailing away on this one. Still my plan was to carve and excavate, drill a little, then carve and excavate some more until it was finished. 3-4 mornings max, no problem.
Sure.
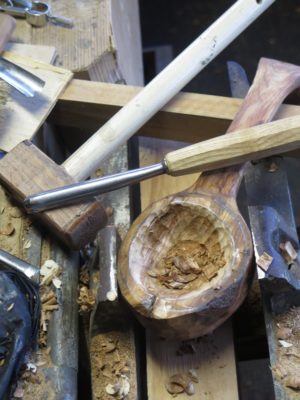
As I got deeper into the bowl of the spoon/ladle I encountered my worst “working burl” nightmare. The cherry burl was crumbly, as burls sometimes are, and caution and a turtle-like pace was called for. But even caution and a slow pace was not adequate for this piece of wood. It needed enhancement.
So, my routine for the next several dozen hours of working on the carving, spread over a dozen weeks, was to soak the entire bowl end of the workpiece with epoxy, allowing it three days to set fully, then carving until I hit crumbles again.
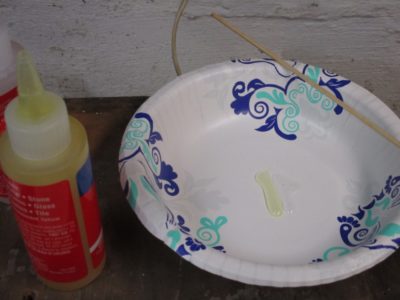
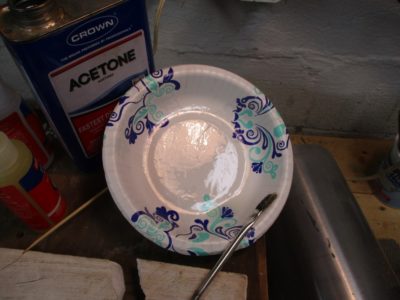
I did not use straight, full strength epoxy — that would have been a catastrophic failure on so many fronts — but rather my old faithful West System, diluted roughly by 1/3 with acetone to allow for greatest penetration when I slathered it on until the surface was fully wet. Even so the effective saturation was only so deep.
With this protocol, slowly but surely the piece began to take shape. My dream of getting this done by Halloween and moving on to other things was not dead but it did require some creative scheduling. I did this for little time, then I did that, then the other thing. Actually if fit rather nicely into my ADHD.
Last summer while on her way to a walk in the woods, Mrs. Barn dropped by to check my progress on processing the coming winter’s firewood. She noticed that I had set aside a couple of burls while continuing with splitting tons of hardwood bolts.
“Oh,” she said, “that would make a lovely spoon,” pointing to a piece I had already identified as a candidate for just that purpose. We spoke no more of it and she headed into the woods.
For almost three months beginning in early September I hacked away at the chunk of burl. Eventually it was finished, just in time for Christmas.
To this point I had never carved a spoon, I am behind the curve on that one as apparently every other woodworker in the universe has done so already, so I was looking forward to the project. Of course I was embarking on some of the most nettlesome woodworking I had ever tried.
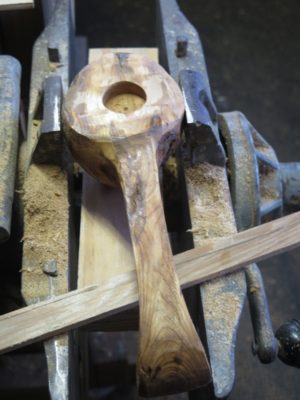
My first step, not knowing if it was the right one because I did not attend the University of Youtube course on spoon carving until I was almost done, was to remove all the parts of the piece that did not look like a spoon, using saws, shaves, and rasps. Actually I did not design the implement, it pretty much designed itself.
Once that was done I started working the piece very gently as the burled wood was not tight. At all. Using spoon cutting knives or even carving gouges was not getting me anywhere as this was burled cherry, and was a combination of hard and crumbly. Not optimal.
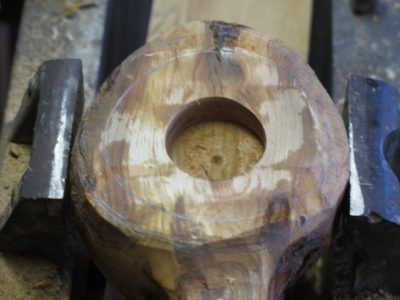
I decided to cheat (?) and drill out a lot of the inside mass for the utensil to give me some entree’ for moving on.
It was only then that I encountered fully the feature that would plague me for the next several weeks while sculpting the ladle.
One of the aspects to living in a locale so isolated as Shangri-la is that it is populated by folks who are at the very least comfortable with isolation; for the “born here’s” it is simply the life they have always known, for many of the “come here’s” it is the life they actively sought. If you cannot tolerate isolation, you leave. I can speak truth to this, for about 99% of the time my only in-person contact is Mrs. Barn. Going to the Post Office or feed-and-seed-co-op hardware store a few minutes a week hardly describes a life of social interactions — “social distancing” describes every day ending in “Y” out here — and during this season of psychosis our only regular time of interaction beyond ourselves is at church. (I am increasingly convinced that functionally Covid-19, while deadly to a miniscule slice of the population pie, is more of a psychological experiment in repression than a public health crisis; I will believe it is a catastrophic pandemic when the elites act like it is one rather than jetting about for vacations in Cancun or group dinners at fancy restaurants and when politicians and gubmint employees rather than small businesses lose their incomes.)
One of the things in which I have been long interested is finding other woodworkers here for fellowship and collaboration. They are around but like me they mostly stick to themselves. I’ve had some success in finding and interacting with gunsmiths, blacksmiths, metalsmiths, this smith and that smith, but thus far the woodsmiths have kept to themselves. In recent months this has begun to thaw as one retired “come here” with whom I am on a local Board revealed he is a luthier, and lo and behold there is suddenly a critical mass of luthiery-ish practitioners in the county. One is a newly arrived pastor/amateur musicologist, another is an actual full-time guitar maker who moved here recently and has a small studio in town. (When your region’s largest metropolis has fewer than 200 people…) Together we are in the gestational phase of starting a woodworking club with just the four of us working in my studio, the only space any of us has that would be amenable to the enterprise — plenty of workbenches in a heated work space. I think the plan is for us to gather weekly to work on individual projects as our schedules allow.
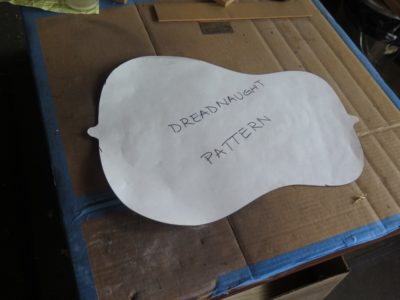
Since I am in fact the only one of us four who has never built a guitar from scratch I will be the main hindrance to the overall performance level. Still my enthusiasm for the effort is high, and not too surprisingly I expect to bring my own peculiar approaches to building a dreadnaught six-string guitar. Eventually I will build a hammered dulcimer for Mrs. Barn, who has expressed a strong desire for one ever since listening to the pastor/musicologist play his at a local music program. She never reads this blog so I will be able to maintain the secret surprise until it is finished.
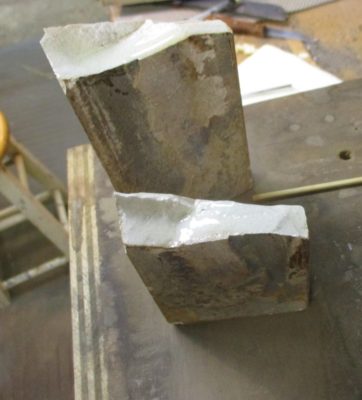
Among my inventory of sharpening implements is an old 8000-grit ceramic water stone that I bought perhaps 35 years ago. I recently dropped it on a concrete floor with the resulting carnage you might have predicted — it snapped in two. Rather than toss it out I tried to salvage it and put it back to work.
Based on the character of ceramic sharpening stones, namely that by nature they are comparatively porous, the foundation existed for adhering the two pieces back together. In fact, since ceramic stones tend to be fairly soft and friable (fracturable) when adhering pieces of these ceramics together you have to pay attention to the adhesive-adherend margin, making sure that the density and hardness of the adhesive is congenial to the density of the adherend. While I cannot modify the character of the cured adhesive film, I can use other methods to modify its performance.
In this case I followed my longstanding practice of using dilute adhesive to size the gluing margin (the surface of the adherend), thus rendering something more hardened-sponge-like than a block of hard plastic in direct contact with the soft ceramic. The latter construct is much more likely to fail in somewhat short order as the harder, denser, and more cohesive adhesive breaks off some of the softer ceramic block, resulting in the failure. In this case I used an epoxy I had on hand.
I mixed the two parts thoroughly, then diluted it immediately with with acetone to yield a watery solution. This was applied directly to the broken stone surface, and soaked in to yield a fairly parched-looking surface. This results in an adhesive/adherent region perhaps ten or twenty of fifty times wider than that accomplished by full-strength epoxy alone. After a few minutes I added another application of the dilute epoxy, then set it aside until the epoxy was almost tack-free.
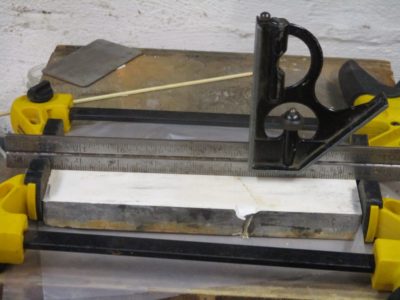
The it was ready for a bead of the full strength epoxy, which I applied to the lower half of the joint to make sure none of the full-strength epoxy would squeeze out the top glue line to excess.
Once the gluing surfaces were coated with the epoxy I placed the two halves together and applied very gentle clamping pressure, mostly to hold the two halves in correct alignment rather than drawing them together. Their fit was wonderfully tight from the git-go. There was a tiny bit of epoxy squeeze out on the top line, and I wiped that off immediately with a paper towel sodden with acetone.
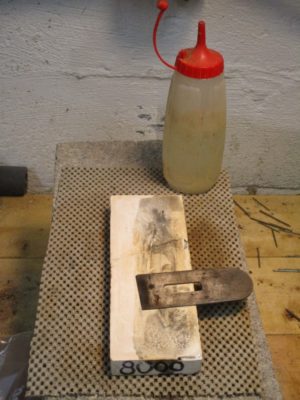
I let the assembly sit until the epoxy was fully hardened, then re-trued the surface, first with a sheetrock screen and then with sandpaper over a flat surface. Since it is an ultra-fine polishing stone it does not need much water; to make sure the epoxy is not challenged I simply wet it on the surface instead of soaking the stone in the water bath.
In use there is a little click as the steel is passed over the fracture line, but the stone still works just fine.
While browsing around the interwebz over the weekend I noticed that Rex Krueger featured Roubo’s winding-winding-sticks-on-stilts from our Roubo on Furniture volume. He is to be commended for bringing the message of hand-tool woodworking to a new audience.
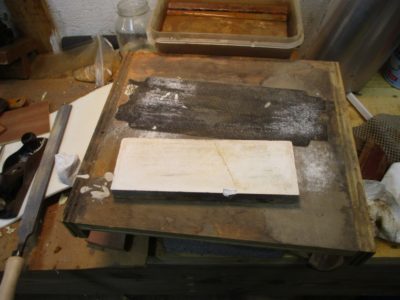
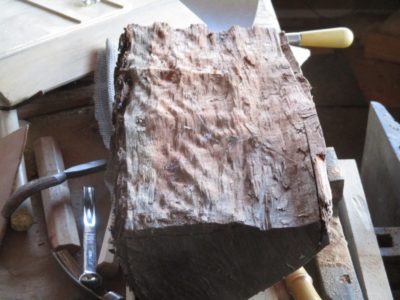
A while back a local friend brought me a pile of wood from his firewood pile. Not until he cut and split it did he realize that it was a load of quilted cherry. Quick as a bunny he brought it over, and I have been waiting for the best time to saw it up into usable boards. Unfortunately that time has not yet come, but my eyes glance over to the pile every time I go down to the first floor of the barn to feed the stove.
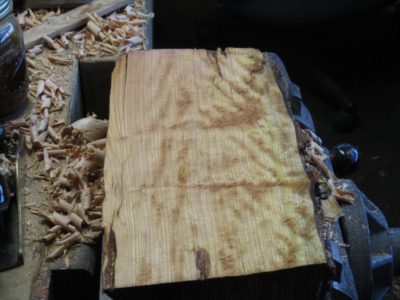
Even when viewing it along the cleavage line from splitting it is clear there is something pretty special inside. A few minutes with a scrub plane and fore plane, followed by a dousing of shellac, confirms the initial optimism. Given the firewood-size of the pieces, this one was about eight inches wide, I’m thinking of some particularly figured panels or small-ish boxes.
Spectacular, and I am betting that if you have a firewood pile there is plenty of woodworking and woodturning treasure in there too.


Recent Comments