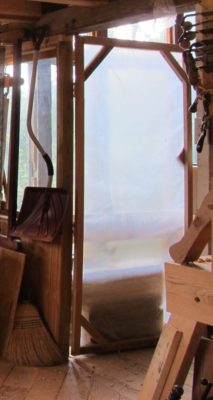
For the past several years, at least since I had a wood/coal stove and propane wall furnace installed to heat my workspace, I’ve been “making do” with a low rent version of doors in my shop. These were nothing more than frames with a double layer of polyethylene stapled to them, and they worked surprisingly well. But. the time had come for me to make something a bit more proper for the entryways to the heated space.
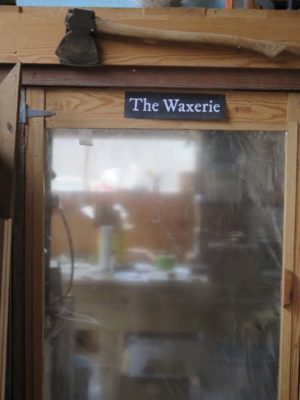
My starting point was a large piece of insulated glass from a former co-worker’s greenhouse; he’d had this panel replaced with a door so of course he thought of me when it came to dispose of the surplus. I’ve been keeping this piece in my inventory for almost twenty years, waiting for exactly this moment.
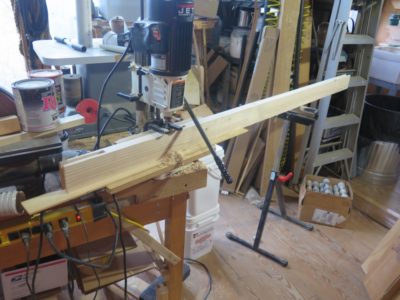
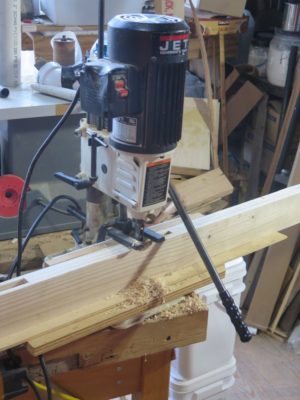
Building a door around this panel was a snap. I used clear 2x construction stock, joined with mortise-and-tenon throughout. I must say that one of my indispensable machines is the bench-top mortiser. I think if push came to shove it would be my next-to-last discarded machine, just below my band saw. Given the unit’s ability to function as a drill press it is a near-perfect twofer.
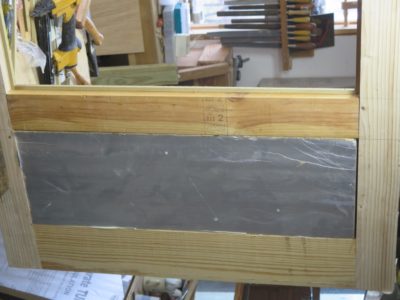
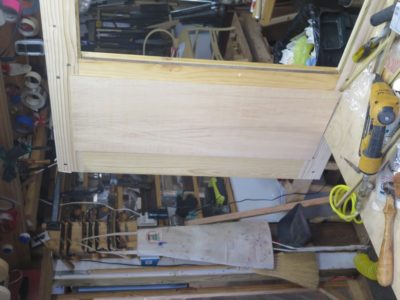
I sawed and chopped all the mortises and glued them together into the frame around the glass panel. At the bottom of the door I had a small-ish void into which I placed some 1-1/2″ foil faced panel insulation, again from my stash of recycled inventory. I faced both sides of the void with some 1/4″ bog-box luan plywood, glued and nailed in place.

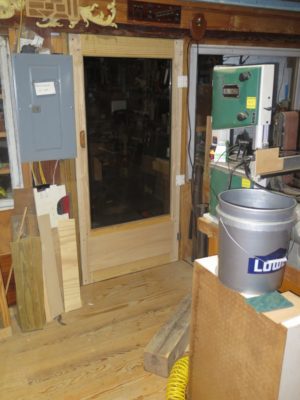
Using the same hinges as those on the poly/frame door I got the new door installed almost effortlessly. Once in place I outfitted the opening with snug weatherstripping and held it closed with a pair of cabinet door catches. I have not yet decided how to outfit the locking mechanism yet, but with these catches and some surface mounted pulls it works just fine.
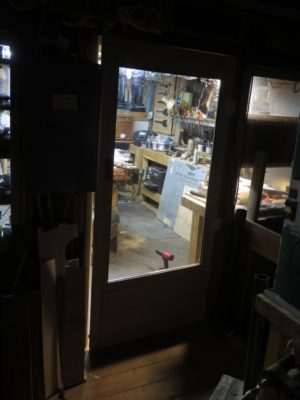
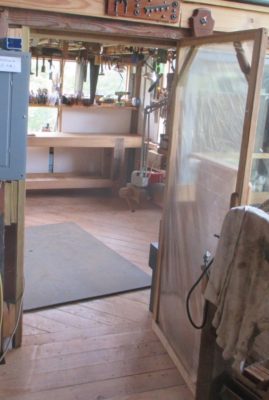
And may I say that the unit is much tighter than the predecessor, keeping the cold out and the warm in. Also, the clarity of the door panel is taking some getting used to. Even when closed, out of the corner of my eye my initial impulse is to turn and walk over there and close it.
One door down.

This winter will be the one during which I begin to address the door issue in the barn.
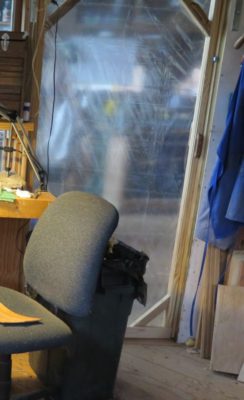

For the past 13 years the entrance into my studio space has been delineated by a pair of doors comprised of nice wooden frames with double plastic sheets, shower curtains actually, that have performed surprisingly well. But, the time has come to install proper insulated doors. Given the odd size of the doorways, determined by unalterable features of the original post-and-beam structure, the two doors into my studio space will need to be custom made.
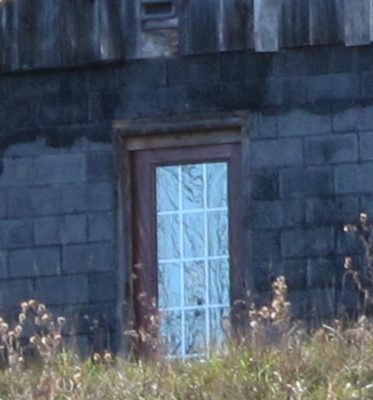
The standard entry door to the first floor/basement was framed in about two hours if I recall correctly, needing to fit a compression fit jamb using only the things I had on hand one Sunday afternoon before heading back to Mordor. What I had on hand was some scrap white pine joist stock and a tube of construction adhesive, along with a salvaged insulated door. Years later this haphazard installation has become decrepit to the point where a good blast of wind or even a curious bear could take it down.
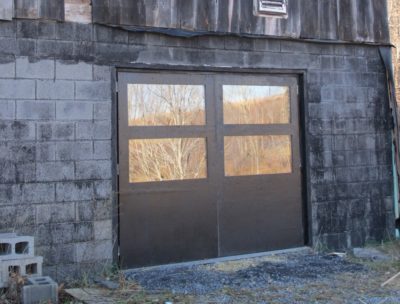
The garage-door opening of the first floor/basement was filled with a pair of four-foot-wide doors I made from 2x, plywood and with insulated glass inserts. Within a year of their installation (the photo was taken at the completion of the original installation) a howling windstorm caused irreparable damage to them (we get serious hurricane-strength (!) windstorms every year or so out in the holler) and ever since they have just been screwed shut with plastic sheeting covering the entire section from the inside. One thing has been made clear as a result, namely that I simply did not need a garage door-style access to the inside space as a matter of regular activity. I’m thinking of building a pair of panels, one screwed in place as an insulated wall and the other openable as a door to allow me to wheel my smelting furnace cart in and out as my foundry work progresses.
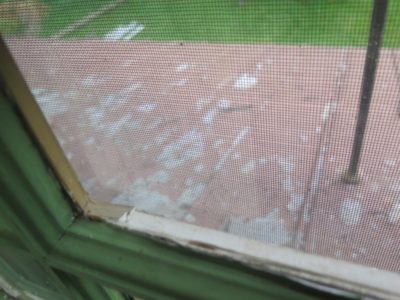
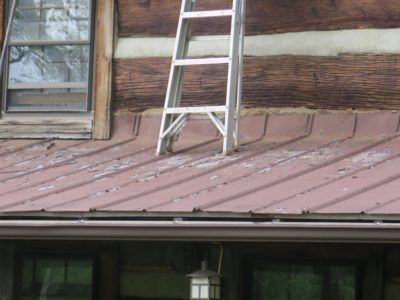
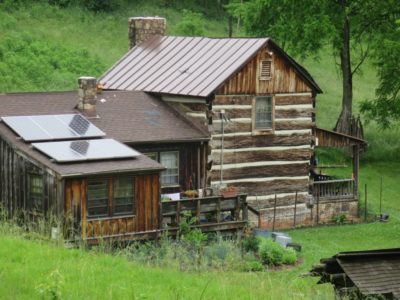
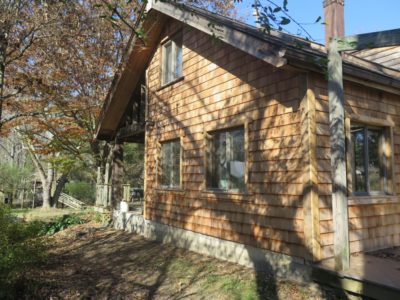
One of the things percolating to the top of the “Needs To Be Done on the Homestead” list over the past winter was the clearly evident need to bring some attention to the roof of the cabin. We had the standing seam roof washed and painted right after we bought the cabin twenty years ago but it was once again showing some age. I think the metal roof was probably installed around 1980 but there is no evidence one way or another. I only know it was looking tired in 2001.
My original thought for this summer was to get the old roof pressure washed and coated with roll-on epoxy paint. (My days of scampering around a steep roof are past, so the only certainty was hiring someone to do the task.) Asking around I got a sense of what that might cost but ran into a hurdle of finding someone who lives in the area to do the job. It was then that we saw the new roof going on the house of the farmer from whom we buy milk. It was a new, beautiful honest-to-goodness traditional standing seam roof, albeit with a baked enamel finish, and when I asked him about it he told me that one of the Amish families new to our area had done the job.
Not long after that I took Mrs. Barn and the older Barndottir to the new greenhouse just south of town, also operated by the same Amish family. While there I happened to speak to the father about our possible project and within a fortnight he was up to give me a bid. His estimate for removing the aged roof and replacing it entirely with brand new baked enamel steel roofing was almost the same price! The decision was not really hard to make.
Given the large number of aging standing seam metal roofs here in the hinterland he has been kept busy almost non-stop repairing and replacing them. He told me they moved here to be full-service carpenters (our county has one electrician, one plumber, and two home improvement enterprises so it was fertile territory) but his roofing work has pushed almost everything aside. We got on the schedule for a new roof in October. Then two weeks age we were notified that there was an opening in the calendar and our new roof project would begin the following day.
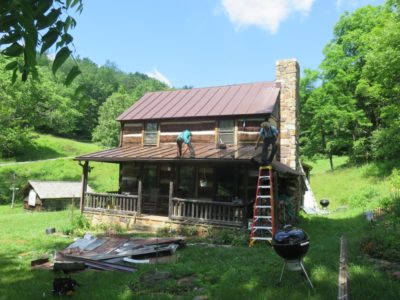
One of the drawbacks to living in such a remote are with such a sparse market of skilled tradesmen is that getting someone to do a job and do it in the time promised is pretty discouraging. So, when the roofers said they would show up at 9AM the following morning we were anxious to see if it would actually come to pass.


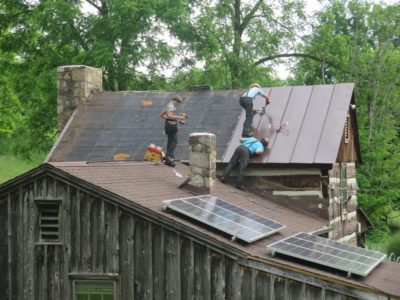
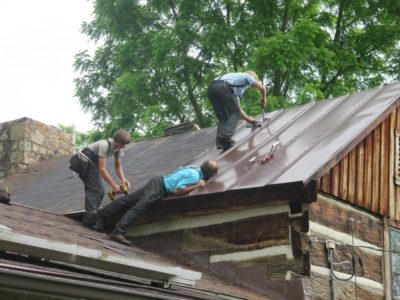
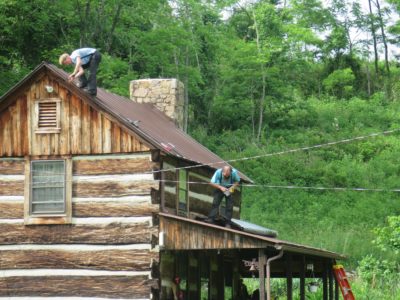
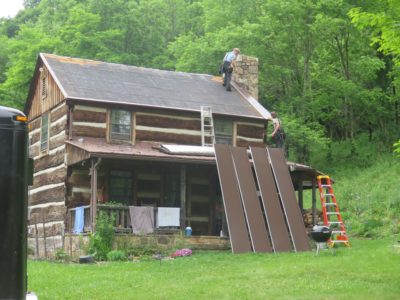
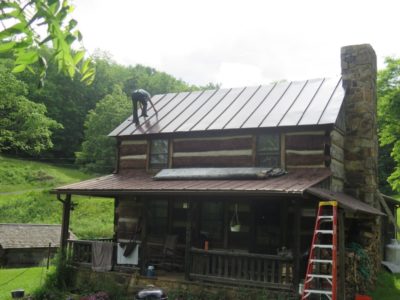

They arrived around 8.30AM. And, got the cabin roof stripped and installed in one day, using their mobile rolling mill to crimp all of the metal panels on the spot. Good thing as there was rain in the forecast. We knew in advance that they would be gone for three days attending a horse auction.
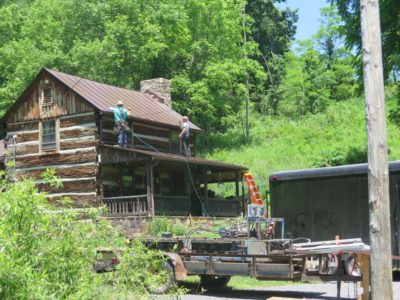
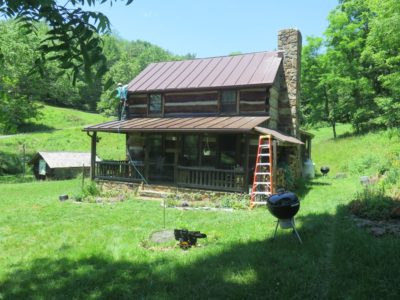
The second work day they also said they would be here around the same starting time. That was an untruth. They arrived at 7.20 and began installing the front porch roofing almost as fast as they were stripping off the old. By early afternoon they were packed up and gone with the flashing, storm clips and gutters installed and the job site cleaned up. I gladly handed over the check for the full payment.
I for one am thrilled at the prospect of more skilled tradesmen moving in to the region and I am helping a newly arrived Amish blacksmith build a foundry in his shop using one of my smelting furnaces. Now that is going to be fun!

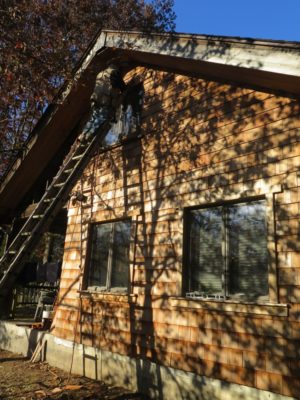
When I projected 90 minutes to completion of the living room siding I was off by just a tad. Yes, the removal of the older siding did take 90 minutes, but installing the new siding took a full day since almost every shingle had to to be fitted and cut individually. But soon enough and once I finished the corner trim, the wall looked brand new, and it was glorious. I have not yet decided whether or not to apply a cedar-tone translucent stain to the new siding to preserve the appearance. Stay tuned.

The only thing left on this wall is to finish re-installing the trim on the upper window and I can call it quits. This was on the calendar for the Friday after Thanksgiving, but I was instead occupied with more important and transcendent things sitting with my mom in her final hours.
The next step is to address the final section on the upper floor siding above the living room. That comes in a couple weeks, I hope.
Working with plastic “wood” decking is something I’d had a little experience with but this was the first large scale project, primarily due to the exorbitant cost. But, dottir’s friend P and I worked together for the better part of a week as he first removed all the aged and non-reusable old decking (and kept the burn pit flaming for three days) and then screwing down the new material. He started with the platforms in front of the porch and I began cutting the “boards” for the larger section in front of the living room.
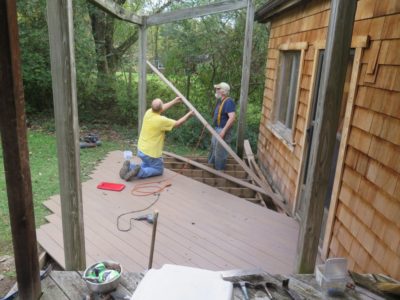
Working the plastic decking is not really dissimilar from using SYP except that there is no grain and much less binding with the circular saw. The stuff cuts like butter because in consistency it really is like stiff butter. The decking comes with some proprietary screws (very pricey, of course) and we went through a lot of them.
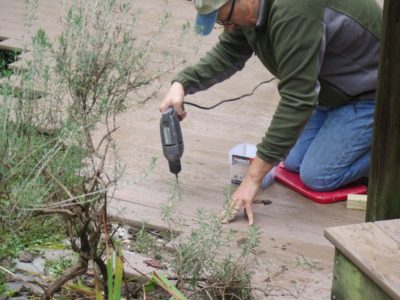
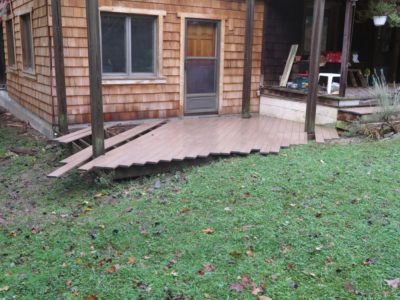
One thing I did notice is that this plastic stuff is much less stiff than SYP or even red cedar or redwood, and there is a distinct little bounce to the decking between the joists since we were applying it on the diagonal for aesthetic reasons. Were I to build a new, heavily used deck with this decking in mind I would definitely space the joists closer that the 16″ o.c. I did for this one thirty-plus years ago. Since this deck is really just a design feature that gets very little use (near zero, actually), the spacing and bit of bounce was not an issue.
After all the “boards” were screwed in place I used a long straightedge to guide my saw in trimming the ends and the project was finished. My project for next year is to dismantle and replace the sagging beams and replace the open arbor that used to be there. The beams were assembled with Japanese joinery, which requires fully seasoned/very dry wood, but the material was not dry enough so over time as the wood dried its dimensions changed and the joint sagged.
…And I would have finished the shingling on this side of the living room. I just ran out of time.

This is how I left the south wall a year ago.

Another hour-and-a-half of shingling and then it will be on to trimming out the upper window and the wall corners.
I resumed the work that I’d been doing last autumn and was making pretty good progress while dottir’s friend was dismantling the front decking. It was actually nice to work on a wall that only has windows, rather than a wall that has plumbing, electrical service, a/c paraphernalia… I was making excellent progress before I had to switch to working with him on the new decking.
Next trip back I can finish the shingling and the new trim without a hitch. Then on to the final stretch of the new shingling on the upstairs wall above the living room.
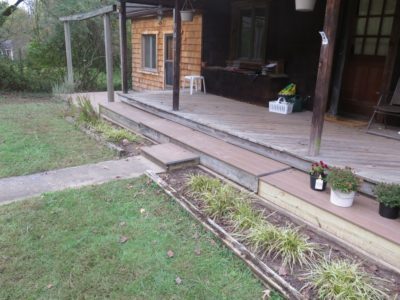
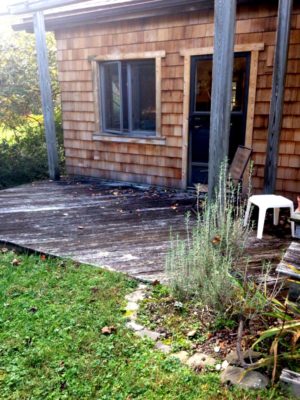
A couple weeks ago I spent several days working on the old house, first replacing some degraded decking on the front side of the house. There’s is a lot of decking on this house, somewhere around 1900 s.f. which needs replacing periodically, especially that which is exposed to nature directly. Such was the case her, as the decking in front of the living room and the platforms for potted plants across the front porch had been in place almost 3-1/2 decades, and were looking all the more shabby alongside the newly installed cedar shingle siding.
Dottir has a friend from church who is temporarily out of work due to Covid insanity so I was able to hire him for the week of work.
My plan was to replace the old SYP decking boards with synthetics so I would not have to address this problem any more in the lifetime. The only downside to using this material was the cost, which was $4/l.f. So, these two small sections of decking cost more than my first purchased domicile, a very nice 12×60 mobile home in 1975.

I also planned to re-use the sub-structure if it was in good enough shape, which was true for everything except one of the front platforms. Taking the old decking off required patience and care as the original screws had become subsumed by the wood expanding and contracting innumerable times over the decades. Two days of this and we were ready to roll with the fancy new plastic boards.

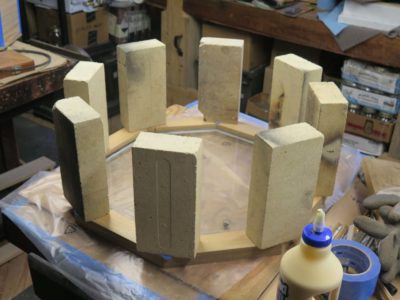
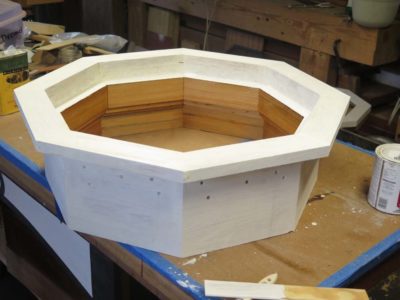
With the basic octagon frame glued and toenailed together I systematically added the inner jamb for the screen and the outer jamb for the tilting window. I moved on to the tilting window frame itself, different only from the unit frame in the orientation of the individual pieces and the cutting of the glazing rebate before assembling everything. None of this was particularly difficult, just some of it was a little fussy. Again the joints were butt miters with waterproof glue and toenailed with my pneumatic pin nailer.

Once I made sure the pieces fit together it was time to add the fascia and start the finishing.

To make sure the window unit was the longest lasting unit I could make I used the old-growth cypress throughout the entire project. That alone should add decades. On top of that every surface had several coatings of finish. The outside surfaces received two coats of primer followed by three coats of acrylic latex enamel. The inner surfaces had three coats of oil-resin varnish applied to them. Oddly enough I must not have thought that the ready-to-install window was worthy of a picture as I did not take one of everything all put together, painted and varnished.


With all the pieces now assembled it was ready to be installed in its new home. The three layers of weatherproofing the original hole in the master bathroom performed well, I am happy to say. I peeled all that off and hoisted the new window on my shoulder and carefully climbed the ladder fervently praying that the fit was good. It was. All it took to install the window was to get the orientation exact and pound it home with a few gently taps from the heel of my fist. A wave of relief washed over me as I did not have to adjust anything.
Now came the truly time consuming part of the project, weaving in the new shingles around the window and the roof fascia. The roof fascia was not removable since the new roof and drip edge were securely fastened to it.
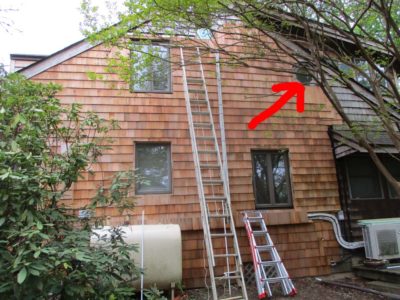

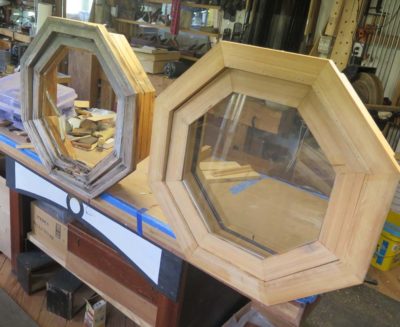
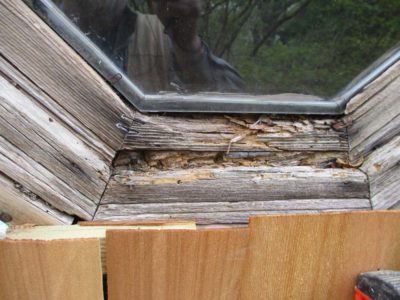
During my most recent foray into the battle of the cedar shingles I was finally at the location of the octagonal awning window in the master bathroom, indicating only another hour or two to completion of that side of the house. Alas, this is what I saw; the window was beyond repair even though I had painted it thoroughly when it was installed 33 year ago. Admittedly I had not monitored it for a very long time and the unit was made from white pine, not renowned as a durable exterior material. Both Barndottir and I searched the web diligently for a replacement unit, but a suitable one was not to be found. We could get one that opened, or or that was the right size. But not both.
Using a cat’s paw and small pry bar I got the window and casing out safely and more easily than I had originally feared, throwing away the exterior trim even though it was cedar. I made the opening weather-tight then hauled the carcass back to the barn to start on making a new one.
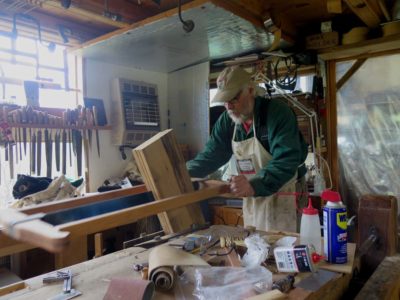

I decided to make the new window from my stash of prized old-growth cypress for longevity’s sake and set to work. I re-sawed the 11/4 cypress mostly by hand then dimensioned it with my lunchbox planer.
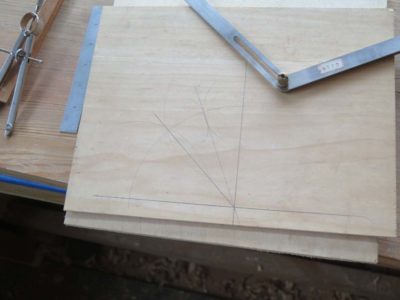
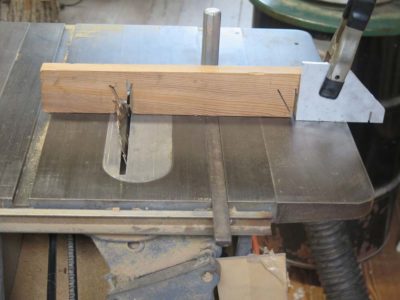
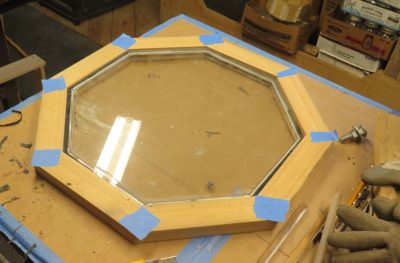
I spent the most time of the project getting the angle for cutting the miters perfect on the table saw so that all eight corners were tight when gluing it up.
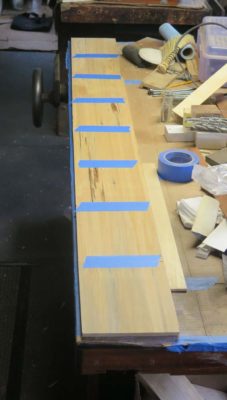
I taped all the segments together, applied Titebond II to the insides of the miters and just rolled it up, holding everything in place with the tape after double checking the squareness. I toenailed each miter joint with brads from my pneumatic gun and set it to dry overnight
Thus the first session ended with the octagon box glued up, a very satisfying stopping point. Foolishly I did not take a picture of the octagon box at this stage but you can see it in the next installment.
Progress on the house siding has been slow but steady. On our last trip I made it all the way to the peak of the wall, making sure to be careful and cautious the whole way up and down the ladder, The use of which made me think of my late friend and colleague Mel, who gave me the ladder with the comment, “I’m done going this high.” The ladder is a beast but there is no other way to get to where I needed to go.

As I was zooming along thinking I would get the entire wall ready for trimming out I made it to the octagonal window in the master bathroom. Uh oh, this does not look good. The bad news is that the window is totally shot. I’d painted it when installing it 33 years ago but time has not been kind to it. So out it came, adding another thing to my “To Do” list. I will make a new one immediately on return to Shangri-La.
The great news is it is plain old weathering and rot, and the surrounding material was in perfect shape. No evidence of a cockroach’s cousin to be seen anywhere in the vicinity.
I have been sending pictures to old friends who know the house, and one replied, “This looks great and like it will last another forty years. By then you will have to be REALLY careful up on top of the ladder!”

Recent Comments