One of the frequently voiced concerns(?)/legends about hide glue is that it should or should not be used because it is so moisture sensitive and joints are prone to failure. From one perspective this feature makes it an unreliable adhesive, from the other it is a near-perfect glue for working on historic artifacts.
A couple weeks ago I used 192 gram strength hot hide glue to assemble a portion of a 7/8″ stock dovetailed box (I will be blogging about the project as a whole once I am done with it) and for some reason the joint dried with a bit of twist. Not a ton, but it was aggravating and probably the result of me inattentively setting the workpiece onto an unlevel surface. So I decided to undo the joint with some water and re-do it correctly (which I did ex poste) this past weekend.
I swabbed the joint inside and out with water and returned a couple hours later.
No effect.
I wrapped it with a wet rag and let that sit over night.
No effect.
Finally I immersed the entire joint in a pan of water and left it to sit and soak. And soak. And soak.
It took two days for the joint to come apart.
If that is “water sensitivity” I can only imagine how robust my joints are when I crosslink the hide glue in situ.
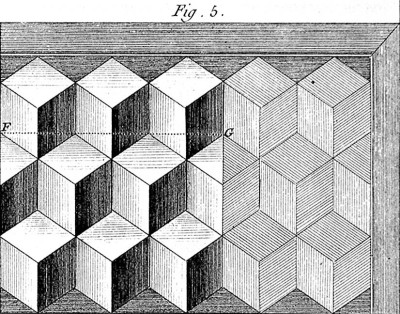
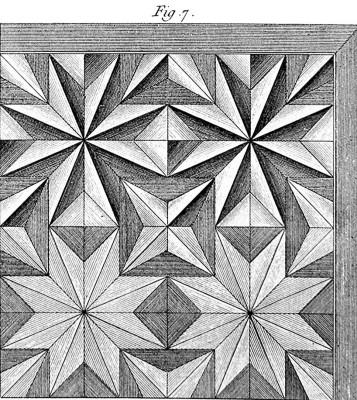
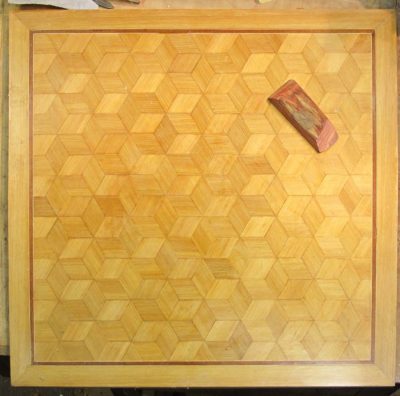
The final of the summer workshops at The Barn will be held August 19-21, 2016, and involve the replication of three principal patterns for parquetry as documented by Roubo’s L’Art du Menusier, from which we have created To Make As Perfectly As Possible: Roubo On Marquetry.
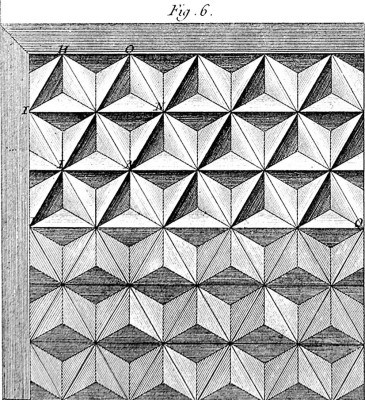
Unlike some of my earlier workshops in marquetry and parquetry, this weekend will focus entirely on the replication of the techniques (lots of precision saw and planing jigs involved) rather than making a completed project. From the review of the design, the sawing of the veneer stock and the individual elements, the participants will leave with completed jigs integral to the techniques and a solid foundation for incorporating these designs into their own work.
Drop me a line here if this interests you.
Once again this year I made a point of making the pilgrimage to the mother lode of vintage “user tools,” namely Martin Donnelly’s July “cleaning out the warehouse” auction in Avoca NY. Not only is the tool selection mind-numbing (3200 auction lots of 50,000? tools) but it is a highlight to spend time with friends old and new. My pal MikeM and I have been tempting the fates this way for it seems like almost two decades. This year our circle included Martin from Toledo, Jon (and the lovely tool mavenette Christine) from NJ, Tom from southern Maryland, long-time friend Craig from Michigan, and the Hyperkitten himself, tool merchant extraordinaire Josh Clark. More about exploits with Josh in a subsequent blog.
If you have never been to the MJD Auction there is no way to describe it perfectly. Tents and tents and tents of old tools, just waiting to be pawed over and examined. And bid on.
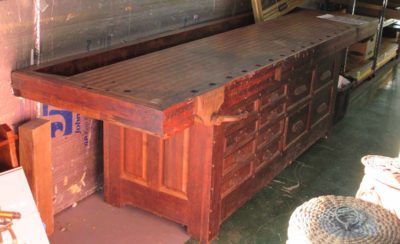
But for me this year the main interest was the chance to see and examine this workbench. It is simply amazing in its scale and mass, and the exuberance of its design and workmanship. The 10′ top is a full five inches thick made from walnut and maple lamina. In form the bench is an idiosyncratic hybrid of a German cabinetmaker’s bench and a piano-maker’s bench, with a finished cabinet of twelve drawers, some of which seemed cavernous. I did not get to see the rear side of the bench base, but I was told there were more cabinet spaces with fitted doors. I thought about trying to check them out, but an initial tug on the bench suggested it weighed only slightly less than an elephant.
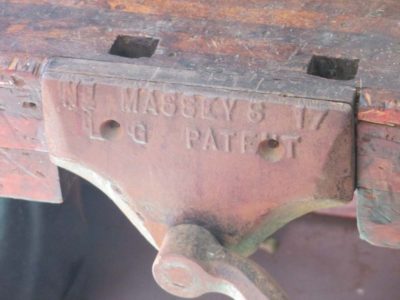
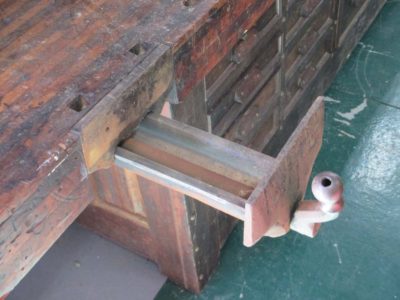
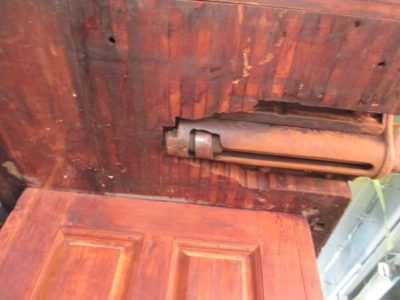
In addition to the jaw-dropping aesthetic of the bench design I was very much struck by the face vise. At first I was somewhat startled at seeing the cam-lever vise where a wheel-handled vise should have been. Oh goodness, I thought, did someone go to all this trouble to create this magnificent bench only to vomit out a Sheldon vise on the most prominent location? Imagine my surprise when I manipulated the vise and found a cam and rack vise that was a precision tool, tight and smooth in its action. I’ve never seen one before but am on the lookout now. I’m not the most serious vise historian but I definitely want to know more about Massey.
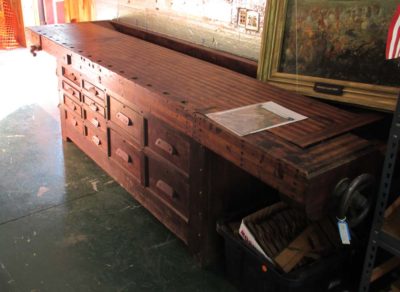
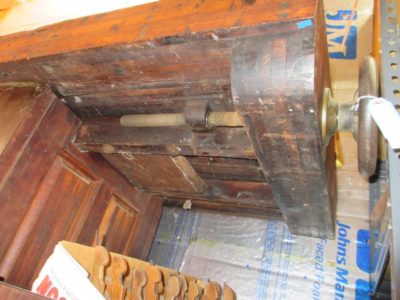
The end vise was equally peculiar, being a wheel handled L-vise. The space holding the bench was so confined I had no chance to get a sense of its workings since there was a shelving unit immediately abutting it.
As I departed (the bench was lot #2,500, with 700 more to go before then and with me facing almost eight hours of driving to get home) I chatted briefly with Martin Donnelly, congratulating him on the sale. He was grousing good-naturedly that now he had to deliver the bench to its new owner. I don’t know the location logistics for its new home but it wouldn’t surprise me if it took a half dozen guys to get it maneuvered there. We think this may have garnered the highest price ever for a workbench at auction. It was certainly the highest gavel price for anything this year.
I’ll be speaking with the new owner in a couple of days, and look forward to working with him to gain greater understanding of this “Wowser” workbench.
Up next – pre-auction grazing
The final steps in the conservation of the carved teak table were to augment/replace the missing ivory filigree elements in the top. Using ivory as in the original was impractical for a couple of reasons, not the least of which was that the budget for the project did not allow it. Secondarily the softening of ivory strips adequate for the tight bending into the now-empty channel would have require boiling the ivory in a lye bath, which was not something I was eager to undertake. So, I took and entirely different path.
In my inventory of stuff was some heavyweight paper of exactly the right coloration for the job. Since it was 100% linen rag paper it fit perfectly the desire for the repair to be both permanent if left alone and easily removable if such a desire emerged in the future. It also fillied the empty channels to perfection.
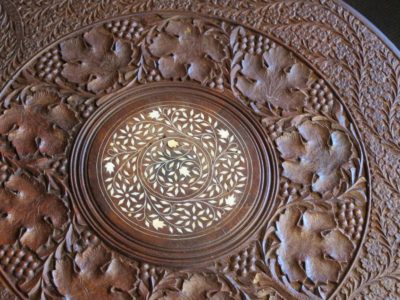
I cut the paper into strips that were proud of the surface by abut 1/16″ and set them into the voids. I then used a striping brush to saturate the paper on both sides of the fill with 192 Special hot hide glue to make sure it was perfectly saturated and would adhered to the channel and harden to the degree necessary to trim it.
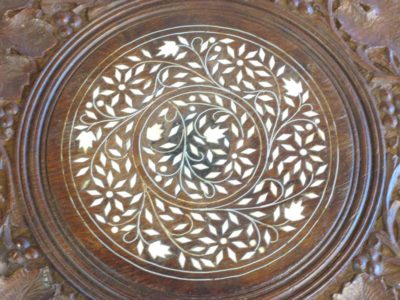
The next morning I carefully trimmed off the excess paper projecting up past the adjacent surface with a just-sharpened small Swiss bench chisel, then swabbed the area with distilled water to remove any surplus glue.
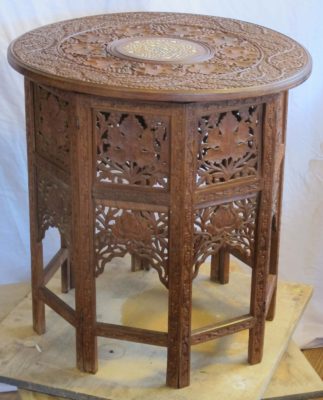
With that the project was essentially done.
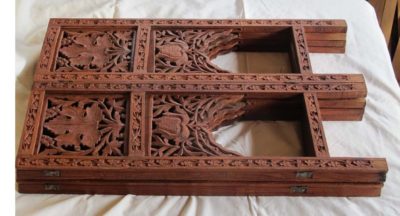
A quick application of paste wax finished it off, and I folded up the base and took it back home.
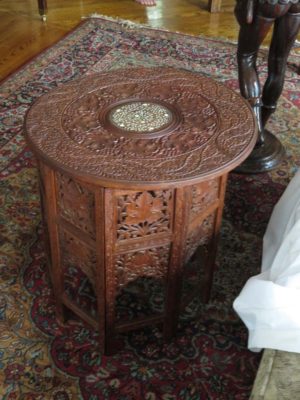
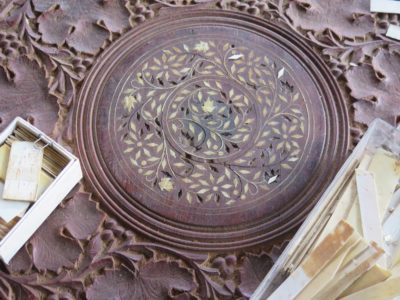
In switching my attentions to the top of the Anglo-Indian teak table, the primary focus was quite necessarily the dozens of missing diamond-shaped ivory inlays. While these intarsia elements seemed identical at first glance, a second glance revealed they were only similar, not identical. The angles were all the same but the dimensions were not.
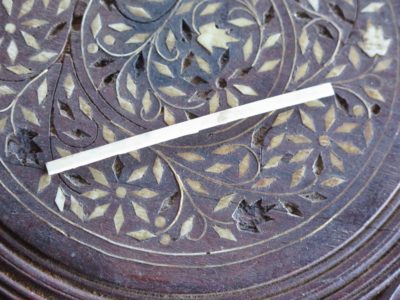
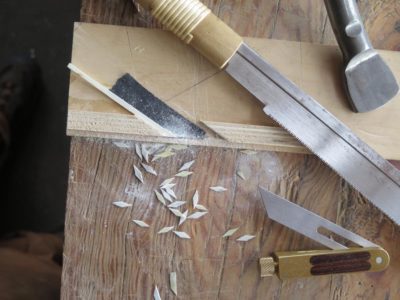
I started by cutting some ivory piano keys into strips, then set up a sawing jig to turn the strips into diamonds.
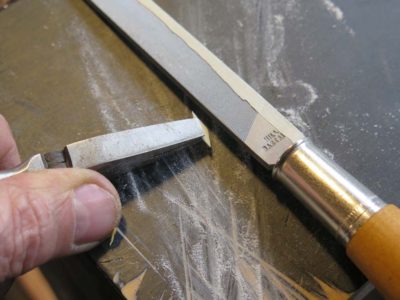
Since each inlay was slightly different than the others I wound up touching the edges of each one with a file to get it to the right dimension. Once that was done a put a drop of 192 Special hot hide glue into each recess and placed the replacement piece there.
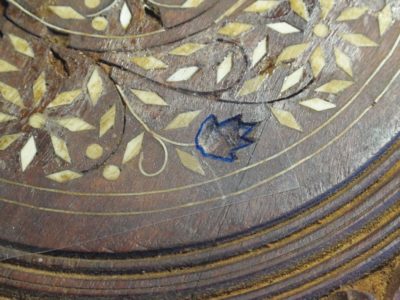
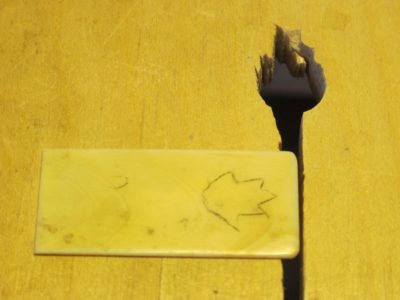
For each missing floral element I traced the void onto polyester sheet, then copied that onto ivory by placing a piece of carbon paper between the polyester and the ivory and used a tracing stylus to make the transfer.
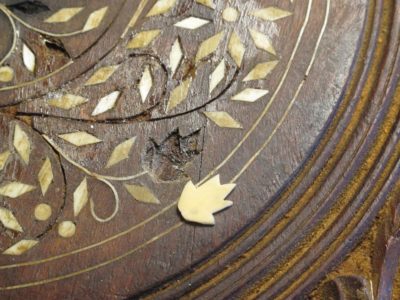
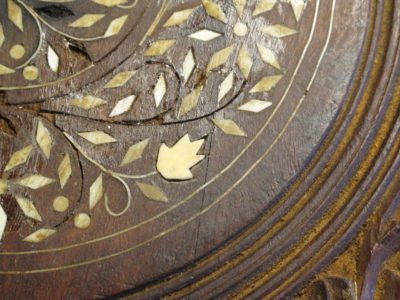
Then I sawed them out with my trusty Knew Products frame saw, trimmed them as necessary with a needle file, and glued them down the same way.
That left only the very thin filigree elements, which required thinking way outside the box.
As I get older and creakier I become increasingly attracted to 1) Japanese woodworking techniques — what’s not to like about a system that depends on you sitting down for most of the work, except for all that contorting and hip-snapping posturing while working, and 2) working while standing up straight so you don’t have to bend over all the time. I think #2 is a big reason we are seeing a renaissance of interest in woodworkers building and using Moxon style vises.
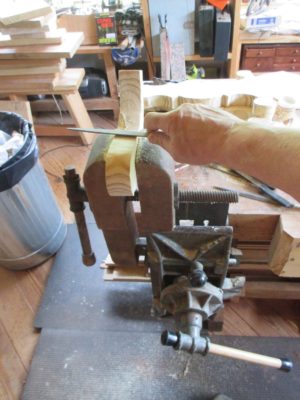
I have not yet gone there, although I will, but my current project of building a writing desk in the style and technology of the early 19th century is drawing me to an old tool I bought on Craiglist some time ago but am only now using it on almost an hourly basis.
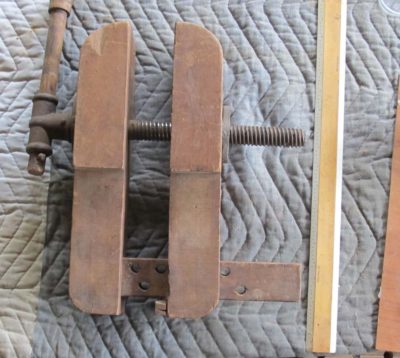
This old vise, purported to be from Amish Country in northern Maryland or southern Pennsylvania, is a miniaturized version of the leg vise that was nearly universal on woodworking benches for two centuries until the advent and popularity of German or Scandinavian style contemporary benches.
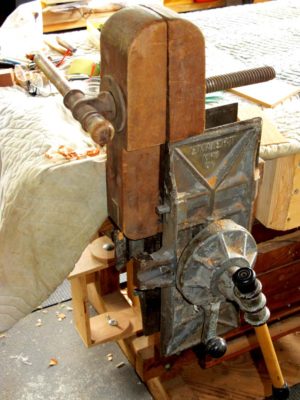
I love that this miniature leg vise fits perfectly into my upturned Emmert, yielding a work space that is perfect for fashioning curvilinear components.
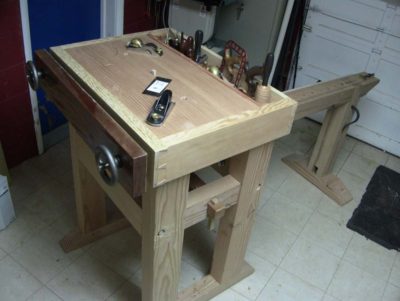
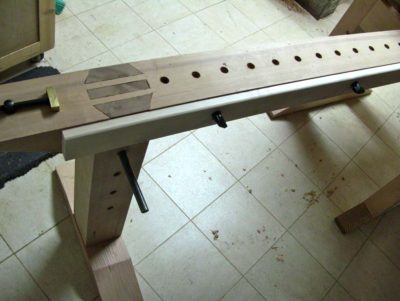
I think I will some day, maybe even some day soon, replicate the ingenious design of Shannon Rogers’ workbench, of which a portion is a standing height Moxon and the other portion a standard height Roubo-type. (photos courtesy of Shannon Rogers)
With the panels reassembled after the fretwork was completed, I installed them into their openings and finished them to be visually harmonious with the remaining fabric of the table.
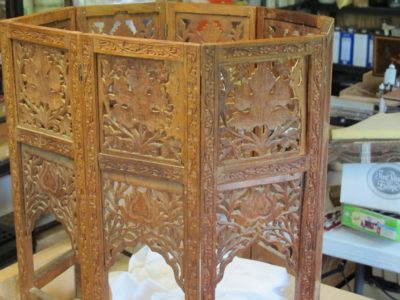
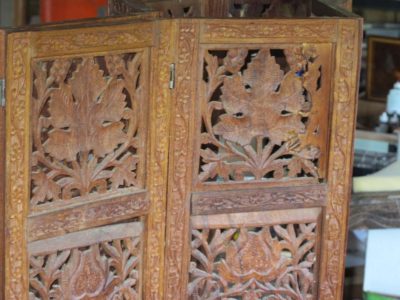
Using a combination of shellac/ethanol solution with dyes and pigments and aqueous shellac/gauche I was able to pull the coloration together. Once again, my aim was to get the gray value right first, then the chroma and hue, and finally the gloss. Here are a couple of “along the way” images to show the gentle buildup of the coloration in a glazing method.
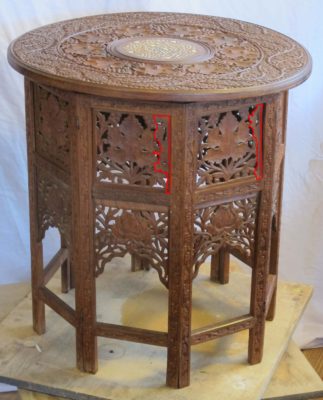
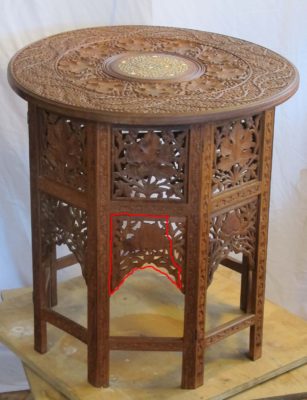
In the end I was not displeased with the overall result.
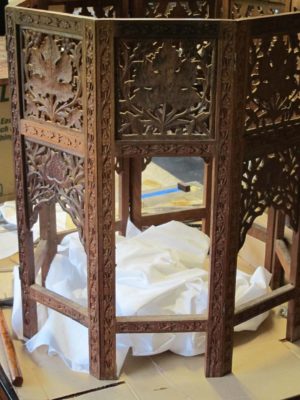
Several sections of the pierced grills that served as the infill panels on each of the table sections were missing, well, three to be exact. The original panels were made of carved teak, but I went in a different direction. This was due to a number of factors, not the least being I did not possess any suitable teak, combined with the reality that carving the replacements would have made the project too expensive for the client. In the end we agreed for me to cut simple fretwork replacements from spanish cedar and finish them to be harmonious with the overall appearance of the table.
I prepared some blank panels of the spanish cedar, chosen because it was softer than the teak and its tonality was amenable to the finishing. The softness of the wood was no particular benefit to me in my own work — I was sawing it by hand with a Knew Concepts saw outfitted with a 2/0 jewelers blade so it cut like butter — but was beneficial in that any failure due to new stresses would occur in the new wood (or the interface between the old and new) and would inflict no further harm to the original material.
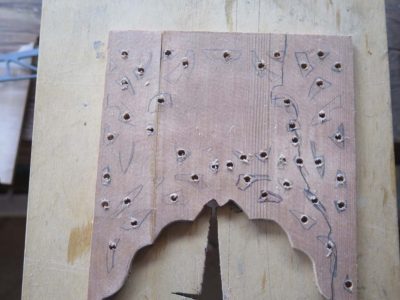
Placing the prepared blanks behind the intact fretwork panels allowed me to trace the pattern of that panel onto the new plain replacement wood.
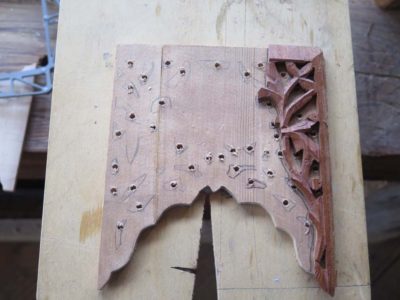
For the partial panels I followed the same procedure and merely grafted the new with the old. I glued them together with 192 gws hot animal hide glue after first cleaning the gluing surface on the remaining original material with with a mild aqueous detergent solution followed by an acetone swabbing once that was dry.
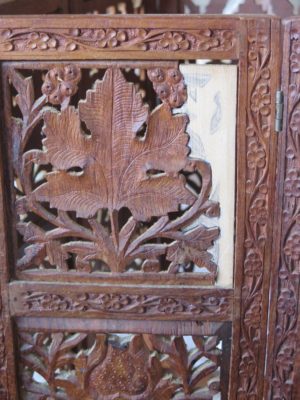
En toto I had one arched panel to replicate with only a small original portion extant, one square panel that was mostly present, and one that was mostly absent. This one illustrated was not what I wanted as I misaligned the top of the new piece. Since it had not yet been glued in place I just made another one that was correct.
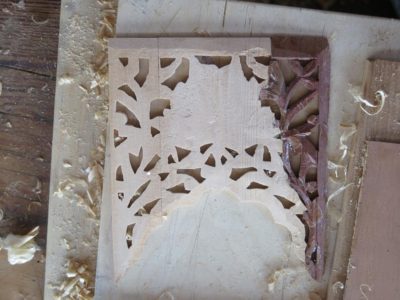
I reasonably short order I had new material grafted to the old material in such a manner that there was visual compatibility.
Last Friday I stopped at Virginia Frame and ordered the southern yellow pine 24-foot 2x12s we’ll be using to build the workbenches during the upcoming workshop July 25-29 at The Barn. Since I did not have time to go through the pile with the crew there I was relying on their handiwork in creating a big pile of 8-foot 2x12s from their inventory.
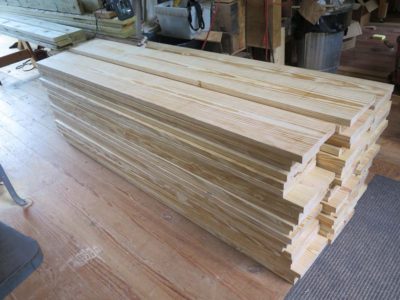
It arrived this morning as I was preparing to go get some milk for my breakfast cereal. The driver chugged up to the barn and we unloaded in about ten or fifteen minutes.
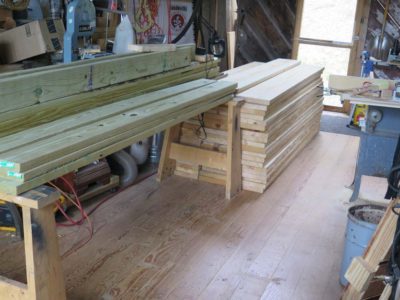
This afternoon I sorted through the pile and restacked it so everything would be ready to go in ten days. About 2/3 of the material was clear and select, another quarter had small knots that would bot affect anything, and a tiny handful had large knots. Not useless, but not prime material either. Fortunately I had ordered plenty of extra, and one of the participant had to drop out due to a promotion and some mandatory training. If you want to take his place, let me know.
I’ve got a hectic week scheduled upcoming, so I wanted to get everything set up well in advance. One or two little things tomorrow and I will be ready to go.
Along with The Lute Player I had two other projects from the same client that were as wildly different as you can imagine. One was a folding teak table with ivory inlays that had belonged to his mother decades before, so it was a heartfelt heirloom for him. I found it to be a fascinating piece given that it folded flat for transport, much like the campaign furniture Chris Schwarz and Andre Roubo have written so much about.
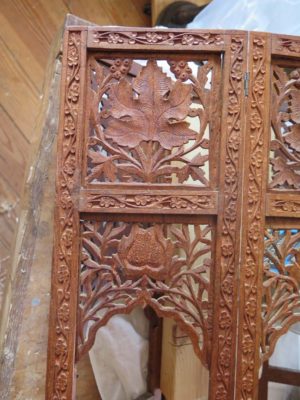
Here’s the starting point for the project. There were two major areas of interest. First was the three sections of missing carved teak in the lower panels of the folding base. (Somehow I cannot find the images of the missing sections, so these images of an intact and complete section along with the layout of one of the repairs will have to suffice)
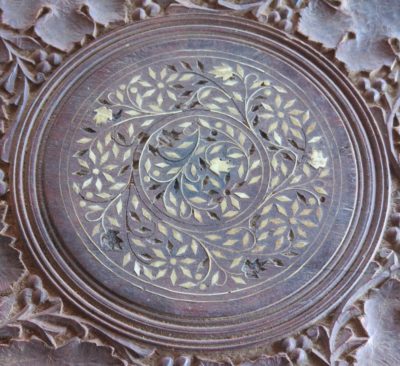
Second was the slew of missing ivory inlays on the top.
In coming posts I’ll walk through the treatment decisions and execution, including an exposition on the choice of non-traditional non-original materials for part of the work.


Recent Comments