I have settled on the topics and approximate schedule for next summer’s classes here in the hinterlands, with three of the four classes emphasizing toolmaking. I will post about them in greater detail in the near future. One minor change I’ll be instituting next year is that three-day workshops will now be Thursday-Friday-Saturday rather than Friday-Saturday-Sunday as before.
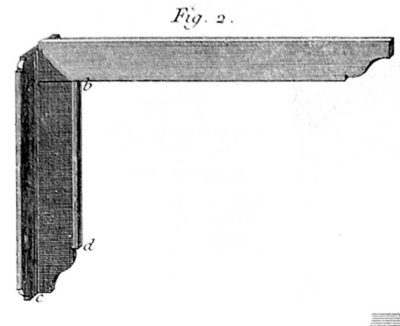
June’s class will be a metalworking event, Making A Nested Set of Roubo’s Squares. The objective will be for each attendee to create a set of four or five solid brass footed squares, the sort illustrated in Roubo’s Plate 308, Figure 2. The special emphasis will be on silver soldering, a transforming skill for the toolmaker’s shop. The tentative dates for this are June 6-8 or 20-22, $375 + $25 for materials.
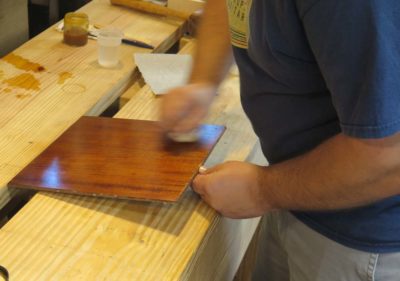
July’s class will be my annual offering of Historic Wood Finishing. Each participant will complete a series of exercises I have devised for the most efficient learning experience to overcome finishing fears and difficulties. Of particular importance are the aspects of surface preparation and the use and application of wax and spirit varnish finishes using the techniques of the 1700s. Probably July 11-13, $375.
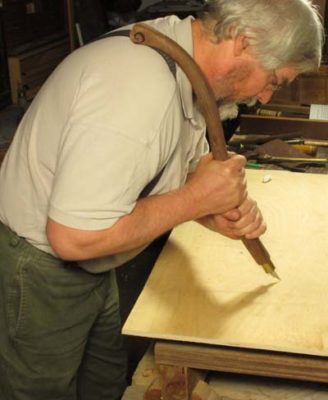
In August we will continue the pursuit of Roubo’s tool kit, this time Making and Using Roubo’s Shoulder Knife. I have no way to know exactly how prevalent was this tool’s use in ancient days, but I suspect more than I can imagine. Each participant will fabricate a shoulder knife to fit their own torso, so its use can be both the most comfortable and the most effective. Probably August 15-17, $375.
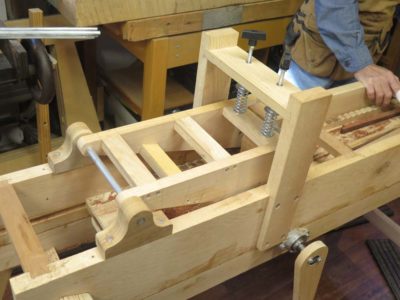
The final class for the year will be a week-long Build A Ripple Molding Cutter. As I have been pursuing this topic and blogging about it, fellow ripple-ista John Hurn and I have settled on a compact design we think can be built by every attendee in a five-day session. Together we will be teaching the process of ripple moldings and fabricating the machines that make them. September 23-27, $750 plus $200 materials fee.
Save the dates and drop me a line for more information.
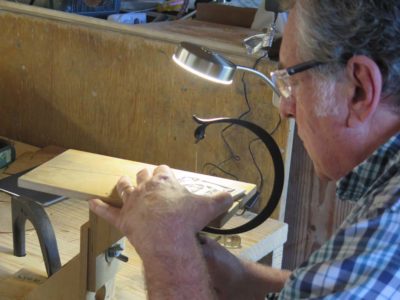
Every three or four years I teach my approach to Boullework, a branch of marquetry technically known by its original Italian title of tarsia a incastro (literally “interlocking inlay”) that was so prominent in the 17th and 18th Centuries . This identifier probably comes from the fact that all the elements of the composition — positive, negative, and sometimes additional accents — are cut simultaneously and do in fact “interlock” with each other. I always cut my marquetry vertically by free-form rather than horizontally on the chevalet, due to the fact that I have almost fifty years of muscle memory doing it the way I do it. This approach also has the advantage of allowing newcomers to begin work with only a flat board as a sawing platform, a frame saw, and some tiny saw blades, investing very little resources to begin.
My approach also has the component of using a persuasive imitation tortoiseshell (nicknamed “tordonshell) I invented several years ago to compensate for the fact that true sea turtle shell is a proscribed material as a result of the world-wide adoption of the Convention on International Trade in Endangered Species adopted in 1975, essentially forbidding any commerce or other transactions involving the two species of turtle shells integral to Boullework.
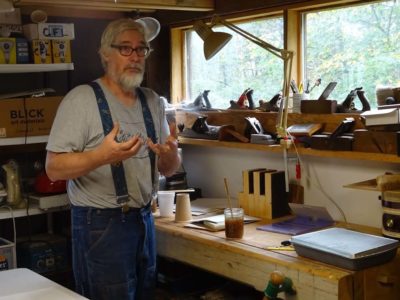
That is where the three-day workshop begins, with a brief chemistry/materials science lesson on protein macro-molecules and their polymerization and the morphology of tortoiseshell.
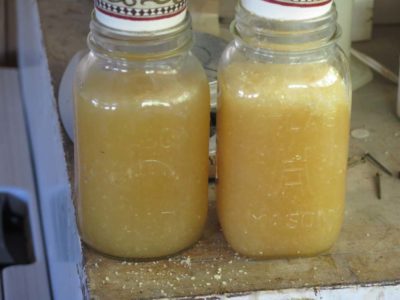
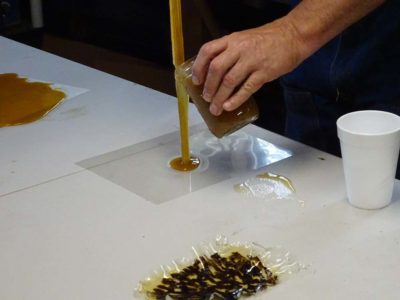
Using materials I prepared in advance, and the addition of ingredients at the moment, the attendees begin the lengthy process of making their own to take home with them afterward (this recounting of that is condensed from work over the three days).
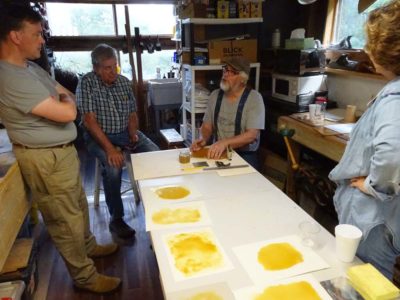
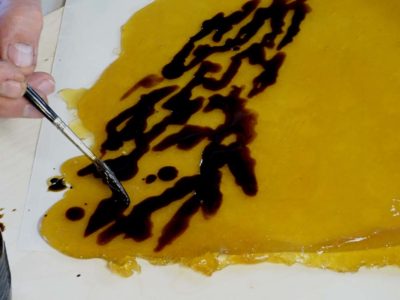
First they cast out a film that would become tordonshell, then created the pattern endemic to the material.
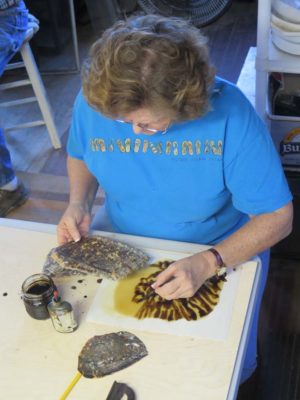
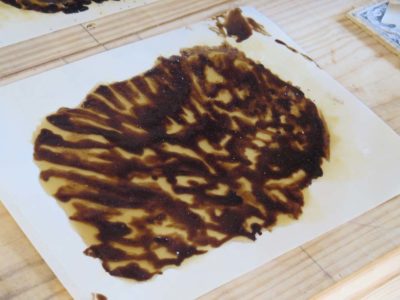

After watching me make a piece they set about to making their own. The results were gratifying.
The process took them the three days to get finished, in part because the chemistry was fighting me. In all the times I’ve made tordonshell I had not wrestled with the fundamental exothermic nature of the polymerization, but it was sure rearing its ugly head this time.
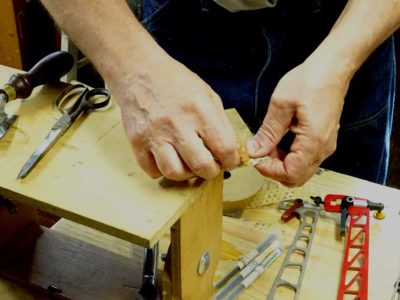

We then assembled 4″ x 4″ packets to saw (I was working alongside the attendees, I find they like me to be working on the same type project so they can peek over my should if necessary), consisting of a 1/32″ annealed brass sheet, a piece of tordonshell, and a 1/8″ plywood support. All of this was wrapped with veneer tape and the mirror-pattern of their initial was glued on to the surface with stick glue.
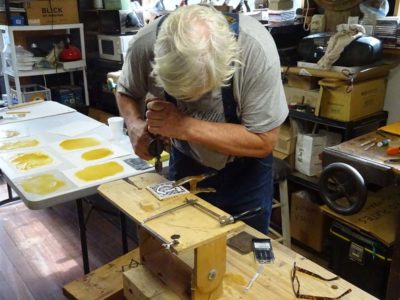
This approach requires beginning the sawing at the center of the composition, so a tiny hole had to be drilled with my ancient mini-eggbeater drill.

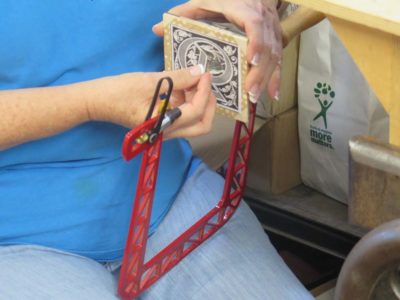
Once that was completed the saw frame was set-up and a 0000 blade was fed through the hole and the frame tightened down. this can be a frustrating task the first time, requiring four hands until you get the hang of it.. After that, no problem.
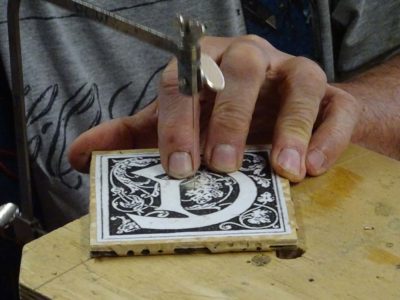

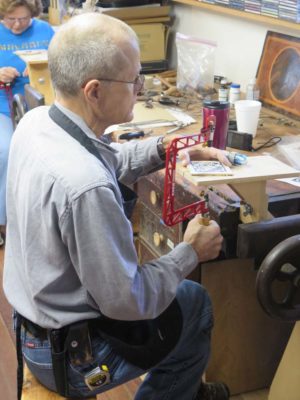
After waxing the backside of the blade the sawing (and blade breaking) began in earnest. There is a real “touch” to sawing like this, so indeed the blades were snapping right and left. Not a problem, I was expecting it. I provided the tools and blades for the most part, but John had recently purchased a new Knew Concepts saw and was giving it its first road test.
Joe had an intriguing saw from Green Lion, I only wish I’d had a chance to test drive it myself but Joe kept it busy. I think I may have to get one, just to round out my inventory. For the most part the others used Knew Concepts saws from my collection.
The sawing continued apace until Mrs. Barn called us to supper.
And that was the end of Day 1.
The stage and setting for the 2013 French Oak Roubo Project workbench build has been covered like a blanket around the woodworking bogosphere so I do not need to address it again here. Just do a search for “french oak roubo project” in your favorite surveillance vehicle/search engine and you will get a multitude of responses, probably somewhere north of 25,000 citations including blogs from about a half dozen of the participants including me. Now I’ll spend a couple of posts discussing the making of the bench, then one on the using of it.
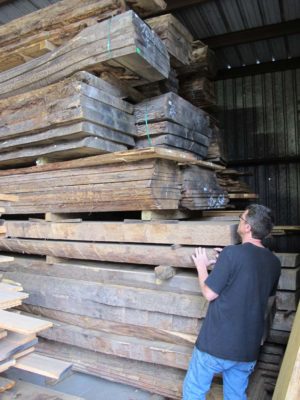
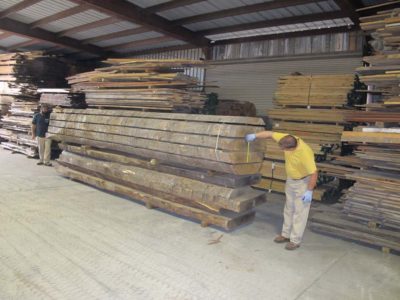
Our raw material was oak harvested from France following the catastrophic Christmas ice storm of 1999, which destroyed over 10,000 trees in the forests around Versailles alone. The trees were harvested and the lumber placed in storage, eventually purchased and exported to the US by entrepreneur Bo Childs, our host for the event who in concert with Jameel Abraham made it available to us. The most mature trees were likely alive even during the lifetime of Roubo himself, and some amatuer dendrochronology on at least one of the slabs put the seedling of the giant timber back to the Napoleanic era. Safe to say that none of us had ever encountered lumber like this before. These imported slabs measured up to sixteen feet long, two feet wide and six inches thick.
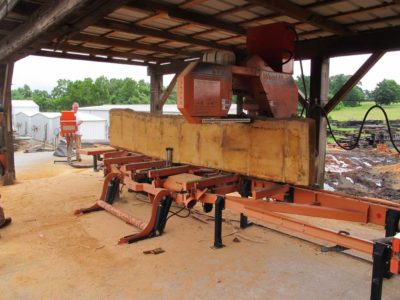
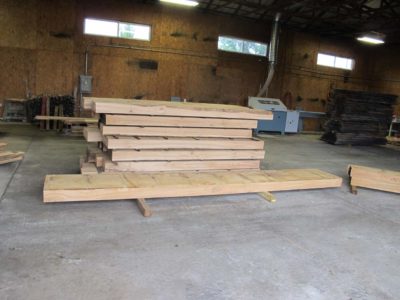
Soon enough on that sweltering July week we were coordinating into teams preparing the stock for the battle ahead. The end point? Slab topped benches made from almost 250-year old white oak, weighing in at about 500 pounds. Impressive. Fortunately thanks to his business Bo had the full range of machinery on hand, ranging from the forklifts needed to move these half-ton slabs around and the bandsaw mill to render them into rough slabs.
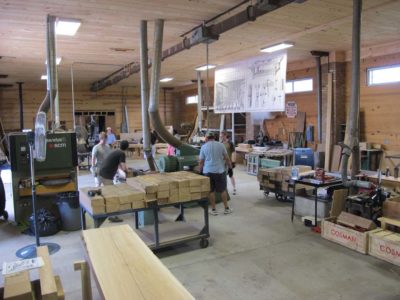
Beyond the material handling aspects, Wyatt Childs, Inc, possessed stock preparation capacity beyond anything I had ever seen outside of a full-scale furniture factory.
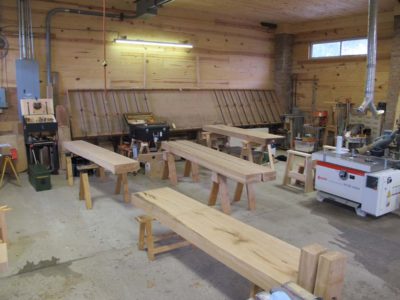
Before you knew it we all had slabs and legs roughed out, ready for us to get to work. Mine is the one farthest from the camera.
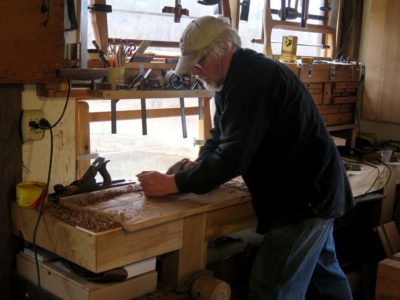
Once it was time to begin construction of the cabinet I looked through my pile of salvaged chestnut and hauled the necessary pieces up the hill. I rough cut pieces to size; there is no point in preparing an eight foot board when all you need is five feet. With the pile on a pair of sawhorses I carefully examined each one, both sides, to locate any wayward nails left behind. Fortunately my initial cleaning efforts at the salvage site were pretty good, I found only a couple of metal pieces left. But even these would have torqued me off to hit them with a plane or chisel.
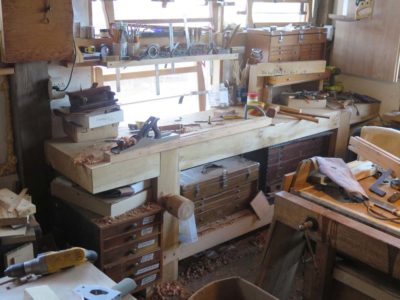
Prepping the lumber for further work was straightforward and pretty fast, all the more simplified by both chestnut’s relative softness and almost a century of seasoning for these particular boards. I made the panel stock from the 1x roof sheathing material and the frames for the frame-and-panel construction from sections of rafter lumber. My newly up-on-its-feet FORP Roubo bench was the platform for most of the work on this cabinet, even though all the amenities (leg vise, planing stop, etc.) were not (and are not) completed. It is a most wonderful tool, and coincidentally the focus of tomorrow’s workbench, and probably the next couple ones as well.

It all moved smoothly along to the point where I was shooting the dadoes for the panel insets and sawing and chopping the mortises and tenons for the joinery itself. It was simple but robust construction; tapered panels sitting in continuous dadoes in the posts and ends of the frames, which were held together with hide glue.
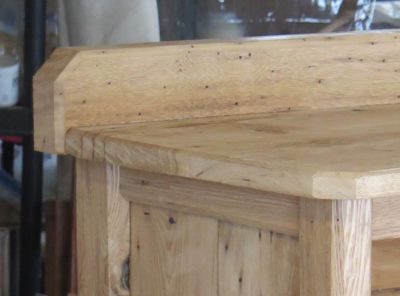
The details of the stylistic “design” were in keeping with the setting and intention, it was going to rest in a small room simply furnished, in a renovated cabin from the late 19th Century. To that end the “design” details were really all about proportion and crisp lines, with the only “ornamentation” being the presence of crisp beveled edges for most edges. Combined with the fairly careful surface treatment of the vintage gnarly wood the overall effect was not unpleasant.
Now it was on to the shelves and doors.
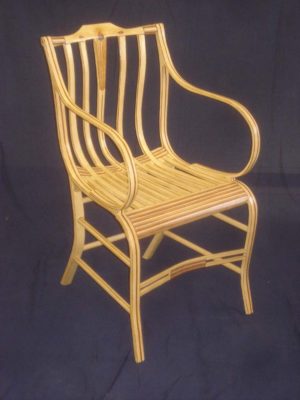
Much like the recently concluded account of replicating the early 19th Century legislator’s writing desk, over the next few months I will run a series of posts recounting the c.1810 Gragg “Elastic” chairs I am currently replicating in the shop. Though I have posted on Gragg chairs several times over the life of this blog I am hoping this series will renew your interest in them.
The story for these chairs (I am building two commissioned by clients and another for myself) goes back to a couple years after the completion of the original replica I finished in 2011. I published the proceedings of the project in that year’s American Period Furniture, the flagship publication from the Society of American Period Furniture Makers, you can read that article here. I am still pleased with that article but en toto these posts should be dramatically more complete in both my descriptions of work, with the continued refinement of technique and process, and my reflections on the challenges of making these chairs.
While reverse-engineering Gragg’s methods I learned a lot about not only how he worked, a combination of sinuous elegance and brute force, but also the kind of wood that would be best suited for making these iconic chairs. Like Gragg I confirmed the material that suited the project best was something like air dried red oak from very large trees (he used red oak, white oak, ash, and IIRC hickory). I remain so fascinated by the form that I continue exploring other routes to the same end point and will comment on those paths as appropriate.
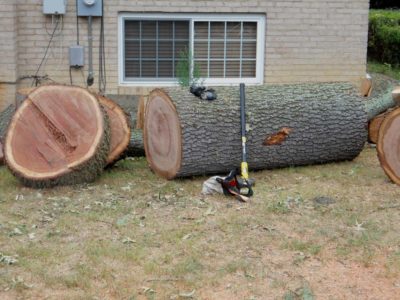
A bit over a year after finishing my first full-blown Gragg my neighbor Bob told me he was having several over-mature oak trees removed from his yard. Though still mostly-healthy their decline was underway and it was only a matter of time before they became an imminent threat to his house. When the lumberjacks arrived I asked if the boles could be sectioned into five or six foot pieces and left intact on the ground for me to harvest. I had to be elsewhere for much of the day so I did not get to watch them bring these behemoths down.
When I returned home later that day I inspected the bolts with anticipation, and spoke with Bob (and his teen-aged grandchildren who were lounging around) that I would be arriving after dinner to begin the harvesting. I’m not suggesting the yutes did not believe me when I showed up with a sledge and a bag of steel wedges and wooden gloats and told them I would be turning these 5,000 pound hunks into manageable pieces from which I would eventually make chairs, but truth be told the looks on their faces indicated they did not believe me. Over the next couple of days their eyes bugged wide more than once.
I have always found making mortise-and-tenon constructs to be more irksome than dovetails. After decades of struggling and countless m&ts I came to realize that much of my animus was due to mortising chisels themselves — they simply were not amenable to the work I was undertaking most of the time. Traditional “pigsticker” mortising chisels seemed akin to sticking a piece of steel into a rolling pin and using that to make a rectangular hole. That approach works for some things, things I do only rarely, but in the diminutive work such as fitting the steam bent slats of Gragg chairs into their crest rails working with oversized pigstickers was not conducive, for me, to good controllable work. Truthfully I got so frustrated that earlier this year I gave my complete set of vintage pigstickers to Steve Voigt.
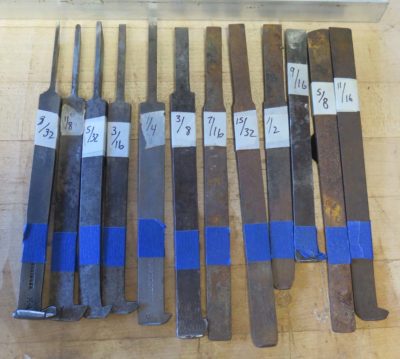
Instead I made myself a new set of mortising chisels more in keeping with the work that I do. And it all started with a derelict bunch of plow plane irons I’ve been assembling in recent years. Such irons are usually available for little money, especially if the ends are completely boogered up. Taking the pile that I had, I marked them all at the same length and noted their width. It was pretty clear I could have a wonderful set of precisely graduated sizes perfectly suited for the work I do, at least 99% of it. For the other 1% I have a couple more “standard” sized chisels, but who knows now if I will ever use them for anything but large scale timber framing.
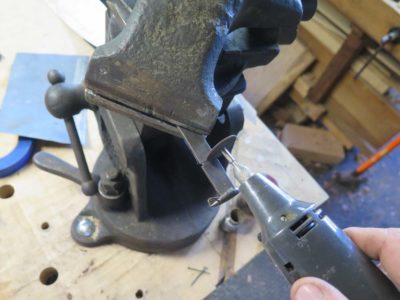
After marking them all to the same length with tape I cut them with an abrasive disk in my micro-rotary (yes, that is my new Emmert Universal Vise; it is real and it is spectacular). It took three disks and fifteen minutes before I had the raw stock to make the set of chisels.
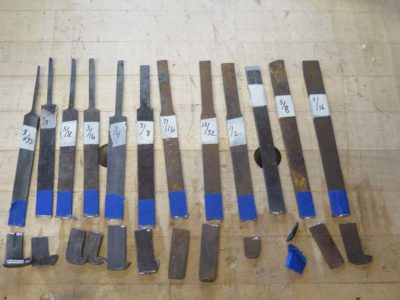
Up next — wood handles from the scrap box. Tulipwood? Bocote? Brazilian Rosewood?
My general bias when contemplating screws at the hardware store is that the only versions of the fastners that are “high quality” are decking screws, which indeed I use a lot for making jigs and serving as clamps for laminating and such. Trying to find old-format slotted flat head wood screws there is a fools errand. Not only is everything a Phillips head, but the quality of the screw material itself is so sub-par that I (and probably you) have countless tales of screws wringing off as soon as you bear down on them. It’s not really the fault of the hardware store owners, my store back in Maryland has owners who have become good friends over the years and I talk to them often about their products, but they have very limited options in their product pipeline. For screws those options are usually a choice between mediocre products and products they would not even deign to have on their shelves.

As a result I had begun lurking for lots of old fashioned screws, stopping at garage sales and on-line auctions with modest success. This container is filled with the sorted contents of one such purchase on-line. It is all useful but not a systematic selection. Often I find boxes of NOS screws on ebay but the prices can be stratospheric.

Given my own psychopathology and domicile remoteness (I want to have a full range of fasteners at my disposal at all times) I have the habit of buying a full box whenever I needed a half dozen of somethings, guaranteeing they would be ready for me next time. They don’t go bad, and the nook underneath the stairs to the third floor resembles a mini-hardware store. The racks in between the joists around the corner hold several hundred linear feet of metal bar stock and the like.

Some time ago I was discussing my frustration with with cheap hardware store screw with Jim Moon and he pointed me in a most excellent direction — Blacksmith Bolt and Rivet. They might be already well-known in the wood world or to you but it was news to me. I have since made several purchases from them and have been pleased with their products and service. My inventory of screws from them is growing slowly, once again whenever I need some I order three or four times as many and put the extras in a labeled box to go into the correct drawer in my mini-hardware store.
Since I do not solicit nor accept advertisers for this site I am delighted to give you a heads up with this unsolicited endorsement.
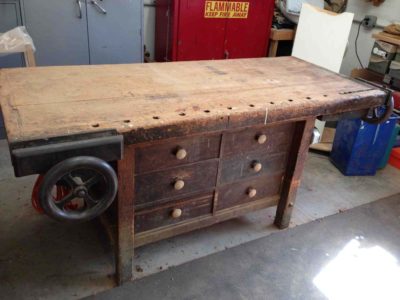
By 2013 the Henry Studley Express was roaring down the rails, building steam and speed with every day. I was driving on long trips to visit the original collection, other examples of similar benches and vises, and compiling research apace. I was almost at the saturation point when, on my birthday, I was contacted by a professor of furniture design who had a piano makers’ workbench that had outlived its usefulness for his work and he was considering selling it. That made for a very fine birthday! He had purchased the bench at a “going out of business” liquidation sale at a piano factory in the early 80s. From what he said, he thought the factory had been there since the 1890s. For years he had worked in designing hand-made furniture but in recent projects he was gravitating towards machine-made/manufactured furniture so his shop was transitioning to reflect these new interests.
We engaged in several rounds of correspondence as the portrait of the bench was clarified, and my interest in it grew by leaps and bounds. Eventually we arrived at a sale price we could live with. Three months after our first conversation I made the trek to upstate New York and picked it up. The drive home was so filled with delight and anticipation that it seemed to take a week to get there, but in reality it was not even a particularly long day of driving.
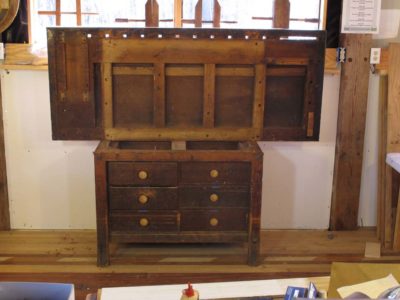
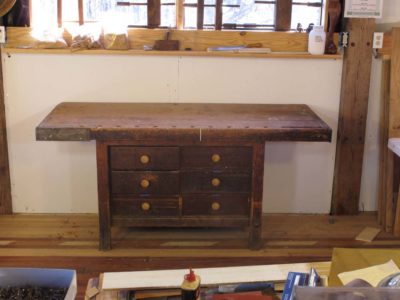
The bench was a modular unit; take off the vises and separate the base from the top and it was a manageable move by myself using a hand truck. In just a few minutes after arriving home it was ensconced in the barn.
Studying the disassembled bench confirmed my premise that for the most part it was a manufactured work station, probably through the catalog from an unidentified industrial supplier. The base was a run of the mill cabinet that was cranked out for industrial and educational institutions by the tens of thousands, to be paired with a bench top of the buyer’s choice. Did the options include vises? I do not know. The top gives every indication of the same context, but is unmarked regarding its manufacturer.
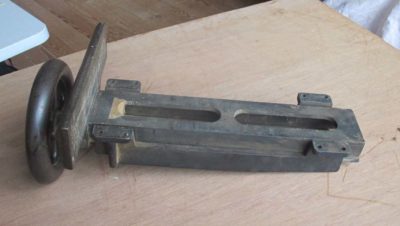

Further, my investigation only heightened the mystery about piano makers’ vises; this pair, like all the others I have seen, was devoid of any manufacturer’s identifying marks. They were a pretty standard pair for this type of ensemble — a typical face vise that opens 15 inches and an end vise with an integral dog.
The bench has clearly had a lifetime of very hard use and was/is in dire need of a thorough restoration. That remains on the menu for this winter. But then, it was on the menu for last winter, too. At this point my goal is to install a new work surface on top of the well-worn extant one, getting the vises polished and perhaps plated (I located a nickel plating shop in Richmond, and Studley’s vises were nickel plated, so as an homage I must also, mustn’t I?) and making new bench dogs for those that are missing. I wonder what the odds are that the new dogs will be spring-loaded ebony blocks.
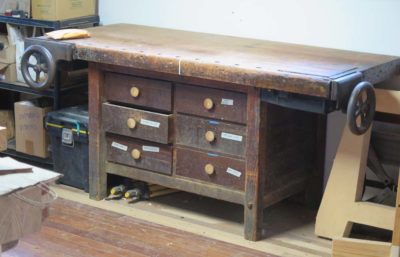
For now the bench serves well for students in the classroom but after the restoration I suspect it might get moved.
I spent part of the weekend getting ready for the upcoming Boullework Marquetry workshop at the barn. The main items were to cut and anneal the brass panels for the workshop exercises, and making some tordonshell.
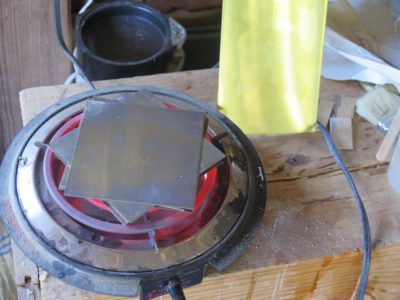
I anneal the brass sheet by placing the pieces on a hot plate and letting everything get as hot as it can get and leave it there for a couple hours. When it has turned from a bright brass color (upper right) to a dull purple/brown it is ready to work. This renders the material much softer and easier to saw with the near-microscopic blades we will be using.
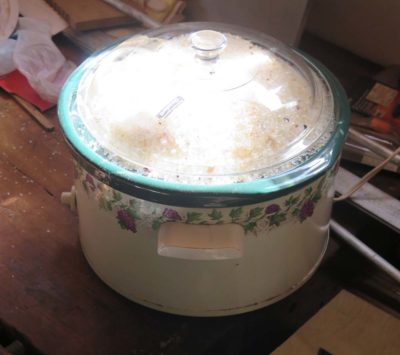
Actually the most time consuming thing (clock-wise, not me-wise) was reconditioning some silica gel to desiccate the tordonshell after making it. But all that took was digging out a slow cooker and the Gamma dog food container I use as a desiccation chamber for dealing with the tordonshell after it is made. I cooked the silica gel for about twelve hours to drive its RH down to about 10% so it should serve as a drying chamber nicely.
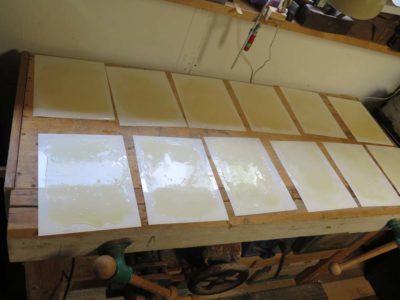
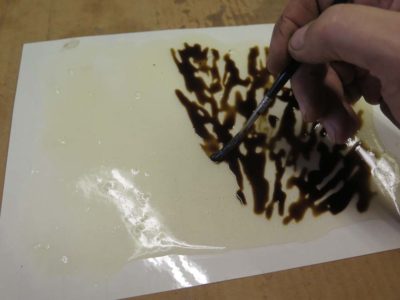
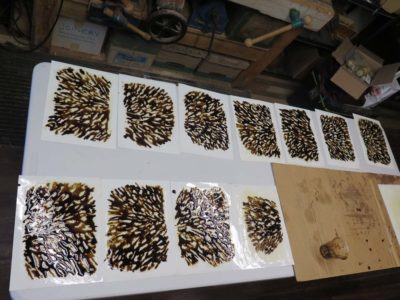
As for the tordonshell I cast and hand-painted several pieces of it, enough for everyone to have plenty for the class exercises. Since our first activity the morning of the first day is for everyone to make some for themselves to take home after the class, they will get the full experience of creating and working with artificial tortoiseshell and brass.
This topic is on my “make a video” list, perhaps for late next year.
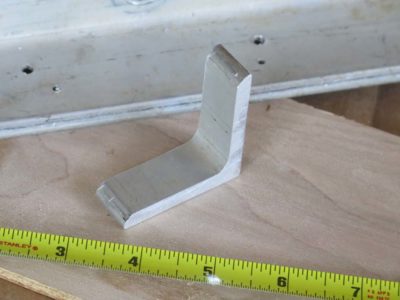
When assembling Gragg chairs I sometimes need to transfer lines from the pattern/assembly jig to the chair pieces. Try as I might all my other squares and such would not work in the restricted spaces of the assembly jig, so I took a piece of scrap 2-inch aluminum angle stock and in about three minutes had a new tool that will become increasingly prominent in the tool kit.
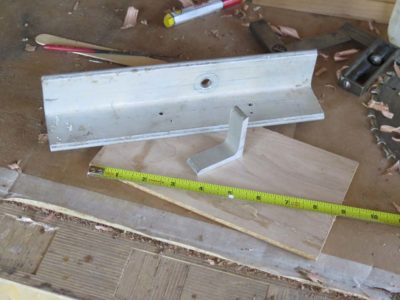
I cut about an inch off the end of the scrap piece after squaring it on the table saw, then cleaned up the edges and put it to work.
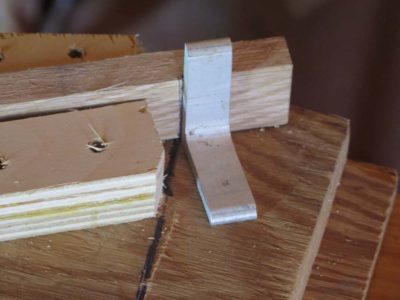
You can see a trace of a previous faulty attempt to lay out the line I needed to mark.
Not much makes me happier than to come up with an elegantly simple and almost cost-free solution to a problem.


Recent Comments