With the wooden core and outer bronze shell fabricated it was time to combine all the elements together to see if the concept was viable. Given the taper of the beveled side of the new plane shape and the resulting narrowing of the plane mouth I needed to cut one ear off the “T”-shaped iron to fit the smaller opening. With my Dremel tool and a cut-off abrasive disc it took all of thirty seconds to do that. Another minute on the diamond plate smoothed it all up and even the sharpening did not take long.
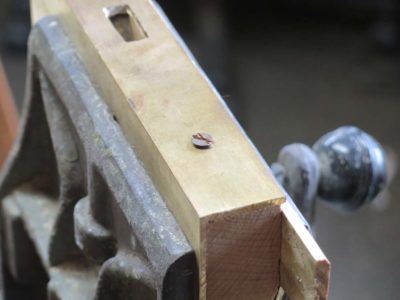
I decided to screw the bronze shell to the wooden body in such a manner that I was sorta working without a net in that if it did not work out correctly I was in for a lot of headache work. Much like Chris Schwarz uses on the corners of some of his campaign furniture, I drilled and countersunk the screw holes such that the vast majority of the bronze slotted flat head wood screws projected proud of the surface by an amount greater than the slot depth, then file the area smooth. I got my bronze screws from my favorite screw source, Blacksmith Bolt and Rivet Supply out in or near the Peoples’ Republic of Oregonistan.


Since the screw’s clamping force was so great the bronze shell deflected and I had to do a fair bit of abrasive flattening to make everything look good. The first ones left me very optimistic. A subsequent error resulted in less satisfactory results.
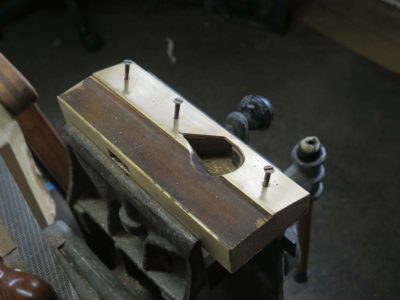

As I moved on to the other screws I mistakenly switched from using my brace and bit to cut the countersink to my battery drill and its countersink bit. Big mistake, as the angle of the new countersink was incorrect, an error I did not realize until it was too late. Clearly the bevel for the second countersink bit was shallower than the first bit in my brace, so the screws did not seat perfectly and there was a tiny line around the fastener when they were leveled off.
Drat.
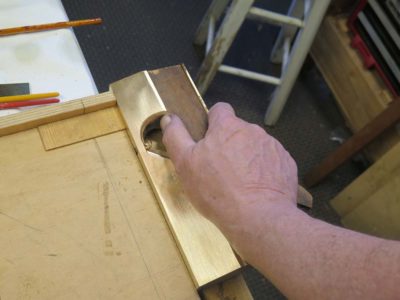
That said, once I cleaned it all up as best I could the tool both performed magnificently but also fit my hand like it was designed for it. For that reason I did not make and install a handle like was on Patrick’s plane. I always have the ability to do that ex poste.
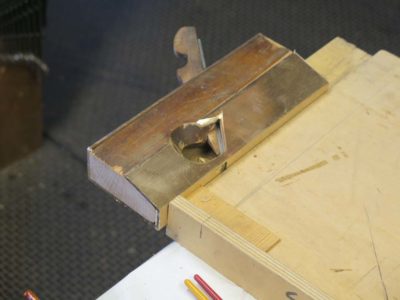
Some last minute clean-up and I declared it finished. Since the purpose of the tool is to shave the edges of veneers (I use hand-sawn veneers pretty much exclusively for parquetry) I gave it an extensive test drive and I have to say that it is more than glorious, more than sublime. It is gloriously sublime! Or is it sublimely glorious?

I’d guess that I have somewhere around 8-10 hours invested in it, and I think it was well worth the effort.
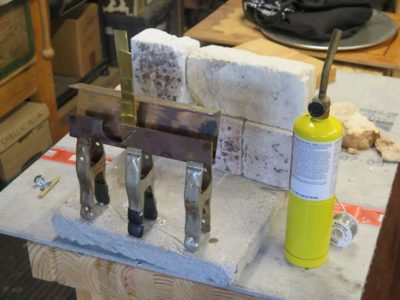
Once I had the beveled bronze cheek fitted and cut for the side opening it was time to silver solder the two major pieces together. Silver soldering pieces together at an angle can be tricky because if you get it wrong the pieces just stay together in the wrong conformation and you have to torch them REALLY hot to get them apart (usually warping at least one of the two pieces) or saw them apart.
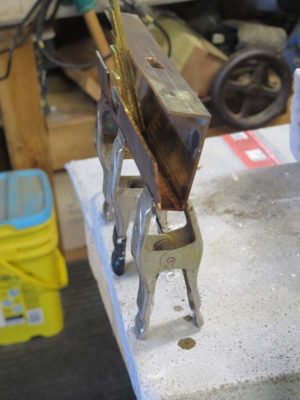

I clamped the pieces together in place at the narrow dimension of the bevel but needed to shim the widest point to get the angle correct. After prepping the surface and slathering on the paste flux I lit ‘er up with the MAPP torch. It took a couple minutes to get the entire mass up to temperature but then the solder flowed like water into the crevices where it was supposed to go. I introduced the solder along the inside corner of the joint and let it heat-wick to the outside, the liquid solder being drawn to the torch. There was surprisingly little excess solder to be cleaned off afterwards.
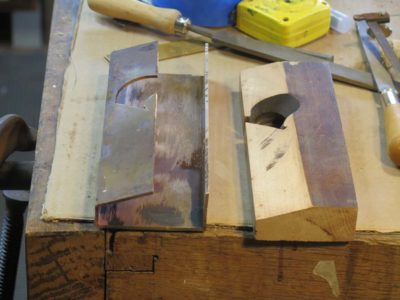
I let the mass cool down slowly in the ambient temperatures and returned a hour later to a hard assemblage in the exact correct configuration.
That’s a day worth celebrating.
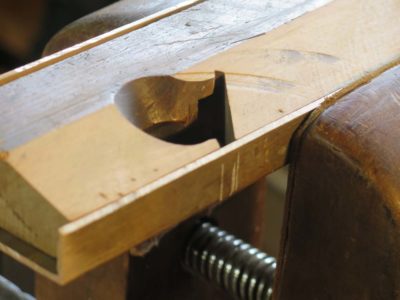
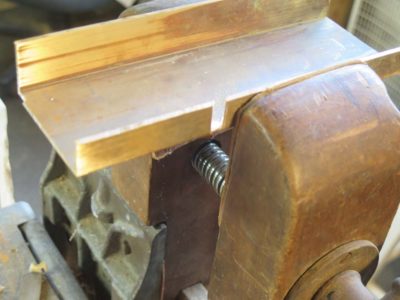
The first thing I did for the new plane was to take the old plane body and cut its height down a smidge to fit into the rectangular space inside the bronze downspout. Then I set the saw blade at an arbitrary angle that seemed pleasing to me, leaving the mouth of the body about 5/8″ wide. With the blade left at this angle and the fence moved farther away equal to the wall thickness of the downspout I cut the same bevel in the bronze. Then I cut the top of the bronze shell to accommodate the thickness of the plane body.

Setting the beveled body inside the bronze half-shell I layed out the openings for the iron. At the mouth of the iron I rough cut the opening slot with a hacksaw and filed it clean.
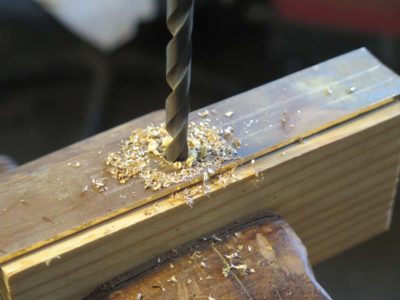
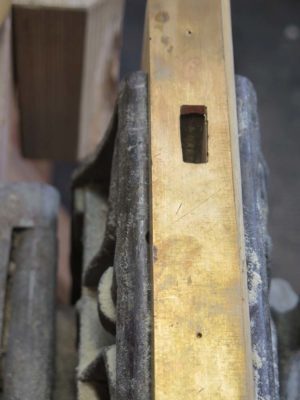
For the upper opening of the iron, to accommodate the tang and the wedge, I put the bronze shell with a backing block in my vise and drilled that out and finished that rectangle off with a square file and mill file.
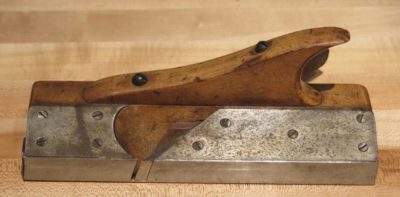
After last year’s WW18thC soiree at Williamsburg I blogged about being fascinated with a parquetry shooting plane Patrick Edwards had in his arsenal, and I vowed then and there to make one for myself.
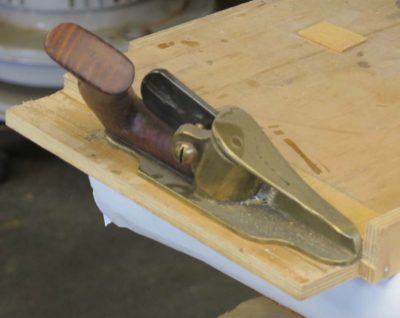
Then last summer I scored this little beauty at Martin Donnelly’s annual house cleaning auction in July, and I thought it might assuage my desire to make one myself. Yeah, right. It is exquisite but only cranked up the flame.

Last week in between some glue-ups for the Gragg chairs on the fourth floor I ran down to the studio to get going on that. I wondered if Patrick’s plane was a reconfigured rabbet plane and decided that this was the path for me in my pursuit. So at a tool flea market I bought three derelict 1-inch rabbet planes with irons for $5 each. I would feel no remorse for trying and failing with landfill candidates like them.
Many years ago I had acquired some sections of bronze downspout from my local metals recycler, not for any particular reason other than it was neat and it was cheap. I figured that it was the perfect raw material for some project, some time. Well the project and time had come.
Stay tuned as I take you on the journey of turning a pile of junk into a sublime tool.
While I appreciate the spatial efficiency and construction elegance of large tool chests, I know myself well enough to realize they are not suited for my temperament nor work habits. As the renowned classical philosopher Harry Callahan remarked, “A man has to know his limitations.”

I prefer my tools to generally be in open storage at torso height whenever practicable (not always possible but still the goal), such as my habit of festooning the shop with machinists’ tool chests and hinged cabinets chest-high around the perimeter of the space, and my always handy rack of drawknives.
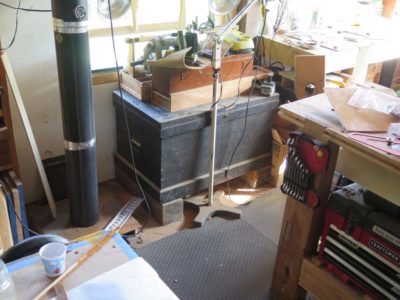
For the past few years I utilized a vintage tool chest for storing my molding and joinery planes next to my FORP Roubo bench. Unfortunately for me the reality of my untidy habits comes to the fore and the chest is almost always under a crap-load of stuff, some of it valuable and some of it less so. Thus I spent more time devising “work arounds” to avoid accessing those tools than using them. I decided that the tool chest had to go. Exactly where it would go has yet to be determined but had to go it did.

At the same time with some shop rearranging I had a surplus but crude shelving unit that fit the spot perfectly. Coincidentally it held all of the planes that were formerly stored in the black hole of the big black tool chest.
Problem solved.
In the weeks since I made the switch I have used the now-easily-accessible planes more than in the years they were languishing in said Black Hole.
The Abraham boys at Benchcrafted just went live with the announcement of the next Handworks event in the wilds of central Iowa. If you did not attend the previous iterations it is difficult to describe it concisely. Think of Woodstock without the music or dope or other nihilistic hedonism; just multitudes of hand-tool enthusiasts and the hand tools that power them.

Stay tuned as more information with be forthcoming. Suffice to say if you go, I will see you there. September 4/5, 2020, Amana, Iowa.
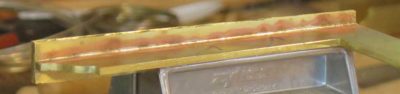
I use some version of the following techniques for cleaning the interior corners of a soldered/brazed joint such as that created at the shoe-and-beam joint for the Roubo squares. If my brazing technique is on its game this only takes a couple minutes from start to finish. If not, more minutes. Actually, were I a better metalsmith there would be no cleanup at all, but this is the kind of joint I usually have after the torch work.

My first step is to clean the excess solder with a half-round Vixen file, which is the metalworking version of a float. I lay the flat side of the file down flat on the workpiece and press the edge between the flat and half-round sides into the joint to remove any excess. Then I repeat it on the other flat face.
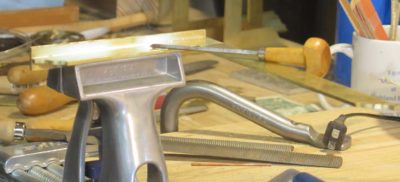
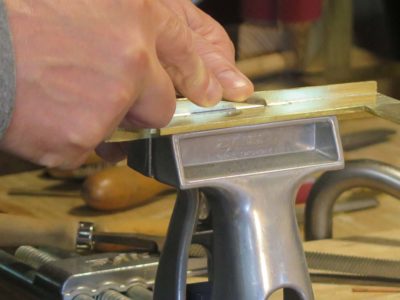
Once any excess solder is cleaned off I strike the joint with a diamond shaped burin, or engraver, to establish a nice clean corner. The spatial circumstance of the task does not allow for me to hold the burin properly, I just hold it sorta like a paring chisel.


Finally I find the halfway angle for a triangle fie and undercut the joint ever so slightly for an elegantly clean look.

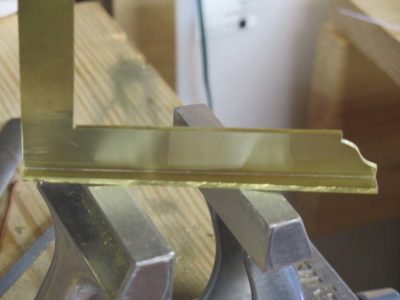
After that I’ve got a nice surface ready for polishing with a light abrasive to make it finished. Once I get the edges finished this one will be ready to go.
Many years ago when Knew Concepts saws burst onto the marketplace I met and was befriended by the gurus behind them, Lee Marshall and Brian Meek. There are not many tools that can change the way I work, but their saws did. As an outgrowth of our friendship I began to collaborate with them to refine their products and even begin down the road of developing whole new tools.
One of the tools I encouraged them create was a vertical oriented marquetry chevalet. Yes, I know that traditionalist and purists might snort at me for that position, but let me explain to you how much I care about that. (Cue the sound of crickets.) You can find my tale of encountering their initial engineering design prototype here.
Now for a little more background.
I have been cutting veneers for more than forty years, almost always in the context of repairing or replacing missing marquetry or plain veneers. I learned to cut it on a horizontal bench pin using a jeweler’s frame saw freehand in the vertical orientation.
Once I got to use a traditional chevalet, a hand powered machine that interestingly enough post-dates what many think was the Golden Age of Marquetry, my experience and muscle memory/work habits left me unimpressed with my own skill with the tool. I have seen others use it in a manner that could only be described as magnificent, but I have never developed a facility with the device to make it my default tool. (It might very well be the result of me not having thousands of hours behind the wheel, so to speak, with an intimidating task master peering over my shoulder. By the time I got to use a full-scale chevalet I was long passed the point of being intimidated about much of anything. Once you go nose-to-nose with a bind drunk idiot neighbor shooting a revolver in his back yard while my kids were playing in my back yard, everything else takes its proper place in the hierarchy of intimidation.) Instead, I always reverted to my older method in which I had honed my skills.
Once I saw Steve Latta demonstrate his version of a bench-top horizontal action chevalet I built my own, and I got better results with that than with the full scale, sit down version. Not yet great, but better. Still, I could see some great possibilities based on my execution of the concept.

Back to Knew Concepts. I was attracted not only to their jeweler’s saw frames but practically swooned once I learned of their Mark Series of fixed-orientation saws. I had to have one! I got one and again it changed the way I could work in the marquetry techniques I used, mostly Boullework style and double-bevel style. The Mark Series saw made cutting small pieces of marquetry (about a 6″ size limit) practically idiot-proof, and sometime I can be a pretty high-powered idiot.


Lee and Brian and I continued to correspond and meet at various woodworking tool events, and eventually I convinced them to give it a try. Our dinners together always seemed to result in a stack of napkins covered in design drawings and spec lists. Brian came to see me in DC, well actually he came to see my bench top chevalet — I was incidental to the trip (not really, I always thoroughly enjoyed my interactions with Lee ad Brian, both creatively and socially) — and he returned to Crazyfornia to begin designing a saw incorporating and fusing all our ideas. Soon computer generated design drawings were flying back and forth across the continent.

Then came the Woodworking in America 2016 when Lee promised to “show you something special.” I could practically see the twinkle in his eye just from the email. As I phrased it at the time,
“I encountered the working concept prototype whose gestation was several years, and as I worked with the tool I felt, more than heard, a thunderclap. Everything that had been was now no more.”
Shortly thereafter Lee fell gravely ill, and eventually passed away. Brian took the helm of the enterprise and the process of transition took all of his time and energy, and then some. We corresponded infrequently for a couple years, then a few months ago it picked up again and I asked him if the bench top vertical-cut chevalet was ever going to become a production reality. Knowing how swamped he was I sorta expected a note of the “Man I am just too busy to think about it,” variety. Imagine my delight when instead he wrote back and told me they were in the home stretch of the initial production prototype.


Last week a couple packages arrived arrived, and it is better than Christmas at the Barn on White Run these days. A whole lotta time, energy, and ideas have come to fruition.
Stay tuned.
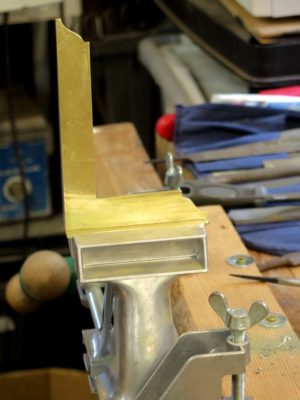
Day 3 was almost entirely a continuation of Day 2, bringing the squares closer to completion. It was pretty insistent that each student had at least one square all the way done to guide them once they got back home. I’m pretty sure each of them headed hme with at least a couple finished.
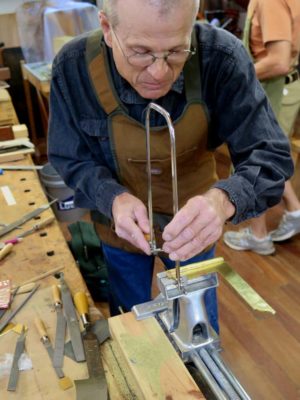
There was a little sawing as the shoes were trimmed as necessary following their brazing.
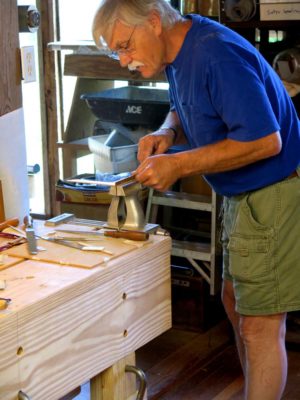
The sounds of filing and sanding permeated the air as squares were trued, followed by the gentler sanding with finer paper in getting the surfaces polished to the point of being “done.”
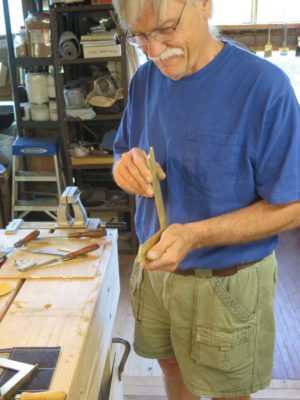
As we continued our work we were able to reflect on a grand time of fellowship and learning.
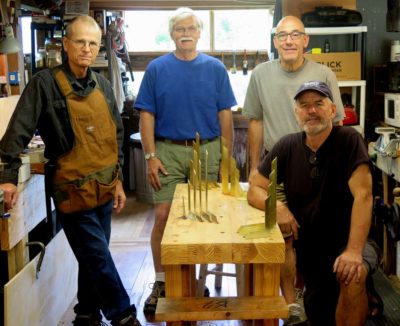
Thanks for a great workshop, gentlemen. Counting my own projects, I think the grand total for the weekend was 30 squares, eight or nine triangles, and several pounds of scraps and filings.
Now it’s time to turn my attentions to this month’s workshop on Historic Finishing.
One of the tools emerging from the recent Making Roubo Squares workshop was a diminutive 30-60-90 triangle. This tool is integral to much of my/our shop life for areas ranging from cubic/pinwheel parquetry to laying out the dovetailed tenons of a Roubo bench leg-and-slab double mortise-and-tenon construction.
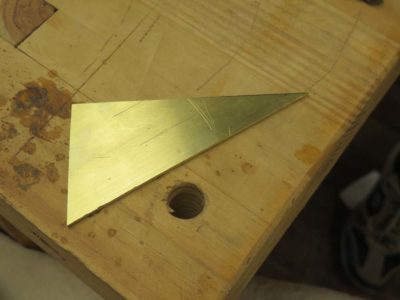
With the surplus rectangle of brass plate left over from the making of our nested set of cabinetmaker’s squares during the workshop there was plenty of brass plate left over for making other, smaller layout tools. Included in these were some small triangles that were roughly laid out with a plastic drafting triangle and rough cut on the bandsaw.
I took the opportunity to demonstrate the truing of the triangle to the workshop students, reminding them of the simple truths they learned decades ago in seventh grade Geometry class. Instead of using a micrometer or something similar to establish the tringle side lengths, a much easier, simpler, faster, and frankly more accurate method is only a compass or divider away.
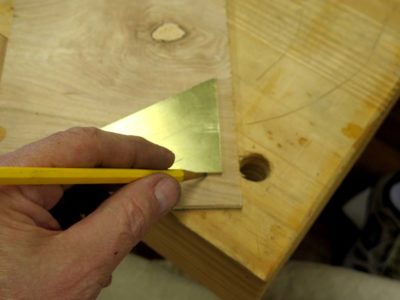
After establishing the perfect square corner between the two shorter legs of the triangle it was possible to achieve a perfect set of 30-60 degree angles by using just a scrap piece of plywood, a pencil, and a set of dividers. For work like this I almost always revert to a pair of dividers from an antique navigational drafting set that I bought for practically nothing many years ago. These German Silver (alloy of brass plus nickel) tools are simply lovely and a pleasure to the eye and the hand.
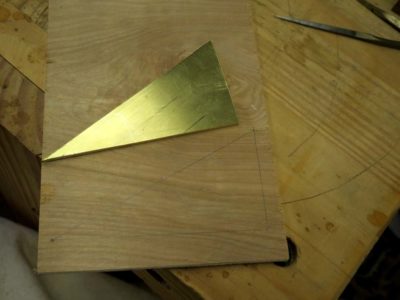
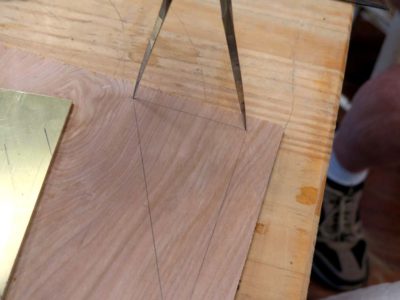
First I traced the rough triangle onto a piece of scrap plywood, and set my dividers to the exact length of the shorter side adjacent to the right angle.

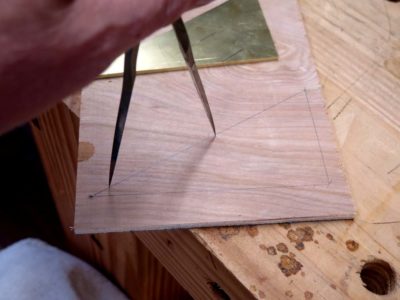
Then swinging the dividers to the hypotenuse I stepped off two of those lengths. If you will recall, for a perfect 30-60-90 triangle the hypotenuse is exactly two time longer than the shorter side of the right angle.

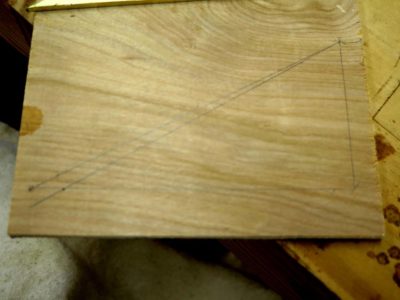
Once I determined that two-times-longer distance along the hypotenuse I re-set my dividers to this exact distance then transferred it to the longer side of the right angle, redrew the hypotenuse on the plywood, then transferred it to the brass.

Five minutes later I had cut and filed the new hypotenuse and had a perfect 30-60-90 triangle ready to braze on the foot and put to use in a multitude of applications.
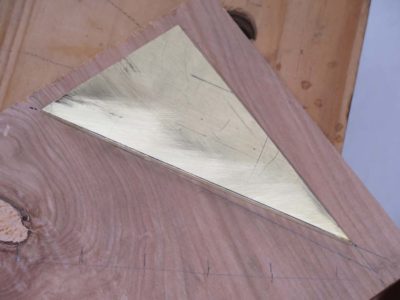
All with zero measuring, although to be honest I did grab my dial caliper afterwards to check. I wound up being off by almost 0.002″ which probably amounts to a couple seconds or so of angle degree (or, about 1/1800th of a degree). I can live with that.
To quote my mentor in the pattern shop, John Kuzma (cleaned up considerably for a family-friendly venue), “Measuring is the enemy. Layout and transfer are your friends.”
I cannot recall my 7th grade Geometry teacher’s name but I do remember Mr. Fiske, who taught me Trigonometry in 11th grade almost fifty years ago. Together these men impressed on me the importance of triangles in every-day life. Thank you, gentlemen.


Recent Comments