By the start of the second day everyone’s trains were barreling down the tracks and all we had to do was keep on keeping on. Even as I entered the barn the sounds of sawing, filing, and sanding filled the air.
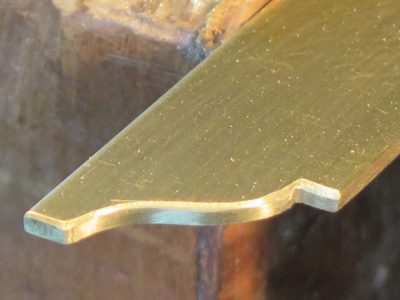
I had given each of the students one of these DARPA funded, MIT developed tools to work on the ogee tips at either end of the squares. One side was flat and the other was round, and when wrapped with sandpaper the tool was perfect for the task of finishing the shape. The uninitiated might think these were simply a 3/8″ dowel split in half on the bandsaw, but they would be properly ignorant of the national security dark technology pedigree of the tool.
Pretty soon the tips were more-or-less derived.
One procedure that was replicated perhaps a hundred times that day was returning to the abrasive covered granite blocks to bring the squares closer to “true,” a process that would be continued until after the torch work and the “square-ness” was perfected versus the Vesper final word square.
Len was the first to get the brilliant idea of creating a 30-60-90 triangle from the remaining scrap of rectangular brass plate left over from the four nested squares. Using my older version of the Knew Concepts Mark III saw he set to work and soon had the inside design cut out.
Meanwhile Dave, John and Pete got their tips shaped and polished.
Len finished the interior of the piercing of the triangle.
All the while the pile of brass filings and shavings built up at every work station. This continued until the very end and we compiled an impressive pile of scraps and waste filings, I’d estimate somewhere around five pounds worth.
All of this was prelude for the tasks presented after lunch as the shoes for the beams were brazed in place with silver containing solder. Once the mating surfaces were perfected it was time to move to the torch work stations.
The set-up was designed for efficient and safe torch work. I will blog about making a perfect set-up for bench top brazing in the next couple of weeks.
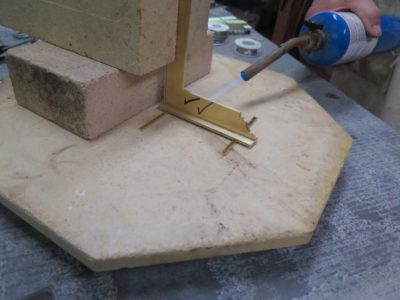
Fortunately I had all the things I needed on hand; fire bricks, kiln shelves to use as brazing platforms, and inexpensive lazy susan bearings so each place could turn. I placed three work stations on top of cement backer board from a home improvement center. For this project it was important to isolate the workpieces from the shelf and the bricks as much as possible to reduce the amount of heat loss from direct contact during the brazing. That is why the work pieces are raised up from the shelf by two small pieces of scrap brass.
After slathering on the flux to the contact edge of the square it was placed on the horizontally situated shoe, in the center. Then the torch was lit and the heat turned up. We were using both propane and MAPP torches, the first was fine and the second faster.
Once the assemblage was heated up and the brass began to get a coppery tone it was time to simply flow the coiled solder into the back side of the joint and let the heat draw it underneath the joint toward the flame.
Dave gave the quenched joint a fierce testing, and was impressed at the strength of it.
Then everyone set to brazing on the bases of their respective squares, then began the cleaning up process.
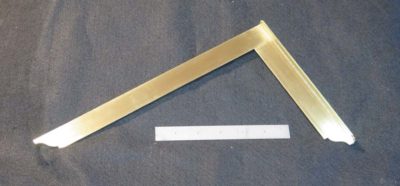
Last week I hosted a workshop that reflected my peculiarities as a craftsman, a woodworker who loves metal work. Four skilled craftsmen, Dave, John, Len, and Pete joined me for three terrific days of fellowship and making. In this case making a nested set of Roubo-esque solid brass squares a la Plate 308, Figure 2.
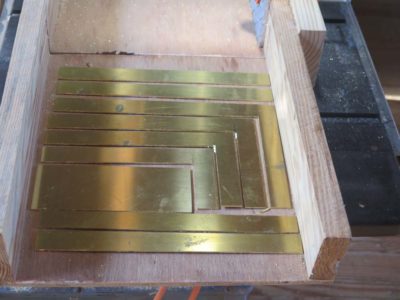
The starting point for the three days was a 9″x12″x1/8″ brass plate.
Using my puny table saw and sled with a waste block to reduce the shrapnel, everyone cut a series of descending size squares.
After the table saw cuts, stopped to avoid over-cutting at the intersection of the inner edges, the cuts were finished with deep-throat fret saws and #6 jeweler’s blades which I provided. Pete had his wondrous Knew Concepts coping saw that worked like a charm.
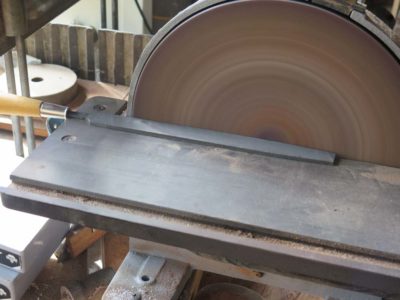
And then the filing began. To protect the inner corner of the squares we ground off one edge of the mill files that everyone brought, starting with the disc sander followed by a diamond stone. This allowed for pretty aggressive work in the corners.
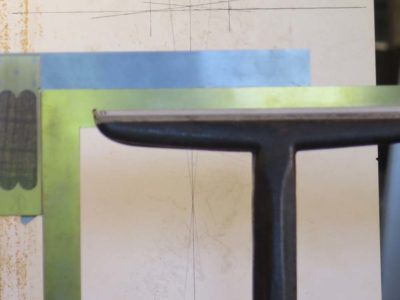
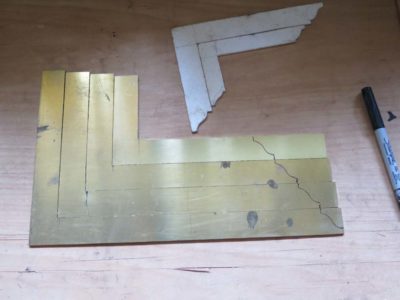
The filing was done on both inside corners of the cut squares and the outside corners of the remaining rectangles in preparation for cutting out the next smaller square, followed by truing on sandpaper over a granite block. (You can see the sublime Vesper square that was our “final word” truing reference for the workshop.)
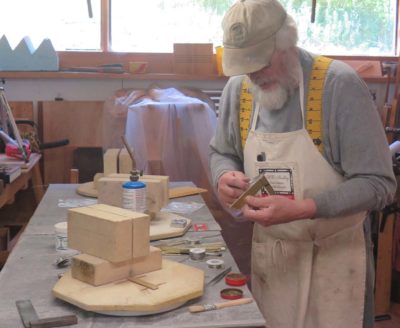
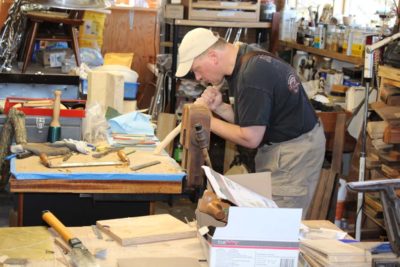
This scene pretty much sums up the whole day. I was working right alongside the students making another set of the squares. I find this approach works best for the students to see me working on the same exact project, several times they came to look over my shoulder at some point in the day.
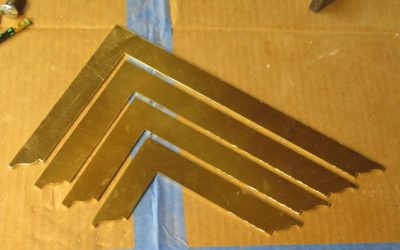
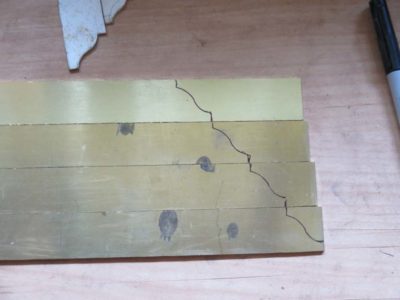
Before long everyone had their four rough squares ready for the next step, which was to trace and cut the offset/stepped ogees on each end. The small rectangle of brass remaining from the first four squares could be used later for a petite pair of squares and a couple of 30-60-90 triangles.
These were roughed out on the bandsaw, ready for filing the rest of the way.
During last week’s workshop Make A Set of Roubo Squares (more about that soon) one of the tools I used fairly regularly was this Roubo-esque and very stout exquisite palm-sized square. I vaguely recall it being in a box lot of stuff I bought at a Donnelly auction several years ago but that could be a false memory.
I have not been able to identify the tool maker but I do not consider myself to be well-versed in that world. The blade is stamped “Anderson” in script. It is a fine tool with a lot of heft, sitting in the apron pocket like a brick.
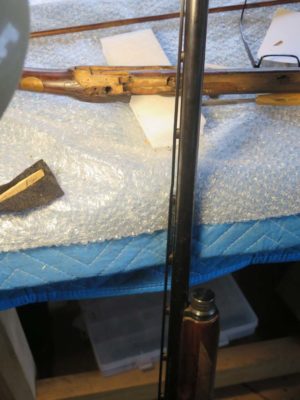
Some time way back I had my Browning shotgun leaning against the bench and much to my dismay it fell over, whacking into a stool in the way down and inducing a pretty severe bend one section of the gallery(?) running o top of the barrel (I am not 100% sure of this part’s name, I am not really a shotgun guy). The gauge of the metal that was bent is about 1.8″ x 1/4″ and the section about 3″ long. Although the shotgun still worked fine it looked pretty sketch with this damage. At the time I tried to un-bend the damage with opposing carpenter’s shims but the metal was too strong to budge.
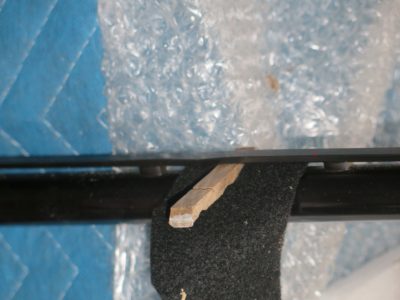
Recently I tried a different tactic, instead using a half of a hardwood clothespin for the tapered wedge to drive between the barrel and the bent element and it worked like a charm. I first laid a piece of felt against the barrel to keep from scratching it, and gently drove in the tapered clothespin. It actually took some fairly robust whacks but eventually the gallery went back into place just fine with almost no noticeable permanent damage. If you look closely there is still a tiny bit of distortion but it does not shout at you from across the room like before.
Just another day at the barn. You can’t get much more low-tech than this.
A few weeks ago my friend B came for a couple days to test drive the shoulder knife making workshop that will be at The Barn later this summer (August 23/24). We had a great time of visiting while he was working on a natural branch from a fallen tree, cleaning it up an fitting it to his torso for use as a marqueteur’s shoulder knife.
He made great progress and we are anxious for the real event in a couple months. If you would like to come and make a shoulder knife for yourself, just drop me a line.
As for my current activities I have been busying myself getting ready for the students arriving for the Make A Set of Roubo Squaresworkshop later this week.
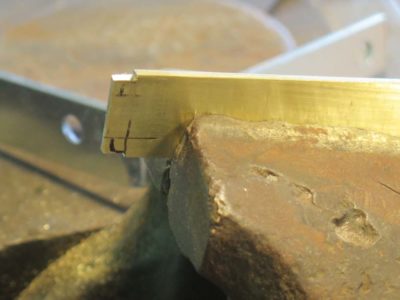
After the blade-and-beam are prepped and trued with the reference square from Chris Vesper I cut and shaped the shoe being soldered to the outer edge of the beam.
Then I prepped the surfaces themselves by cleaning them with 400 grit abrasive paper, and placed them together with flux in the contact of the joint. The square was held in place simply by placing it between two fire bricks.
A propane torch and some wire solder finished the task.
A little clean-up and the square was ready to get to work. Now do that several more times and you have a nested set.
Not too long ago I discovered something that perhaps many of you knew already (and if so, why didn’t you tell me?), and my response to the problem and solution imparted great satisfaction.
Being both a metalworker and a tightwad I am pretty fussy about my files, and in fact have a substantial number of them. One I could never talk myself into getting was a die-maker’s mill file with one shoulder devoid of cutting function. All the ones I had seen while shopping were simply more money than I wanted to spend. Since this is a utility I need on a fairly frequent basis I generally just put a strip of tape along one edge of the file so I could work into one side of an inside corner without boogering up the adjacent shoulder. Perhaps I had some bad tape but recently I was continually frustrated as it peeled off while I was working the inside corners of the Roubo squares.
I decided to deal with the problem once and for all.
I took my new-ish mill file to the disc grinder and very gently just ground away the teeth/grooves on one edge. I say “gently” on purpose because I did not want to heat up the tool and have it lose its temper. So gently it was.
After that I took it to the vise and dressed the sanded edge to a fairly nice polish (1200 grit diamond stone). In almost no time (less than ten minutes) and for no money(!) I had a die-maker’s mill file that allowed me to work both more aggressively and more precisely on inside corners. And if I need to do any edge filing, I simply rotate the file 180 degrees and use the opposite edge.
I hope I don’t hurt my shoulder patting myself on the back…
Every participant will begin with a slab of brass which we will cut on the table saw to yield the preferred number of graduated squares.
Once these have been cut and the corners cleaned up, they will be laid out for the graduated nesting sizes.
Ogees are cut and filed into the ends, and all the detailing is finished in preparation for the silver soldering of the shoe on the outside of the beam.
If this workshop interests you, drop me a line via the Comments or Contact functions of the site. It will be June 20-22, and the tuition + materials is $425. You will leave with a completed set of squares.
Since I had very little invested in my set of kerfing planes I felt no hesitancy in attempting to modify them into greater usefulness, even if the result was their destruction. Fortunately it did not.
Clearly the solution to the knuckle scraping problem illustrated last time was to elevate the position of the trailing hand.
Since the bodies of the planes were made from Baltic birch plywood, my favorite material for prototyping (although probably far too often the prototypes remain the final in-use version for a lot of things) I just cut the handles off and remounted them to a more satisfactory position.
The only real challenge was to make sure that the glue line between the plane body and the newly re-located handle fit closely so that the new glue line was robust enough to withstand the use.
It was. I glued the handle in its new location then went back in and rounded out the front of the hand hole and it was ready to get back to work.
As you can see and I can testify the new posture was perfect for continued use without having to be attentive to the blood flowing out of my pinky knuckle. For someone who re-saws by hand a fair bit, this is a big deal.
===============================================
PS I am still trying to post the next video. I must have forgotten some trifling step in the process, but a soon as I remember it the video will go up.
A while ago I made myself a dedicated kerfing plane, adapting the designs by Tom Fidgen which in turn were probably originally documented by Roubo in the 1760s. Tom re-invented the idea unaware of Roubo’s tools, and in turn I adapted them for my own use. My first foray into this arena was re-purposing a derelict plow plane, and idea that worked okay, but then I moved on to a dedicated tool made with Baltic birch plywood build more along the lines of a backsaw profile.
For the workshop I taught last summer in Arkansas I made a few more kerfing planes, and their shortcomings, which I had dealt with unthinkingly, were a serious issue as almost every person who used them got their pinky finger knicked simply due to their configuration.
I noticed that the students modified their handhold to grab the tool differently, as I had done at home almost unconsciously after ripping open my pinky knuckle a time or two. It was time to address this nuisance and I did.











Recent Comments