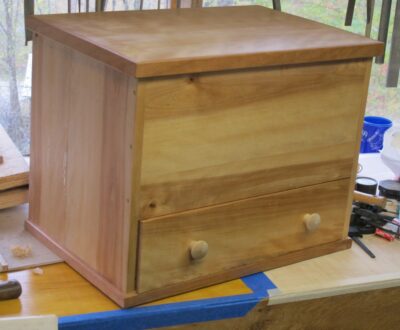
In preparation for his visit to me a couple months ago for us to build his black walnut split-top Roubo bench, Webmeister Tim got together with a woodworking pal and built a small toolbox which he presented to me as a gift. It’s 20″ wide x 14″ deep x 16″ high.
I had already decided to retire my traveling toolbox of the last decade-plus, a repurposed and augmented mahogany box originally made for housing a surveyor’s theodolite. Not that I will be discarding it, but for now it will serve as the repository for small-ish tools gathered for a little boy whose use of them will begin sooner than we can contemplate.
Back to the new box.
The box is exceedingly well-built and sturdy (read: heavy) and capacious so I need to be careful in outfitting it; I still have to haul it to wherever I am working away from the barn. As to the space inside, I will be tricking it out to have lots of sub-sections and fittings to hold the tools I might need to accomplish a full range of woodworking tasks while away from Shangri-la.
To that end I will be spending many hours over the coming weeks to make of its interior what I want and need. Probably not as obsessively as did Henry Studley with his tool cabinet, (our only “profile” of Studley is his tool cabinet and based on that I would guess he was wrapped pretty tight) and certainly not as elegantly — there will be no ivory, mother of pearl, or ebony fittings –but I will have stops and starts as I compose the interior of the box. I will of course be musing silently and not-so-silently about Studley and his interior layout for his preposterously magnificent opus.
Stay tuned on that.
As for the exterior of the box I am undecided. Do I make it a canvas for fauxrushi, or French marquetry? Decisions, decisions. At the moment I am contemplating leaving the recto of the lid alone to let it serve as a work surface.
Thanks to Webmeister Tim’s generosity I have a delightful puzzle to solve.
As I assemble a tool kit for Li’l T I find myself reminiscing about my own first ventures into Tooldom. Thanks to the guidance of my own Dad when it came to buying real tools I followed the path of Quality. In 1969 that meant Sears/Craftsman (Woodcraft, Constantine, and other catalog merchants came into my orbit much later). My first few tools, screwdriver and pliers, were bought at the new Sears in North Palm Beach, Florida with my lawnmowing money. When I finally got steady income working illegally in a scaffolding yard at 15, then legally at a bakery at 16, the purchases became more substantial. Wrenches. Ratchets and sockets. Screwdriver sets. Channel Locks. A tool box.
Now more than 50 years later I still have all those tools and use them regularly. After all, this was when Craftsman was still, well, Craftsman.
My very first tool was the black folding tri-blade Boy Scout knife, now that I think of it probably bought not in Florida but at the Sears in my hometown of Owatonna, Minnesota, around 1965. It still resides in the top drawer of the end table next to my recliner. It was probably 3 or 4 dollars, maybe only $2, still a lot of money to a kid making 25-cents per lawn to mow. I just can’t remember exactly, but it would have been during my very brief tenure in the Scouts (I just couldn’t take the structure and hierarchy. It’s amusing to think of iconoclastic me trying to enlist in the US Navy in 1973. That would not have been a happy outcome as I do not respond well to arbitrary orders.) I’m pretty sure I blogged about that knife some time ago.
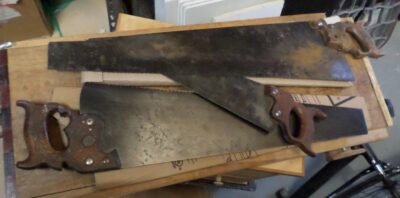
My first honest to goodness woodworking tools were these two, a Craftsman (Stanley) block plane that is still a favorite, and this dovetail saw that has cut an untold number of joints in the past five decades. It was a “Craftsman” probably made by Disston, although it is devoid of marks. I do remember that each tool was $13, a number I recall because it was the number of Wilt Chamberlain.
As I compile to tool kit for L’il T and his new sibling (early March 2024) it will be real tools, sharp and ready to go. His/their Dad and I will teach them the right way to use them, just as my Dad taught me. (Li’l T’s other Grandpa was a high school shop teacher so the heritage runs deep) And if Elderbarndottir and her new husband are blessed with children, they will be getting real tools from Grandpa too.
For a lot of my routine sharpening I finish off with an 8000 grit water stone, and I recently had a stretch where I did not attend to the stone’s needs as conscientiously as I should have and it got wallowed out. That it was my setup at my daughter’s house was no excuse, but in all honesty I am more attentive out in the barn shop.
Not having my marble slab for referencing the surface to flatten this one, I relied on one of the theorems (or was it a Postulate or Law?) from eighth grade Geometry class. That is, “every circle defines a plane.” Using a concrete block with a piece of mirror I had laying around and a sheet of sandpaper I was able to flatten the dried-out stone face-down on the abrasive by pressing and moving it in a roughly 1-to-2-inch circular motion. Before long I had a super flat stone and got it back to work.
I’m glad that some lessons from 55 years ago took root, allowing me to minister to this stone in need of, well, ministrations.
The cost? One sheet of 80-grit sandpaper, five minutes of my time, and a bit of elbow grease.
Back in the day when I still watched broadcast television there was a strategic plotting device known as “the story arc,” wherein minor plot threads would be interjected into numerous episodes even though the prominent episode themes were stand-alone. With life on the homestead settling down, a bit at least, and (hopefully) become more manifest after barndottir #1’s wedding in a couple weeks (plus barndottir #2 has Lil’T’s sibling in the oven), the “long arc” will likely become an occasional feature on the blog. Not THE feature, but A feature. It’s just that many of my upcoming and ongoing shop projects are just that, ongoing. And going, and going…
Prominent among them will be making new and salvaging and repurposing old tools. While I still use The Accidental Woodworker as my go-to reference for a lot of tool restoration, I’ll let you peek over my shoulder as I indulge my own whimsies in this realm.
First up will be some accounts of rescuing and modifying old saws, including my advice on buying old saws and the methods I use to salvage and sharpen them.
Repurposing my old and tricking-out my new traveling tool boxes.
And my creating a special case of the former, repurposing a vintage tool chest (probably late 19thC) to house my 18th Century-style woodworking kit.
And lots of other stuff that isn’t popping into my brain right now.
Looking through my lumber inventory for vintage cherry boards from which to make the trim for the new bay window, I found some beauties. Unfortunately, all the boards I had on the top of the pile were about 4″ shorter than I needed for the lintel and base trim. The deeper into the pile I looked, the more frustrated I got as these were too short also. Aaaargh!
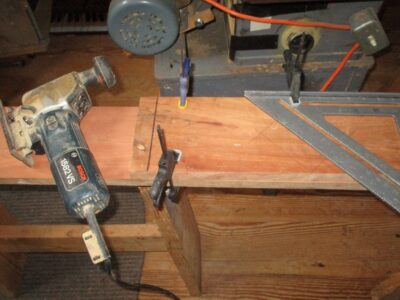
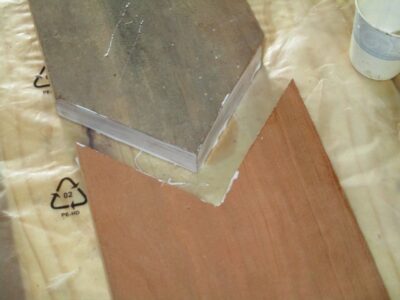
After many days of ruminating on the problem, including contemplating a trip to a sawmill to get some new lumber, I settled on a plan to stretch my boards by grafting in some diamond “dutchmen” as decorative elements into the center of the boards I had. I rough cut the boards with my circular saw and a fence, then fed them through the lunchbox planer.
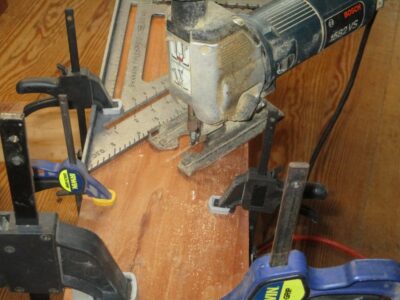
I laid out the dutchman on the inlet, clamped the inlet board and the longer board together, and cut the angles with my reciprocal saw and a speed-square fence. The kerfs were smoothed with my Iwasaki float to fit them together well.
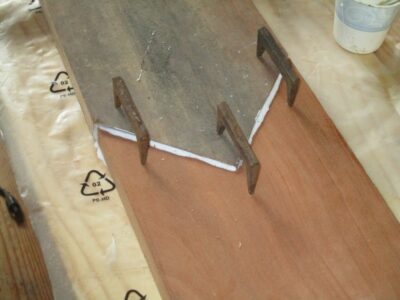
Using pinch dogs on the verso as the clamps (indispensable accessories I first used in the foundry patternmaking shop when I worked there 45 years ago), the glue margins drew together very tight with nice squeeze-out of the PVA I was using as the adhesive.
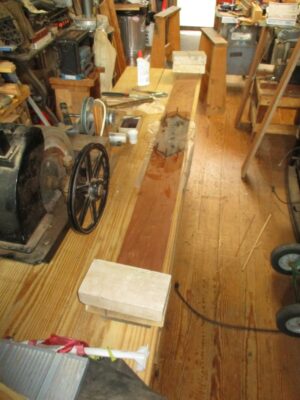
To counteract the slight curling induced by the pinch dogs being only on one side of the assemblage, 10-pound bricks were placed on each end of the gluing-together element to press them flat on the bench top.
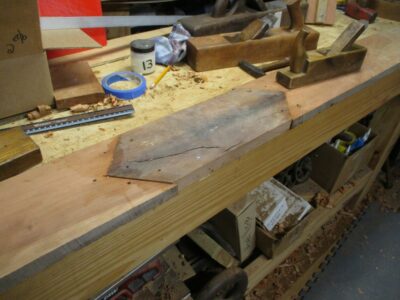
The next morning they were ready for me to work by hand.
My fundamental operating preference is for almost all of my hand plane irons to have camber, or some degree of curve along the cutting bevel. About the only plane irons that are not cambered are 1) block planes, of which I have many and use nearly every day, 2) smoothing planes, 3) “miter” planes for use on shooting boards, and 4) rabbet/dado planes for crisp shoulder/joinery work. Otherwise, pretty much everything is cambered.
And, since it such a routine part of my work, I have developed a simple, easy, and straightforward process to deal with inducing camber and sharpening cambered edges. It has to be simple and easy or I would not go there.
Exactly how much camber depends on the use of the tool. For general-use bench planes like jointers it’s a teensy bit (the precise technical description) and for scrub planes it is a gob of camber (again, the precise technical description), and jack planes and foreplanes somewhere in the middle. How much camber, and when to induce it, are almost whimsical at this stage of my life after decades of creating and maintaining them. That said, the basic process is the same in that it depends on how my hand bone is connected to my arm bone, and my arm bone connected to the shoulder bone.
The most basic truth is that the hand/arm/shoulder joints function as pendulums (pendula?) and their pivot points. As a result, while I use a sharpening jig to establish the bevel on a new or really trashed old iron, virtually all of my sharpening at the stone is designed to overcome or counteract this pendulum imperative. I will not go into depth here on my theory and practice of sharpening (ask three woodworkers about sharpening and you are likely to get 74 opinions), in routine sharpening I am a freehand sidewinder, and in the world of cambers this is an added benefit.
Here is how it works for me.
Holding the iron so tha the bevel is flat on the stone surface, when pushing the iron away from my body I press down hard with my thumb. On the return trip, pulling the iron back towards my body, I press down hard with my index finger. With this simple process camber is induce. Exactly how much camber depends on how many strokes you move fore and back, and how coarse the stone is.
With the iron bevel-down on the sharpening stone, I establish (or discover) the bevel angle moving the blade fore and back. Here’s the sublime part, camber-wise — all I have to do to induce the camber is press more on the trailing edge on the push stroke and on the pull stoke to begin a rocking action and remove more material in a near perfect curve on one side for the push stroke and the other side on the pull stroke.
Simple as that.
Again, exactly how much camber and when to induce it depends on the purpose of the iron. For bench planes I induce it at the 600-grit stage of the sharpening process. NB – my progression for a new or derelict iron edges is to work up through very coarse silicone paper or diamond stones to 220 diamond to 600 diamond to 1200 diamond/1000 water stone to 8000 water stone, followed by stropping with micro-abrasive impregnated into a wooden board.
=================================
BTW I am playing with creating short shop-based videos, and if there is enough interest I could easily feed this topic into the pipeline.
When restoring a plane iron my starting point is always flattening the back, a frequently arduous task as a surprisingly few irons have undergone such a corrective action. As a result, the time and energy for this step is an outsized proposition. Even with coarse stones, diamond plates, or abrasive paper, flattening the back of a derelict iron can be a real workout. Generally, I’ve found that it is practically impossible to work the iron too hard on the abrasive, whatever it is. And, although I have pretty big, strong hands, it can be wearying session. To make it less of a nuisance I need a force multiplier.
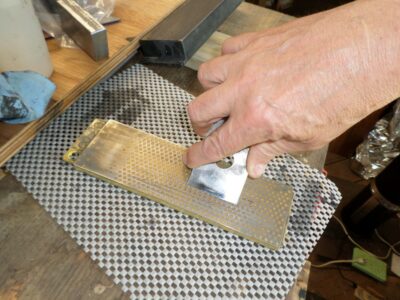
This is where The Magic Stick comes in handy. This fundamental tool was introduced to me by my late, lamented and much-missed work pal Mel Wachowiak (his obituary is still tacked up in my shop), who in turn learned it from somebody working on a Japanese plane iron. The tool is beyond basic but required for a new Japanese blade as the “grabbable” real estate for handling the blade is roughly half that of a Western blade.
With the Magic stick you can really, really bear down on the blade when working it on the stone or sandpaper or diamond or whatever.
By gluing a piece of very coarse sandpaper on the bottom of the stick with epoxy, and pressing that coarse surface against the upper side of the iron, you are no longer limited by hand strength and endurance for flattening the back. You can basically impose the downward force of your entire upper body on the workpieces with surprisingly little effort. This approach cuts my work time for the initial set-up of the back by at least 75% and at times 90%.
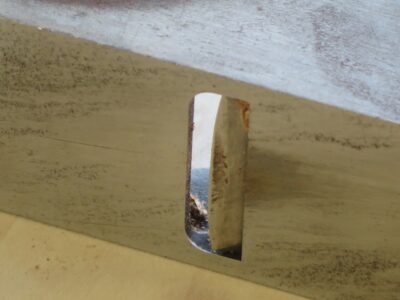
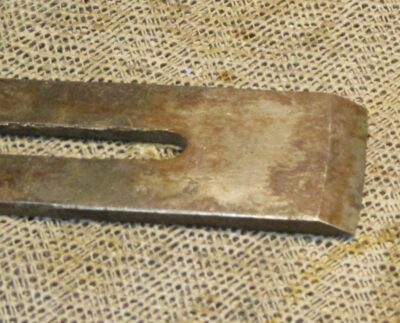
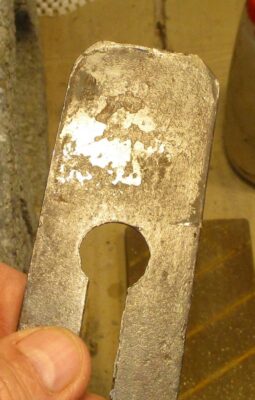
Recently I brought up to snuff a narrow coffin plane that had been originally used as a semi-scrub plane, and it had been worked mighty hard if the mushrooming of the iron heel was any indication.
Looking closely at the iron I saw that the bevel had been established on a bench grinding wheel or something similar. But the edge had never been honed and the back never flattened. The iron was essentially straight-from-the-factory forge. I knew this because the fire scale had never even been touched! (I’m still kicking myself for not getting better pictures of this.)
Fire scale is the deposit that forms on the surface of metals when they are worked at high temperatures, it is the stuff that sloughs off when a blacksmith is working a piece of wrought iron or steel. Not being a metallurgist I am not 100% clear on the composition of ferrous fire scale. All I can tell you that it behaves carbide-ish, hard and tough. Very hard. Very tough.
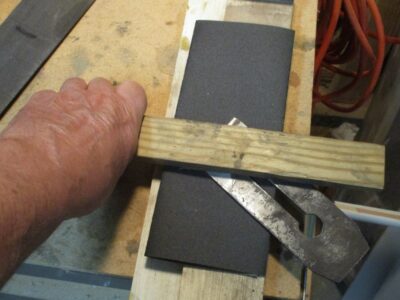
So, on this blade I had a lot of fire scale that needed to be ground off to accomplish the preparation of the vintage iron blade. Just abrading it on a diamond stone was brutal work by hand, but with the Magic Stick it was doable in about 10 minutes. BTW, the carbide-ish ferrous fire scale was so tough that it trashed my 120 grit diamond stone. Absolutely trashed it. I wound up doing most of the work on a piece of folded silicone carbide paper.
Working my way up through the grits on diamond and water stones, a dozen seconds at a time, was a piece of cake thanks to the Magic Stick. This blade is not the previous one with extreme camber, but an example of a blade back that was prepped in just a few minutes.
I am not a tool collector per se. I am a tool acquisitor, but that is a whole different mindset. I own fewer than a dozen collectible tools – my Robert Towell and Raney Nelson planes, a Chris Laarmans finger plane, a Laarmans router plane, a set of Otner-Botner luthier’s planes, perhaps a couple others — but my inventory of acquired tools is always in flux. I am always on the lookout at flea markets and tailgating events to find tools that I can rehabilitate and find them a new home to someone who needs one of them. Sometimes the refurbished tools go to family, some go into the wooden box marked “tools for Lil’T”, and some go to friends or even friends I’ve never met. Such was the case a couple years ago when I was able to send several boxes of tools to Rob Hanson in the aftermath of his shop and all its contents turning to ashes in the Paradise Fire in California. I counted it as joy to send them even though we had never met, because it was the right thing to do.
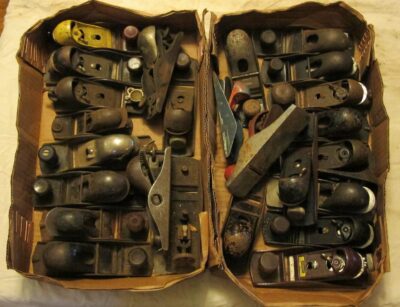
One of my very favorite things is to buy boxes of old block planes to tune up and give away to new woodworkers. One sharp tool can make a difference in charting someone’s passion for woodworking.
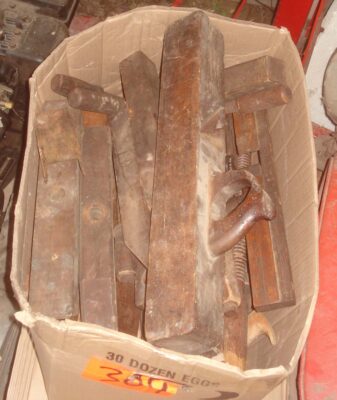
I often purchase wooden body planes even if they have no iron, and often purchase irons even if they have no plane. As long as they are basically in good shape I can eventually make something of them, combining an iron from my drawer full of irons with a body who needs one. Then I can find some body who needs the finished tool.
NB — for guidance on restoring all manner of iron planes and other woodworking tools, Ralph Baumenot’s Accidental Woodworker is the reference, a must read for me on a near daily basis.
I am currently rehabbing a series of wooden body plane irons, good projects in that they can be worked on a few minutes here, a few minutes there.
When working on an iron that is in really rough shape, or even sometimes brand new, I find my most valuable tool to be “The Magic Stick,” two versions of which are illustrated above.
You’ll find out the Why and How next time, along with a cut list.
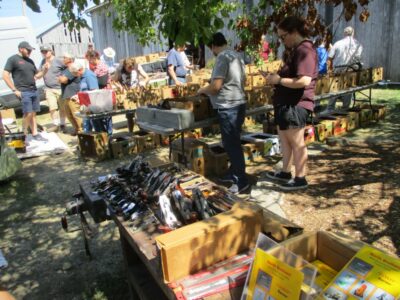
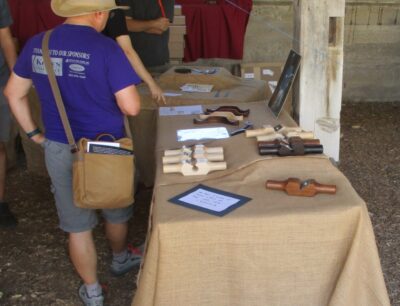
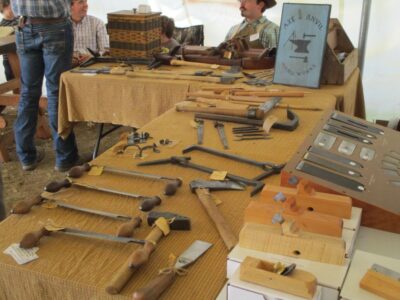
Saturday foot traffic to the booth was less than Friday’s, although the demo and product interest remained the same. Since John and I had zero time to wander the town on Friday we each took an hour in the early afternoon to do just that. There were scads of toolmakers I had never seen, although to be honest I was unable to browse HW2015 (Studley tool cabinet exhibit) or HW 2017 (working the booth all alone).
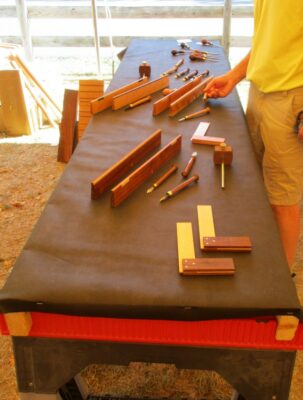
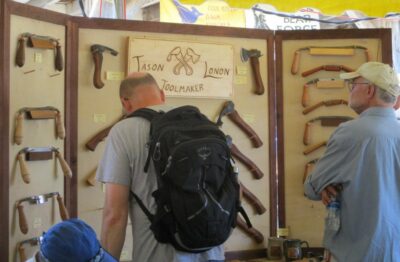
Here’s the pictorial travelogue with minimal commentary. NB – My effort of traveling photojournalism was greatly hindered by the crowds, which were much more than in the Festhalle. Still, I hope you get a taste of the many flavors present.
Just outside the Festhalle was this most impressive inventory of vintage tools.
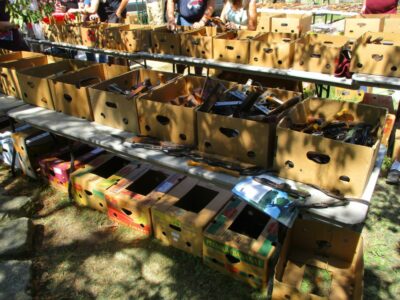
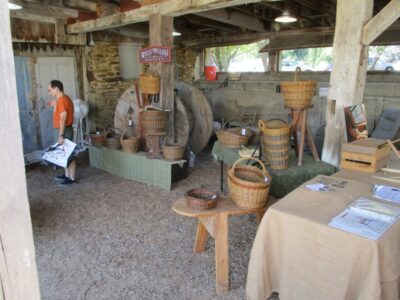
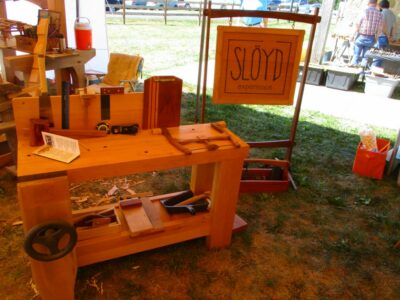
Wandering over to the stable area with its big circus tents, the feast continued.
Immediately adjacent to the stables were a pair of circus tents, chock full of baubles but mostly packed with people (hence the paucity of images).
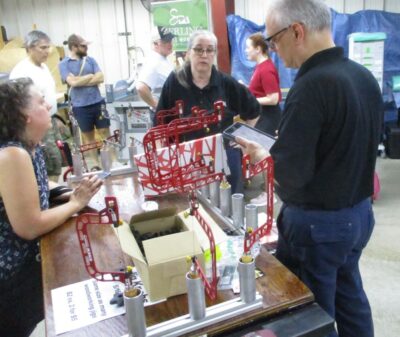
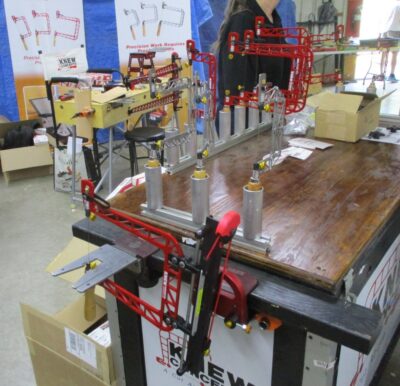
Wrapping up the walking tour at the Amana Furniture warehouse room, I was especially impressed with the Knew Concepts display, including the large vertical chevalet, for which I was an enthusiastic collaborator an own Serial #1, and its new little brother.
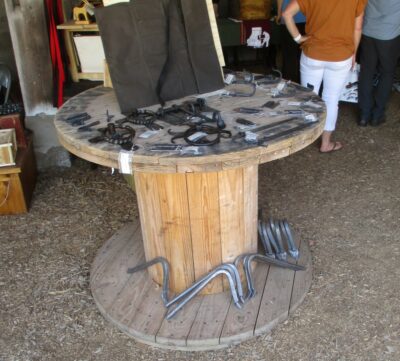
The crowds in the stable, tents, and warehouse were such that I was only able to photograph about one third of the offerings there.
Then it was time to get back to the Festhalle and finish up the day, pack up, and head for home first thing the next morning.
I am a sucker for anything to do with artisanal brush-making, and this one on fabricating urushi lacquering brushes had me from the get-go.
The only way it coulda been better if there was another one. Oh wait, there is.
And another…
In fact, in the year-plus since I really browsed deep into urushi videos on youtube there is a whole new inventory of them, including these really cool ones about lacquer brushes.


Recent Comments