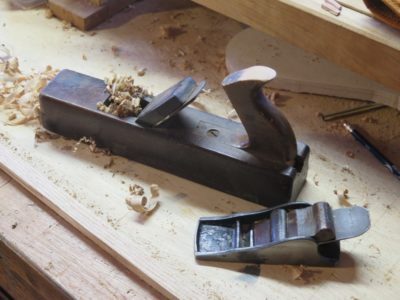
A second, most useful, “plane” that is adjacent to my Mount Rushmore of planes is the router. Hmm, is it really “a plane?”
Though primarily used for excavating, such as dados and rabbets (if I did more case-building it might be in that pantheon) but I find myself using it more than I would have thought when excavating areas for inlay or excavating joinery where my rabbet/dado plane will not work. I’ve even thought about getting one of the mini-routers now on the market, just for small inlay work.

I have two vintage routers, one “D” style and one platform style, both with no adjustments other that tapping and tightening screws. Both are tool swap/flea market finds, and I found both to be terrific tools so much that I had no problem finding a new home for my NOS Stanley router.

Once again, the only reason they are not ranked higher on my list is that I don’t do enough of the kind of work that makes them reside there. It’s not their fault I don’t have them in my Essential Planes.
Among the multitude of planes that I own and use, the five previously mentioned are my Pantheon. Three more planes are “near misses” for one of three reasons. First, even though the tool might be called “a plane” it might not really be a plane in the most common sense of the word, that being a tool to make lumber flat, smooth, true, to a specific dimension. Second, it might not be as integral to my own work, in other words my projects might not require this or that tool. If your projects do require this tool, wonderful. Finally, I wanted to make sure the Essential Planes were not gargantuan or heavyweight; my Pantheon are things that would be found in a reasonably-sized traveling tool box. Admittedly, these restrictions are idiosyncratic and almost arbitrary, but so be it.
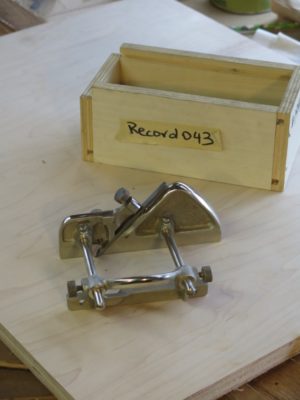
One of the tools in the “near miss” category is my sweet little #43 mini plow plane. Though technically a groove cutter rather than a stock prepping tool, it is called a plane in the lexicon so I will do so too. Were I more of a frame-and-panel sorta guy (I have recounted about how I am a premium plywood user for panel construction, even to the point of laying up my own custom veneer plywood) it would be right up there in the Mount Rushmore of planes. If you produce a lot of small boxes and furniture like RalphB over at The Accidental Woodworker it would be a perfect fit. The fact is I do not make much frame-and-panel work so this little beauty mostly sits on the shelf, patiently awaiting those few projects where it is an integral asset. If you do build a lot of frame-and-panel work, especially small to medium sized, this could easily be one of your two or three most important tools. I know that if I migrate in that direction, it will be for me too.
All that said, I do own two of these plow planes, one for the shelf in the shop and the other in my traveling tool kit; it breaks down to a very small package that fits into a #1 mailing envelope. You just never know when a frame-and-panel project will strike.
Up next – not a bird, not a plane, but for me a supertool!
When choosing “the essential planes” the sorting factors differ from person to person, and my selection definitely reflects my interests and projects. These three planes, combined with the previous pair, fulfills my needs for 99% of the work I do, and, as an added benefit, don’t weigh much or take up much space.
My final three Essential Planes are;
The scrub plane is simply part and parcel of my work in that they get rough wood flat (but not smooth) fast. I find myself using one more and more and the power planer/jointer less and less. A great part of that development is the nature of my projects — I make almost no large scale “cabinetry” — and the steeply cambered iron works wonders at getting things flat. Even on my large-scale projects, mostly workbenches, the scrub plane is a jewel when it comes to flattening gigantic slabs of wood that don’t even fit into the planer anyway.
I’ve got both metal bodied (LNT) and wooden horned scrub planes and use them interchangeably.
Next comes the toothing plane, perhaps peculiar to my work in that I do a lot of veneer work and laminations for which the toothing plane was designed. The serrated, or “toothed” iron is perfect for getting surfaces prepared perfectly for gluing together and there are regional techniques whereby all secondary surfaces are flattened quickly. Again, not smooth, but definitely flat. Admittedly I own far more toothers than I need (13) but you should have at least one and incorporate it into your work. It really increases production efficiency.

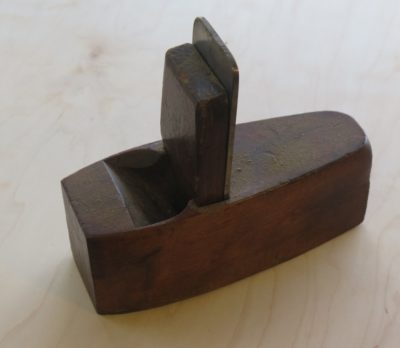
Finally is a plane probably in most of your tool kit, the rebate/dado plane. When it comes to making wide channels to fit pieces of wood together, or cleaning up the inside corners of joinery, nothing can compete with a rebate/dado plane. I would say that it is a tool perfectly designed to do one essential thing, but it is more than that. It is great for shooting moldings the Roubo/Bickford way.
Up next, three tools that may or may not be “planes” per se, and whose utility depends on my projects. If my work was a little different they, too, would be in the pantheon.
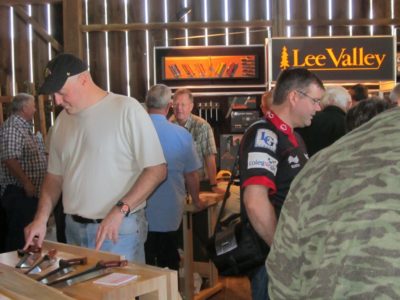
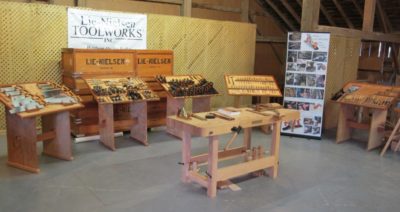
During the set-up for Handworks 2013 the weather was lovely (the bitter cold front moved in overnight as we were preparing for the Studley presentation), and my booth was tucked into a corner adjacent to the Lee Valley/Veritas mega-booth. Mrs. Barn wandered about the Festhalle before returning to cross paths with Robin Lee as his crew finished installing their scrumptious displays.
At one point she noted the walls of hand planes, and asked Robin, “How many planes do you really need?”
His answer? “How many planes are there?”
It could have not been more perfect had I scripted the exchange myself. She does not know exactly how many planes I own, but it is a lot, probaby a couple hundred by the time you count all the specialty planes
As I am simultaneously building my own tool cabinet and reviewing/winnowing my own shop contents, the question of “How many planes do you really need?” has been running through my mind a lot. I have come to the following conclusion, which I can state without fear since she does not read the blog — a lot fewer than I own. In fact, I believe I could engage in 95% of my own work with just two planes, a jack and a block.
I have a great many planes that would fit these descriptions and nearly every variation therein. But these two are my favorites, the ones I reach for more than any others. The jack plane is an ancient, high-mileage lignum vitae “shipwright’s” plane (I am an absolute sucker for vintage rosewood and lignum planes and own several), unmarked, simple in design, and outfitted with a slightly cambered iron I keep at a razor’s edge effortlessly. I find myself using this plane for hours at a time, especially when preparing stock for making Gragg chairs but truth be told it is my tool of choice for almost any stock-planing exercise. Yes, I have many longer, fancier and more noteworthy stock prep planes but given the nature of my work over the past and coming decades, this is the one for me.
My other favorite is this low-angled Excelsior sleigh bodied block plane that like the lignum jack was probably in a box lot of tools from an auction or flea market, the details of which are lost in the mists of time long past. I do recall it was a filthy mess when I finally retrieved it from the pile, but once I got it cleaned and tuned it is an absolute treasure. With a tap or two from the iron-setting hammer it can be hogging off material to make a softwood door fit its frame or remove gossamer hardwood shavings as it performs exquisitely as a smoother. Again, I have many smoother planes from renown makers and none surpass this little gem. It might in fact be one of the three favorite tools I own along with the ball peen hammer with the curly maple handle, a gift from my long-time consigliere MikeM, and the tiny brass spokeshave I made when working in the pattern shop 45 years ago. (Obviously, I am not including my Victorinox Spirit multitool; that is no mere shop tool, it is an essential component of daily life.)
I recall with amusement an exchange I had on a panel discussion with a famed furniture maker who snorted at the thought of incorporating a block plane into fine woodworking.
“A block plane has no place in a furniture makers tool kit, it is a carpenter’s tool,” he said.
I responded sotto voce with, “Well, if you need for me to help set one up for you, I will.” Normally a jovial sort he was none too happy with my comment. But then, he never met my sweet little Excelsior.
Up next, the three planes that round out my “Essential Planes” pantheon. With those five planes I am up to 99% of what I do.

If you follow this or any other woodworking blog you might already know that Handworks 2023 is on the calendar!
The event-to-end-all-woodworking-tool-events will be taking place the Friday and Saturday of Labor Day Weekend, and unless something catastrophic happens in the meantime I will be there in a booth with my trusty compatriot Ripplin’ John.

I’ll have plenty of my wares to sell — polissoirs, beeswax, shellac wax, videos, First Edition Roubo engravings, etc. — so I hope you will make the trip and stop on by. I think John can be persuaded to bring his Roubo Ripple Molding Machine.
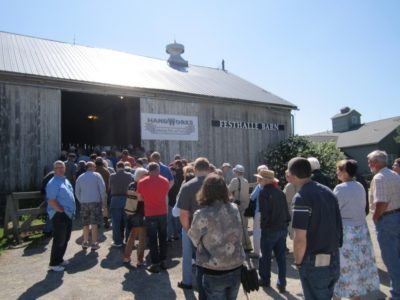

The event itself is the largest (to my knowledge) celebration of woodworking hand tools on this planet. Previous iterations of the event have garnered crowds of several thousand tool geeks from around the globe gawking and trying out (and buying) sublime tools. My own weakness is the booth of Slav the File Meister. I have yet to resist the temptation to enhance my inventory of files and rasps from amongst his dozen display tables of the new-old-stock wares he has for sale.
I know Amana has undergone some spatial reprogramming since the first Handworks ten years ago(!) so I’m not too sure what it will be like this year, but there will almost certainly be several venues scattered about through the tiny village.
See you in Amana!
When the Studley tool cabinet book came out eight (!) years ago I had two great mutually exclusive hopes. The first was that a new wealth of information about Studley would come flooding in. The second was that the research I and my collaborators unearthed was pretty much all there was knowable about H.O. It turned out the second was the correct one, in the intervening years not a single useful datum has come my way. Sigh. Or celebration.
On the other hand, the interest in Studley’s tool cabinet and tools has grown to the point where replicas of his tools are being made and, even more impressively, replicas of his entire cabinet and its contents have been fabricated and assembled.
The latest of these is by Fred Armbruster, who intersected with my pal Ripplin’ John at a Rose Engine Lathe get together, and at John’s behest forwarded some photos of his own Studley creation. It is spectacular, as is Jim Moon’s recreation I wrote about in PopWood. Fred’s is every bit as deserving of praise and admiration, and I look forward to the time when I can see it in the flesh and shake his hand.
Well done, Fred. Simply magnificent!
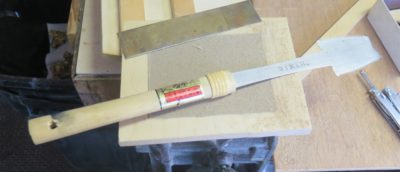
Remaking the Japanese mortising saw into a premium veneer saw was straightforward, but, as in the case of any instance where you must first break apart a perfectly functonal quality tool to do so, gave me pause. I thought about it long and hard, even going to the extreme of ordering a duplicate tool. In the unlikely case where the “remaking” went south I would still have the original capability.
The mortising saw business end did a great job at the cutting, but the long neck made the saw somewhat floppy and unwieldy for repeated and routine veneer work like the hundreds of cuts I will be making for the tool cabinet parquetry. Somehow that floppy neck had to be dispensed with. Once I settled on a simple strategy it was, like I said, straightforward.
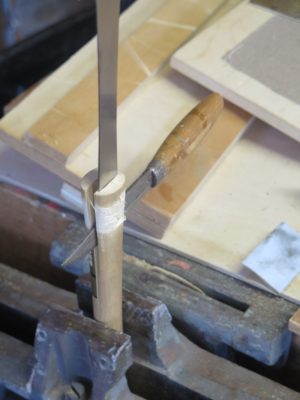
I began by removing the bindings and set screw from the handle, which I then split along the blade tang with a sharp rap on a Sloyd knife.

The handle, being paulownia, cleaved instantly and cleanly, releasing the entirety of the metal blade.
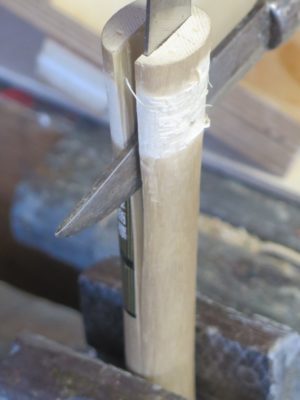
Re-housing the tang to “remove” most of the floppy neck was a piece of cake. Using the tang itself as the template I marked then excavated a pocket of the exact dimensions of it so the two halves of the handle could be reassembled to incorporate it. I cleaned the tang and abraded it lightly, then reassembled the unit in the new configuration with epoxy.

To hold things steady until the epoxy set I wrapped the handled with some elastic tape and left it for two days.
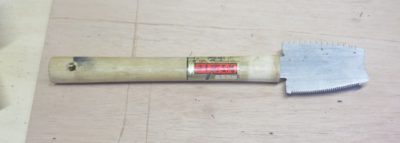
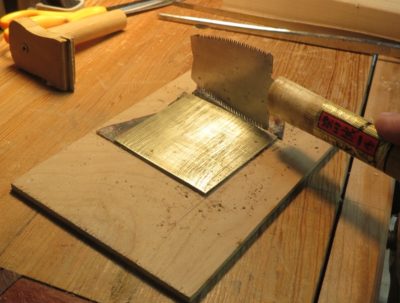
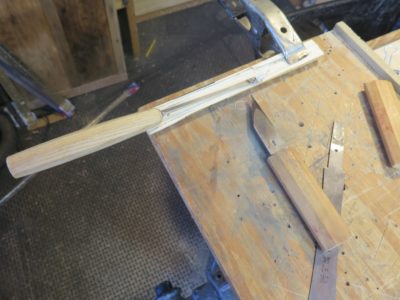
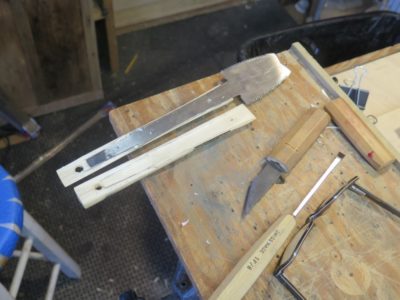
Removing the tape revealed a now-perfect parquetry cutting saw. Now all I need is a perfect set of sawing templates.
Stay tuned.
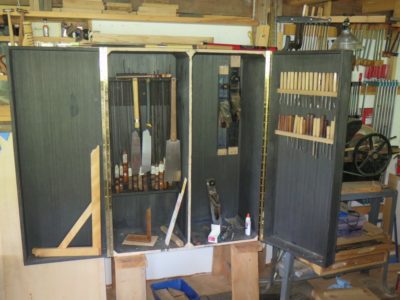
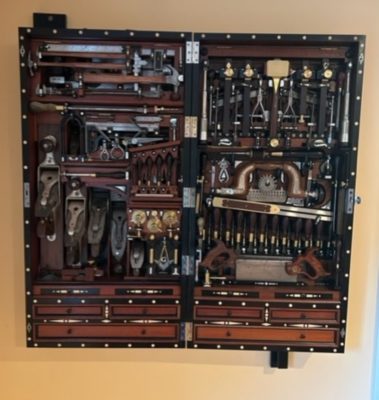
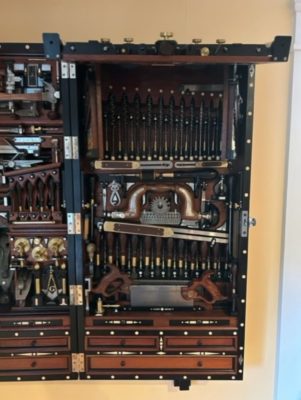
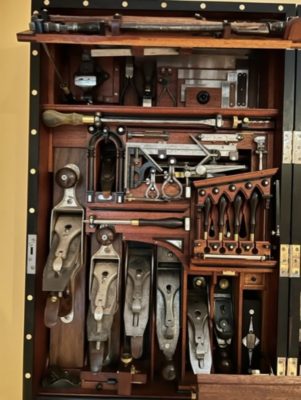
As I slowly move forward with my ultimate tool cabinet the reminders and memories of the Studley Tool Cabinet are ever operating in the background as I strive to integrate the maximum inventory of tools into the space. Fortunately (?) my tool cabinet will be five times more voluminous than Studley’s, which presents a multitude of opportunities and headaches. Sure, I can include five times as many tools, but like Studley the multi-layered layout must be accomplished by hand and trial-and-error. I expect that hugely time-consuming process will continue to infinity and beyond, or until I run out of tools to put inside.
Less problematic, at least in principle, is the decorative treatment of the presentation surfaces. There I have a starting premise and need only to fine tune the execution. My goal is to assemble a complex diamond-and-stringing parquetry surface evocative of the creative genius of Abraham and David Roentgen who, like many of the monumental French ebenistes, were Germanic. My parquetry surfaces will be based on some of their work, but without the over-the-top exuberance. As for decorating the interior surfaces, I have plenty of black dye, mother-of-pearl, and “bone,” both genuine and artificial.
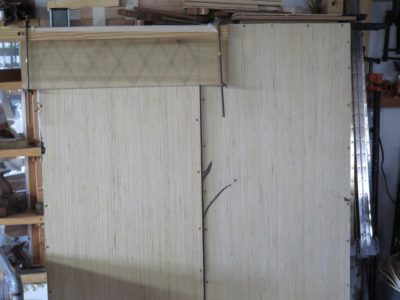
Since beginning the project my efforts have vacillated between fitting the tools inside and mapping out the parquetry process. For the latter I needed to create a very rough proof-of-concept panel that could provide useful information about tinkering with the size and proportions, and the process of executing whatever/wherever I wound up.
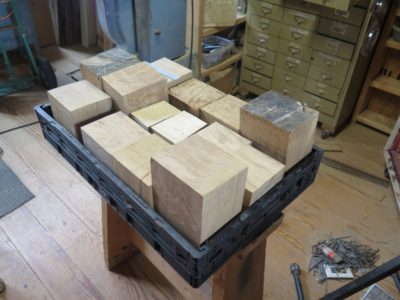
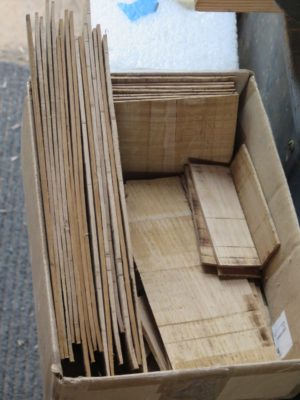
One of my foundational starting points was to use wood from Roentgen’s era for the veneers. Fortunately I had a large inventory of leftover white oak scraps from the FORP gatherings in Georgia, which employed timbers that were literally growing at the time the Roentgens were active. While none of the wood pieces were sizable, they were certainly process-able.
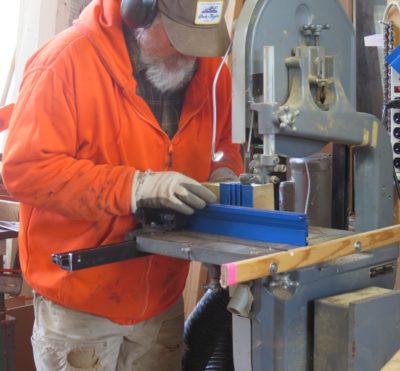
With a newly tuned bandsaw and brand-new, variable spaced teeth bandsaw blade I set to work making enough sawn veneer to execute the sample panel.
Stay tuned, this project will consume dozens of blog posts over the coming months.

Years ago when my sister’s family was visiting and we were giving the kids a walking tour of the property, one of my nephew’s exclaimed, “Uncle Don, it’s just like you live in a state park!” As you can probably deduce from some of the firewood-harvesting pics, the topography for much of the property is, shall we say with literary license, exuberant. One moment of inattention or one spot of poor footing can put you on the ground in a twinkle of the eye. Given my poor vision with almost zero binocular depth perception and my history of injury I am becoming increasingly attentive to keeping upright in the place I want to be moving or standing still.

Traipsing around up and down and across the hills requires good footing and for all of these years I have relied on an old pair of lumberjack-ish boots. For standing, these are the most comfortable footwear I have ever worn, but as my excursions into the forest have become more purposeful, they were wanting. For starters, as the knobby soles became worn they were less able to grab the ground as needed, but even worse is the fact that they weigh about 8 lbs apiece making the traversing of rough terrain all the more problematic. Hiking around iffy ground with a brick lashed to each leg is not optimal.
Since firewood-harvesting became integral to my routine here I started looking into spiked-sole lumberjack boots (the term for this type of boot or shoe is “calked;” I have no idea of this etymology) as a response to slippery footing.

After much browning of the interwebz I found this pair of “calked” boots built on a hiking boot platform, thus reducing their weight by around 50%. They are comfortable, lightweight, and grab the ground like they were, uh, spiked to the ground. They have transformed my time in the woods or when bush hogging the hillsides, or even just mowing the yard (although I must be attentive to where the water hoses are so as to avoid stepping on them). In these arenas, they are perhaps my most important tools.
In my frequent travels this past year to visit Li’l T and his parents and Barndottir the Elder I have almost always taken a traveling tool kit. Perhaps not enough for major home repairs or construction but certainly enough to get most woodworking tasks done. Fortunately, my SIL is an accomplished remodeler and the basement and shed at Barndottir the Elder’s home still has a pretty complete inventory of my tools, so I am almost fully set up regardless of which place I am.

My traveling tool kit is a very concise collection of woodworking tools with a couple of extra things useful for home repairs. Perhaps one day I will blog about the contents of the kit, which resides in a mahogany surveyor’s theodolite box with a couple drawers added on beneath.
Since space is always a premium in a kit like this I have become additionally enamored with Japanese saws, more particularly Z-brand saws with replaceable/interchangeable handles and blades. With one handle I can outfit it with any number of set-ups to accomplish everything from sawing timbers to fine dovetails and all points in between. I keep a cardboard “envelope” for the blades and pack them separately from the handle, so the spatial footprint is surprisingly small for such a large range of sawing utilities. In just the space of a handle I can carry a good set of saws.
Yet another reason to incorporate Japanese saws into your inventory of tools and skills.

Recent Comments