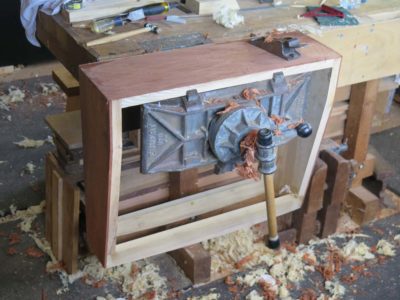

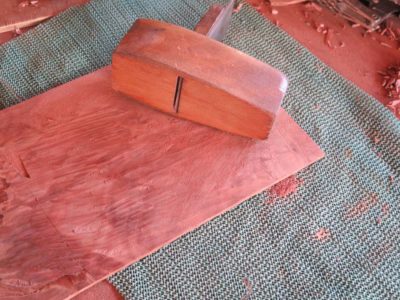
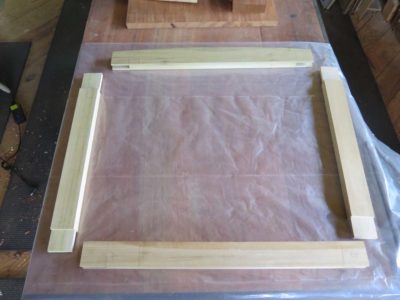
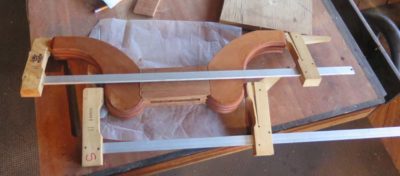
Veneering three sides of the writing box was so straightforward it almost does not deserve its own blog, except for that fourth side, the one with the drawer front. On the two sides and back it was simply a matter of cutting the veneer and gluing them down. I used cauls and clamps because the veneer was so thick I simply was not confident of my skills in hammering veneer of this thickness.
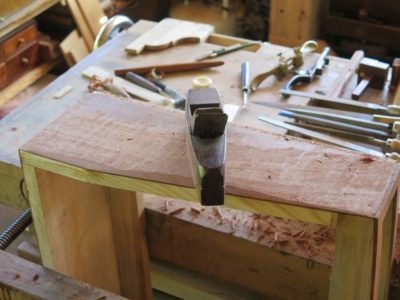
Once again the beauty of sawn veneer revealed itself as the thickness allowed for the surfaces to be planed once the application was complete.
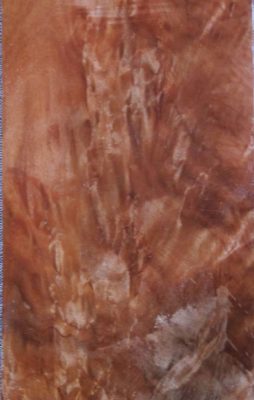
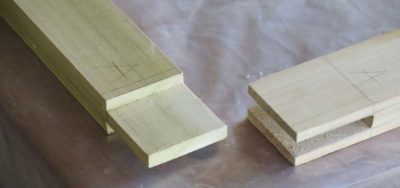
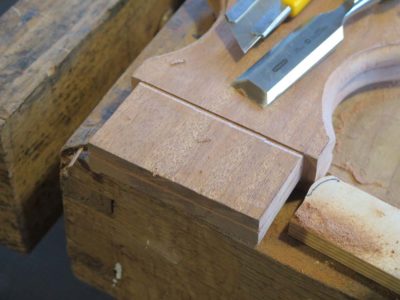
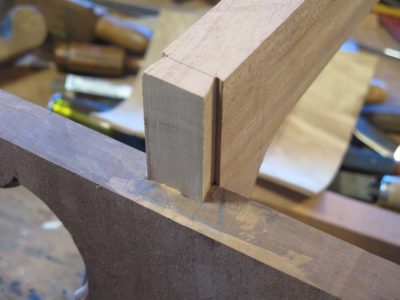
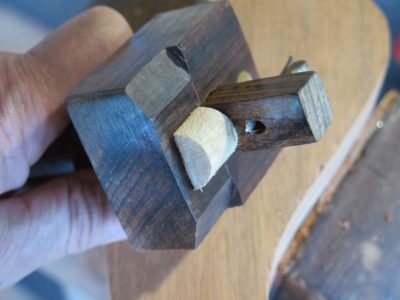
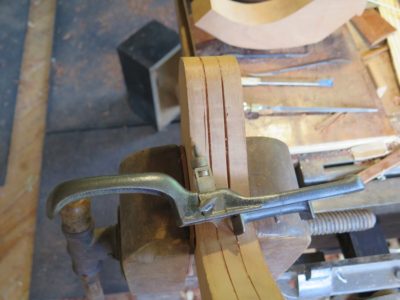
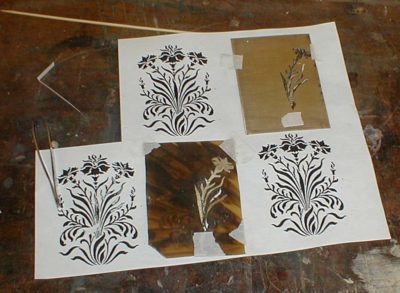
The drawer front was actually a challenge and a lot of fun, as I wanted the veneer to present an uninterrupted grain pattern. That meant I had to cut out the field of the drawer front from the border on the writing box itself.
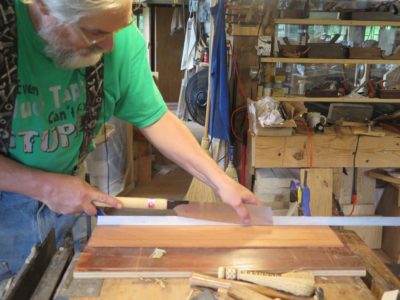
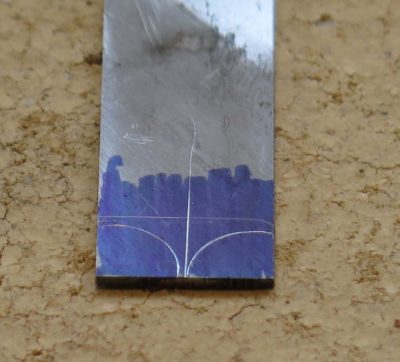
Using a straightedge and one of my Japanese saws with curved teeth I carefully layed out the cuts and started making them.

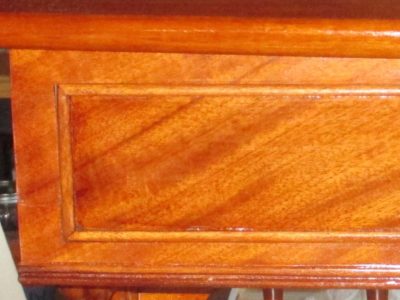
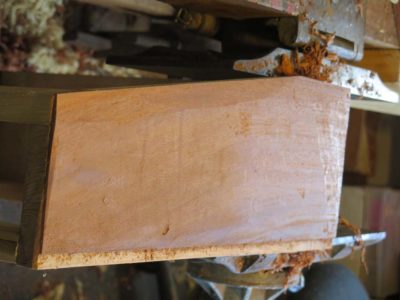
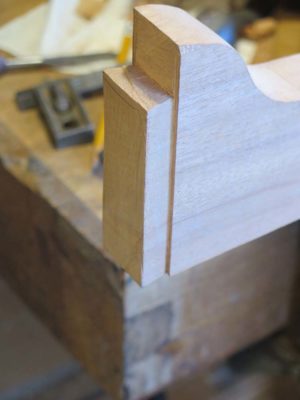
Once that was done the veneer was glued to the drawer front and the surround, mirroring precisely the veneer from the opposite side. The result was not unpleasing.
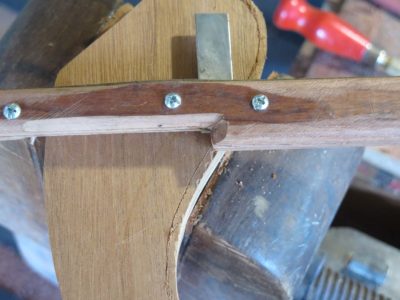
I added the beadwork drawer trim and set the writing desk aside while I went to work on the veneer “fancy work” on the legs. That took several weeks and by the time I returned to the writing box and drawer to begin the finishing, catastrophe struck.
Stay tuned for that tale of woe.
Both the writing box and the legs for the desk are fully veneered on their faces, and in a most prominent manner. In keeping with the client’s request to make the complete piece from technology appropriate to the 18-teens I sawed and prepared all the veneers by hand.
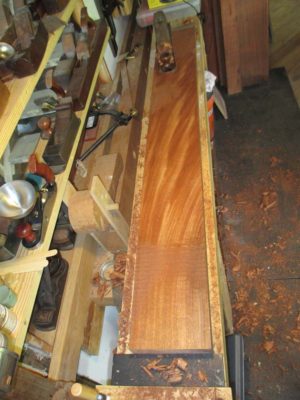
For the writing box I used a superb piece of Cuban mahogany I had been saving for nearly 40 years. I did not know back then what I was saving it for, but I knew it would be something special. The board was just the right length and width to allow me to wrap the entire box’s full sides and back en toto and continuously, I made the back and the drawer front match which turned out nicely.
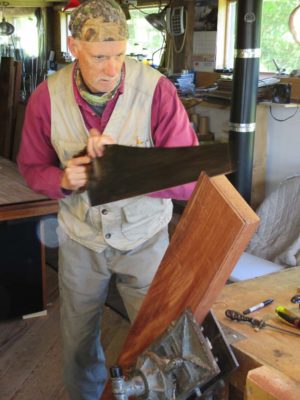
Using a variety of saws, my pal Tom and I sliced off two full leaves of veneer, about a shy 1/8″ thickness. We were not excessively experienced at the task and chose to err on the side of safely rather than efficiency. The density of the mahogany made it a real workout, but the results were definitely worth it. Sawn veneer is such a delight to work with; I have a sizable stash of sliced veneer and to tell you the truth I use it more in gluing up small pieces of plywood than anything else. Well, that and making sample boards for students to use in finishing classes.
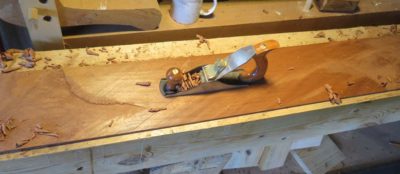


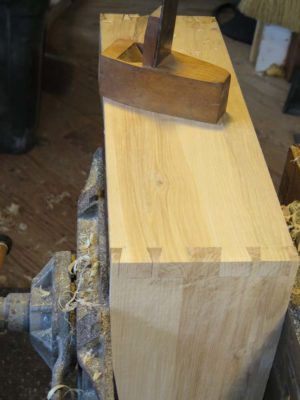
With the thick sawn veneer I can actually plane it by hand to prepare it for use. I usually concentrated on the underside, that is the side that would be glued to the substrate, hitting it quickly with a succession of the scrub plane, a fore plane, and the toothing plane.

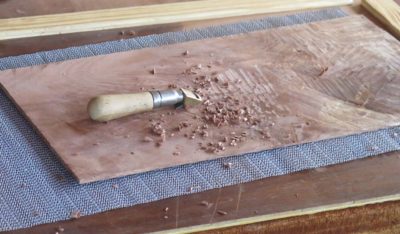
For the veneer on the legs, the central decorative fields were comprised of flame crotch mahogany. I had purchased some big 3/4″ slabs of that but they had warped so severely that dealing with it was a challenge. Even cutting them down considerably they were still a squirrely mess of end grain. I wound up sawing these almost 1/4″ then planing them flat. Now that was an exasperating adventure.

To work the pieces I made a special planing jig with thin stops on two edges, I’d put the veneer on a piece of rubber matting, push it into the corner and set to work.
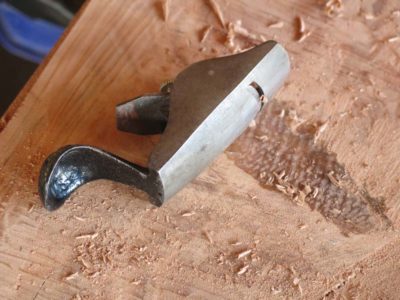
The scrub plane was too aggressive, so most of the work in flattening and thinning the stock was done with a vintage Stanley spoon bottom palm plane and some luthier’s planes, followed again by the toothing plane.
The results were pleasing albeit aggravating.
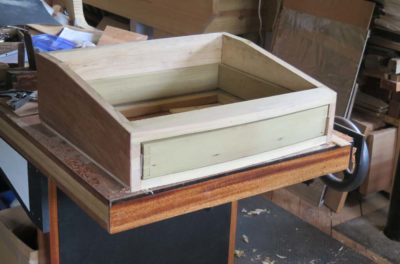
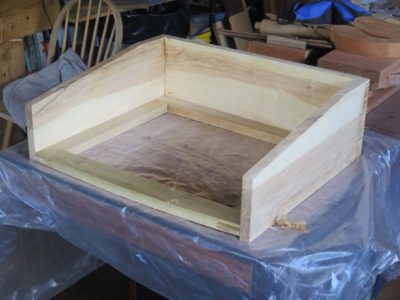
The structure of the desk writing box was literally that, a box, albeit with only three sides and no bottom. I knew that the original was an ash box veneered with figured mahogany, so that’s what I did. I had a stash of vintage, locally milled ash boards I’d bought from an old woodworker who was moving back to the city. He was selling his lumber inventory and I bought it, including some spectacular bog oak and pine from an 1850’s crib dam down on the Rapahannock River. Some day I will make something from this and write about it, but not now.

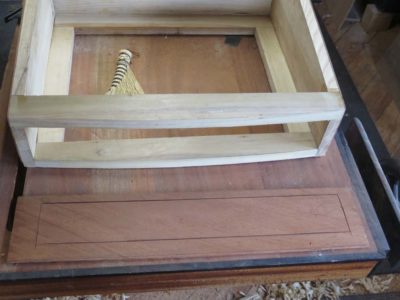
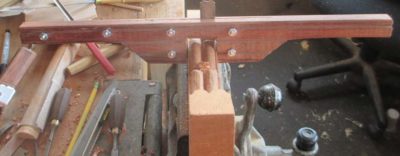
The exercise of making the writing box was straightforward, consisting of three boards for the box and an open mortise-and-tenon frame for the drawer platform. The only noteworthy thing here is that the drawer, and thus the top and drawer platform, were bowed. Not a problem of any sort, but a nice feature nonetheless. NB: some of these images might be from the practice prototype, not the final version.

The ensemble was assembled with 192 gram hot hide glue, then placed in the incomparable Emmert K1 to plane and tooth the surfaces that were the substrates for the veneering yet to come.
The actual top of the box, the writing surface, was actually the very last step in the construction. Given how the legs and the box were attached to each other it was just easier to do it this way. You’ll see that in a later post.
On to the veneer.
Cutting and assembling the joinery for the desk base was a chicken-and-egg sorta thing. Since they were so forcefully integrated, did I cut the moldings into the desk frame first, then cut the joinery, or do it the other way around?
In the end I decided to cut some of the joinery first, like the mortises in the feet, but then mostly did the moldings first and added the upper joinery after that.


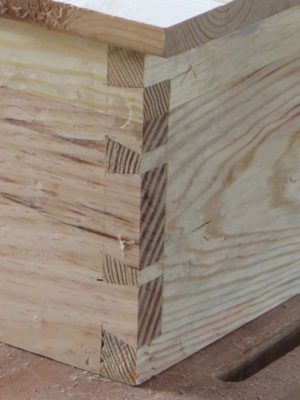
For the tenons I marked and cut the saw-line first with a knife, excavated a bit with a chisel to provide a clean, precise shoulder, then sawed as usual.
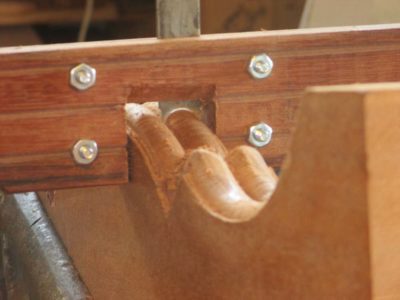
The only real interesting exercise for the joinery was the main cross beam at the top of the base, immediately underneath the writing box. Originally I had considered a simple mortise with screws from the outer face since that would be covered completely by veneers (I think the Senate replica I worked on was made this way), but then decided a better way was to make a haunched blind sliding dovetail.
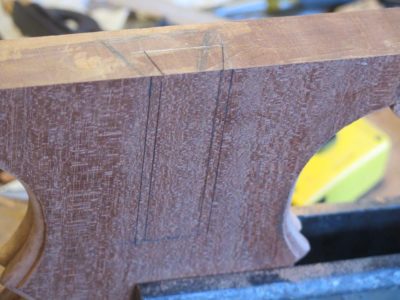


That sliding dovetail tenon was matched with a dovetailed mortise. I used a mitered block as a sawing guide and things proceeded smoothly in cutting the dovetail shoulders, followed by a series of cuts to make the waste removal easier.
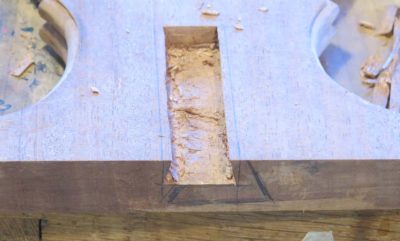

Chopping out the waste with a chisel followed by a router left a perfect mortise.
The dry fit made me smile.
When constructing a bowed or undulating panal or structure, one of the challenges is to decide the manner of achieving the shape. Commonly there are main four methods employed: sculpting/carving from solid slabs, a la bombe’ chests; glued laminations (home made curved plywood); contour- sawn layers or segments glued together in a stack, sometimes called “brickwork”; or coopering, which involves the assembling of long sticks or boards that are isosceles trapezoids in cross-section (“staves”) with the legs of the trapezoid angled such that the assemblage follows a desired curve.
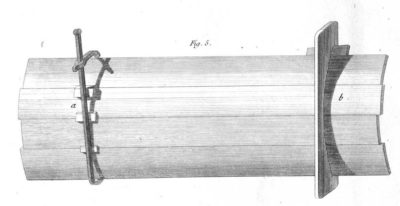
If you consider the forms of furniture common in Roubo’s time, it is clear that there was a need to produce large numbers of curved panels reliably and quickly. This calls for coopering. And, for each individual curvature/radius a unique set-up was required. Roubo presents two distinct solutions to the problem. The first, marked “a” in his drawing, shows a pincer/bar clamp and a group of spacer shims to align the individual staves to assure the proper configuration while the glue sets. This approach strikes me as very finicky, and thus time consuming, to achieve standardized results.
Roubo’s preference was stated unequivocally in his commentary on Plate 102.
Before speaking of gluing curved wood, it is good to enter into the details of gluing those pieces which, although straight along their length, are only curved on their width, like panels that are curved in plane, columns, etc.
For curved panels [in plane], they hardly differ from straight ones. As to the manner of joining them and gluing them, it is only a matter of using a clamp to bring together the joints because when these same panels are a bit curved, the clamps always make them a bit more or less curved than is necessary. You remedy this by putting cauls between the panel and the clamps [bar], which is always placed at the side of the bulge, as you can see in figure 5, side a. No matter what precautions you take, the cauls that you are required to tighten or loosen twist the joints and prevent the glue from working properly. Even when the panels are thin, the clamps bend them and even break them. That is why it is much better to make cradles that you [cut] hollow in the same shape as the panel, which you join and hold in the cradle by means of a wedge, see figure 5, side b.
There must always be at least two of these cradles for gluing a panel and even three for one a bit larger. One should also observe that the angle of the hook “holding the wedges” of these cradles be a bit sharp [acute] so that the panel cannot shift when closing it, see figure 6.
I do not know how to conceal the fact that this method takes much longer and consequently is more costly than the first one because it is necessary to make as many cradles as one has of panels of different curves. These considerations should diminish the advantages that result from using these cradles. These same cradles also serve to fasten [peg] the curved work, which is always better than the clamps, which distort the joints and sometimes break curved crosspieces.

The second approach, marked “b” in the top drawing and important enough to make another detail drawing to communicate the essence of it, makes more sense to me. In fact I have used this approach countless times beginning back in the pattern shop where we produced dozens/hundreds(?) of core boxes for creating cores for casting pipes. Although our patterns were permanently assembled, the process is conceptually identical to using a coopering cradle.

The general process is pretty fool proof. First, lay out the curve with a compass or trammel on a pair (or more) of wooden timbers. Cut out the concave form. Since these would be used for gluing it is almost certainly true that these would be slathered with wax or tallow to prevent the curved panel from being glued to the form as it is being built.


Saw as many staves as are needed for the panel being built. On the edges of the staves plane or saw a slight chamfer so that the staves fit nicely into the curved form, with intimate gluing surfaces aligning between each stave. This angle can be determined during the layout of the panel, and transferred with a bevel gauge.

Place the beveled staves into the form to confirm the fit. Make sure the forms are square to each other.

Fill any extra space with loose boards, and pinch the curved panel staves together with individual or compound wedges. If there is glue between the coopered staves, once that dries the task is finished and after knocking out the wedges the curved panel can be removed to work further.
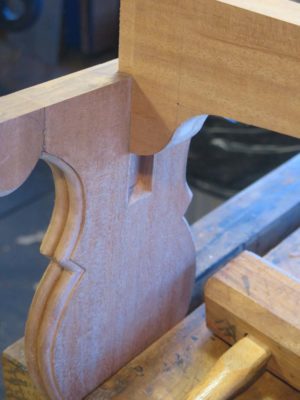
With the fairly straightforward triple moldings on the feet completed and my broken arm on the mend, albeit still fairly weak, it was time to move on to the double moldings on the thinner upright sections of the legs(?). These presented the additional challenge of including sixteen inside-corner sections that could not be completed with only scratch stock cutters.

Since the scratch stock cutter for the triple moldings was also perfectly sized for the double moldings on the thinner “legs” I gave it a try but soon decided that I needed to make another scratch stock to straddle both sides tightly in order to achieve the best results. Even so I got more chatter to the surface than I found acceptable, so in the end I wound up touching all the surfaces with rifflers.
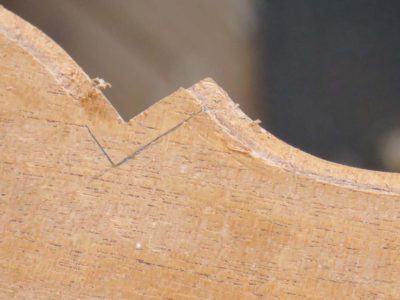
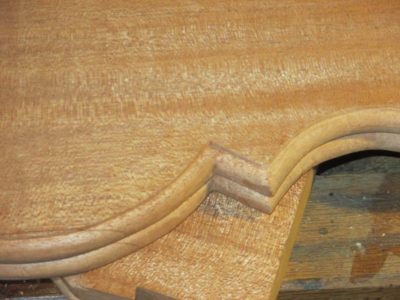
On top of that the shape of the “legs,” and the sixteen inside corners to the molding runs left me with a fair bit of hand carving to accomplish. I followed and extended the shoulders of the rabbet with a sharp knife and excavated them with straight carving gouges, then carved the remaining profile sections with gouges.


The final step of the moldings for this element was to carve the terminus of each molding run at the bottom of each “leg,” where they would join the feet. It was fairly simple, I just whacked at the appropriate place with a carving gouge of the correct size and sweep, and removed the excess with a flat gouge. Somehow I failed to take a photo of this area once it was all cleaned up, but you get the idea.
Once the convex triple moldings were established effectively to my satisfaction the time came to cut the tiny rebate on the outer edge of the foot. That step took a couple of tools, one a modified marking gauge and the other a very simple rebating scratch stock.
For the marking gauge, which in fact I had set up already as a slitting or cutting gauge with a sharpened knife cutter, I needed to modify the block so that the beam could follow the radius as the contour swept in and/or out along the outside of the element. The intricate technology required for this modification is no doubt intimidating, but it was really nothing more complicated than sawing a 1-inch dowel in half and adhering it in place with double stick tape. I also relieved the shoulders of the gauge block to allow for even tighter turning, which would be needed for the leg moldings.


This allowed me to scribe the inner shoulder of the undulating rebate with little effort.

The follow-up tool was a scratch stock fashioned from a piece of tropical hardwood flooring with a tiny rectangular exposure that scraped out the rebate perfectly. On the first foot I cut the three convex beads first followed by the rebate. After that I reversed the order of the process.

The end result was satisfactory.
Then I broke my right arm and was out of commission for another few months. See what I meant about the client’s patience?
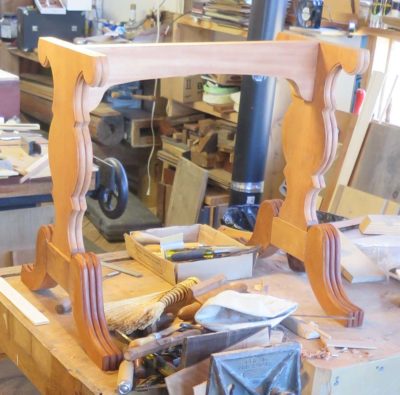
The decorative elements of the desk, in fact the base frame of the piece, were all about deeply incised moldings on the edges of every planar element. I would estimate that the construction phase of the base was about 90% for making the moldings, about 10% for making the joinery.

Once the individual elements were cut and cleaned up, I set to work on making the moldings on their edges. Given the nature of the moldings this was a multi-step process, using some tools that I bought and many more that I made or modified. I began with those surfaces that were the most amenable to trying and perfecting the technique, namely the feet. They were manageable in size and complexity, and completely accessible since I was working them prior to assembly.

In essence these were not carved moldings early as much as they were “scratched” moldings, in essence created with a series of scratch stocks. So, my first step was to fabricate a slew of scratch stock cutters to configure the primary shape of the three half-round runs on the edge of the feet. I ground a center flute cutter from a blank from my inventory from the English profile tool to establish the valleys, and a Lie-Nielsen iron needed only a bit of tuning to work just fine to perfect the convex rounds.
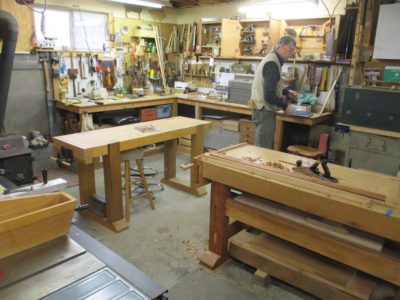
Recently I was back in Mordor and had the chance to visit with my old pal Tom. I first met Tom at a community flea market, he was selling tools and I was looking. I waited too long to get what I wanted from his table, but in our subsequent conversation he indicated he had another one and I could have it in exchange for some lessons in lathe-work. That started a decade-long tradition of my spending Wednesday evenings in his spacious and well-equipped shop. It seems even more spacious now since my projects are no longer there taking up space.
Mrs. Barn would occasionally ask on my return from these Wednesday evenings, “How’s Tom and his family? What did you talk about?”
My reply was generally something like, “Sweetie, we are guys. We didn’t talk about anything but woodworking.” Wednesday nights were often dedicated to building workbenches and sharpening tools.

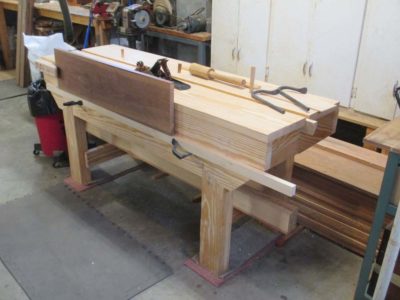


Since I moved to Shangri-la Tom has built some new workbenches (I was really impressed with both his Roubo-esque bench and a terrific little Nicholson) and has started some new projects, but going there was a welcome homecoming of sorts. He visits me here with some regularity, at least a couple times a year, and he like so many others was crucial in the completion of the barn. He has his own bench here, autographed by The Schwarz.

While driving to Tom’s shop I did notice that a regal oak tree along the driveway had come down. It was at least 25-feet in girth. For scale of the picture, imagine me standing next to this wreckage with my hand straight over my head. It would have not reached the top of the horizontal trunk. As you can tell, the tree was a mere shell of itself by the time it came down, with the core hollowed out by disease and rot.
We spent most of the afternoon going to our favorite local sawmill where I placed an order for 300 b.f. of clear southern yellow pine, just to add to the inventory. The price has jumped since I last bought some clear SYP eight years ago, skyrocketing 33% to 60 cents a board foot! I’ll pick up the order in three weeks and it will be ready to use next spring.
While we were chatting in the shop, Tom said, “In all the years you have been coming here you have only indicated one of my tools you would like to have, so I got you one.” He had, and I was very appreciative of it. It is an absolute treasure an immediately assumed a place of prominance in the shop
Stay tuned.
Acknowledging three truths, namely that 1) folks have been generally resistant to coming to The Barn for workshops (I cancelled three workshops last summer due to lack of interest but am more optimistic for this year), 2) I think I have something to offer to an interested audience based on my 45 years of experience in woodworking and furniture preservation, and 3) I am comfortable and can work very efficiently when making presentations/demonstrations without a lot of wasted time. Given these three things I’ve decided to jump into the deep end of a pool already crowded with other swimmers.
I’ve made a great many videos before with Popular Woodworking, Lost Art Press, C-SPAN, cable networks, and dozens of live interviews and such for broadcast television. I am fairly familiar with the process and recently have begun what I hope is a long-term collaboration with Chris Swecker, a gifted young videographer who has returned to the Virginia Highlands after college and some time served as a commercial videographer out in Realville, to create a number of videos ranging from 30-45 minutes to several hours. Obviously the longer videos can and probably will be cut into episodes.
In concert with this endeavor has been the ongoing rebuilding of the web site architecture to handle the demands of streaming video (and finally get The Store functional). I believe webmeister Tim is in the home stretch to get that completed.
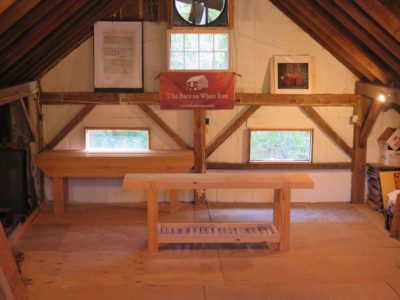
Beginning last autumn I turned the fourth floor of the barn into a big (mostly) empty room suitable for use as a filming studio. It is cleaned up, cleaned out, and painted with some new wiring to accommodate the needs but I have no desire to make it appear anything other than what it is, the attic of a late 19th century timber frame dairy barn. It is plenty big enough for almost anything I want to do.
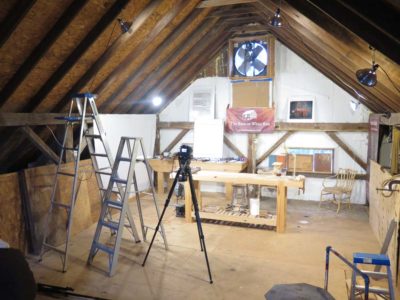

The only shortcoming is that the space is completely unheated and generally un-heatable, limiting somewhat our access to it. This issue came into play very much in our initial effort as our competing and complex calendars pushed the sessions back from early November into early December and the weather turned very cold during the scheduled filming. We had been hoping for temperatures in the mid-40s, which would have been just fine especially if the sun was warming the roof above us and that heat could radiate down toward us. It turned out to be cloudy and almost twenty degrees colder once the day arrived and we set up and got to work. We had to do our best to disguise the fog coming out of my mouth with every breath and I had to warm my hands frequently on a kerosene heater just to make sure they worked well so we could make the video. Yup, this will be a three-season working space for sure.
The first topic I am addressing via video is complex veneer repair. Based on my experience and observations this is a problem that flummoxes many, if not most, practitioners of the restoration arts. It was a challenge to demonstrate the techniques I use (many of which I developed or improved) in that this requires fairly exacting hand dexterity and use of hot hide glue, and the temperatures were in the 20s when were were shooting. It was brisk and oh so glamorous.
The electrons are all in the can and Chris is wrapping up the editing and post-production, so I am hoping to review the rough product in the next fortnight or so.
Paying for this undertaking remains a mystery and leap of faith. I will probably make this first video viewable for free with a “Donate” button nearby, but am still wrestling with the means to make this at least a break-even proposition. I do not necessarily need to derive substantial income from the undertaking (that would be great, however) but I cannot move forward at the pace I would like (5-10 videos a year) with it being a revenue-negative “hobby” either. I want to produce a first-class professional product, and that requires someone beside me to make it happen, and that someone has to be paid. As much as I am captivated by Maki Fushimori’s (probably) I-pad videos – I can and have watched them for hours at a time, learning immensely as I do – this is a different dynamic.
I continue to wrestle with the avenues for monetizing this just enough to pay for Chris’ time and expertise. I’ve thought about “subscriptions” to the video series but have set that aside as I have no interest in fielding daily emails from subscribers wanting to know where today’s video is. Based on my conversations with those in that particular lion’s den, subscription video is a beast that cannot be sated without working 80-100 hours a week. Maybe not even then.
Modestly priced pay-per-view downloads is another option that works for some viewers who are mature enough to comprehend the fact that nothing is free. For other viewers who have come to expect free stuff it does not work so well. I am ball-parking each complete “full-length”video at $10-ish, with individual segments within a completed video a $1. Just spitballing here, folks.
A third option is underwriting/advertising, but I find this unappealing as a consumer and thus unappealing as a provider. I have no quarrel with companies and providers who follow this path but it is not one I want for myself.
Finally there is always the direct sales of physical DVDs, which remains a viable consideration.
If none of these strategies work for me I will make videos only as often as I can scrape together enough money to pay for Chris.
At this point I have about 25 videos in mind, ranging from 30 minutes to several hours long. Our next one will require some “location” filming as I harvest some lumber up on the mountain.
Here is a potential list of topics for videos.
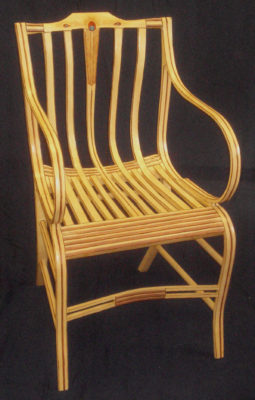
Making a Gragg Chair – this will no doubt be a series of several 30-45 minute episodes in the completed video as the project will take several months to complete, beginning with the harvesting of timber up on the mountain and ending with my dear friend Daniela demonstrating the creation of the gold and paint peacock feather on the center splat.

Roubo’s Workshop – L’art du Menuisier is in great part a treatise on guiding the craftsman toward creating beauty, beginning with the shop and accouterments to make it happen. I envision at least three or four threads to this undertaking, each of them with the potential of up to a dozen ~30(?) minute videos: the shop itself and its tools; individual parquetry treatments; running friezes, etc.
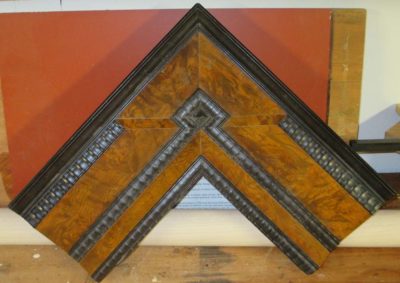
Making a Ripple Molding Cutter – A growing passion of mine is the creation of ripple moldings a la 17th century Netherlandish picture frames, and building the machine to make them. This topic is garnering a fair bit of interest everywhere I go and speak. I want this video (probably about two or three hours) to be compete and detailed enough in its content to allow you to literally follow along and build your own.
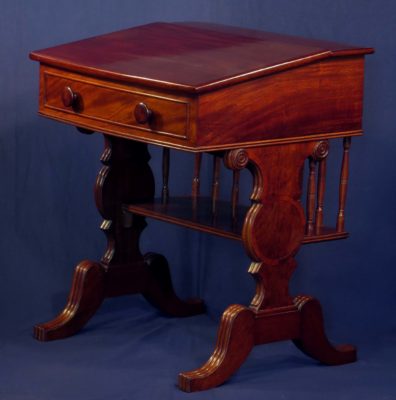
Building an Early 1800s Writing Desk – One of the most noteworthy pieces of public furniture is the last “original” c.1819 desk on the floor of the US Senate (home to a great many sanctimonious nitwits and unconvicted felons). All the remaining desks of this vintage have been extensively modified. This video will walk you through a step-by-step process of making one of these mahogany beauties using primarily period appropriate technology based on publicly available images and descriptions.

Oriental Lacquerwork (Without the Poison Sumac) – To me the absolute pinnacle of the finisher’s art is Oriental lacquerwork. It is created, unfortunately for me, from the refined polymer that makes poison ivy, poison oak, and poison sumac, well, poison. Driven by my love for the art form I am creating alternative materials employed in nearly identical work techniques. Tune in to see a step-by-step demonstration what can be done.
Boullework with Mastic Tordonshell – Very early in my career I loved to carve and gild, but that passion was re-directed more than thirty years ago to the techniques of Andre-Charles Boulle and his magnificent tarsia a encastro marquetry with tortoiseshell, brass, and pewter. Once I had invented a persuasive substitute for the now-forbidden tortoiseshell, a process demonstrated in exacting detail in the video, the sky was the limit.
Metalcasting/working for the Woodworker – This is the video topic I am most “iffy” about as many/most folks will be trepidatious of working with white-hot molten metal. But I just might give it a try to show creating furniture hardware and tool-making. It’s possible/probable I might make this a series of specific projects to make the topic more consumable.
Ten Exercises for Developing Skills in Traditional Furniture Making – Based on my banquet presentation at the 2017 Colonial Williamsburg Working Wood in the 18th Century conference this series of very approachable tasks for the shop will de-mystify a lot of historic furniture making for the novice in a very non-intimidating manner.
The Compleat Polissoir – starting at the point where Creating Historic Furniture Finishes left off this would be an in-depth exploration of the ancient finisher’s tool kit and will be expanded over the Popular Woodworking video (about which I am still very pleased) with a boatload of information gleaned from my in-the-home-stretch Period Finisher’s Manual for Lost Art Press.
I’m sure there will be more ideas popping into my fertile brain, or maybe that’s fertilizer brain.
As always, you can contact me with ideas here and once we get the new web site architecture in place, through the “Comments” feature that was disabled a lifetime ago to deal with the thousands of Russian and Chinese web bots offering to enhance my body or my wardrobe.
Stay tuned.

Recent Comments