Since the vendors from Handworks were going to be, well, vending during the times the exhibit was open, the only way they could experience it for themselves was for me to arrange with Jameel for a “private” viewing outside normal business hours.
So I did.
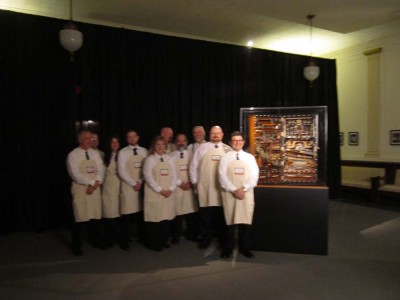
After the installation was complete we all hustled down to Amana for a quick bite to eat in the Festhalle Barn, then back to Cedar Rapids to get changed into the dress code for the weekend. Our attire was that worn by Henry in the only known image of him. Dark shoes, black pants, white shirts, and necktie, set off by a cotton shop apron.
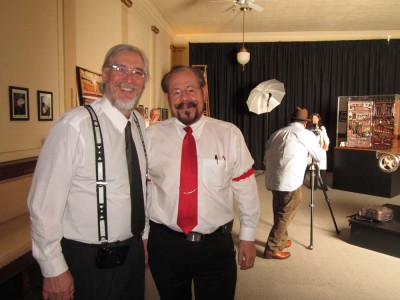
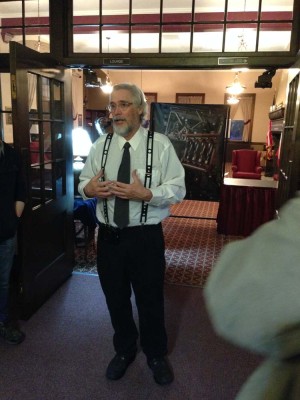
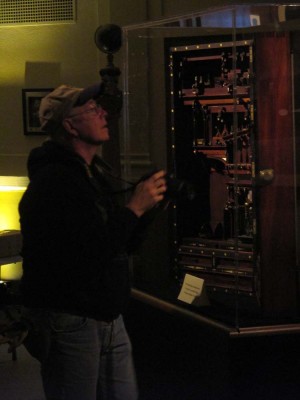
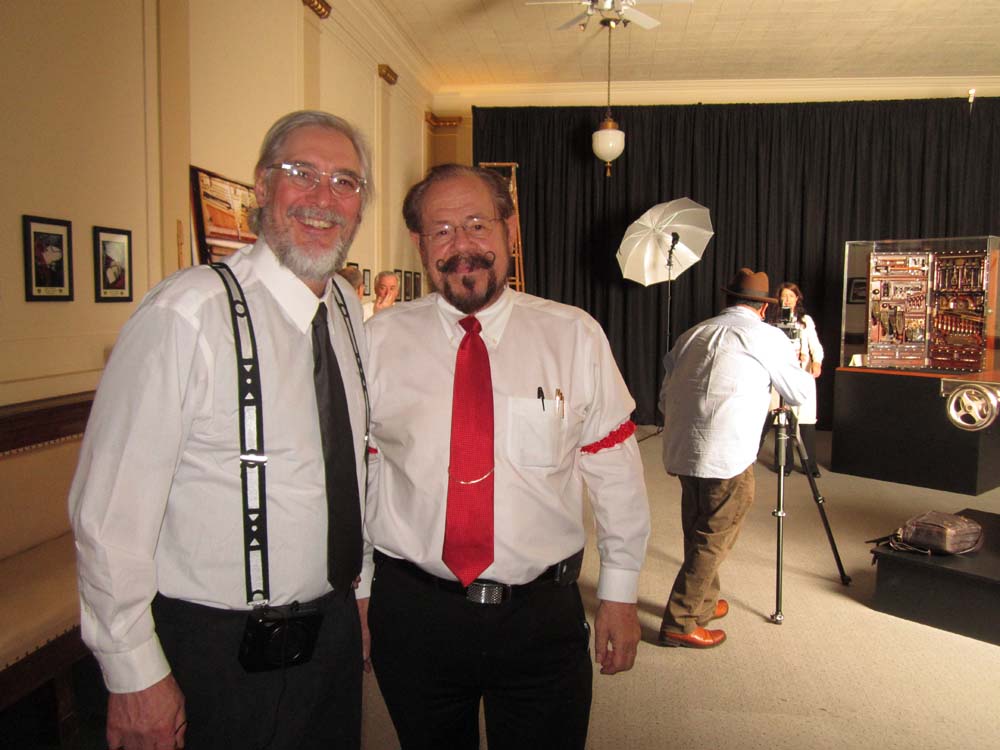
In my case I dispensed with the apron and instead wore some of my self-made studelyesque suspenders I created especially for the event. Here I am with our delightful host, Douglas Heath, who was in charge of the Scottish Rite Temple facility. I think he had as much fun looking at the exhibit as any of the patrons.
Narayan Nayar, the gifted photographer for the book, was on hand to take pictures of us with the exhibit before the hordes arrived.
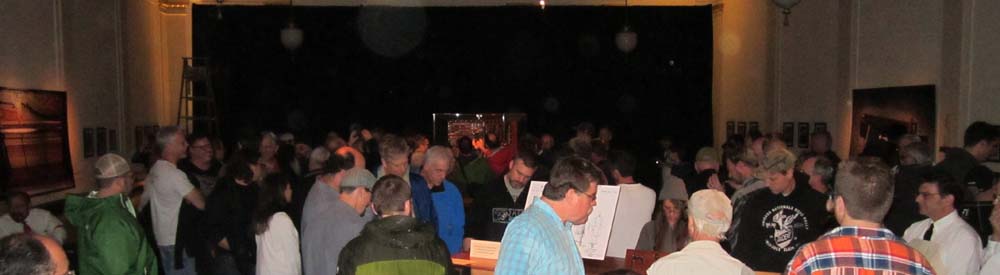
At the appointed time I went out to greet them, and my what a crowd it was! The entire lobby of the Scottish Rite Temple was packed.

After a few words from me we directed the folks into the hall. Unfortunately (?) I was kept pretty busy mingling and chatting, so all the pictures here are from the people who were there and took them, and are allowing me to share them with you. Thank you all.
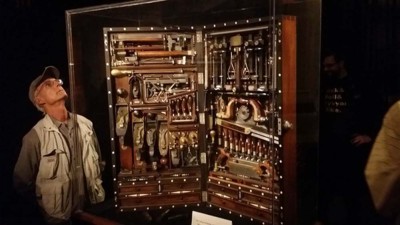
The audience was rapt and enthusiastic. I actually did not stand near the case on purpose, I have seen it and would just take up space for those who wanted to get close. And yes, these tool makers wanted to get close!
One of my many enjoyable moments was crossing paths with Vic Tes0lin from the Lee Valley Tools Posse. About two months earlier, just as I was making my own suspenders, Vic wrote me a fan letter about the earlier iteration of the suspenders I had worn at Handworks in 2013. As a possessor of a mature physique, Vic said that he wore suspenders routinely and though the Studley version was great. Since I was already making three pairs of suspenders for myself, it was easy to just make it four pairs. Vic was near speechless when I gave him a pair, and he wore them proudly for the weekend and apparently ever since.
Many more pictures are bound to come my way, and if all goes well we will be building a gallery of photos over at the exhibit site.
Last Thursday was spent setting up the show, or in the lexicon of museology, “installing the exhibit.” Several of the volunteer team for the exhibit had arrived the previous day and helped to unload both the dedicated fine arts transport truck and the cargo van I drove from The Barn. The remaining volunteers arrived through the morning and pitched in seamlessly. I will blog about these heroic volunteers next week.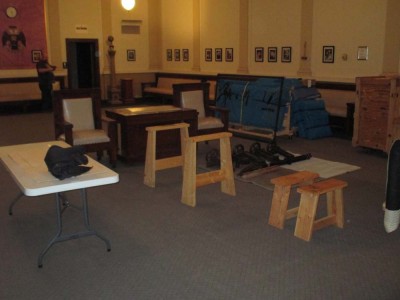
The raucous good nature of the day was genuinely infectious and invigorating. There I was, watching the different continents of my life collide: friends from the museum world, an on-line restorer’s forum I have been with for many, many years, and the newer World of Schwarz. Not to fear, rather than volcanic activity as the tectonic plates collided, jocularity ensued. In a lot of respects it was just like our sessions in Studleyville where despite the grueling work there, Chris and Narayan and I spent just as much time laughing intensely, with sometimes ribald humor.

So while we started out that day with all the pieces of the puzzle I brought with me, the composition of the picture goes back a few days. The week prior I had spent several days in Cedar Rapids making sure everything was on track for the installation. Dedicated transport arrangements? Check. Host site? Check. Graphics? Check. Cabinetry? Check. Vitrine? Check. Lighting? Oh oh.
The lighting company was the last stop before departing for Studleyville, and it was clear immediately that there was trouble. Despite months of correspondence, in-person discussions, and repeated promises that, “Yes, 1) we know what you want and 2) we have what you need,” it was abundantly clear that 1) no they didn’t, and 2) no they didn’t. So I fired them and welked out the door with no lighting arrangements in hand. Frantically I called Jameel, who in short order found exactly the vendor for me. So, with less than a week before the exhibit opens — in other words, about two years behind schedule — the entire lighting scheme needed to be redesigned from a blank piece of paper. I did not sleep much that night, but by noon of the following day we had all the details worked out. I hit the road for Studleyville with a great sense of relief.
Six days later I returned with the exhibit in a box.
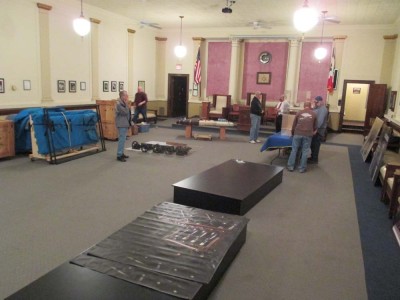
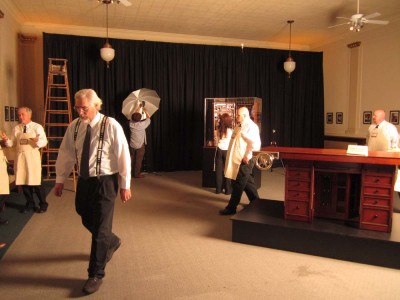
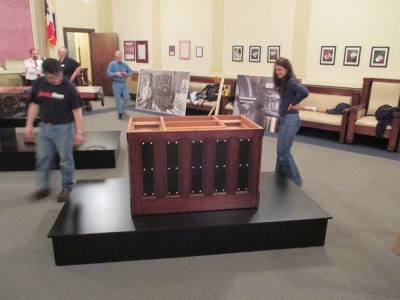
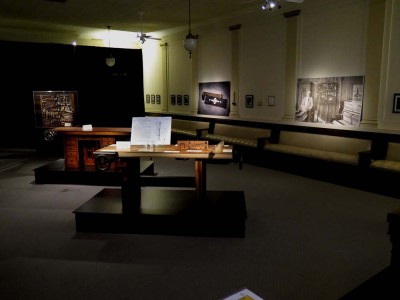
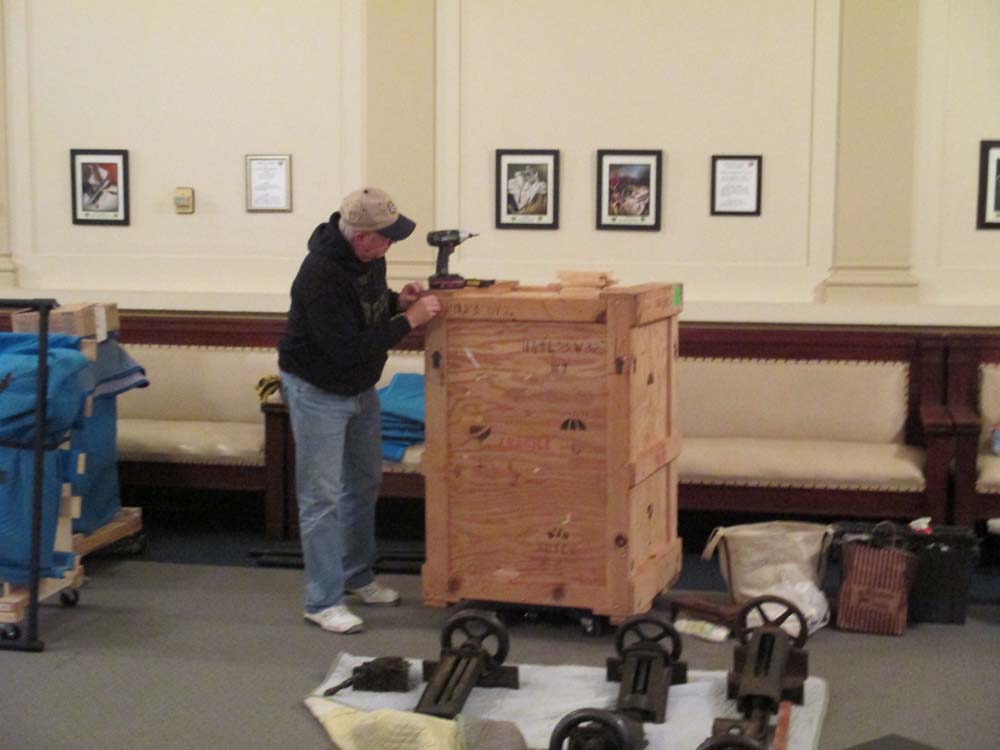
The first step in the installation was the receipt of the platforms and vitrine case. They were waiting for us when we arrived at the Scottish Rite Temple before 9AM. Those got hustled inside in short order. While a team of folks measured and laid out the room, the remaining volunteers carefully placed the exhibit furniture where I asked them. The layout resonated visually exactly as I had hoped.
At the same time the fellows from the graphics company arrived with the panels and banners for the exhibit.
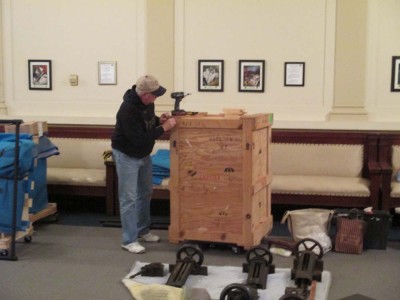
Next came the unpacking of the Studley Collection. The packed tools were set on a work table for me to fill the tool cabinet later in the day. Each crate was re-closed exactly as they came apart. Losing pieces of the customized packing is not beneficial.
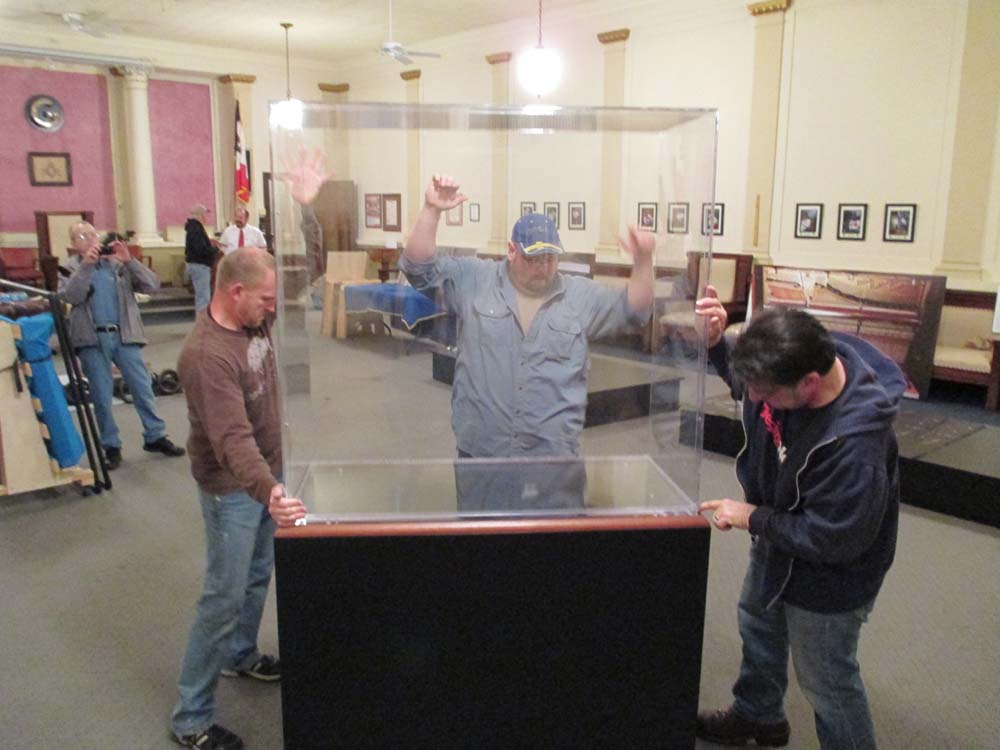
At the same time was the assembly of the base for the replica workbench top. Simultaneous with that was the placing and assembly of the vitrine case for the tool cabinet (see below).
The really heavy work came next, as around 500 pounds of cast iron was affixed to the approx. 250 pound replica top.
The photo of moving, flipping, and placing the elements of this ensemble was not taken as almost everyone in the room was doing lifting, flipping, moving, and exact placing of the multiple pieces.
First big piece down, two to go.
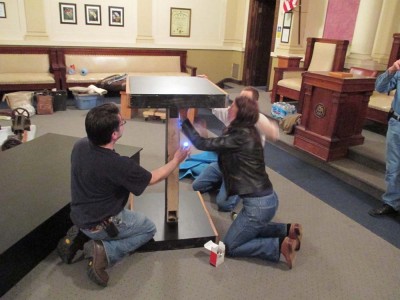
Next came placing the replica bench base for the original Studley bench top. This was not easy as the base was very heavy and the handholds few, but with care and muscle we got it done.

Yup, things were shaping up spatial composition-wise.
Up went Studley’s original bench top, on top of the replica base. O-o-o-oh yeah. We took a minute to stand back and admire our work.

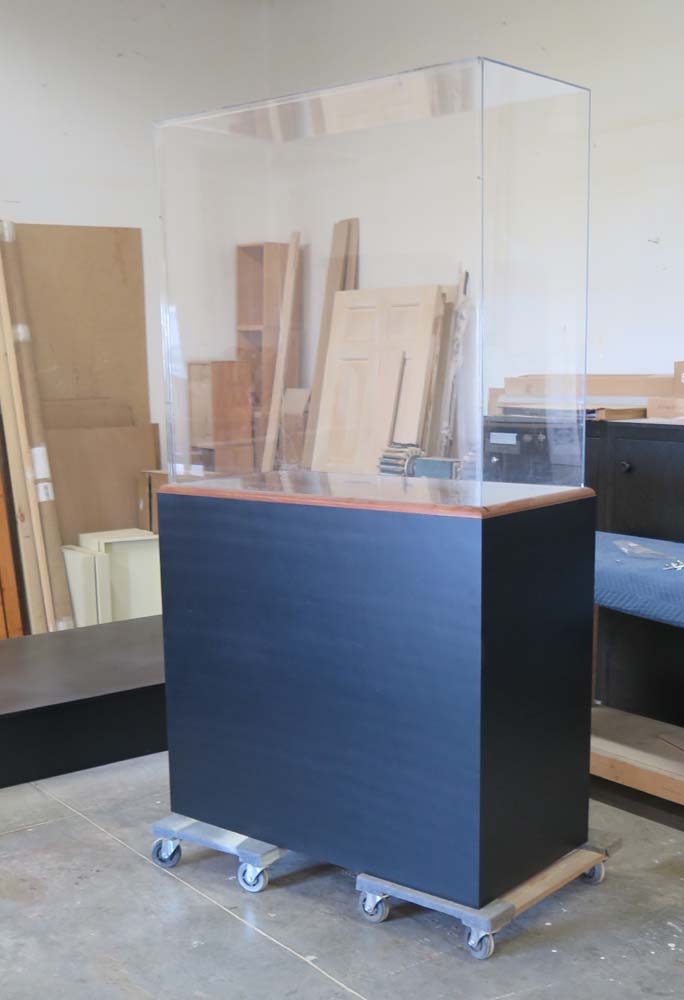
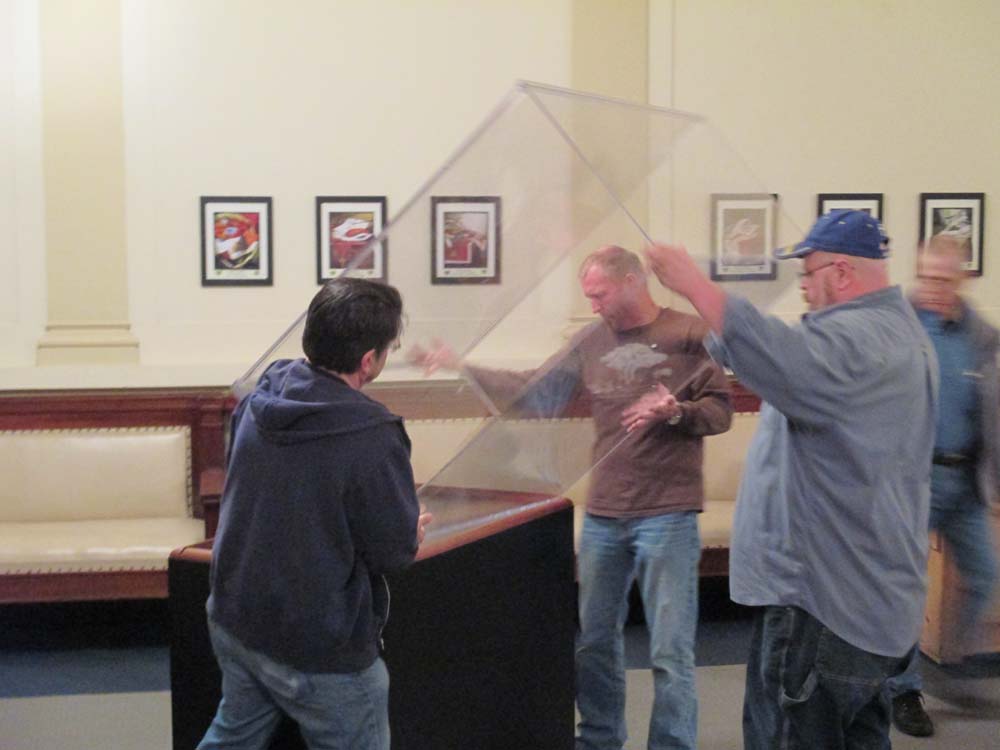
At the other end of the room was the team joining the case and the vitrine. I had asked for a very snug fit, and boy did we get one.
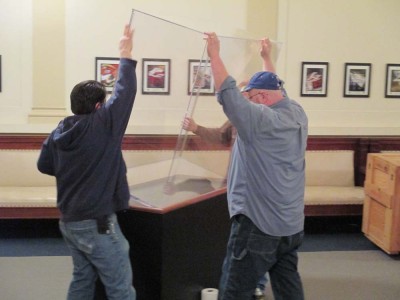
It took almost everyone on the vitrine team to hang on to the top and press it down into the rabet of the base.

With a notable “thunk” it popped into place. Beeeyoooteeeful.
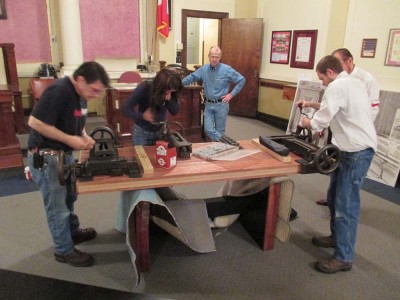
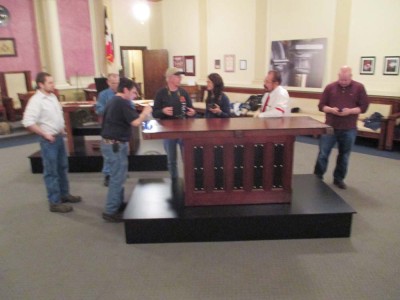
We were under some time pressure as we had to get the major elements of the exhibit in place before the lighting guys arrived, because they had to know where to point the lights. Makes sense, huh?
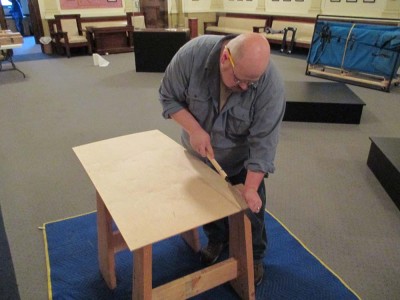
The bottom panel for the vitrine was cut, then lined with black felt for the plane underneath the tool cabinet. The fit had to be exact, and presented in such a way as to become completely unnoticeable once the exhibit was being viewed.
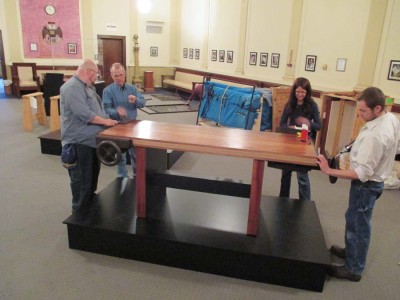
The lighting guys showed up exactly when they promised, with all the exact equipment they needed. What’s up with that? Just kidding. They were fabulous.
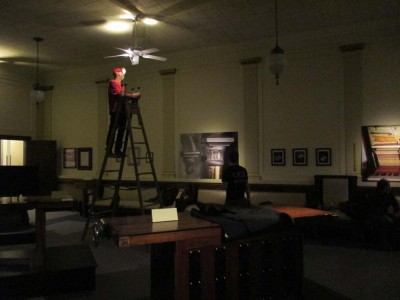
We killed the house lights and turned the guys loose.
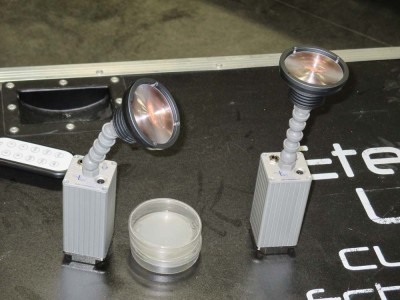
The lighting units they had were slightly warm (2700K color temp) lithium battery light fixtures with magnetic bases, which the stuck on the ceiling fans!
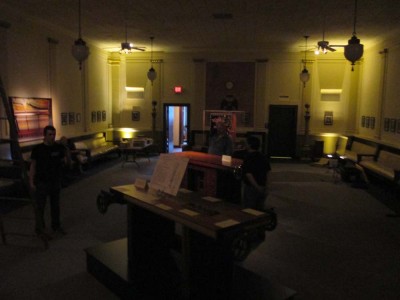
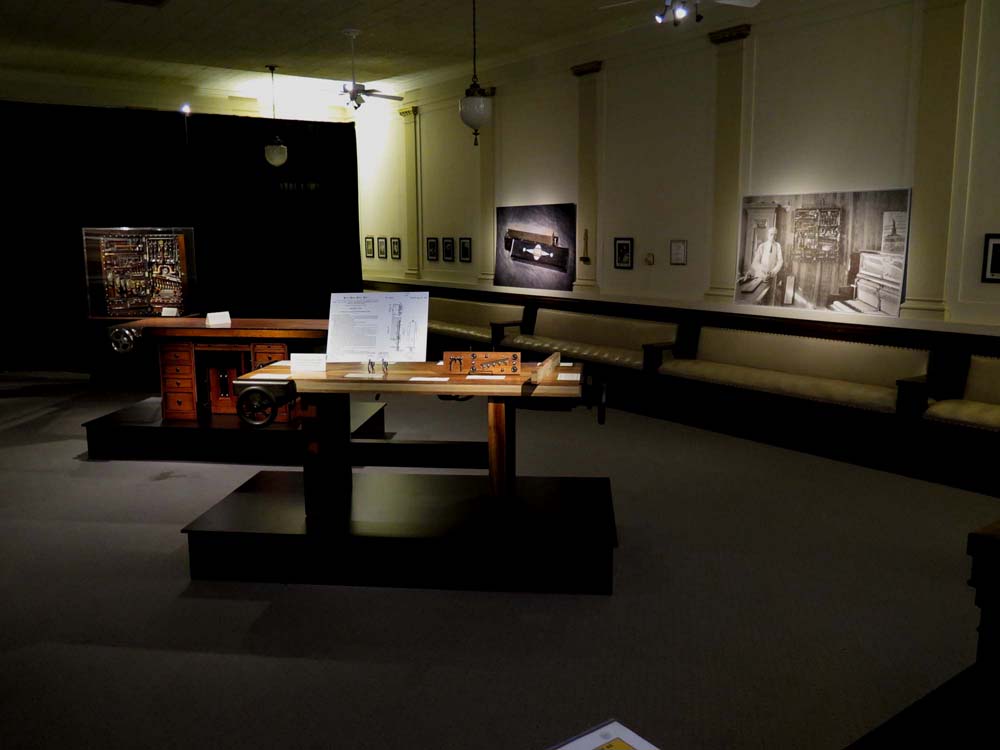
Soon it was looking like an exhibit should.
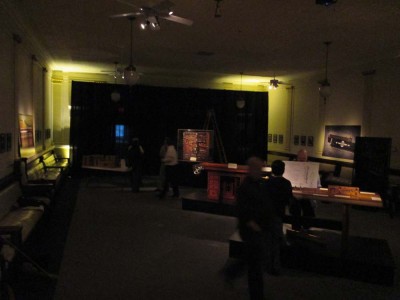
Once the lighting was done, up went the black theatrical backdrop, setting off the entire space and establishing the respectful tone for the entire event.
I took a couple hours to load the tools in the cabinet, with the entire crew of volunteers watching with the same looks on their faces I would see throughout the weekend.
With several minutes to spare, were we done.
I think my tracking down of literary shellac treasures is just like Indiana Jones’ quests for ancient artifactual treasures. Except without the alien and dangerous locales. Or the mega villains and the life threatening predicaments they inflict on the heroes. Or the femmes fatale.
Okay, it’s nothing like Indiana Jones. Well…, maybe a little like Indy’s adventures as this episode did involve traveling to a terrifying place, Hades-On-The-Hudson (cities absolutely creep me out, my temperament is much more suited to life in the boonies where my nearest permanent neighbor is a thousand yards away) and two lovely ladies instrumental in the discoveries. And there wasn’t really a mega villain, just a knuckleheaded academic, but then I repeat myself.
As my Shellac Archive grew into the thousands of pages it is now, it became clear that one of the brightest lights in the historic shellac research firmament was the Shellac Research Bureau of the Polytechnic Institute of Brooklyn, New York. In the 1930s, as the winds of war for the survival of civilization began blowing, much of the research function of the venerable London Shellac Research Bureau migrated across the pond to our shores, to Brooklyn Poly. As a result, perhaps the golden-est epoch of subject research emerged as the research output of the SRB-PIB soon overshadowed the breadth and quality of almost anything ever produced by the LSRB or their Indian counterpart. As both of these enterprises were part and parcel of an imperial, ossified mercantilist/socialist system, when SRB relocated to a new culture – albeit struggling mostly due to the collectivist FDR regime in Washington – of innovation, risk, and accomplishment, perhaps the outcome was predictable.
At its peak just before and during the war, SRB’s group consisted of several faculty and several dozen students, all working on original basic and applied research under the direction of the renowned William Howlett Garner (let us pause for a moment of respectful silence. Okay, we can move on.)
Over the years I had acquired a number of the literary products from the group, mostly research monographs, but I knew from the few Annual Reports I had that my holdings that these monographs were but the tip of the iceberg. I could not help but wonder how much more there was, and began to follow up on this speculation. About 15 years ago I contacted Brooklyn Poly to see how much of the shellac research archive remained. It took many, many phone calls before I finally spoke with Heather, the research archive librarian for the university. And what an enriching experience our interactions were!
Heather was one of these classic cataloguers and retrievers of knowledge, and my inquiries into scholarship from three generations ago simply raised her estimation of me. Enthusiastically she embarked on her own journey of exploration with a promise to call me back.
And she did.
I knew immediately from the tone of her voice that the news was not promising. Deeply apologetic, she informed me the Shellac Research Bureau’s records were gone. All of them.
All of them.
Assembling the pieces of the story in retrospect revealed the utter shortsightedness of even institutions of scholarship in a culture with the attention span of a fruit fly. In the third and final installment of this tale of woe and reclamation, of knowledge lost, found, and shared, I reflect on the sentiments of the university’s Chemistry Department Chair (or perhaps it was Chemical Engineering) from the 1970s as the Institute was forming its new strategic vision, “Shellac? Who cares about that? The future is all about polymer synthesis! Throw all that old stuff away.”
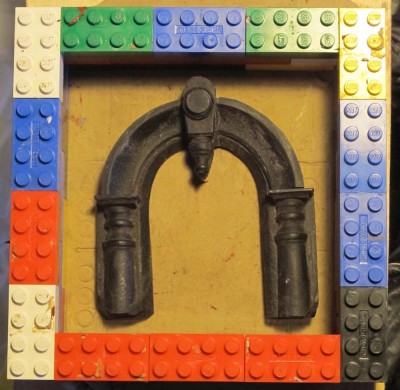
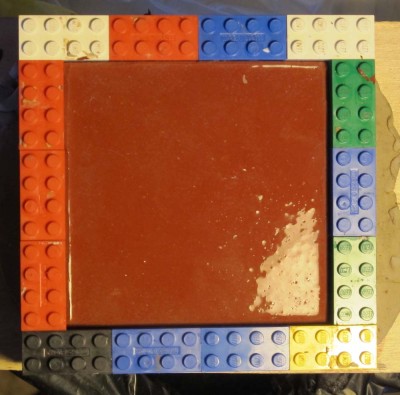
Once the wax model is refined to an acceptable point the time has come to make the rubber mold for casting the replica. I simply lay the wax model down on a bed of sulfur-free plasticine clay, which is necessary to seal the back side of the model and prevent the rubber from seeping underneath when the rubber is poured in to make the mold. If it does seep in that is not the end of the world, it just makes more work in extracting the model and refining the rubber mold. What IS the end of the world for this process is to use any sulfur-containing modeling clay instead of the sulfur-free plasticine. The sulfur in the modeling clay inhibits the chemical reaction in vulcanizing the rubber mold, and in the end all you have is a gooey mess that never makes the transition from liquid to solid. Believe me, you do not want to enter this territory.
With the wax maquette set down on the plasticine, I build a dam around the space with Logo blocks or some analog. It is a simple and cheap way to enable a near infinite multitude of sizes and shapes for making molds.
Once everything is ready to go, I mix the silicone rubber and pour it in. For many years I have used products from Polytek; their prices are good, the product is good, but their customer service and technical help are stupendously great. Colleagues of mine are partial to Smooth-On products, and I have seen excellent results with their products but do not have personal experience with them.
I like to pour the liquid RTV silicone in a fairly thin stream from a foot or more in height. This breaks up almost all of the little bubbles that become included in the cup when stirring up the mixture, and bubbles are the enemy. By pouring in this manner, starting in one corner of the mold form and letting it flow over the model of its own accord, I find virtually all bubble problems disappear.
Once I have a rubber mold I find acceptable, and this often takes several generations of models and subsequent molds, I’m ready to cast a replica.
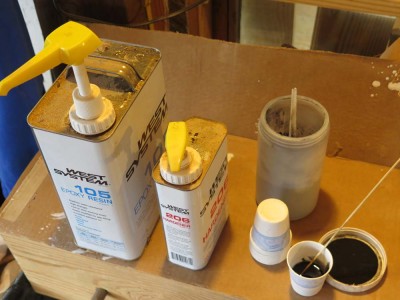
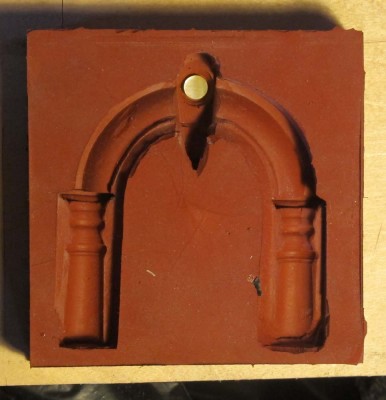
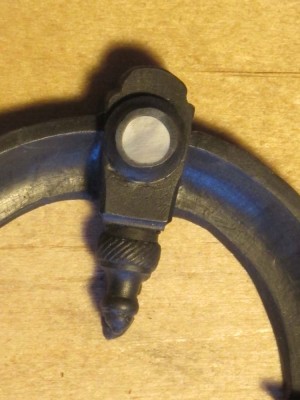
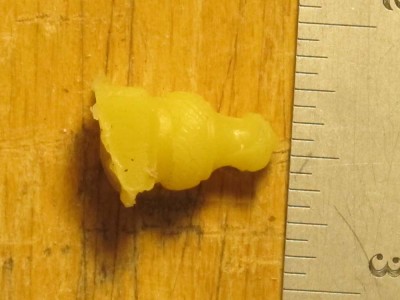
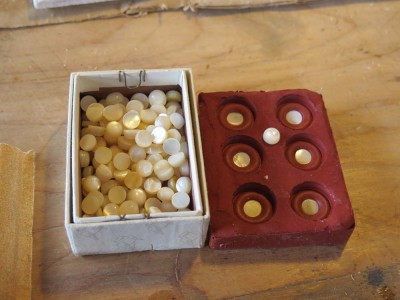
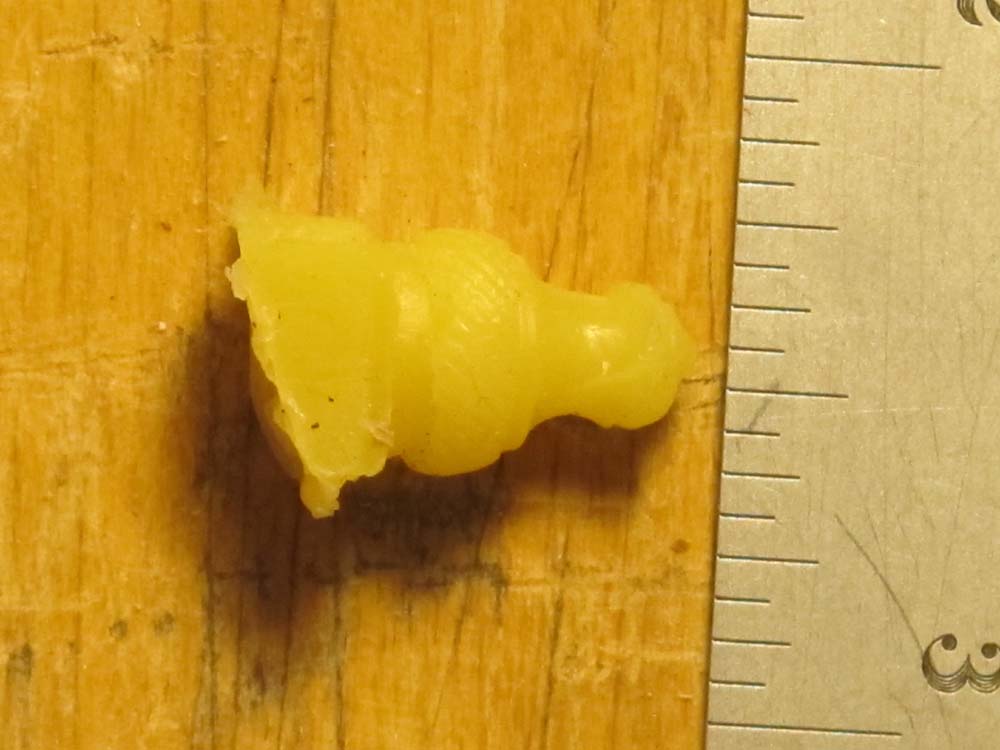
For these arches, I found that using West System epoxy worked just fine, and I mixed a paper cup with the resin and hardener, along with a dollup of black powder pigment to replicate the ebony of the original. I also dusted the surfaces of the mold with the same powdered pigment, to assure a “not glossy” final surface and to help reduce any surface bubbles, always an issue when casting heavy bodied resins.
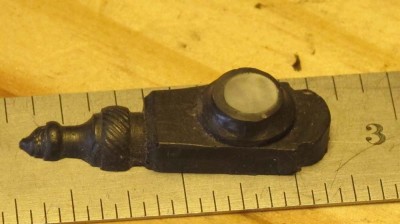
For these arches I had the added element of including a pearl button in the element where Studley marked the center of the arch. I had the best luck with this in putting a drop of the resin in the recess then placing the button, using the liquid resin to hold the button in the correct place.
Having the button move while pouring the resin is a constant problem, I can only conclude that the specific gravity of the pearl button and the casting resin are similar, causing the button to “float” a bit after the resin is poured. Waiting a bit on the full pour after the button is placed and the resin begins to increase in viscosity helped but I am still wrestling with perfection on this one.
I take the raw casting out the following day, and smooth the back side on a flat plate with sandpaper, and the replica is done.

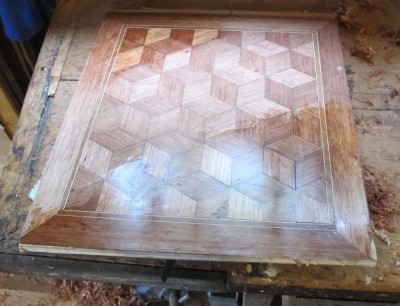
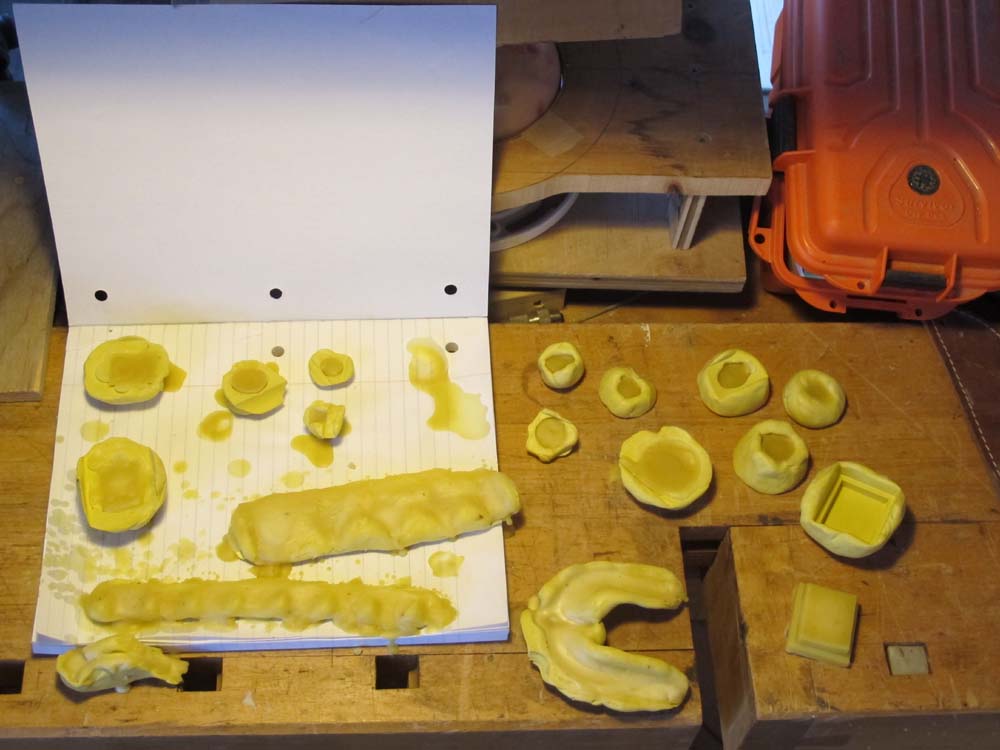
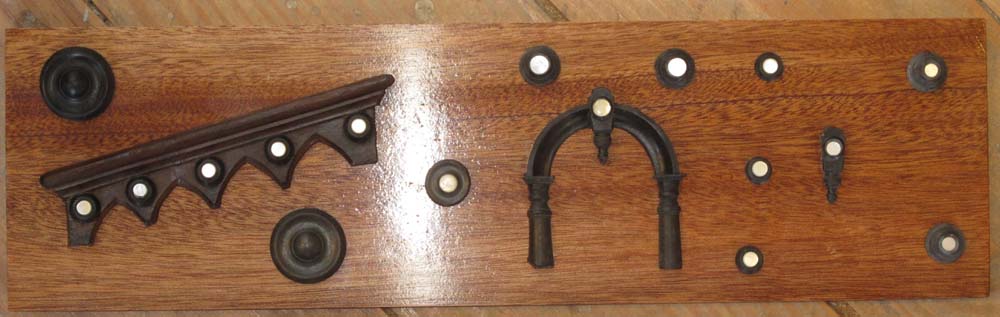
I prepared a panel with several of the decorative element replicas from the Studley Tool Cabinet (this picture is just a mock-up, the best castings were not yet ready when I took it), and if you make it to the exhibit next week you will get to handle that panel.
There are still plenty of tickets for Sunday afternoon especially, I think the remaining time slots are getting full or nearly so. If you are willing to hang around until Sunday afternoon, you might have a darned near private viewing.
See you next week.
Two weeks from today I will be in the home stretch as the final process for executing the HO Studley Tool Cabinet and Workbench Exhibit (there are still tickets remaining here) begins at the Scottish Rite Temple of Cedar Rapids, Iowa, only twenty minutes away from the hand tool nirvana of Handworks. The list of things “To Do” in preparation for the exhibit is getting shorter. Off the top of my head this is the status report of what I’ve been doing over the past two years (there are undoubtedly many other components I am not remembering at the moment):
Exhibit locations and spaces scouted and evaluated – done
Exhibit space reserved – done
exhibit $pace paid for – done
exhibit graphics (wall panels, banners) selected and edited – done
exhibit graphics sent to production company – done
exhibit graphics in production – check
exhibit graphics paid for – no invoice yet
Studley collection apprai$ed – done
Studley collection appraiSal paid for – done
exhibit in$urance arranged – done
exhibit in$urance paid – done
exhibit casework designed and submitted to fabricators – done
exhibit ca$ework paid for – done
exhibit plexiglass locking vitrine designed and sent to fabricator – done
exhibit locking vitrine fabricated – done
exhibit locking vitrine fabrication paid – no invoice yet
Studley collection high securitydedicated transport locked in – check
Studley collection high security and dedicated transport paid – invoiced after the exhibit
exhibit didactics designed and fabricated – 90% there
Studley workbench replica fabricated – done
custom fitted dollie for Studley workbench base – fabricated
exhibit theatrical backdrop$ and lighting secured – scheduled
exhibit theatrical backdrops and lighting paid for – no invoice yet
exhibit tickets designed (different designs for each day) – done
exhibit ticket$ printed and paid for – done
exhibit installation crew recruited – done
exhibit docents recruited – done
book manuscript proofs sent to docents – done
exhibit deinstallation crew recruited – done
packing everything I need to take with me – NOT done (yet)
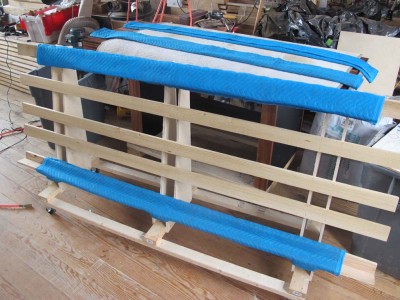
Today I am wrapping up the last “big” thing, which is to finish applying the padding to the “A” frame style cart on which I can secure the exquisite mahogany-over-oak bench top from the original Studley workbench.
After this it is just a matter of wrapping up a multitude little things, getting packed, and then heading towards Cedar Rapids for the opening on May 15.
I hope to see you there.
You might be getting tired of HO Studley posts, but it is all I am working o these days so it’s pretty much all I have to talk about. It will all be over soon.
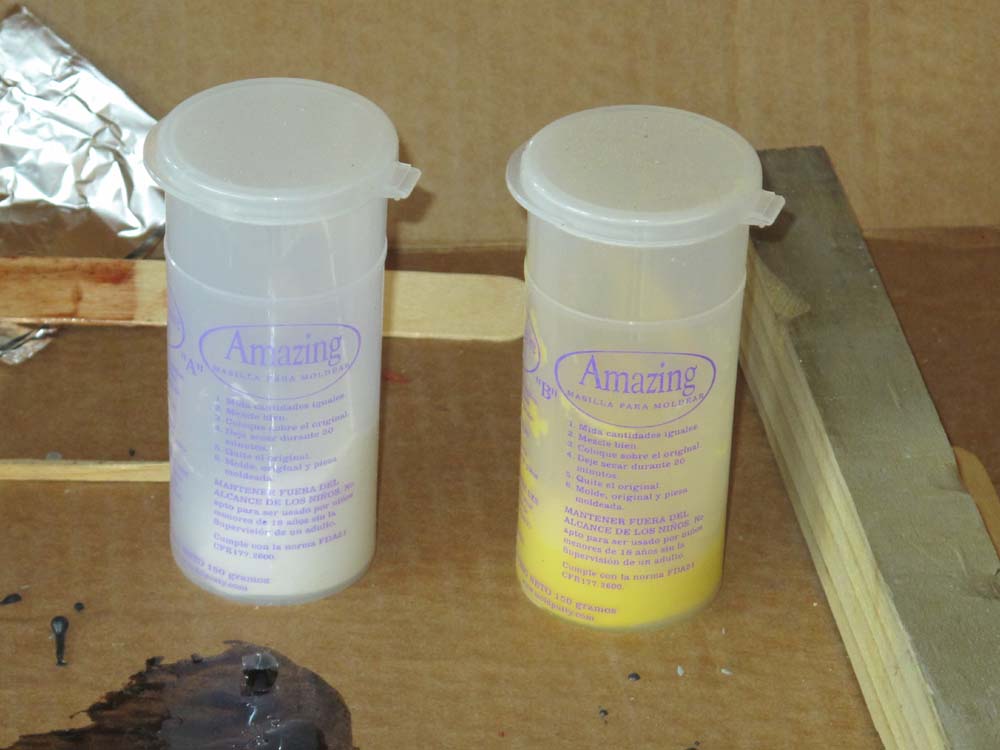
On my final visit to the Studley tool cabinet last October, with the owner’s permission I made a number of silicone rubber molds from the details Studley created and integrated into his masterpiece. My access to the elements was not perfect, it was an intact artifact hanging on the wall after all, so I chose two part silicone molding putty from Hobby Lobby. In the past I have used food grade molding putty by the bucketful, but for this project I needed just a bit and the hobby store package was just fine.

Using it is simple, just take equal parts of the two putties and knead them together until the color is uniform. Then, in the next 15-20 seconds press the wad against the surface you are trying to mold, sit back, and remove a finished and cured mold in a few minutes.
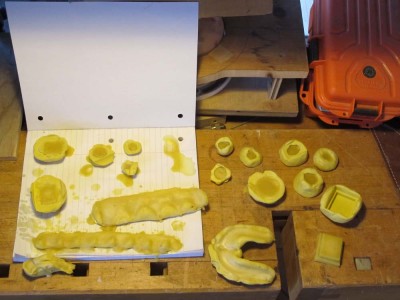
Given the spatial logistics of taking impressions from the tool cabinet, the molds were not perfect but they were useful. Once I got into the swing of producing the elements for the exhibit “The Henry O. Studley Tool Cabinet and Workbench” (tickets still available) I made some first generation beeswax castings from those molds just to see what was needed to come up with something exhibit worthy.
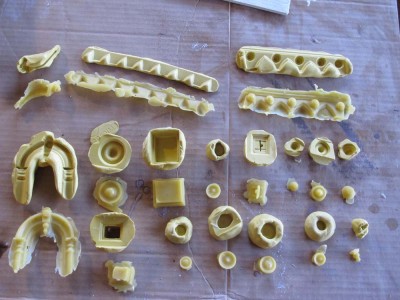
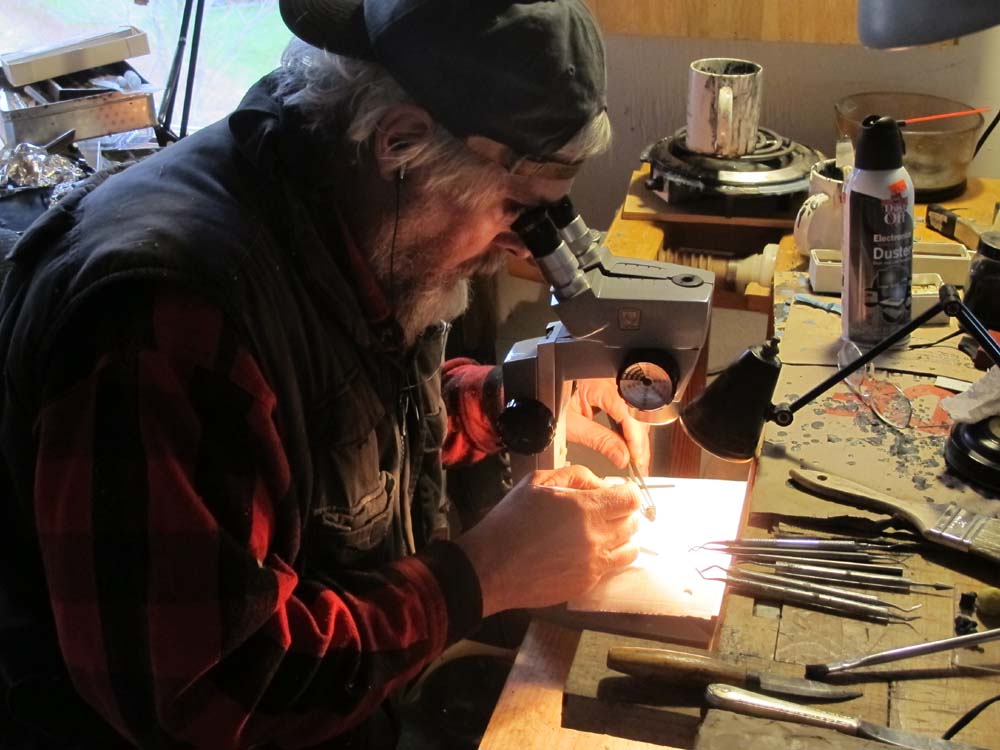
It’s fair to say that all of the castings in the upcoming exhibit were the result of several generations of molds and castings, with many hours spent in refining the representations of the elements under the microscope. On a project with more available time I might spend a week per element, but in this case I was lucky to carve out a day per element.

Much like picture from the Mars Rover, the whole is often a composite assembled from the disparate pieces. Even so, these are not perfect but they will allow the exhibit visitors to get a better sense of what Studley made to embellish his masterpiece.
In the end, using the molds for casting some pigmented West System epoxy and some mother-of-pearl I got results that will convey the grandeur of these elements up-close-and-personal for the exhibit patrons as this panel will be sitting on the replica workbench for touching and examining closely.

As time allows I will detail the process of refining specific elements, with observations about both moldmaking and casting materials useful to the decorative artisan.
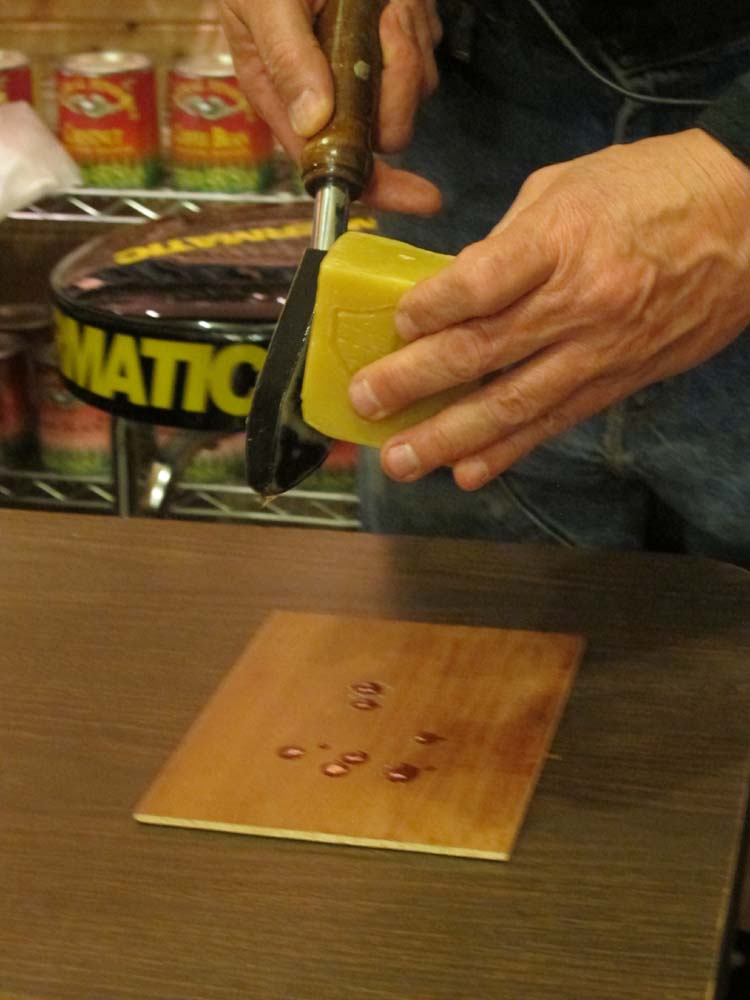
Probably the simplest beautiful finish from a technological point of view is the French molten wax polish, which has but a few individual components yet yeilds a beautiful, lustrous presentation surface.

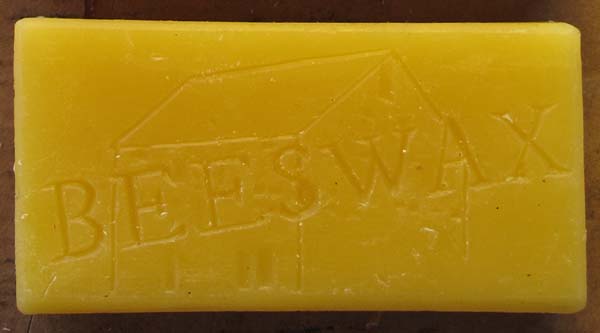
The first thing is a block of clean beeswax. I render my own from raw wax straight from the beekeepers after the honey is harvested.

Next comes a source of heat to melt the wax onto the surface of the wood. Historically something like a roofer’s soldering iron was used, these days I use an electric tacking iron.
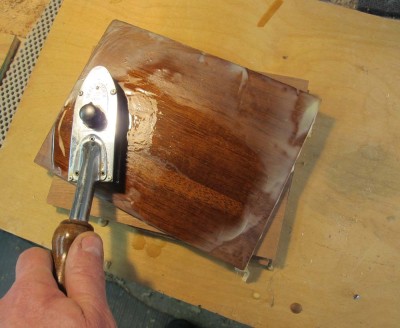
I move the hot iron over the surface, spreading and melting the wax onto and into the surface until it is fully saturated.
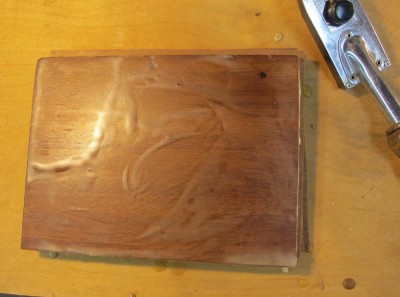
Once the molten wax has been imbibed fully into the wood surface it is left to cool,
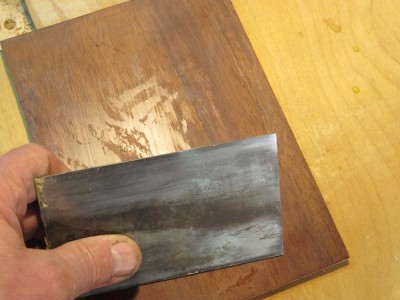
and once fully hardened it is scraped with a simple metal, wood, or bone scraper. If the scraper has a nice clean edge (no burr!), the resulting surface can be mirror-like. A little buffing with a piece of soft cloth like worn flannel or fine wool and you are done. This might even be enhanced with some spit polish.
The result is a high-sheen, non-toxic and easily repairable surface that is pretty robust against abrasion but utterly defenseless against heat or oily materials. I’m working on some formulations to make this finish a lot tougher, but it is increasingly one with which I am toying, and as I move forward with designing and fabrication parquetry panels, you can believe it is something I will employ.
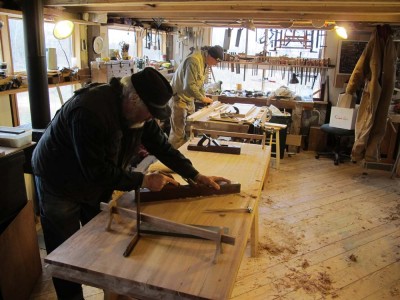
While many artisans are content to work alone, as I am almost all of the time (an mp3 player loaded with podcast lectures and such is about all the social interaction I need during my work day), there are those magical interludes of fellowship around the workbench with a like-minded soul. Such is the case with my pal Tom, whom I first met by chance at a flea market ten years ago (he was selling, I was thinking about buying). That led to hundreds of Wednesday nights in his first-rate shop where a multitude of tools were sharpened or made, mountains of shavings were made then swept out into the yard, and on occasion, the world’s problems were solved.
Tom even accompanied me frequently on working weekends to the barn, where what we were working on WAS the barn.
Tom visited recently, and is often the case, he tossed out an offhand comment that was a thunderbolt.
While he was making some tapered octagonal legs for a dressing table I had been wrestling with my HO Studley workbench top replica for the upcoming exhibit of the workbench and the accompanying tool cabinet. The grain of the bench surface, African “mahogany,” was just being, in the words of my ever foul-mouthed 98 year old mom, “A real stinker.”
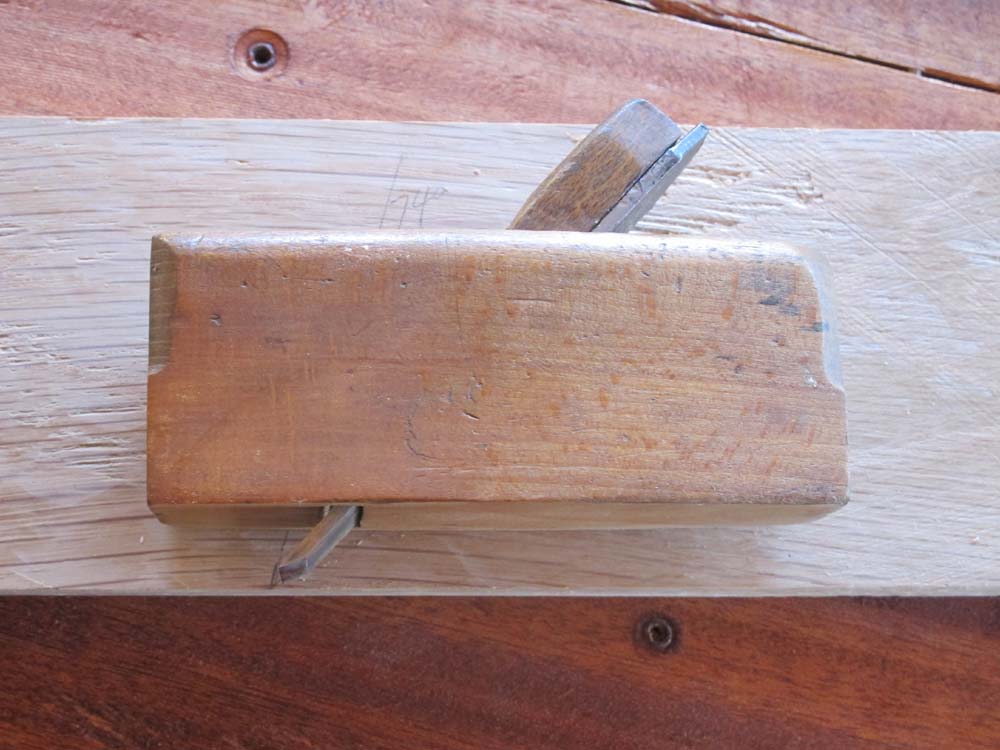
Rob in Lawrence KS had offered his helpful observations, namely that I could use a high angled smoother tuned to a fever pitch. When I mentioned this to Tom with the regretful statement that I did not own such a tool, and that I was going to set things up to make one for myself, he casually remarked that there was a simple way of making a high angled smoother that might serve my purpose. When I tried it, I had to smack my forehead. Hard. The solution was both brilliantly insightful and mindlessly simple and best of all, easy. Coordinated problem solving like this is what woodworking fellowship is all about.
The solution? why, flipping the blade, of course!

I first tried it on a tiny coffin smoother that I had, which was set up to cut at 49 degrees, but when the blade was flipped the new cutting angle was a bit too steep at 74 degrees. Yeah, a bit too steep.
I then looked through my collection of bench planes to see which of them might be a good candidate for this modification. I had a nice little coffin plane with a very shallow angle on the blade bevel. It is set up to cut at about 45 degrees, and simply by flipping the blade over I got a 62-degree cutting angle. Not the perfect setup, but way better than I had before.

The new orientation turns the plane from a double iron bevel-down tool into essentially a single iron bevel-up plane. Yes indeed, I transformed one of my bench planes into a pretty nice high angle smoother in less than 30 seconds. For zero dollars.
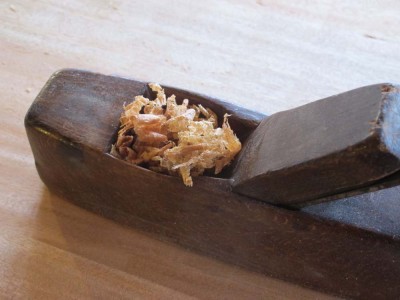
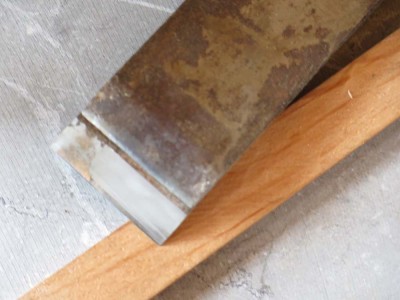
A couple minutes to touch up the blade on my 12000 water stone and the tool began its work. It wasn’t pulling off long, gossamer wisps, but did I mention I was planing African “mahogany,” a/k/a braided broom straw?
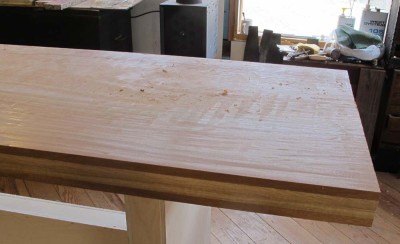
The result in the lower right corner of the image speaks for itself. Following the smoothing with a bit of scraping yielded an outcome that was acceptable, especially since after the exhibit I will be surfacing the bench top with a toothing plane. I remain committed to avoiding African “mahogany” in perpetuity, but for this one problem the result is in the right direction.
Yes, I am “all Studley exhibit, all the time” for the next month, but that tedium (?) was punctuated by a banner week at the Post Office box.

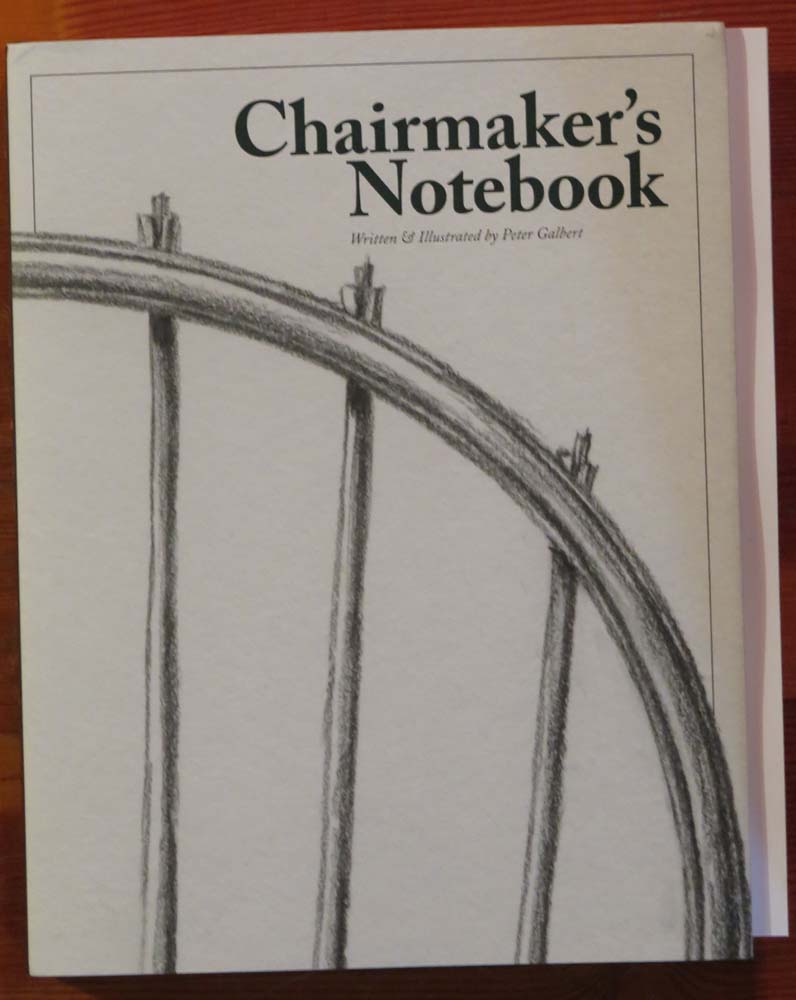
First came the brilliant Chairmaker’s Notebook from Peter Galbert. It arrived just in time for one of my periodic days at the ophthalmologist’s office (the periodicity depends on which of my eye diseases is acting up, and how severely) during which I had time to read a good part of it carefully and browse all of it to the end. The book is only partly about making Windsor chairs. In truth it is really about the way to think about, and the way to do almost anything of real consequence.
I am not a Windsor chairmaker and unlikely to become one other than as an amusement, my chairmaking runs from Point A, Gragg chairs, to Point A’, making slightly different Gragg chairs. Still, Peter’s eloquence and deep understanding, and the exasperatingly skillful manner of conveying them, made me smack my forehead repeatedly with the silent exclamation,”But of course!” while simultaneously silently muttering, “Man, I wish I had written this.”
I also received the printer’s proofs from Virtuoso, and to tell you the truth, the combination of the sumptuous imagery contained therein combined with the realization that almost five years of work are nearing the end made a sizable lump in my throat. It has been a project of passions — sometimes love, sometimes hate — as are most such undertakings, but it it noteworthy to celebrate its conclusion.
Finally, my good friend of three decades Dr. Walter Williams just send me a signed copy of his latest book. A collection of scores of columns, it will make for enticing bite sized bits of common sense wisdom.
All in all, a good week at the post office.
Just for fun, I want to walk you though the steps you will be taking when you attend the Henry O Studley Tool Cabinet and Workbench Exhibit next month. Some of the details are yet to be resolved, but I have a general idea of what the experience will be like.
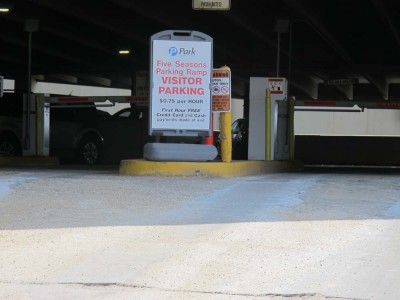
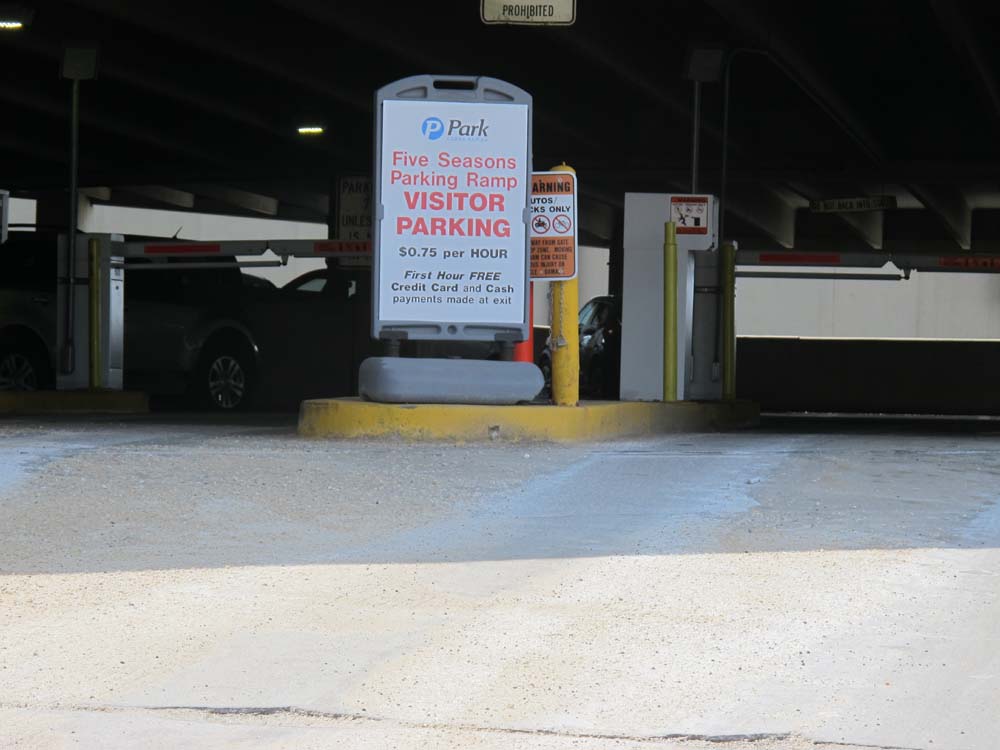
The first thing you are likely to do is to park in a lot either across the street from the Scottish Rite Temple, or a parking garage on the corner of the next block (but still visible from the SRT).
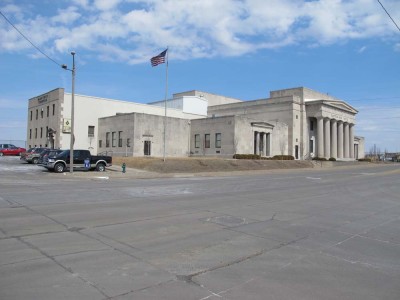

Then, walk through the front door at the center of the main facade.
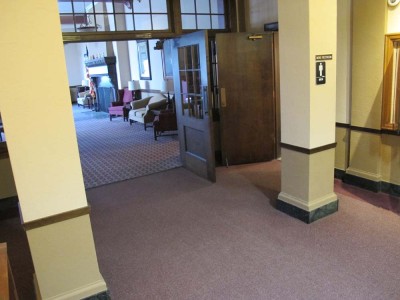
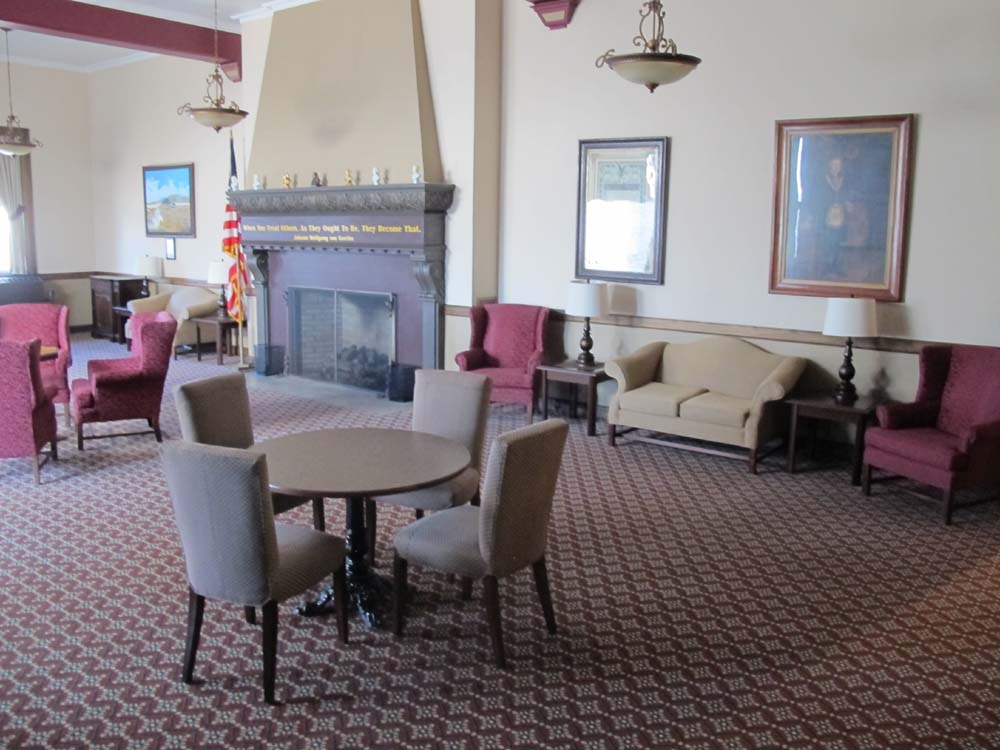
Once in the lobby, turn to your left.
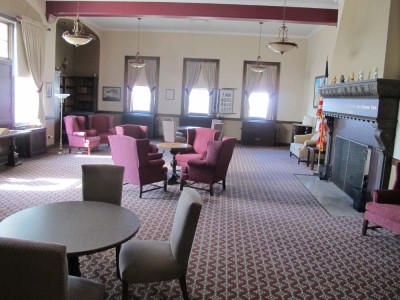
You will see the Library, and walk into it. We may have the tickets and books there, or they may be in the exhibit hall itself. Stay tuned on that.

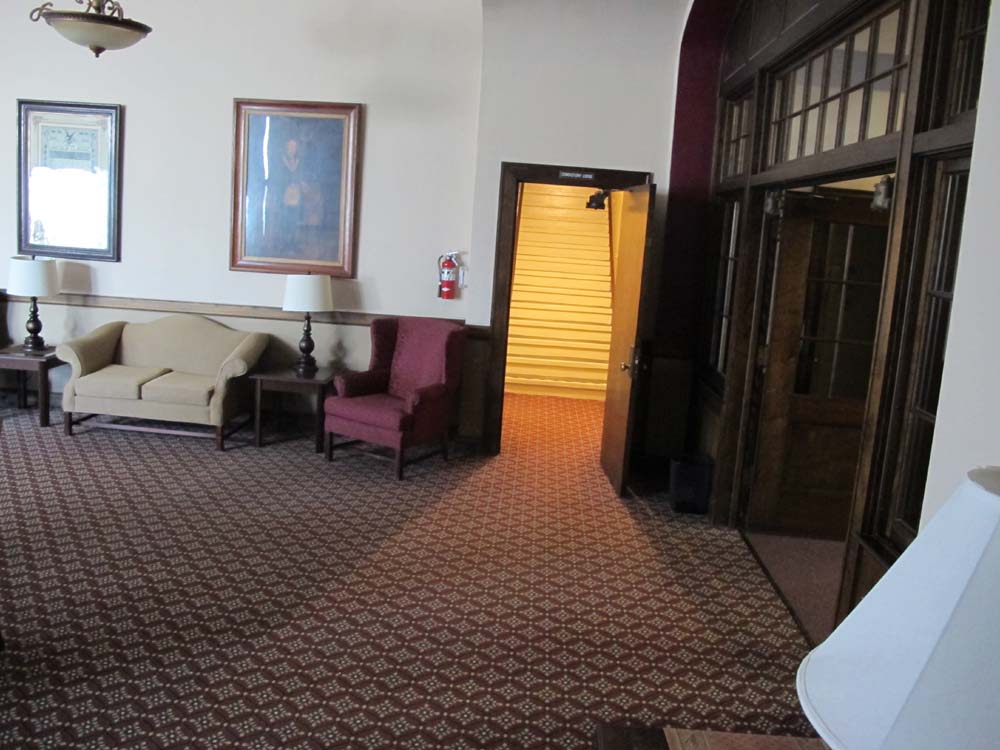
Once inside the Library, turn right and walk through the doorway.

After about six feet, turn left into the entryway for the exhibit hall.
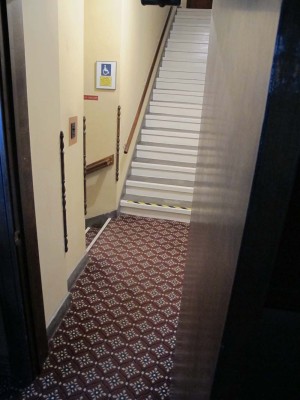
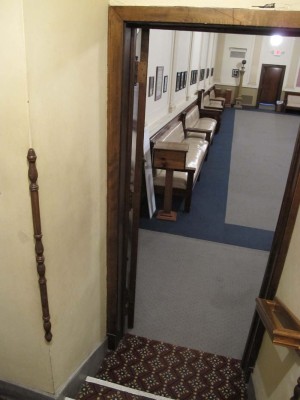
Come on in!
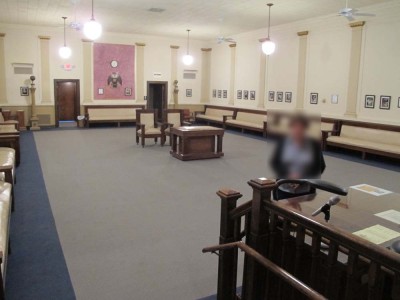
The exhibit hall will be drastically different once the exhibit is installed, as there will be dramatic theatrical lighting (no overhead lights at all), a black drapery backdrop, and large graphics and didactics on the walls.
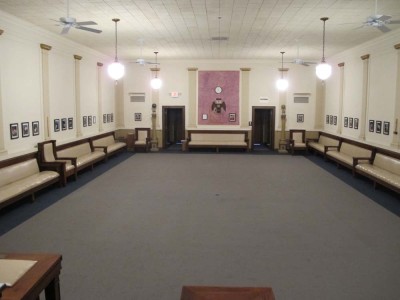
Along the center axis of the room will be the three main components of the exhibit. First will be the replica Studley workbench festooned with a half dozen vintage vises for your entertainment pleasure, along with castings from the original decorative Studely-made details in the cabinet. This will be the “You Can Touch This” part of the exhibit. Next will come Studley’s own personal workbench, and the culmination being the third station, that being the tool cabinet itself. These last two stations will be the “Don’t Even Think About It” installations.
In addition, there will be a silent video playing overhead on the projector screen of me emptying and packing the cabinet, video Narayan and Chris shot during our multiple safaris to Studleyville.
I hope you agree with me that the setting is darned near perfect for honoring the legacy of Henry O. Studley, and celebrating the release of the book chronicling his life and labors.


Recent Comments