The final steps for conserving the tortoiseshell mirror frame were to make sure all the excess glue was cleaned off and the surface was given a final gleaning and polishing with the incomparable Mel’s Wax.
As I mentioned earlier, the tortoiseshell veneer was very fragile in general, and the simple gentle tasks of cleaning and polishing caused three new areas to pop up, so I had to deal with them immediately as well, exactly as described int the previous post.
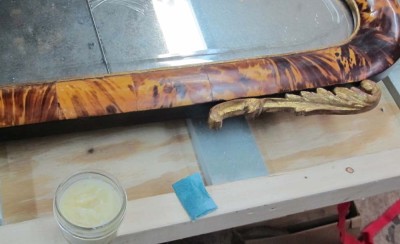
Mel’s Wax goes on effortlessly, and in the end yields a near-flawless archival protective surface. It goes on like sunscreen lotion, then goes dull as it dries, and buffs perfectly with almost anything. Paper towel, flannel, linen, cotton rags, anything.
As always, the very last thing was to strap the mirror to its litter, take it back to the client’s house, and hang it up. I must say, it does look pretty good.
I will work on the second mirror once the storm of Studley calms down.

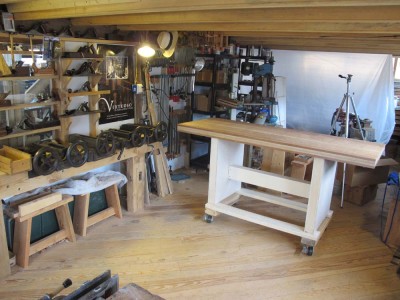
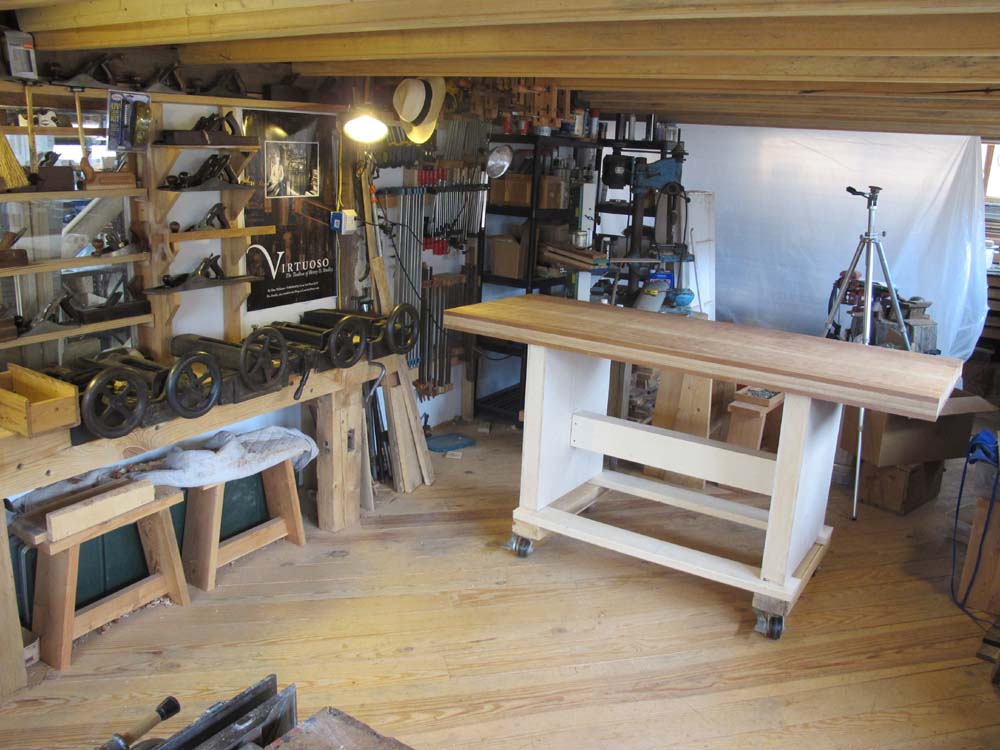
The replica workbench top continues apace. I got the top smooth enough (more about that in a day or two) to seal it with my preferred benchtop finish of 1/2 tung oil with 1/2 mineral spirits, and about 2% japan drier.
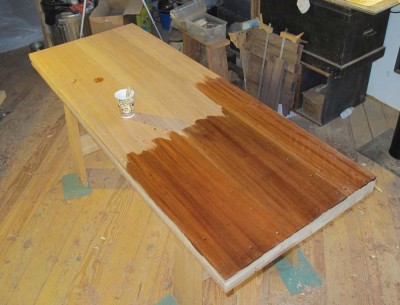
I like this finish as it soaks into the wood deeply and provides a nice robust seal to the wood.
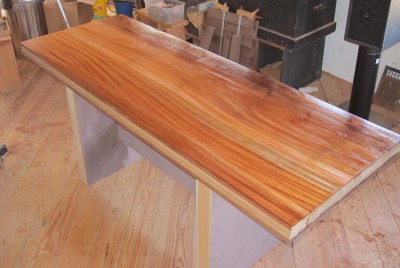
For the exhibit the top will be pretty smooth, but once it gets back home I will achieve my preferred top surface by cross-hatching it with a toothing plane, a technique I learned from my long-time friend and colleague, and Roubo project collaborator, Philippe Lafargue. But for now it is nice and smooth.

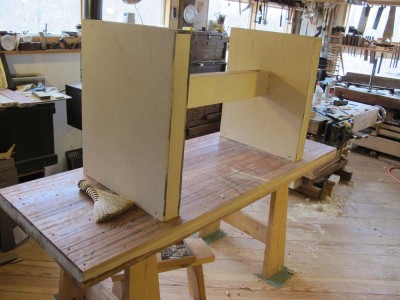
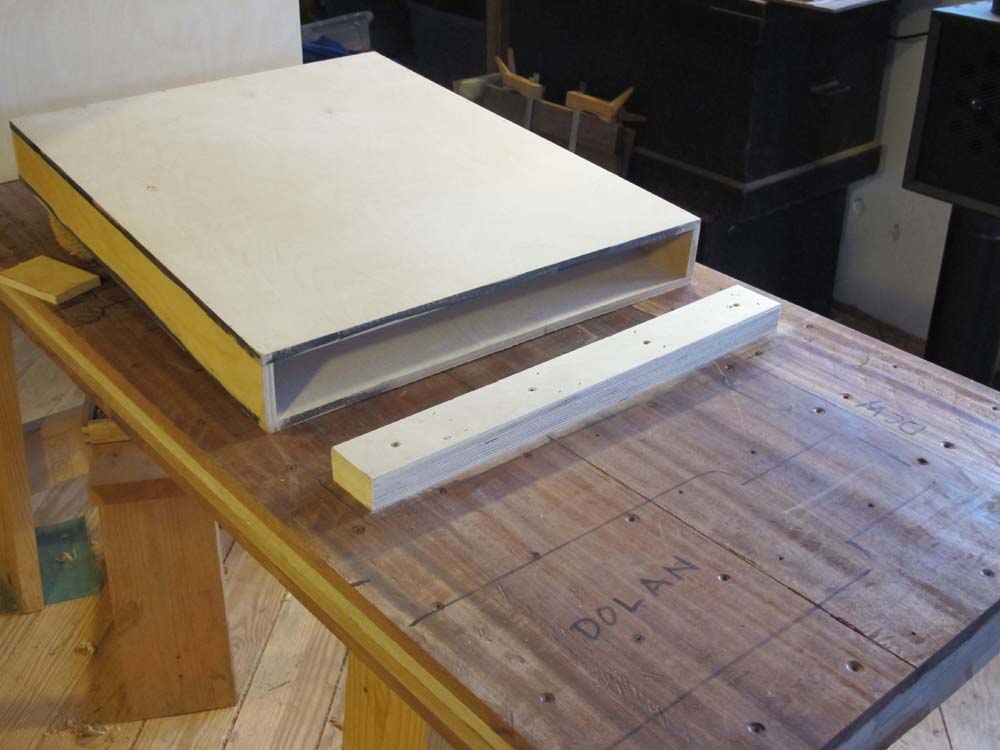
I fabricated the exhibit base for the top from three 1/2″ Baltic birch plywood boxes, fitted them to fastening battens, and temporarily assembled it in order to layout all six of the vises going on it for the exhibit.
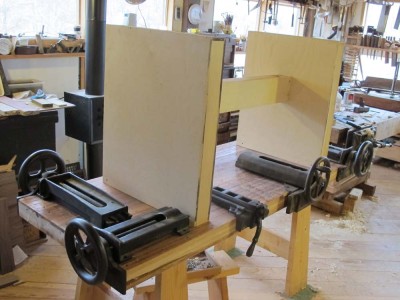
One of the beauties of this exhibit is that it may be the only time in their lives that patrons to a museum-quality exhibit will get the chance to touch and manipulate historic artifacts, namely the six vintage vises hanging from the new bench top.
===================================
If you would like to experience the bench top in person, and oh by the way see the entire Studley Collection, there are still tickets available here.
 You can now order “Virtuoso: The Tool Cabinet and Workbench of Henry O. Studley” by Don Williams from the Lost Art Press store. The book is $49 and will ship in mid-May.
Orders received before May 13, 2015, will receive free domestic shipping. The first 1,000 orders will receive a nice commemorative postcard featuring a beautiful shot of the open tool cabinet shot by Narayan Nayar.
When you order, you will have the option to pick up your copy at Handworks in Amana, Iowa., on May 15-16, or have the book shipped to you. All shipping will occur after Handworks.
Retailers for ‘Virtuoso’
While we are certain that many of our retailers will stock “Virtuoso,” we do not know which ones yet will opt to carry it. When we have that information in the next couple weeks, I will definitely post it here.
Why No Digital Version?
There will not be a digital version of “Virtuoso” at this time. We have experienced a significant amount of pirate distribution of our titles, so we have decided that for this book, the pirates will have to manually scan and assemble the book if they want to rip us off. Our apologies to our law-abiding customers for this difficult decision.
Other Studley Products
We will have more news on other Studley-related products in the coming weeks, including posters, a feature-length DVD and toilet-seat covers (oh wait, no, those are for “The History of Wood”).
Thanks for all your patience during the last four years since we announced this project at Woodworking in America. A team of people has poured thousands of hours and tens of thousands of dollars into the research and production of this book. I think that effort will show in the book, and I hope you will be pleased.
— Christopher Schwarz

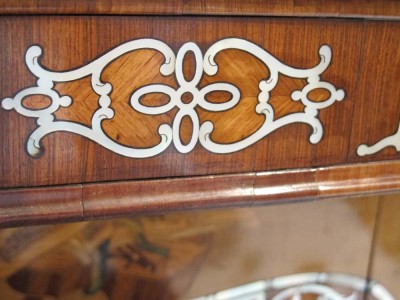
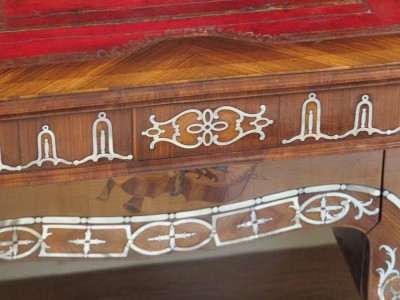
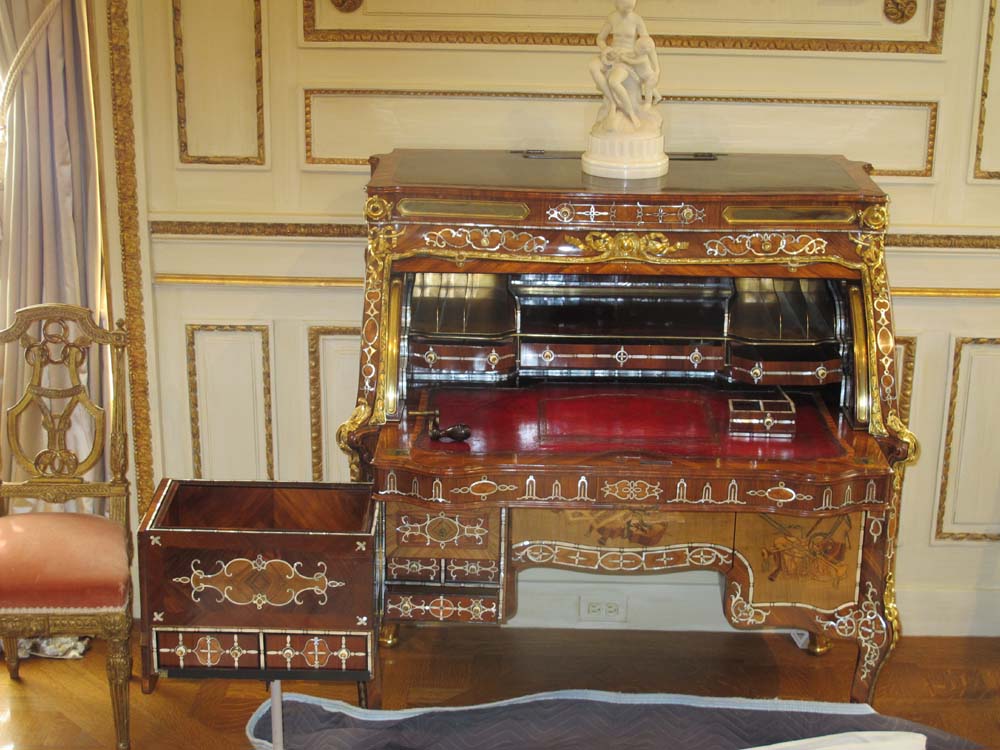
Recently I had the chance to work on a fairly snazzy roll-top writing desk, which needed a bit of conservation. It was built around 1770 by arguably the greatest furniture makers who ever lived, and is prominent in the collection of the elegant museum dedicated to European fine and decorative arts.
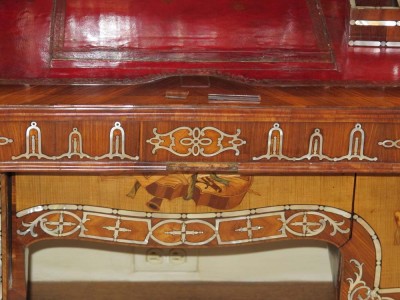
A short section of cross-grain molding had become detached, and part of my charge was to examine the desk from top to bottom to assess its overall condition. I did, and it is in fine shape.
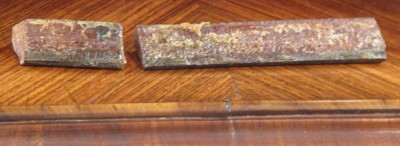
As was clear from the back of the moldings and the ground under them, this was not the first time these pieces had separated from the mother ship. I counted three distinct campaigns of glue, and there could have been many more.
The pieces fit their place nearly perfectly even dry, with only the tiniest bit of rocking due to the excess glue under them.

My strategy was to soften the extant glue and remove only a bit of it, so I poulticed the glue line on the desk with some blue paper towel, cut to fit the space precisely and moistened with water.
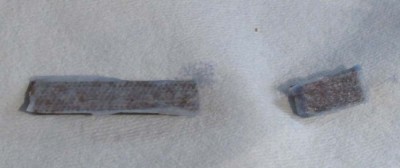
I did the same to the backs of the detached pieces.
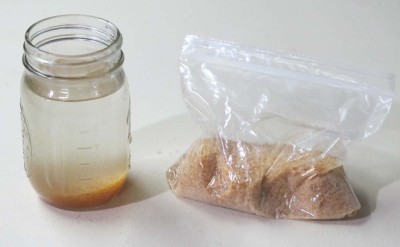
After a quarter hour or so the glue had softened and swelled to the point I wanted, and I removed the worst of the clumps and left the remainder in place. For adhesive I turned to my long time fave, Milligan and Higgins 192 Special grade hot animal hide glue. I had prepared this the days before the treatment, soaking it first in water overnight, then cooking it twice the day before I went. A little dab of that, a minute of holding them in place with my infertips to gel, and I was done.
I packed up and left, reflecting on the fact that the opportunity to care for furniture from the greatest menuisiers of all time is exactly the reason I started down this path 43 years ago.
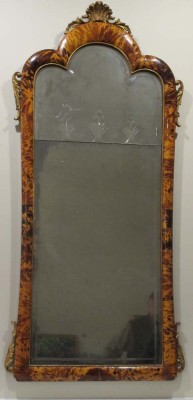
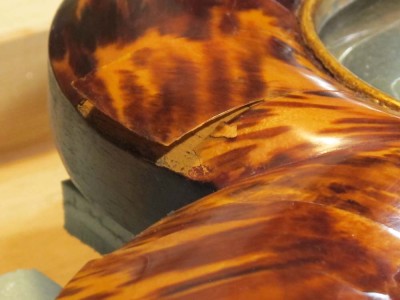
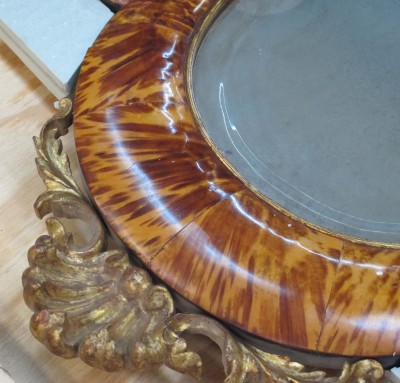
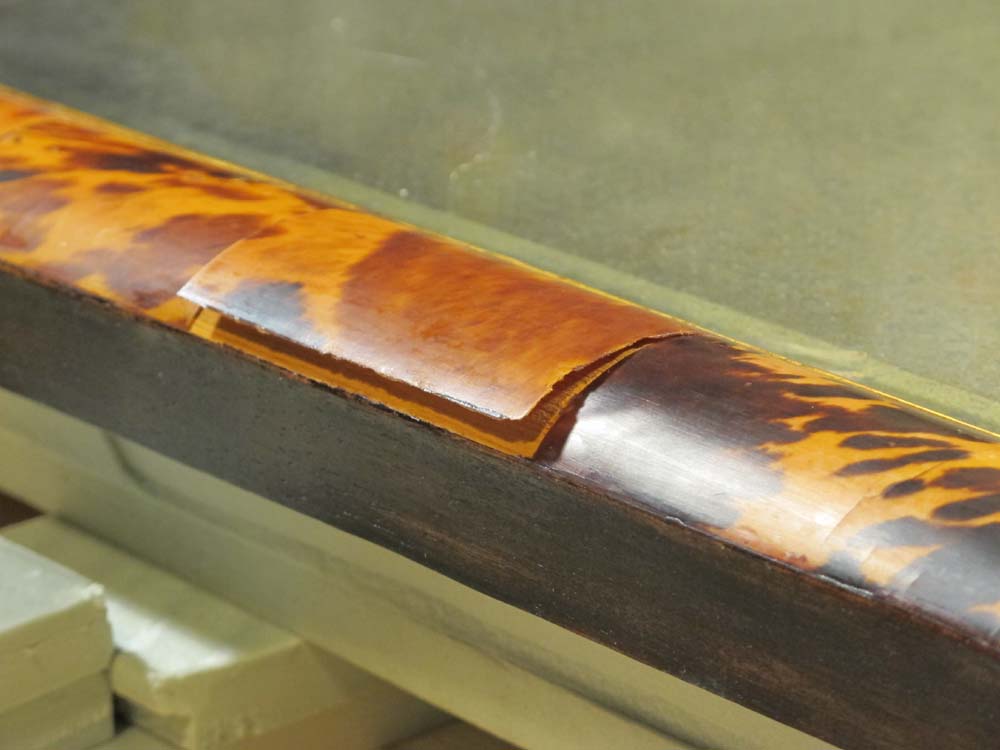
The tortoiseshell surface of the mirror frame was replete with areas of delaminated and detached (lifted) shell veneer, with even more numerous areas that were delaminated but not detached as they were still adhered at their margins.
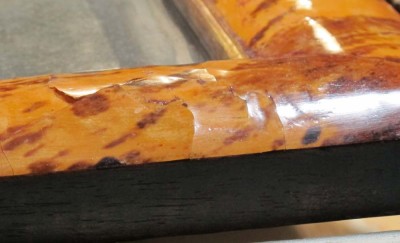
This was particularly prevalent at the seams of the shell pieces.

Nevertheless as most of these regions were stable I left them alone. They are not at imminent risk, so I can always return to them should the situation change.
The main concern was those pieces flapping in the breeze, or in danger of becoming so. Those were the areas where I needed to introduce adhesive underneath them, then clamp them in place until it dried.
I chose Milligan and Higgins 192 Special hide glue for my adhesive; it has more than enough shear strength, and is much more tacky quicker than the standard hide glue (eliminating the need to add glycerine as a tackifying plasticizer). I soaked it overnight, 1 part glue to 2 parts distilled water, then cooked it twice on my coffee cup warmer before using it.
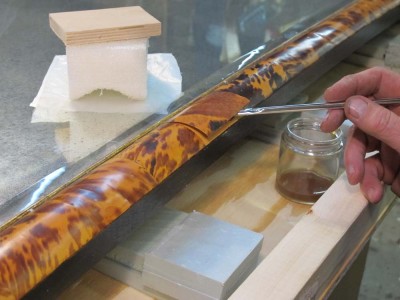
With my fingertips, or often with bamboo skewers and hors d’oeuvers toothpicks I gently lifted the edges of the tortoisehell and inserted my glue brush underneath, working it until there was excess glue present.
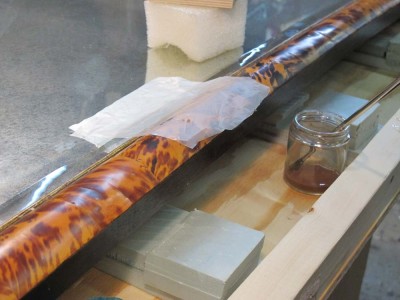
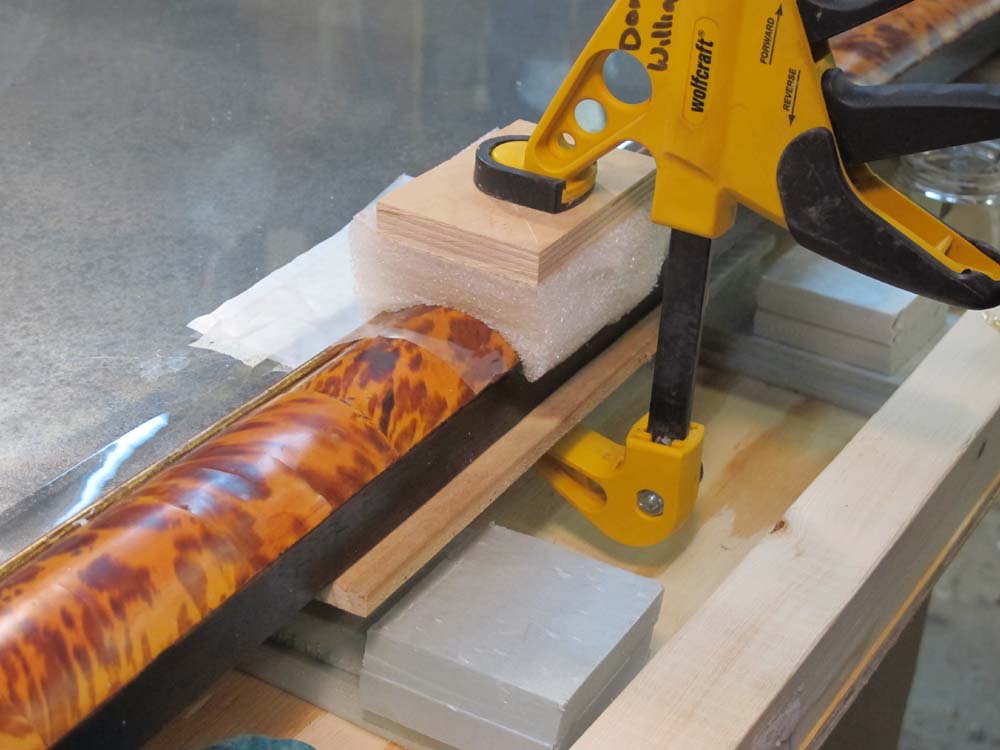
I then pressed down the shell by hand to swab off most of the excess glue, then laid down a piece of this plastic sheet (I really like food vacuum packing membrane for my gluing barriers; I bought several rolls on ebay for about fifty cents) followed by a shaped caul of polyethylene foam.
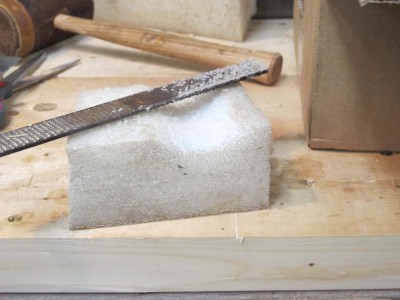
I made the cauls from scraps of foam left over form various projects, hollowed out with a few strokes of a convex rasp.
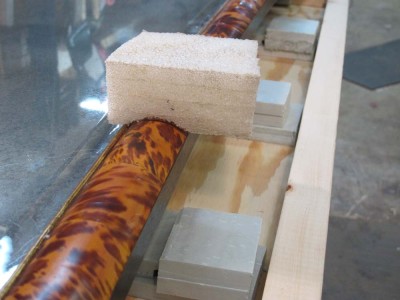
When in place, their concave shape provides admirable clamping pressure on the convex surface of the mirror frame.

I placed a foam caul over each section being glued, followed by a piece of plywood backing and a clamp. Extreme clamping pressure was not needed, only enough to hold the shell in contact with the substrate until the glued hardened. I left it over night and removed it in the morning.
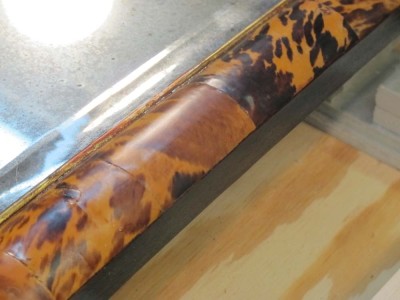
I was fortunate to have success with every glue-down, not always a certainly when working on a contaminated surface and substrate.
Cerusing, or glazing, is the technique whereby you apply a hyper-thin layer of pigmented medium on the surface of the wood in order to manipulate its coloration. “Glazing” is the more generic term for using the technique to change coloration is any direction, but “cerusing” is a term specific to the lightening or whitening of wood. Ceruse had been first used actually as a cosmetic known as Venetian Ceruse, a face “glaze” made from led white and oils to make the wearer look, well, pasty faced (think about the court of Queen Elizabeth I). Lead white was an especially prized pigment by the ancients in great part due to its translucency. Imagine how pasty-faced you could look after a lifetime of slathering lead white on your face!
Not surprisingly we do not use lead pigments widely despite their evident beneficial properties (oil paints made with lead pigments are nearly indestructible as the lead imparts tremendous durability) beyond very specialized application by fine artists making easel paintings. Instead we use a combination of titanium dioxide and calcium carbonate or similar benign pigments for our whites.
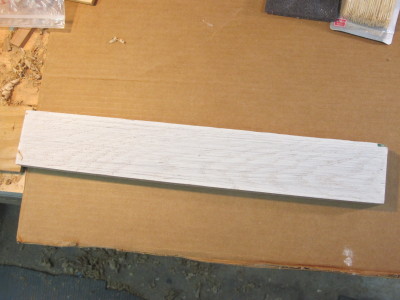
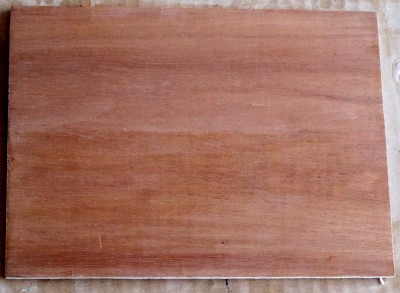
Like the earlier liming process, for cerusing the wood was planed and scraped but unlike liming it not scrubbed with a brass brush.
The key to this process is to prepare and apply a thin layer of essentially translucent paint evenly over the surface. In many instances of glazing the surface is first sealed to provide a barrier to the glaze soaking into the wood, but in this case the controlled “soaking in” is a critical component. If the surface is smoothly scraped this works fine. If the surface is sanded, the results can be more of a challenge as the comparatively rougher, more “open” sanded surface behaves differently vis-a-vie the glaze than the scraped surface.

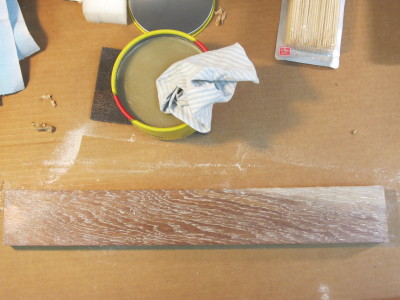
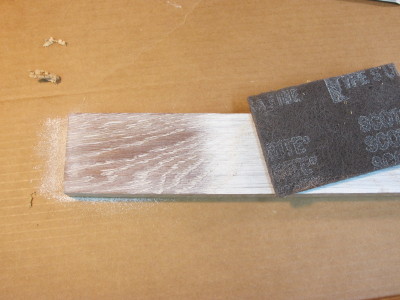
For these sample boards I prepared a white glaze from one part oil-paint primer, one part tung oil, and one part mineral spirits, with about 2% japan drier.
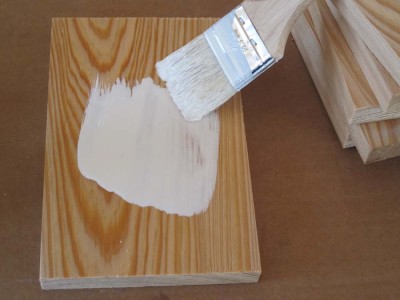
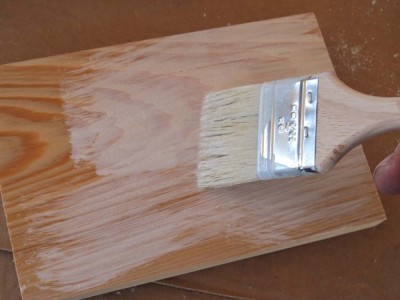
I slathered a thin layer of the glaze over the surface distributing it as evenly as possible with the cheap disposable brush, then worked it back and forth with a fine bristle brush, going one direction, then perpendicular to it, then diagonal and perpendicular to that, then finishing up with the grain with a very light touch. Excess glaze is not helpful, just put on enough to cover the whole surface to the visual intensity and depth that you want, keeping in mind that your working the surface with a brush will pull some of the glaze off. As you smooth out the glaze and pull it off with the brush, make sure to clean the brush frequently by rubbing it against a rag, which you will throw away when finished (make sure to do it properly, as the oily rag is flammable).
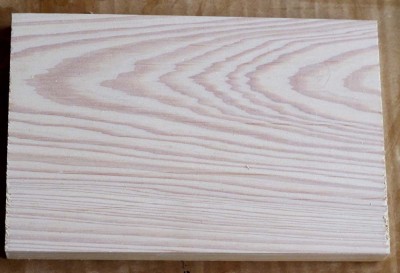
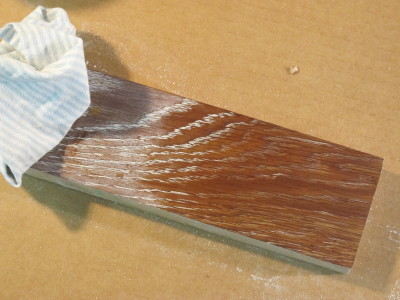
With a light touch and a good brush you can leave a perfect translucent layer on top of the raw wood, with just enough soaking in to bring it to life.
Once the glaze is fully dry, I follow it with a wiping of paste wax, and call it done.
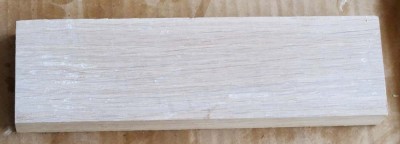
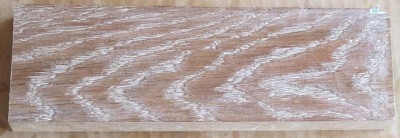
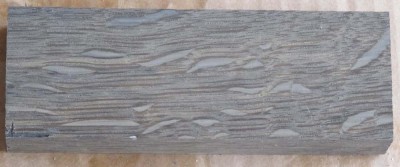
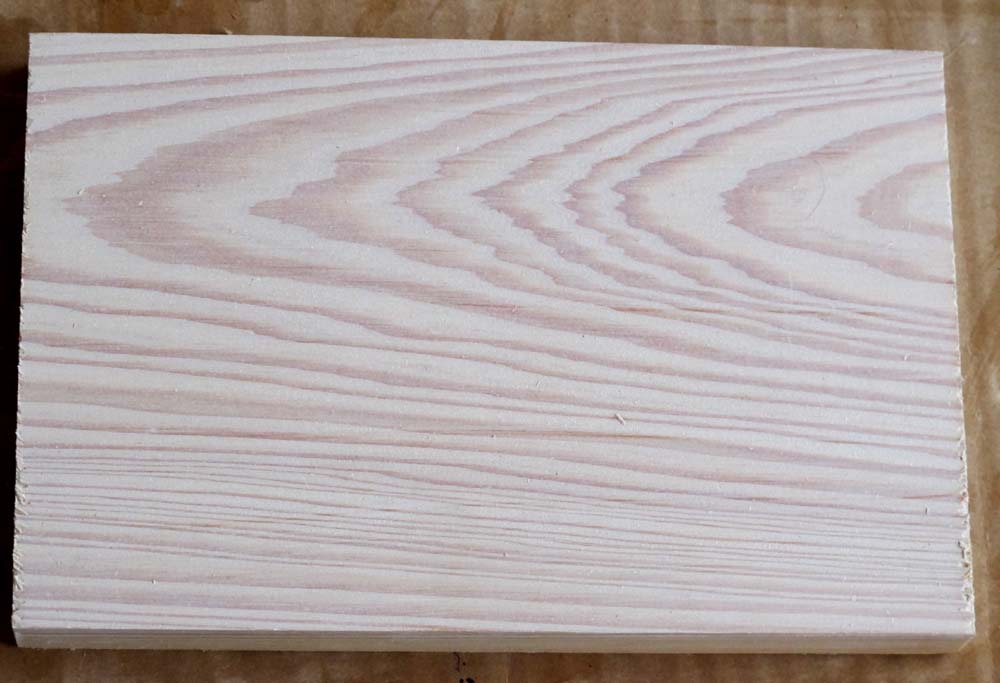
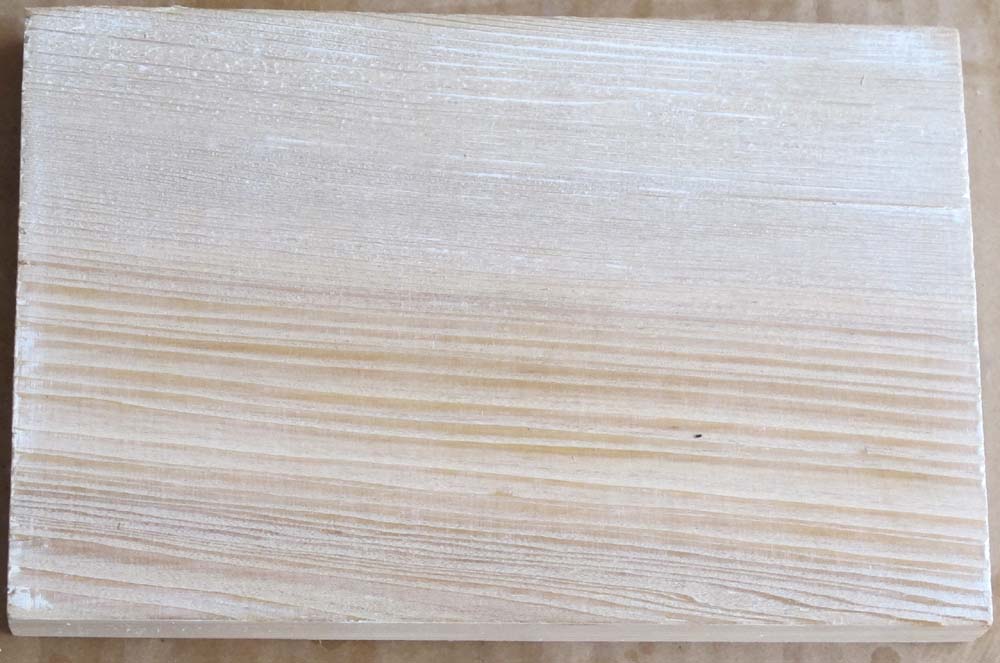
As you can see from the comparative samples of flat-sawn cypress and quarter sawn oak, a cerused pickling is well suited for bold grain.
The techniques of glazing will be mentioned regularly in this blog and upcoming presentations and writings, as it was both historically accurate, especially asphaltum and brick-dust glazes, and is an important tool in the kit to making new surfaces appear to be aged.
Stay tuned.
Among the flaming chainsaws I am juggling at the moment, by far the weightiest is my interpretive rendition of HO Studley’s workbench I am fabricating for the upcoming exhibit of the Studley Tool Chest and its companion workbench, now less than two months away. The purposes of this element of the exhibit are basically two-fold; to demonstrate the manner in which Studley built his bench top, and to have some place to hang the half-dozen piano-maker’s vises (which you will be allowed to play with). I realize that not everyone is as interested in these as am I. Heck, outside of Jameel Abraham, nobody is as interested in these as am I. Why do these vises capture my imagination so? Why is peanut butter and mayonnaise my favorite sandwich? Some things are just chalked up to the vagaries of the cosmos.
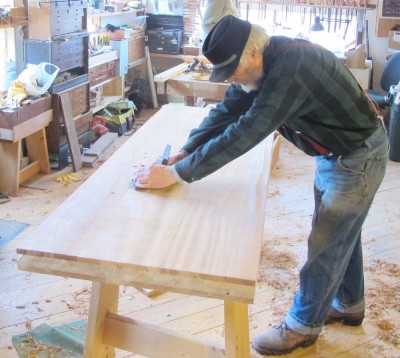
I’d blogged earlier about my frustrations with the African “Mahogany,” and in return heard from my friend Rob in Lawrence, Kansas, with encouragement. He had encountered the same problem, and instructed me on how to overcome it. I will write soon about my adaptation of his advise –use an ultra sharp high angle smoother and take infinitesimally light cuts — in an upcoming post, but for now all I was wanting was to get the slab workably flat.

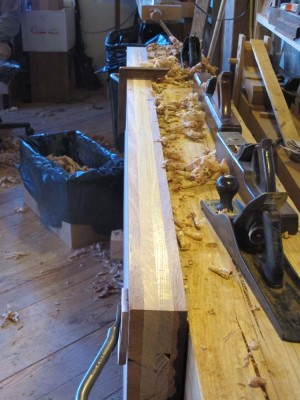
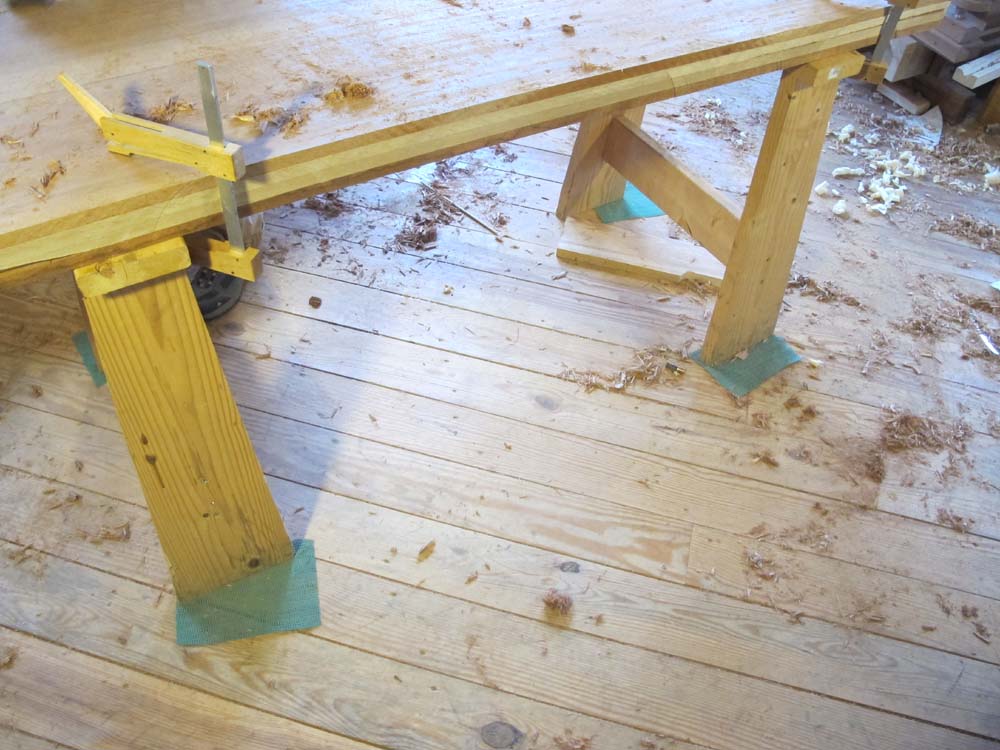
For that I continued working with my newly sharpened toothing plane, which was doing its job admirably. Still, the process was not without problems. I had the slab clamped to the sawhorses in the corners and worked regionally. The issue at this point was the floor. Yes, my southern yellow pine flooring has become “polished” through foot traffic, and at times the entire assembly of slab and sawhorses skidded across the floor. After extensive exasperation with this, I grabbed some of the open webbed non-skid padding I used under my sharpening stones, or when sanding on the bench or something like that, cut it up and tossed a piece under each foot of the sawhorses.
Problem solved. Next?

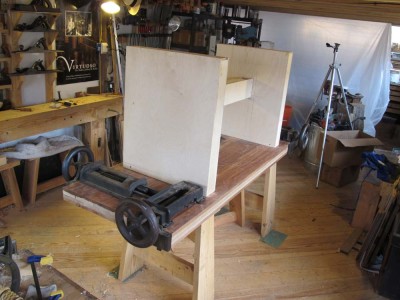
I then got the slab on edge clamped to my planing beam with a new pair of holdfasts from Tools For Working Wood (they are fabulous and I will order three or four more pairs) and worked the long edges, which will eventually receive the edging similar to Studley’s.
One of the dominant aesthetics in the interior design world of my early days in the furniture trade in Palm Beach County, Florida, was the lightening or even whitening of wood furniture and paneling, presumably to reflect the bright sunniness that was numbingly constant outside, especially in the winter when those with the financial means escaped the cold, grim climes of (mostly) New England. This was manifest in what decorators called “pickled” finishes for wood surfaces. During my recent luncheon presentation in Palm Beach, one of the topics my hosts requested was to address this one.
Traditionally this was applied over either oak or cypress, and I recall finishing what seemed to be acres of it. In fact the “whitening” of these woods was accomplished by two unrelated techniques.
One technique involves the deposition of white material into the grain of the wood, and the other requires the deposition of a thin uniform layer of white translucence over the entire surface. Though I executed both techniques on both oak and cypress, you will see from the results that one technique worked well for one wood, and the other, the other.
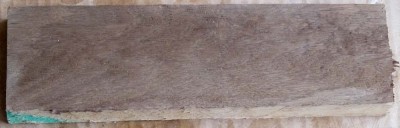
“Liming” of wood requires the deposition of, well, lime onto the wood, or more precisely, into the wood. In these samples I planed and scraped the panels, then lightly scrubbed them with a brass brush to wallow out the grain. In the case of oak, it resulted in the emphasis of the ring-porous nature of the wood, while with the cypress it created a muddy, unremarkable effect.
Once the surface was ready I took some hydrated lime from the hardware store and prepared some very lean gesso from the lime, water, and about 2-3% 315 gws glue. I first soaked overnight and cooked the glue in the water, then added powdered lime to the desired consistency.
This was brushed onto the surface, making sure to work it down into the grain, and allowed to dry completely.
Since the gesso was very lean, I was able to remove the excess gesso, that is the gesso not down in the grain, with an abrasive pad rather than the coarse burlap of days gone by.
Following that I applied a single coating of paste wax, and when that was hard I buffed it with a piece of clean cloth. This is a nerve wracking step the first time you do it as the paste wax saturates the lime deposit, making it disappear. Never fear, as the solvent in the paste wax flashes off, the white will slowly emerge again. The effect in oak is dramatic.
For cypress, the presentation is fairly undistinguished.

Fortunately, there is a technique that works wonderfully on cypress.
Stay tuned.
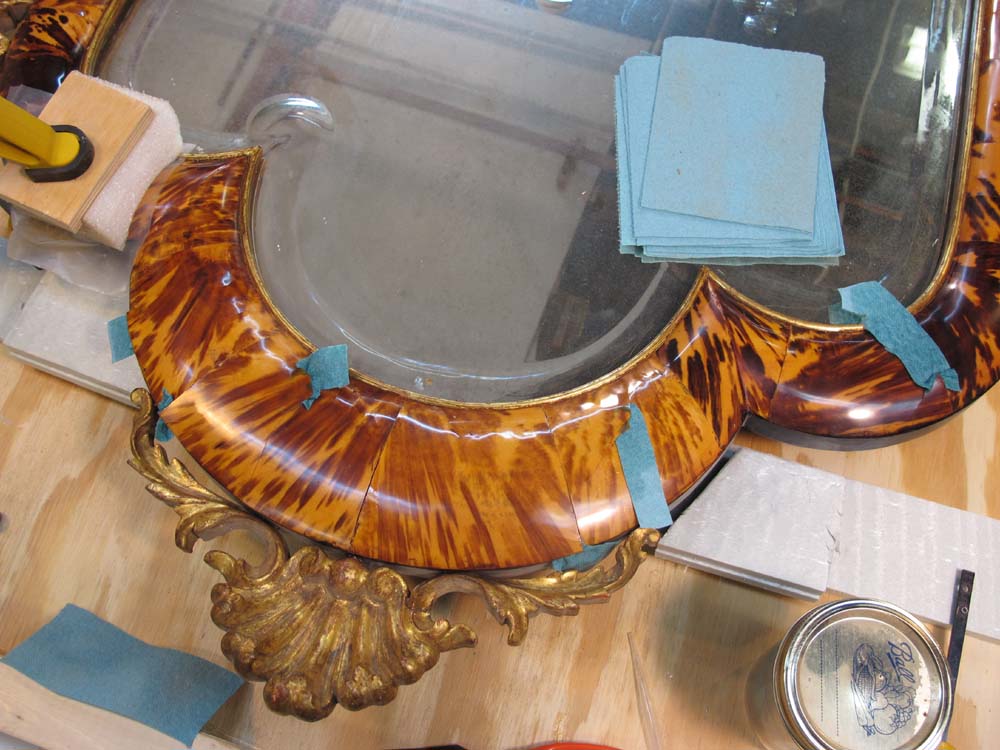
Once I finished with documenting and photographing the mirror frame, with special attention given to the areas of fracture and delaminated tortoiseshell, I began the process of cleaning it.

Like a legion of its brethren, this mirror had undergone a longstanding and typical process of being oiled periodically in order to spruce-up the appearance. In this particular instance, I believe the oil used was olive oil. Unfortunately, this process also contaminates every presentation surface, and if there are any cracks through which the oil can wick, the gluing margins as well. Equally unfortunate is that oiling tortoiseshell provides at best a temporary luster, while producing a long-lasting gooey residue that adheres airborne particles to the surface.
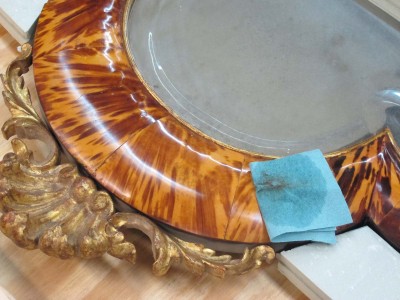
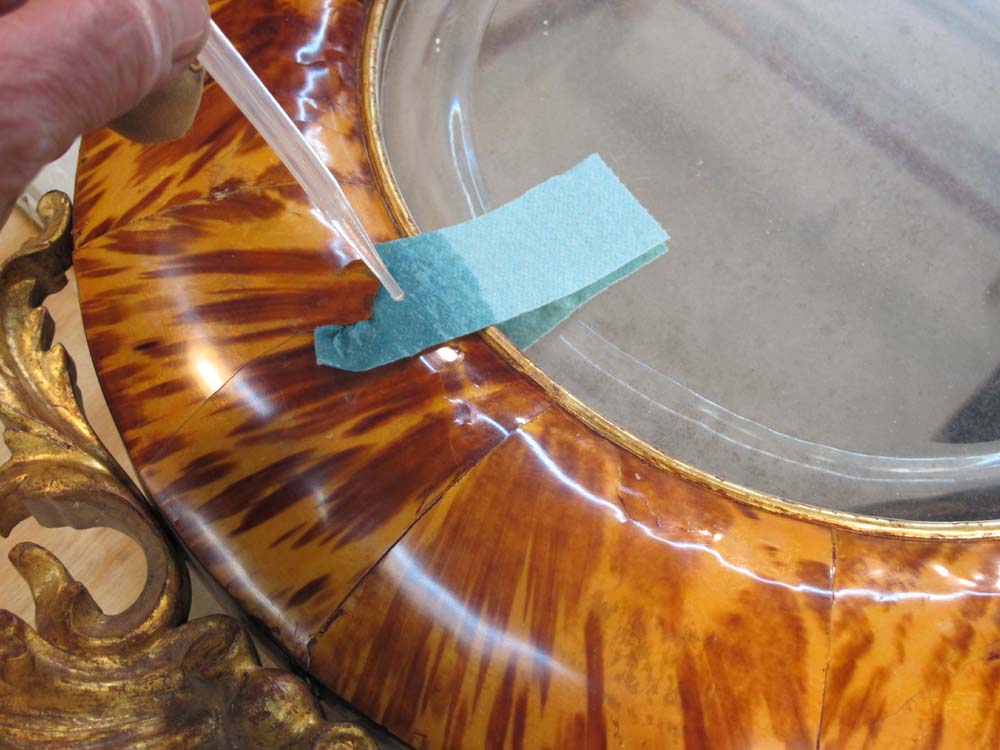
To address this I cleaned the entire surface of the mirror frame three times with naphtha on soft disposable shop towel pieces, until I was satisfied that the surfaces were clean. Somewhat more challenging was the incursion of the oil underneath the areas of lifted tortoiseshell. For these I not only needed to dissolve the oil but the transfer it to a spongy material in order to imbibe the oil into the sponge.

Once again I used the blue paper shop towels, cutting small pieces to gently slide into the openings of the fractured and lifted tortoiseshell with a thin spatula. Once in place, I used a dropper to wick naphtha into the paper sponge and let that wick up to the end, underneath the delaminated tortoiseshell, contacting, dissolving, and transferring the oil into the disposable sponge.

After a couple iterations of this, with two or three hours of contact each time, I let it dry thoroughly and tested one area and found it to be adequately cleaned in order to proceed.
As I presented my sample boards at the luncheon banquet on my recent trip to Florida, I began with two simple methods to enhance and modify the wood surface itself, even prior to beginning the application of any finish materials.
The first, and a very popular once again, was the coloration of white oak through the application of ammonia. In the first sample I simply brushed on liquid ammonia and left it to dry. The coloration is about what I expected, with the slight blotchiness and shallow penetration that would be the result of a light liquid application. The depth of penetration from the single wetting with ammonia was about 1/16″
A second and similar sample was that of white oak exposed to ammonia vapors. In this instance I prepared the six oak samples and placed them standing upright in a circle around a coffee cup warmer, on which I placed a half pint of full-strength hardware store ammonia. I turned on the coffee cup warmer to heat and vaporize fully the ammonia and placed a plastic bucket upside-down over the lot, and left it for twelve hours. I neutralized the ammonia with a light swabbing of white vinegar and left them to air out for a few hours, but there was no noticeable odor.
The result was the sumptuous almost-mocha coloration we have come to expect as the base for a lot of Craftsman furniture. An application of a couple coats of deep red garnet shellac would have yielded a magnificent dark reddish brown finish. I left the samples in their “native” state to make sure that the audience could see it in the raw. Just to see how effective the fuming was, I sawed a sample in half, and the entire 1-inch cross section was the same fumed color.
As a special treat I showed a set of samples that I did not prepare other than to cut them to size. These were pieces of “bog oak” from a crib dam on the Rappahannock River that had been submerged for nearly a century-and-a-half. The coloration and luster of these pieces as truly spectacular, and I cannot wait to make some furniture from the pieces I have.
A final “pre-finishing” step was, not surprisingly, burnishing with a straw polissoir. I lightly scraped the entire surface, then burnished one half of it. I demonstrated this one at the luncheon, bringing the mahogany surface to a desirable sheen in just a few seconds. I also noticed that these samples drew continual attention (caressing?) during my presentation, even after I had moved on to other topics.
After that we got down to the serious business of selecting and using a variety of finishing materials


Recent Comments