You can now order Blend 31 block wax in the Store at donsbarn.com. Blend 31 is a solid wax of 3 parts hand-processed beeswax and 1 part shellac wax. It is $16 per quarter pound block, domestic shipping included.
I use Blend 31 for all kinds of things around the shop including lubricating plane soles and saw blades, and it works wonders on drawer runners. Since it is 1/4 shellac wax, and since shellac wax is the second hardest natural wax, it is a fair bit harder than pure beeswax. And, unlike pure beeswax, thanks to the shellac wax fraction this blend warps a bit when going from molten to solid.
Recently I posted the recipe I use for turning Blend 31 into a stout paste wax good for any application where paste wax is the desired form.
I was busy with travel yesterday, so this is a day late.
The procedures for making this pair of benches was identical to previous and more recent versions, the primary difference being the scale of the project(s). The first steps revolve around rendering usable lamina from 2×12 southern yellow pine, ripped and cut to length. As has become my practice I run all of the stock for the top and the legs through the power planer to get clean surfaces and edges for the glue-up.
This project was so routine in fact that I made no record of assembling the top, but it was an identical approach as I have recounted previously.
This approach makes for almost effortless cutting and fitting of the leg tenons and the top mortises. With the top flipped I just drove the leg tenons home with almost gentle pressure. Sure, I was using a 12-pound sledge, but I wasn’t having to wail away on it.
Actually the driving home of the legs in this manner is why I off-set the three lamina for the leg, leaving the center lamina untrimmed. This disposable tongue gives a great place to pound on.
Lying the assembled unit on its side allows for effortless trimming of the legs to the identical length. Soon enough the first one was upright, serving as a bench for the second.
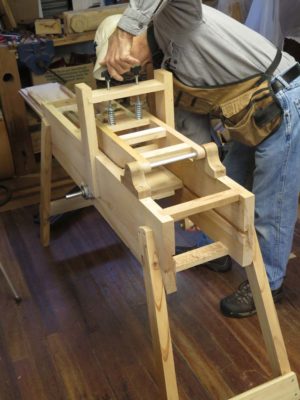
Given the petite dimensions, particularly the height, I needed to devise a system to raise and lower the bench according to the height of the user.
I prefer a bench higher than do most folks, I am about 6″-0″ and like the bench to be about the height above my wrist with a hanging arm, so I figured that a stepped height would be fine. Using 2x construction lumber and some coarse sandpaper I created a set of stepped slippers to allow for the height to be variable. In the end this turned out to be a crucial component for the end result of one of the benches (actually, probably both of them).
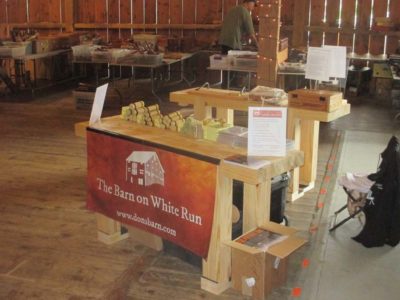
With some final detailing, flattening the top and drilling for holdfasts, I had a near-perfect workbench/display table for the task most immediately at hand.
One of the features I designed into the benches was the easy removal of the legs so that the benches could be portable knock-down units. I fabricated a fitted block to drive the tenons of the legs down through the top of the assembled top, allowing for complete disassembly. This strategy worked perfectly and in time the benches were ready for transport to Iowa.
They served me perfectly there, and confirmed the original concept of a small-ish Roubo-style knock-down bench (an idea I first stole for Kari Hultman).
After the Handworks event the benches came home with me, awaiting their next chapter.
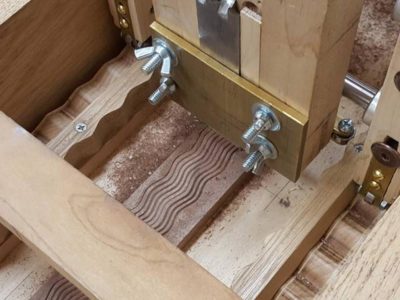
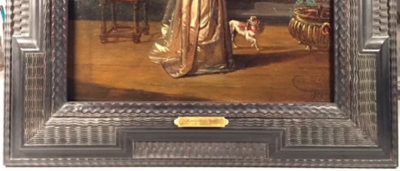
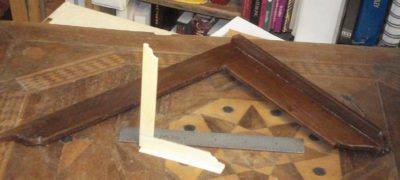
Just as I was writing the blog post for the final Barn workshop of 2019, Make A Ripple Molding Machine, I got an excited note from my friend and fellow instructor John that after many months of experimenting with seat-of-the-pants engineering he has conquered the waving problem. In our two years of Rippleista gatherings with me, John, Sharon (who wrote to tell me she had just purchased a 17th century painting with a ripple molding frame), and Travis we made great strides in recapturing the technology for replicating ripple moldings from centuries past, but the wave moldings were still not where we wanted them to be. Such is no longer the case.
Sharon’s new old frame
The ripple/wave machines we will be making during the workshops are at least tenuously connected to the concepts of those in the 17th and 18th centuries but we are incorporating modern hardware into the equation to make these machines precise workhorses in the studio. We’ll work with each attendee to produce a completed hand-powered machine to take home with them, capable of producing almost six-foot moldings. After that it’s all up to you to make it sing your song.
The workshop is September 23-27, $950 all materials included. It’s probably way too cheap but this is our first time to teach this one. We will probably be so jazzed that John and I will build a couple ourselves.
In August we will continue the pursuit of Roubo’s tool kit, this time Making and Using Roubo’s Shoulder Knife. I have no way to know exactly how prevalent was this tool’s use in ancient days, but I suspect it was used as much or even more than we use pocket knives today. Each participant will fabricate a shoulder knife to fit their own torso, so its use can be both the most comfortable and the most effective.
I do not yet have enough experience with the tool to be fully skilled in its use but we can practice together.
I’ve still got some of these left so I am re-posting the offer.
Thrashing around my “mail” closet I came across a stack of leftover postcards I had printed in 2014 to promote the then-upcoming exhibit of the H.O. Studley Tool Cabinet and Workbench I was creating for the following May.
Rather than simply throw them away or use them for notes to myself, I decided to make them available to you for free until they are all gone. I guess I could make some charge, but that seems like too much trouble to me.
So, if you would like one of these cards to post on the wall next to your tool cabinet just drop me a note and I will send you one for free (make sure to include your mailing address!). If you feel compelled to compensate me you can buy me a cup of tea or a brownie the next time our paths cross.
My own long-time favorite workshop will be convening once again this summer, as we will spend three days implementing my “Six Rules For Perfect Finishing” in the historic tradition of spirit and wax coatings. Each participant may bring a small finishing project with them, but I have found that invitation to have erratic responses so the workshop will focus on creating numerous sample boards to keep in your personal collections.
The class dates are July 18-20, and the tuition is $375. For more information contact me here.
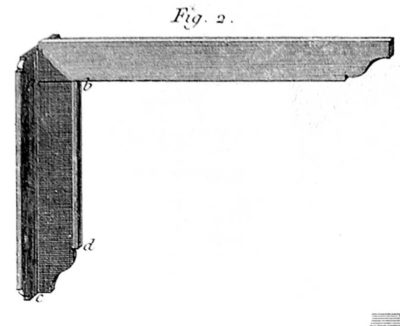
One of the more pleasant aspects of creating the English-version of the Roubo books has been to integrate the images of tools and the descriptive text of their use in the atelier. Roubo had a particular take on a range of measuring devices to be used in the fabrication and assembly of furniture, and I was especially taken with his cabinetmaker’s squares. I have made a variety of them in wood, brass and ivory and find them a delight to use.
In the upcoming workshop on Making A Nested Set of Roubo Squares each student will make a series of stepped squares, in other words each one will be a step up or step down in size from the next. These will be fashioned from solid brass stock with the base/shoe silver soldered to the beam of the square as illustrated by Roubo (his squares were welded steel, I believe. The text is ambiguous if I recall correctly). We will use one of Chris Vesper’s sublime squares as the reference for all the tools made this week. Chris told me that the square I bought from him has an accuracy of no worse than least 0.0005″ per foot of blade length. If that is not good enough for you it is time to check into an asylum.
The class will be June 20-22, and the cost including materials is $425. You can contact me here to get more information.
One of the very useful tools for me is a desiccation chamber for drying out wet things, like uncured tordonshell, a fresh plaster casting, wet wood, or something similar. I achieve such a chamber by using either a Gamma pet food container or a five-gallon pail with a Gamma retrofit sealing lid. I load the chamber with desiccated silica gel and it is ready to do its work. Put something damp in there, tighten down the lid, and the moisture gets sucked out of whatever it is you are trying to dry.
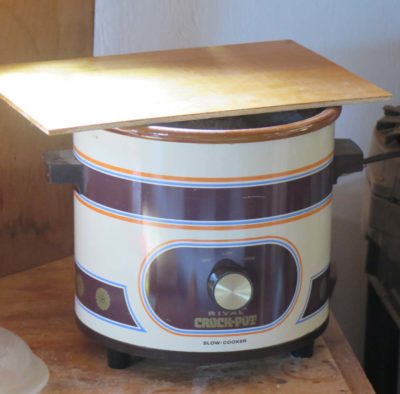
But the silica gel eventually gets damp itself, or at least adsorbs all the water being removed from the object in question. Fortunately silica get can be re-conditioned an unlimited number of times. My regimen for drying it out fully involves one of two routes typically. For much of the year I simply place a mass of the crystals into a slow-cooker and turn it up. In about 12-24 hours of cooking there the gel achieves a moisture content such that a sealed container holding it after cooling is at about 2-3% RH.
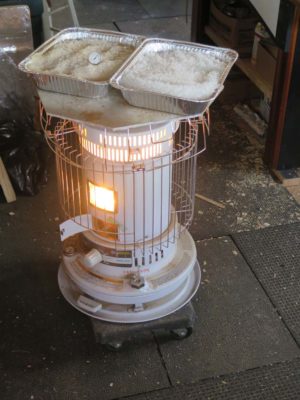
Another option for me in the winter is that I can dry out the gel in pans on top of kerosene heater I sometimes use to jump start the heat in the morning, or leave it on when the temperature is chilly but not yet frigid. I keep a plate of aluminum on top of the heater to increase the heating efficiency by integrating a large radiant plate, and this often serves as a tray for heating things in the winter. As with the slow cooker the total cooking time is somewhere between 12-24 hours, with the same 2-3% RH end point.
In either case, the slow cooker or the kerosene heater, I cover the batch overnight when I turn off the heat source, to prevent it from adsorbing moisture from the night air.
Silica gel can also be conditioned to a specific RH buffer but that is another topic.
I received notes from two of the recipients of Mel’s Wax that the jar had leaked during shipping, ruining the label and stinking up the package. The contents of the jar were apparently unharmed, but the jar and its label were not so fortunate. I am taking steps immediately to resolve the problem for the next units being shipped.
If this happened to your jar of Mel’s Wax, please let me know immediately. Send me a picture of the damaged package and I will send you a brand new one at no cost.
I am so confident of this product’s performance that I want nothing to detract from its sale and use.
Continuing the minor detour from recounting the inventory of my own workbenches, today I will talk about a sweet left-handed Roubo made from, I think, salvaged local Douglas Fir. I saw this bench when visiting our daughter and SIL over Christmas.
My daughter had recounted the tale of chatting with their friend K at church, wherein K mentioned to them that he had built a dream workbench. When asked about it, K mentioned that it was a French-style workbench documented by this guy Roubo that they would have never heard of.
At which point my daughter piped up and said, “Hey, I know that name. My Dad is writing a bunch of books about him.”
“Really? Who’s your Dad?”
“Don Williams.”
She said that K’s eyes got wide with disbelief that the author of the book he had used as guide for building his bench was his friend’s Dad. Small world, huh?
So, while in NorCal for Christmas it was arranged for SIL and me to join K for a manly breakfast from several of the fried food categories. We did and had a grand time of fellowship, then trekked to K’s home nearby for the viewing of the bench.
It was indeed a terrific bench.
There were some innovative modifications, including re-locating the leg vise to the right end reflecting K’s left-handedness. Perhaps the most intriguing modification was the re-design of the double-tenon joint where the leg top joins the bench. Instead of ganging together the single rectangular tenon and a single dovetailed tenon at the top of each leg, K chose to use two rectangular tenons with the one set back from the edge face of the bench, rendering it a fully-housed joint. I was very much impressed.
He also included a sliding deadman, a fairly typical feature of many benches, and a nice slipper to fit underneath the holdfasts.
He is rightly pleased with this centerpiece of his own workshop.
We then went down the road to The College of the Redwoods, where K is an instructor in the cabinetmaking program there. IIRC CoR was the umbrella for the Krenov School 125 miles down the coast, which is now independent of CoR. However, K indicated that the CoR administration is interested in creating a new fine woodworking making and design curriculum to stand alongside their other construction technology programs.






Recent Comments