
The second annual gathering of Rippleistas convenes a week from today, and I am readying the barn classroom and main room. I’ve heard back from all three of last year’s participants and they hope to be here, along with one other person who will drop by if he can. I’ve had no other confirmation of attendees wanting to join us even though the event is open-invitation and tuition-free so perhaps the charm of ripple moldings is less than I thought.
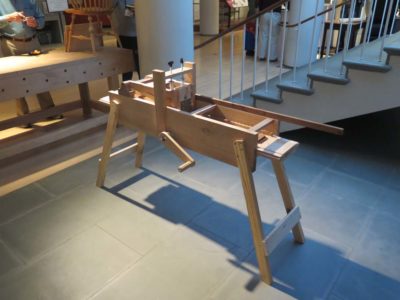
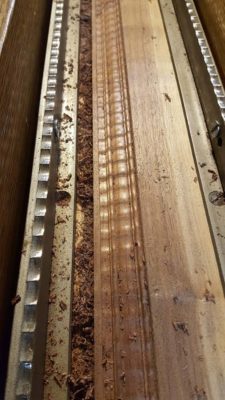
Although I no longer have the Winterthur Museum ripple molding cutter here, it having been made functional and returned, I know that one of our posse wants to experiment with a bench-top version of a ripple molding cutter, another will be perfecting his own machine built since last year, and two of us will no doubt be working on a new machine and revisiting my own machine design from last year.
I’ve ordered a pile of the nece$$ary hardware from McMa$ter-Carr so we should have everything we need to have a week of productive fellowship and undulating creativity.
Stay tuned.
Early last week I was contacted by two separate spoon carvers asking about customizing Roubo’s polissoirs for their needs. I do not know if this is a point of discussion among spoonsters or both of these creative folks arrived a the same point at the same time. I gave it a try, and both orders have been sent off.
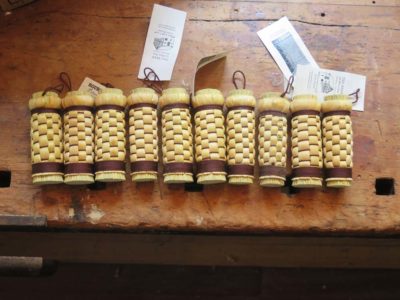
Given their descriptions of their needs I started by looking through all of the turner’s polissoirs I had on-hand, selecting the three with the longest bristles. Ostensibly these are designed to have 1/4″ bristles that can be gently domed for polishing the concave contours of bowl turnings, but in this case the crown needed to be dramatically more pronounced to fit into the bowl of the spoon. Since all of the polissoirs are hand-made there were minute variations in them, I wanted the ones that were a smidge longer (its a technical term you might not recognize) to accentuate the curve that could be imposed on them. Longer bristles allowed for a higher crown, so that is where I started.
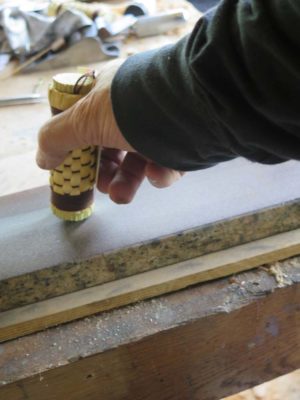
With the first test I discovered that a very dramatic crown was possible. I worked cautiously to impart the contour I though they needed and arrived at a point that made sense to me.
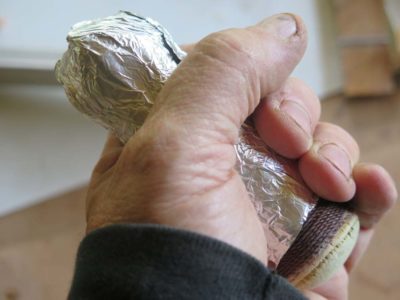
The test subject got pretty dirty and the label beat up so on the subsequent two I first wrapped them with aluminum foil to provide a bit of protection.
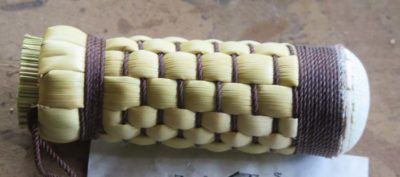
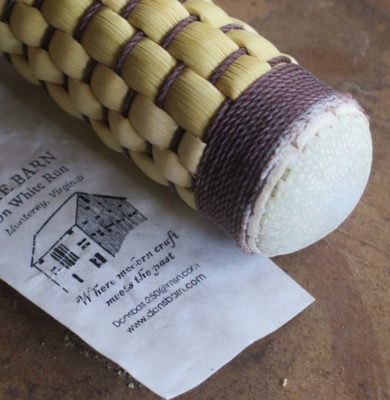
I hope these work for the spoon makers, if not I guess I will hear back from them. Of course the unmodified end can serve to burnish the flat and convex surfaces of their spoons.
My practice polissoir remains on my workbench and I will carve a spoon-sized shape to see how well it works.
Stay tuned.
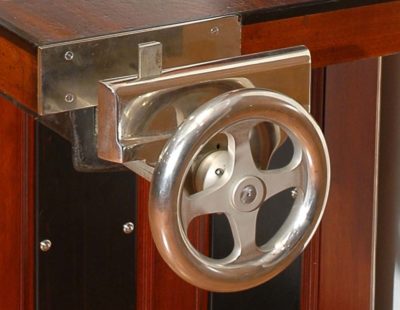
The original end vise from Studley’s bench. The rising dovetailed dog is the giveaway.
I was noodling around the interwebs recently, looking for any new images or information about piano-makers’ vises, (I am in the pattern-making phase of reproducing H.O. Studley’s vises) and came across the web site of Victoria Morozova.
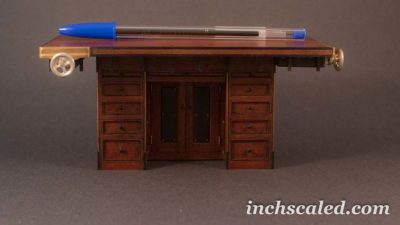
Victoria is a Moscow miniaturist who was steered towards Studley by Bill Robertson, who is both a famed miniaturist himself but also a contributor to Virtuoso: The Tool Cabinet and Workbench of H.O. Studley. The gallery of her work on the bench is breathtaking. Give it a look.
PS – She also has a three-part step-by-step description of replicating (I think Jameel Abraham’s) Roubo bench. Prepare to be blowed away, real good.
The complete 2018 Barn workshop schedule, which I will post every couple of weeks to help folks remember the schedule.
************************************************
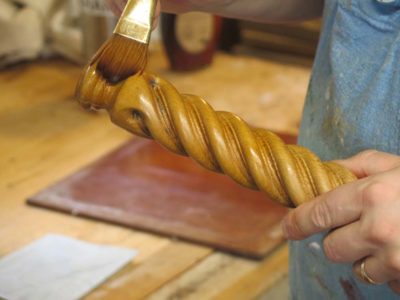
Historic Finishing April 26-28, $375

Making A Petite Dovetail Saw June 8-10, $400
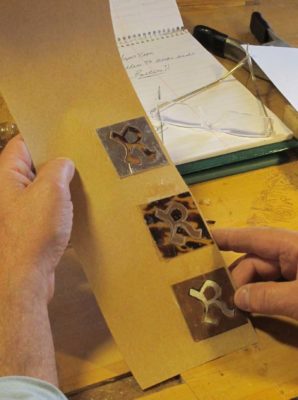
Boullework Marquetry July 13-15, $375

Knotwork Banding Inlay August 10-12, $375
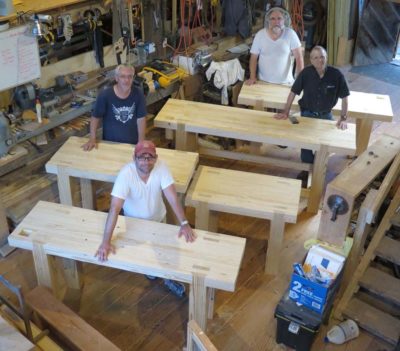
Build A Classic Workbench September 3-7, $950
contact me here if you are interested in any of these workshops.
Recently I was noodling around with the gigantazoid wood vise screw that was part of the FORP package from several year ago. Since I only got my bench up on its feet in recent months, I’d had no reason to give the leg vise much thought. These screws were custom made by Lake Erie Toolworks specifically for the FORP benches, and are a thing of fearsome beauty and function.
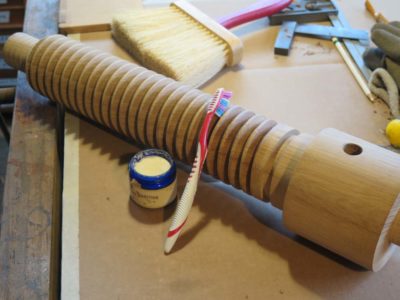
To make sure it would operate easily I ordered some unscented mutton tallow and worked into both sets of threads with a toothbrush, and sure enough it works like a charm.
Previously I had been using wax on threads like these, sometimes even a wax/petroleum jelly blend, but find the tallow to work much better. Since we live in sheep country I’ll have to see if any of the locals make it.
With Roubo Joinery Bowsaw Prototype tested in battle and found wanting in the lightness department, it was time to think about ways to reduce the overall weight and bring that down to a point I was comfortable with. As it was now, it was a massive beast that was simply too heavy to use as a one-handed saw for cutting tenons or dovetails.
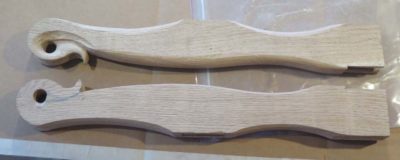
I rounded all the edges substantially, but that was not enough weight reduction.


I sculpted the tops of the arms, it was pretty but insufficient.

I transformed the stout cross-bar into a diamond cross-section with tapered chamfers providing the transitions. Nyet.
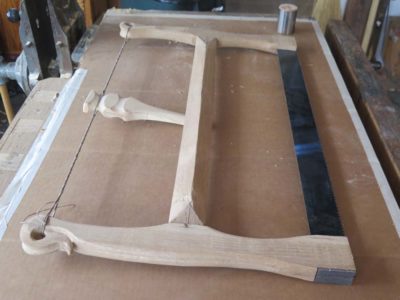
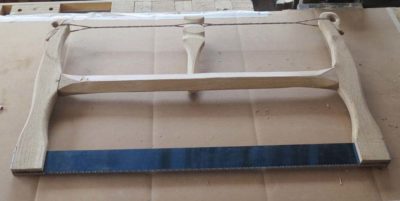
It wasn’t just a smidge heavy, it was a couple pounds too heavy. Achieving any more mass reductions would have been quicker with a new starting point since I had obviously selected the wrong one here. Since Bad Axe had sent me some new plates to my specs, that’s where I went next. We’ll see if 3/4″ white oak stock is up to the task of restraining these plates, or if I need to address this frame again with acres of carving and other diminutions. At the very least, with 3/4″ stock I would start with a 40% reduction in weight, so the idea was promising.
Stay tuned.
When asked how many clamps they have, any woodworker worth their salt usually has two connected answers “1) A lot, and 2) not enough.” Given the expense of manufactured clamps in our age, consider the relative cost 250 years ago when everything was made by hand. I would imagine forging a single functioning iron clamp was the better part of a day’s work.
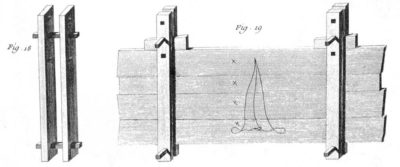
In part for this reason, Roubo and his contemporaries devised inexpensive, high-performance and practical solutions to the problems of clamping, especially for clamping up panels. I too have followed their lead, and despite having many bar and pipe clamps I find these to be a terrific addition to the workshop. The engravings are petty self explanatory, straightforward enough that I could crank them out in minutes.
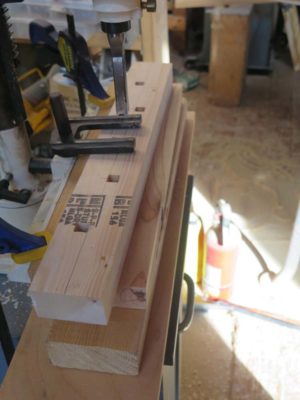
My base stock for these is scrap 2×4, with clear grain if possible. Laying out a series of square holes, off-set from the center line (almost certainly overkill, but then I tend toward overbuilding everything), I punched the 1/2″ square holes through the 2×4 with my mortiser.
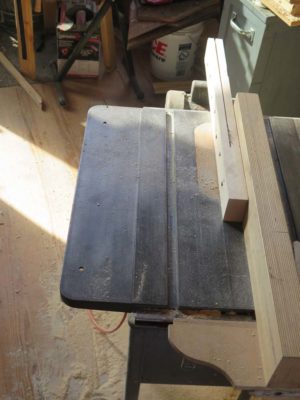
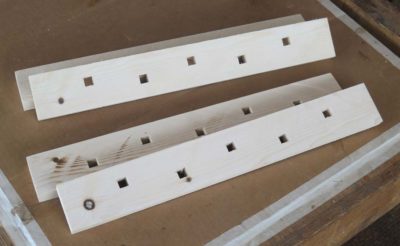
That done I just re-saw the 2×4 on the table saw, yielding two identical halves of one clamp bar set.
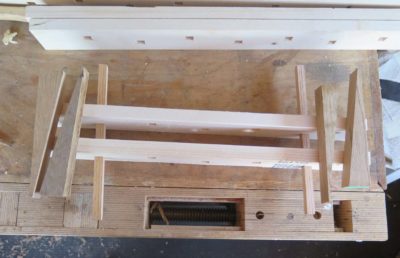
Add a group of squared pins to connect the clamp bars and some wedges to tighten on the panel being glued and you are pretty much done. NB: Before using for actual gluing all the surfaces of all the components should be coated with wax or grease to prevent sticking once the glue dries.
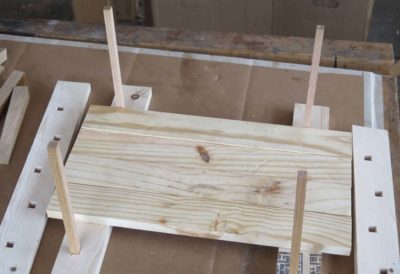
In use I just place half of the bar pair on the bench at each end of the panel assembly and insert the cross pins into the square holes, followed by placing the gluing subjects in place.
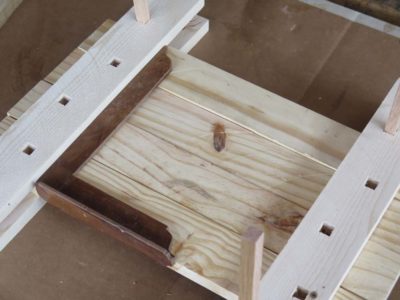
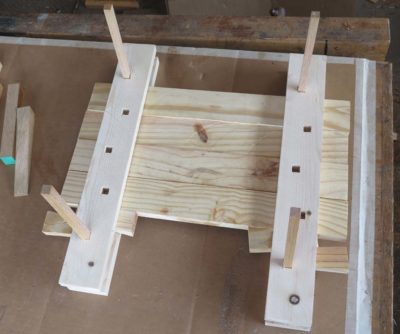
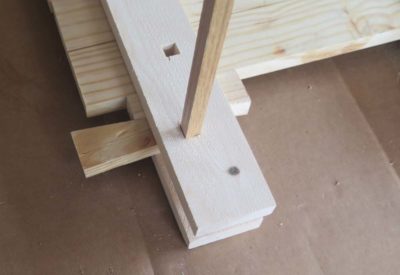
The other halves of the clamping bars go on top and once everything is squared the wedges are driven in to squeeze things together.
Finito Mussolini.
With the stirrup system finalized for anchoring the saw plate it was time to move on to the frame. Armed with some extra-dense 5/4 white oak I dove in. I wanted to make sure the frame was both simple in construction and beefy enough to withstand the stresses of tensioning such a robust plate.

The overall structure couldn’t be much simpler — two vertical arms connected by a crossbar that was inserted as an unpinned mortise-and-tenon into the arms. Once I had the dimensions and proportions where I wanted them I used my mortiser to cut the pockets in the arms and sawed the tenons on the crossbar.


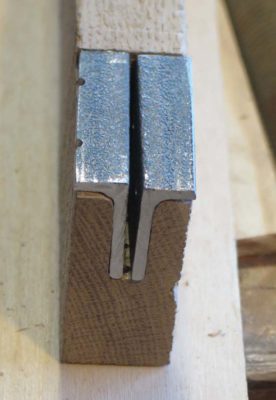
Then I moved on to the housings for the stirrups. It was a simple matter of laying them out against the base of the arm, removing the material so that the stirrup fit neatly, then sawing a slot for the plate to go through.
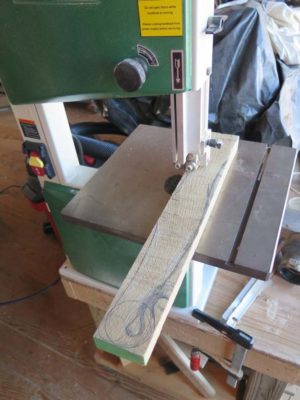
With the arms and crossbar cut to length and fitted together, and the stirrup housing made, I sawed the curved shape of the arms on the bandsaw.
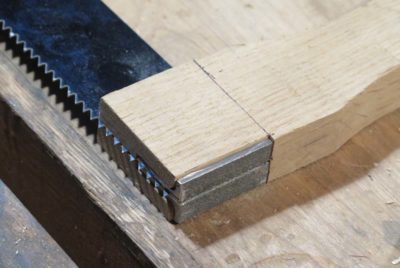
I assembled everything together just to make sure the parts all worked together before moving on. I really was pleased with the manner in which it all fit together. It seemed a little beefy, but I had not put it to work yet. Besides, it is considerably easier to make elements smaller ex poste than to make them larger. It made me recall on of my Dad’s favorite quips in the shop, “I just don’t understand this. I’ve cut it twice and it is still too short.”
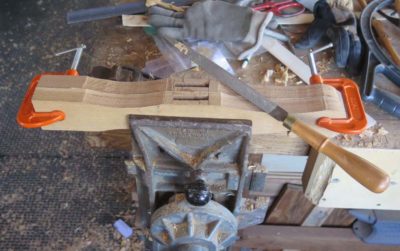
With rasps and spokeshaves I shaped the arms to be more congenial to being hand held. Once it was far enough along to give it a test drive I assembled it completely and strung the top with multiple strands of linen cord for tensioning, found scrap stick (a practice spindle from the writing desk) to act as the windlass paddle, and it was ready for the race track. I’d added a small vanity flourish at the top of the arm so I just knew it would saw like a banshee. I cranked up the tension until the plate twanged like one of Stevie Ray’s guitar strings (before he broke it) and lit into a scrap of wood.
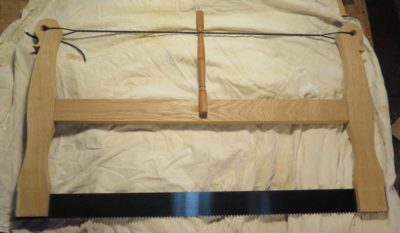
And it did saw like a banshee. Made from concrete. It was so heavy I actually grunted when picking it up to use the first time. Somehow I had to hog off a gob of mass or otherwise it was a two-handed-only tool, and I wanted something that could be used with one hand.

Before I got too deep into making the “bow” of the bowsaw I realized I needed to work out the details of how exactly the saw plate was to be anchored to the bow frame. Given the robustness of the saw plate from Bad Axe and the illustrations and commentary from Roubo I knew this was not a casual thing. The amount of tension required to make the saw plate perform well was considerable given the dimensions of the plate, so the anchors for the plate had to be able to withstand the force requisite for making it function well. And, given the likelihood that any user of such a saw as this might well want to swap out the plate from one utility to another, taking advantage of varying plates that could be available. So, the fitting of the plate to the frame needed to be not only exceedingly stout but also easily reversed or swapped-out.

The clue to the preferred manner of fixing the plate within the bow frame was pretty clearly described by Roubo in his commentary to Plate 12. While the simplest method would be to simply drive a pin through the foot of the bow frame and the end of the plate, there was and is a better way. And he tells us how to do it.
There is still another way to attach the blade in the saw, which is to use stirrups, which are pieces of sheet or flat iron that you fold into the form of a “t”, and that you attach to the two ends [of the blade into the stirrup] with a single nail the same way as above. These are then inserted into grooves in each of the arms, which you take care to fasten tight enough to hold them. This method is very good because the stirrups holding the arms from their back sides make full use of the arms’ strength, without which they might split, and you only use one nail to hold the blade at each end because if there were two it would prevent even blade tension, figures 11 & 12.
I took this information/description and started running with a couple of changes. First, the folding of bar stock into the “T” was not possible with the material I had on hand, although it might be fine with lighter steel flat stock like 1/32″ or 1/16″. I didn’t have that (nor did the local fabrication shop) and I was too impatient to wait for some to be shipped to me. Second, the plates supplied by Bad Axe have two bolt holes, which I believe are necessary to house fittings strong enough to tension the plate. Still, I really liked the concept of a “T” shaped stirrup to affix the plate in the frame.

So instead of folding thin flat stock for this purpose (although I am certainly likely to try it in the future with either thin soft steel flat stock or brass, although I like the solution I came up with for other reasons) I sawed some 1/8″ x 1″ x 1″ angle stock I had on hand. I cut the length such that the body of the plate would be fully housed but the teeth were exposed and unfettered.


Then I cut off most of one side of the angle stock to reduce the arm of the stock from 1″ to 1/2″ so that when two pieces of the cut angle stock were placed together the configuration would be a “T”. I used the finished plate itself to provide the layout holes into the stirrup “T” plates. One half of each pair of the plates was drilled and tapped, the other was drilled and countersunk to fit machine bolts I had in my hardware stash.

Placing the two halves of the “T” stirrup over the pair of bolt holes in the plates, and screwing in the machine bolts, the task of mounting the plate to a stirrup was finished and it was time to move on to the bow frame (this picture is a bit out of sequence and was intended for another purpose but you get the idea).
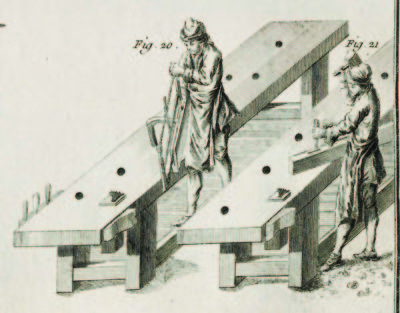
One of the many peculiarities of mid-18th Century Parisian workshops and their accouterments as documented by Roubo revolves around the absence of backsaws and panel saws in the tool kit. These were bow saw and frame saw folks, and they used bow saws for any number of functions at the bench including stock prep and dimensioning to delicate dovetail work. As for the panel saw, it was only mentioned in one brief sentence and then only in the context of building carpentry. For whatever reason the French furniture and joinery shops were committed to open frame saws, whether bow saws or sash saws, as their workhorse tools.

Subsequent to my visit to Bad Axe Tools in November and the conversation it sparked about saws in mid-18th Century Parisian workshops, both Mark Harrell and I were noodling the concept of interpreting those saws for contemporary craftsmen. I think we arrived at the same point more-or-less simultaneously, and I suggested the need for exploring bow saw prototypes based on the saw plate for the Bad Axe one-man Roubo-esque frame saws. Mark bit and expressed immediate support. By “support” I mean that he would provide me with some saw plates for me to try out the concept, and would fabricate custom specified plates for me to experiment with.

***A note about such a collaboration: I gladly share my knowledge and curiosities with anyone interested in pursuing the same paths I am on. I’ve made available all the observations, opinions, and documentation I have, including detailed photographs of my own vintage saws, to anyone who asked. In that regard I am not showing any preference for Bad Axe, they were simply the folks who asked me to engage in this exploration.***

Since I already had a Bad Axe frame saw and thus the dimensions of their standard saw plate I was able to begin fabricating a bow saw as close to Roubo’s as possible, or at least as close as I could guess. I grabbed the saw plate, some of the ultra dense 5/4 white oak from my stash (left over from making the Studley bench top replica for the exhibit), and got to work.
The results were instructive.


Recent Comments