
The new website for Handworks 2020 is now live and kicking. With virtually every maker of fine woodworking tools present as vendors and three adjacent venues and thousands of fellow comrades-in-tools it will be a memorable experience.

Once again Roy Underhill will be the Saturday morning speaker, always a great crowd pleaser.

The Barn On White Run (that’s me!) will be present with loads of our polissoirs, waxes, polishes, and other items for your viewing and purchasing pleasure, and I will be giving demonstrations once an hour on using all of these items.
Plus my friend John will be joining me with the latest developments in ripple molding cutters.
As the days grow closer I’ll be blogging frequently bout the event and our participation and experiences there.
Make your plans to join us.
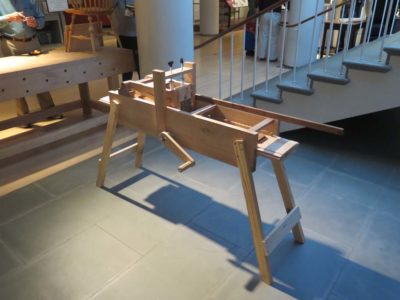
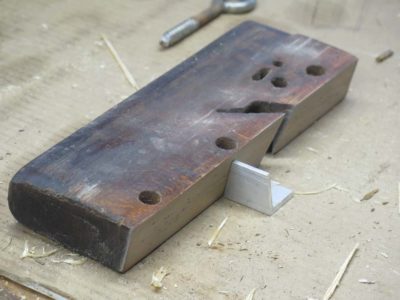
One of the accessories I want to make to accompany my new Japanese tool box is a traditional Japanese planning board, complete with sliding dovetailed “feet.” Since the only dovetail plan I owned was really too small for such a task a new one needed to be made from a derelict 1-inch rabbet plane body.
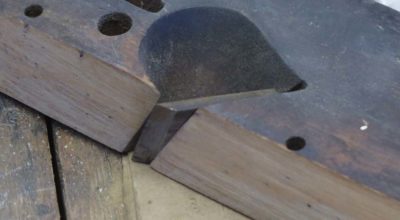
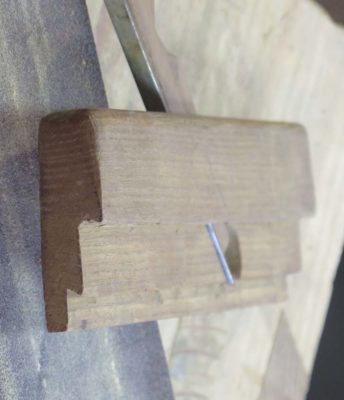
Once the new sole angle was established to match my dovetail gauge it was time to re-make an old iron to serve the intended purpose. Placing the old iron in the body showed how much steel needed to be removed to get the cutting iron and the sole angle to match each other.

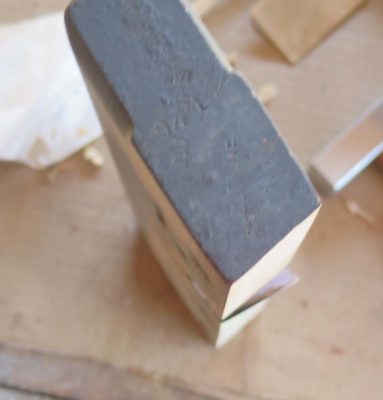
I highlighted the iron with marker and shooting a line from the new sole surface against the un-beveled side of the iron with a carbide scribe I now knew how much steel to grind away.
I ground the new line with no bevel to establish that line perfectly.

Once that was done I ground away most of the bevel on the power grinder and then finished it off by hand on my granite block and 60 grit abrasive belt.
I moved on to 120 grit and set the iron in place to assess the fit.

Perfectamundo.
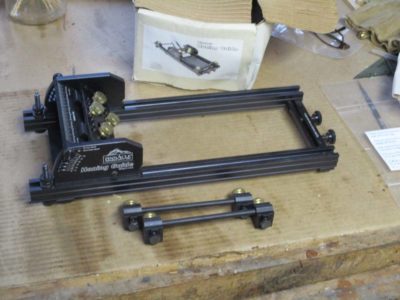
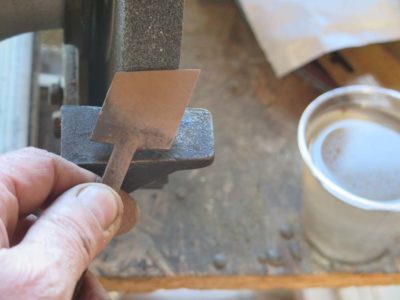
Several months ago I was at a tool flea market and picked up this sharpening jig just because I thought it was neat and the price was right. I use jigs to establish the blade geometry but finish them up freehand, so this might come in handy when rehabbing a damaged edge. Ironically, I made a wood version of this concept and found it useful, so I look forward to giving this unit a tryout.
Stay tuned.
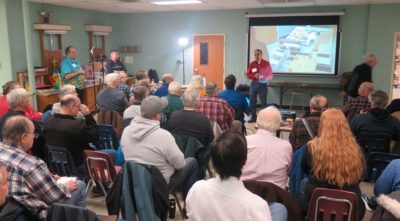
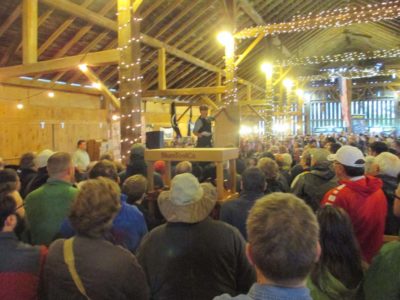
A week ago Saturday I had the great good peasure to spend the day with two DC area woodworking groups, the Manassas Woodworkers and the Washington Woodworking Guild, as they co-hosted a day of Japanese toolification with my friend Wilbur Pan of Giant Cypress fame. The event was at the Manassas group’s space which turned out to be almost perfect for it. I did not take an exact head count but the room was crowded with an estimated 75-100 folks, some of whom came from surrounding areas as distant as Fredericksburg or even the Virginia frontier. Since I have been in that circle of woodworkers for a long time I knew many of the folks in attendance.

Beginning at noon and winding up at supper time, Wilbur walked the audience through the many facets of using Japanese tools in his woodworking, taking pains to refer to those areas where Japanese tools are different from European traditions and where they are similar and complimentary.


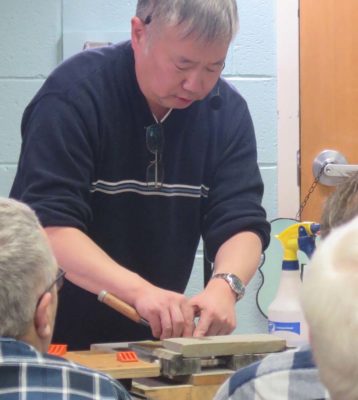
Systematically he reviewed the major tool categories — planes, saws, and chisels — including a full menu of reference information ranging from metallurgy and manufacturing technology to edge geometry to ergonomics and kinesthesiology. My impression was that this was unfamiliar to many in the audience, but there is no way anyone could depart at the end of the day without a deeper understanding of woodworking in general and Japanese woodworking in particular.
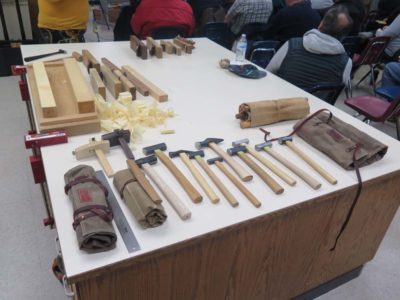
In addition to Wilbur’s tools for the demonstrations, WWG member JayC brought his sizable inventory of tools for show and use. This was one of three or four tables Jay had set up for his tool collection. As we were cleaning up and clearing out afterwards I noticed Jay giving instruction to some of the attendees who wanted to try things out.
I finally got back to my daughter’s home around 9.30, just in time to Skype with other daughter and SIL. It was a darned near perfect day; breakfast with a friend who is a political mechanic, strategerizing about disrupting the malevolent Virginia political establishment, woodworking toolism with friends old and new all day, a delightful dinner with same, and ending with Mrs. Barn and me chatting with the ones we love most dearly.
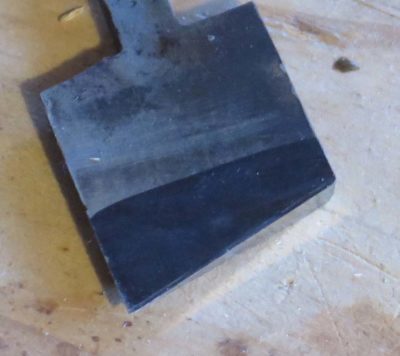
One of the projects soon to be underway in the studio is to make one (or three?) Japanese planning boards complete with sliding dovetail legs and perhaps even a dovetailed planing stop. But first I need a dovetail plane. I had another derelict 1″ dado plane up on the shelf so the raw material was already in hand. This poor thing had the snot beat out of it in ages past, so it was $3 at the PATINA tool event two years ago. If you are anywhere close to northern Maryland on March 14, you should go. The deals are simply amazing.
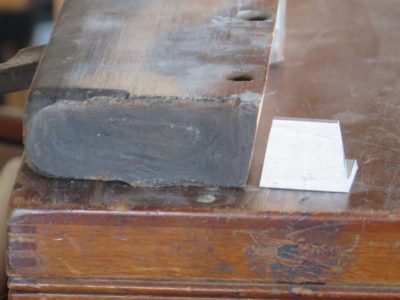
The first step was to decide on the dovetail angle on the sole and cut it on the table saw. It was sooper dooper easy, I just got out my zero-time-zero-cost home made dovetail template from the drawer and set the saw blade to that angle, positioned the fence, and ran it through.
Done.
Follow along on the remaining steps of the journey in the coming posts.
When reviewing the voids in the tool set for the Japanese tool box I decided to make as many of the missing tools as possible. Sure, I can find them easily in the marketplace and for the most part afford them, but if I followed that path I would miss the joy of making the tools. Sometimes I revel more in tool making than woodworking.
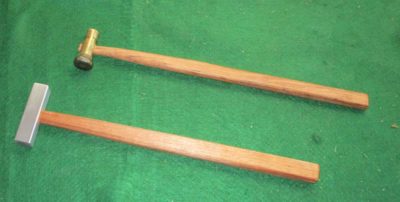
The first and easiest one to make was a small-ish joinery hammer. I’d guess it took about four or five hours over three days to make, and the materials included a 3/4″ x 3/4″ piece of mild steel bar stock from the scrap drawer, a piece of padauk or similar tropical hardwood from the box of wood scraps, and a couple pieces of ivory from my ivory pile. The steel for this hammer came from the larger bar.

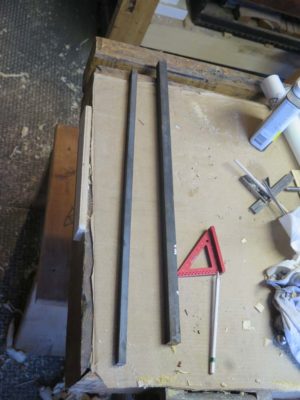
I started by cutting a three-inch piece of the steel bar stock from the larger piece of scrap. As is my preference for a lot of similar cutting activities I use a German jeweler’s saw with a #4 blade. While I was at it I sawed the smaller bar for a plane-setting hammer I will make soon.

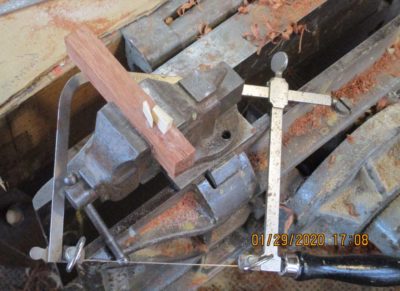
After the steel bar was cut I dressed all four sides on my granite block with 60 grit sanding belt, I drilled out the two holes that established the eye hole for the handle, then filed them into a nice oval. I originally intended to make the eye hole with the cross feed vise on my drill press, but the vise was so cheezy it could not hold anything steady and I wound up just drilling two holes instead and filing out the oval.
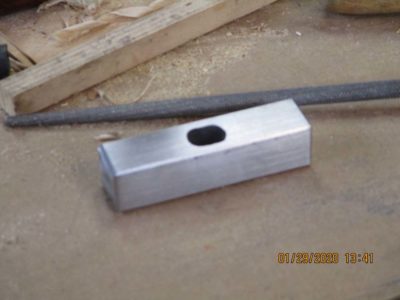
Once I had the eye hole the way I wanted I dressed the chamfers on all the corners, mimicking the character of a Japanese hammer, albeit with slightly “off” proportions since this was perfectly square in cross section. True Japanese hammers are slightly taller than they are wide in cross section. In addition my chamfers are a bit light, I will make them heavier on the next one.
Looking through my pile of wood scraps I picked out a piece similar to what I used for a plane adjusting hammer some years ago, it actually might have been from the same piece. I like the handles on such hammers to be long and slender.
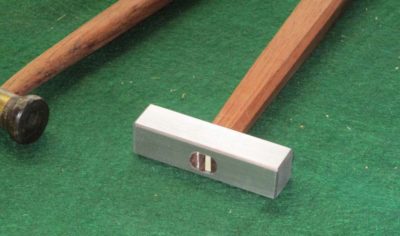
With the handle made and fitted to the hammer head I got out some ivory and cut a pair of wedges, which I drove into the pre-cut kerfs in the end of the handle. A little smoothing out and the tool was done.

The only other thing I might do to this little beauty would be to blue the sides to an almost-black appearance, and do a little engraving through the bluing. That would look nice, I think. As is it’s a very nice addition to the Japanese tool box and feels great in my hand.
While working on the Maryland house I have found one tool that is now integral to my everyday activities in or out of the shop, and two tools re-purposed to even greater utiity for the execution of tasks.

The first one is this superb little Japanese-style saw from Lowes, I think was about $14. I bought it as a semi-disposable tool for cutting cedar shingles as house siding, and before long I was keeping it in my tool belt or my ancient Skillers tool vest all the time, for every project. I went back to Lowes and bought three more so that I have one at my daughters house, one in the cabin in the mountains, one in the studio in the barn, and one more in reserve in the Japanese toolbox.

Then while I was prepping to do a little spackling to touch up the wallboard from when I had to removed and reinstall the cypress trim in the living room, I simply could not find my sheetrocking tools. Exasperated I looked around to see what I could use to “make do” on the shelves of the basement. I grabbed a couple of tools and much to my surprise and delight they worked even better than anything else I have ever used for the task.

First I applied the joint compound with a square-end masonry trowel that I used for a small patching job at some point long ago. It was easier for me to control than a typical taping knife. Then to smooth out the freshly applied spackling compound I used a plastic bondo spreader. It also worked better than anything I have ever tried before. Brilliant!
Now all I have to do is wipe the areas with a damp sponge and they will be ready for paint.
Sometimes we just gotta be Keith Jarrett (more about that later).
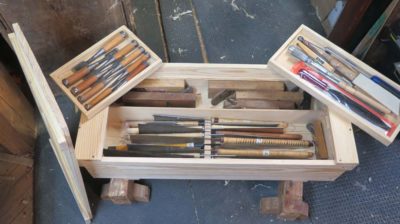
Of the inventory in the finished Japanese tool box there are several instances of absence. Over the next several days/weeks/months/years I expect to acquire or fabricate the following for inclusion:
mortise gauge(s)
panel gauge
straight edge/winding sticks
layout square(s)
saw sharpening vise
plane setting hammer
bigger hammer
even bigger hammer
mallet
Many of these additions will be housed on the underside of the lid, the only place they could fit. I will chronicle each of the fabrication projects here along with at least two planing boards.
One of the tools ubiquitous in most work setting is a pair of scissors. Less common in a woodworking shop is a good pair of scissors. Thanks to the evangelism of my pal Mike the upholsterer (thanks Mike!) I am always on the lookout for a good pair of scissors to add to the shop toolkit. He has about 42 bazillion pair of scissors, each in top condition.
When I take note, it is surprising how often I grab for a good pair of vintage scissors to cut out patterns, make shims, or what not.

While at PATINA a couple months ago I was browsing through the tailgating flea market prior to the program and found a sweet, heavyweight pair in extremely good condition ($5 IIRC). Once I got them in the shop and cleaned up they did not even need sharpening or adjusting. The blades are six inches long and the action is smooth.
These scissors cut fabric, paper, cork sheet, leather, and lightweight carboard without breaking a sweat, and commercial veneers almost as easily (I use the veneers for shims, mostly). Best of all is they do not take up much space.
So be on the lookout for similar tools for your shop and toss away the cheap scissors from the dollar store. You will be glad you did.
About the same time I made the hanging wall “cabinet” for my Japanese tools I also made a similar cabinet for my hand saws. It is fair to say that the second iteration of the concept was every bit as successful as the first. I had this “cabinet” tucked into the corner above my Roubo bench. Once again the cabinet door was so large (24″ x 36″) that almost everything (well, mostly the Gerstner full of layout tools) blocked it from opening fully, thus inhibiting the access to the inside contents of a dozen mostly vintage carpenter’s saws. Plus, the combined inside depth was so shallow, ~4 inches, that I had to hang the saws flat inside, several to a peg. That got real old, real fast.
The only part of the set-up that I liked was the holstered fittings for my back saws, which kept them visible and accessible.
So I pulled out all the saws from the interior and abandoned the “cabinet” on the wall.
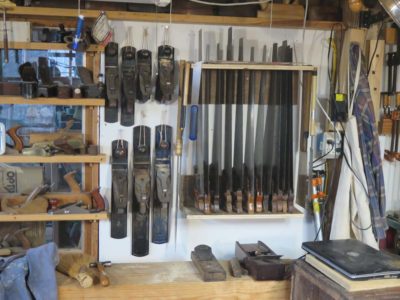
Pulling out some scrap plywood I made two shelves to hold saws, one slotted for the top and one plain shelf for the handles at the bottom. I attached these to the wall where my Japanese tool “cabinet” had resided previously. The fit and location seem perfect.
I use the sides of the top shelf to hang surplus Japanese saws, and that arrangement also works very well. I’m thinking that I will make a swinging panel on the front of the shelves to hang my back saws, but have not committed to that yet. I have a bit more spatial arranging to do in the studio space before I get to that point.

Recent Comments