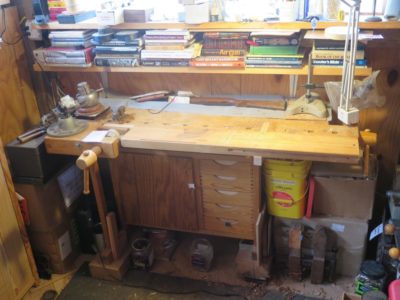
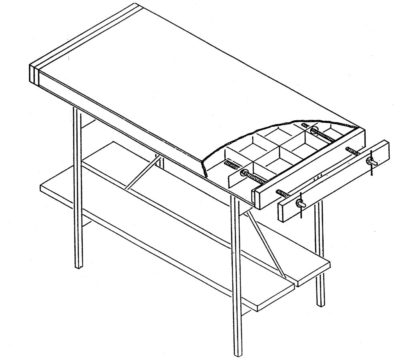
No, I have not forgotten the Ultimate Portable Workbench and will return to it very soon, but last week I spent a day resolving one of my frustrations with the massive oak Roubo bench. Until now I have just had open storge underneath it, and even though I put contents in boxes and milk crates it was not a particularly useful setup. Given my intention to reorient priorities in the shop and gather all my marquetry tools into one place, now was the time to make a change.
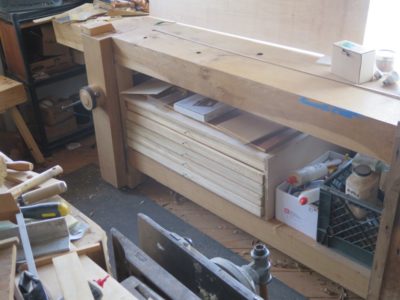
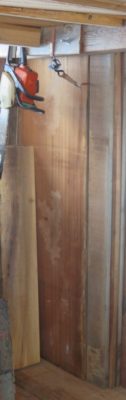
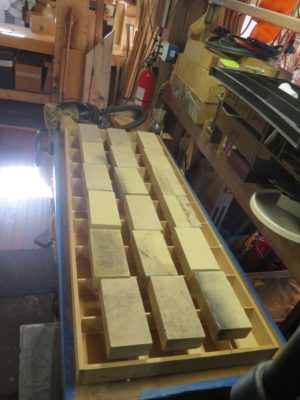
Way back in time I acquired a large number of drawers from surplused (read: thrown away) museum collection storage cabinets and have used them variously as cabinets themselves with a piano hinge, parts trays, etc. In this instance I tossed together a cabinet box into which I could place five 24″ deep x 36″ wide drawers to hold marquetry and parquetry tools and jigs. It was nothing special, just Baltic birch sheet stock and aluminum angle drawer supports.
I am pleased with the new accessory for the bench and shop and await my own decision on drawer pulls to complete the project. Sometimes I am a fussy client.
I’m thinking much of this topic and most of these projects, with one or two exceptions, fall clearly into the “…and well beyond,” territory.
I’ve got plenty of workbenches scattered around the barn (16!), but I cannot seem to stop myself from planning on building even more. It is apparently one of my dysfunctional psychopathologies. Perhaps I was deprived of a workspace/bench when I was a toddler. In short, I may have to start recruiting more family and friends to take some behemoths off my hands.
At this point I have several ideas in the works, some innovative, some self indulgent, and almost none of them “necessary.”
First, I need to finish up my Ultimate Portable Workbench, which I have already been chronicling here.
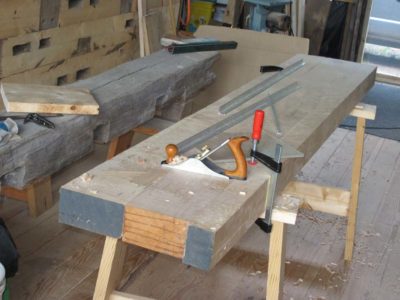
Second, two years ago I built a bench-top planing board from cypress and I would like to replicate that project using a slab of vintage black walnut, which I would resaw and actually build two.
Third, I would dearly love to build a version of Renaissance Woodworker Shannon Rogers’ truly innovative “apartment” workbench, with its joinery tower and detachable planing beam. Simply genius, probably the most inventive workbench design in my lifetime.
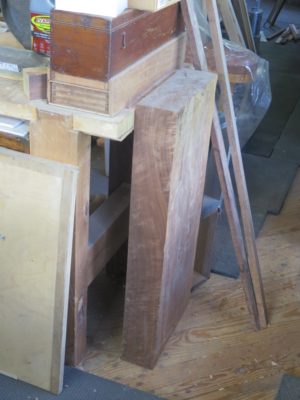
Fourth, I’ve got a massive slab of ancient mahogany from the Cincinnati area lumber yard that Chris Schwarz obtained for me, it is roughly 4″ x 22″ x 7′. To go with this, I have some 6″ x 6″ ancient black walnut for legs. This would yield a truly remarkable Roubo bench, but then I already have a truly remarkable ancient wood Roubo bench in place. Sounds like a pure vanity/self-indulgence project for me. Maybe I should just sell the lumber to someone else who needs/wants a bench even more than I do. If this is you, let me know.
Fifth, I’ve got a slabbed-up hunk of birds-eye maple ready to be turned into a bench, with vintage oak 6″ x 6″ legs. Like the one in the previous paragraph, this would result in a truly eye-popping Roubo bench. But also like the previous one, I do not need it and should find someone else who really does.
Finally, I’ve got a pile of oak 10″ x 15″ timbers airing out in the yard next to the barn, and with a little chainsaw work they could be rendered into usable bench slabs. Maybe I can use them for chainsaw practice.
Oh, and I’ve got a stash of 7″ x 14″ Douglas Fir timbers from a building dismantling from around 1945 or so. They would also make superb bench tops and legs.
My ongoing project to complete “The Ultimate Portable Workbench” takes a back seat to my revisiting a existing workstation in the shop this week.
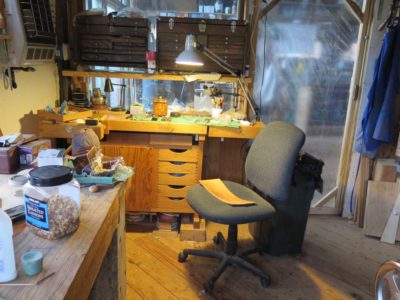
A recent learning experience led me to re-think my salvaged Sjoberg bench that serves as my “fine work” station for almost everything un-woodworking-ish, like engraving, checkering, fine metalwork, etc. During Thanksgiving week my son-in-law and I had the opportunity to attend a workshop on reloading ammunition, which involves a lot of press work. The Sjoberg was simply inadequate for those particular tasks even though I do a lot of other gun work there. But, could it be modified to work for reloading?
I am happy to report that the answer was, “Yes.”
At issue was the shallowness of the workbench top and the difficulty, read: impossibility, of attaching some presses to the edge of said top as required by the processes involved. A simple add-on solved both problems in one swell foop.

I had a scrap of butcher block benchtop material that fit the cutaway configuration of the bench top almost perfectly. All I needed was to create a way to affix it solidly to the existing bench yet make it removable for more routine work.
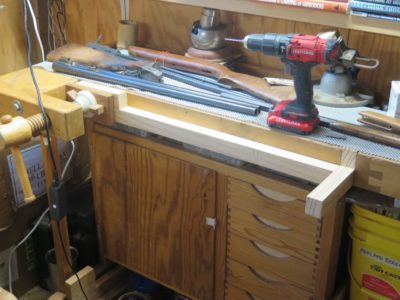
I accomplished this through the addition of a couple simple elements to the underside of the slab so that one end could be captured by the face vise and the other end by the end vise.
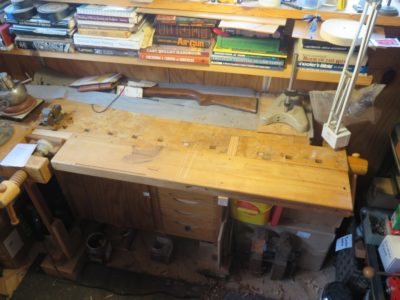
Putting the new appendage in place and tightening the vise screws and viola’, the new feature is darned near perfect for the tasks. It suits me so well I may wind up leaving it in place most of the time.
Installing it and de-installing takes upwards of seven seconds per operation.
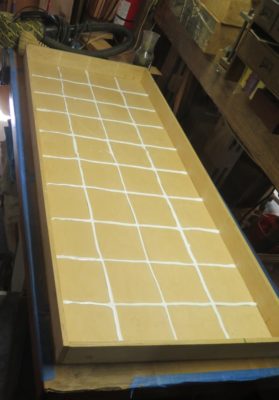
Gluing the internal ribs was no big deal; first I dry-fit all the ribs then marked their locations, so that I would know where to put the bead of glue. I used PVA mostly because I have a lot of it left over from another project and just wanted to use it up.
Once the glue lines were down and the grid re-placed on top of them I simply “clamped” them in place with a couple hundred pounds of bricks. Everything stayed put over night and in the morning all was well.

I moved on to the backing blocks needed for the threaded screw holes and a couple of other features. For the threaded vise holes I just held them in place with spring clamps.


For the backing blocks on the top and bottom faces I uses more of the same ‘brick as clamps” strategy.
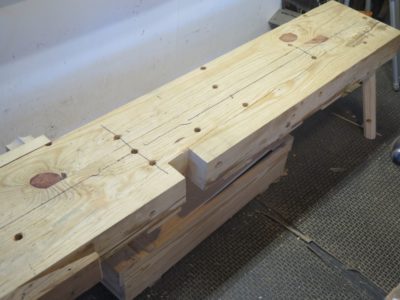
One of the major evolutions of this final version versus the first one was the overall length of the unit, from 48″ to 60″. There was no a priori reason for this change from a functionality perspective, there is precious little conservation work you can do on a 5-foot long bench that you cannot do with a 4-foot long bench. The proof of this is my beloved 4-foot torsion-box-with-Emmert bench that has served my everyday needs for more than thirty years, with a little help from a movable deadman.

In the earliest versions the only way I could fit in 30″ legs was to install them offset. For reasons I can never really articulate, I found this feature offensive.
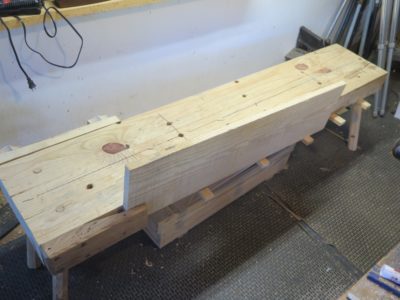
When it comes down to it, the real reason for the extended length is that it allowed me to have folding legs that did not have to overlap when the bench was folded up. Splitting the length distance in half, I can have folding legs of 30″, which when added to the 3-inch bench thickness proved me with a 33″ working height; lower than I prefer but adequate for on-site work even for an extended period. Given that the bench was designed for on-site conservation tasks, much of which would be executed while sitting, this was more than acceptable.

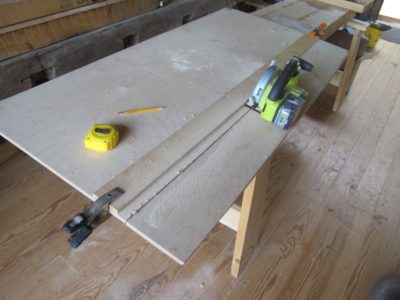
As an incidental benefit, the length also allowed me to make full advantage of a 60″ x 60″ piece of Baltic Birch plywood. I began by cutting the whole piece of 6mm Baltic Birch into two 24″ x 60″ face skins and one piece of 12″ x 60″ to use towards the internal torsion-box grid.

With a perimeter of 12mm Baltic Birch I set to cutting and gluing the pieces in place.

I ripped the 6mm plywood into the necessary ribs on the table saw, then ganged them together to edge plane the whole lot of them to enhance the overall flatness.
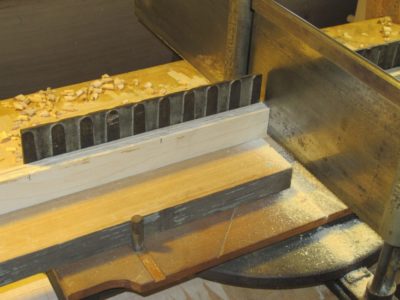
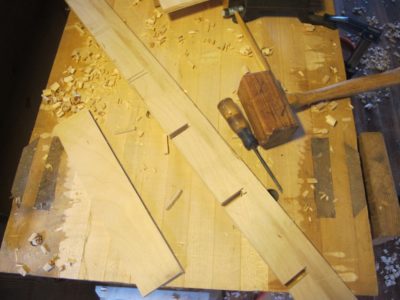
I cut all the ribs to length and notched them for the egg-crate construction.

This is us test-fitting the internal grid on the previous version. Somehow I did not take pictures of this step on the current model.
Over the next several Wednesdays I will be chronicling the construction of a new, 4.0 version of a portable workbench I first designed and built more than twenty years ago. This version began its gestation more than seven years when I reflected on version 3.0 and imparted several additional modifications to improve its utility immensely as I am finishing the project only now.
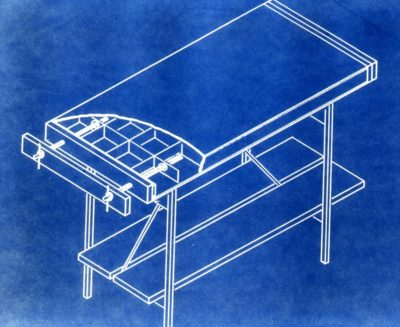
The entire concept rests on the twin features of an ultra-high slab strength and ultra-low slab weight. The only obvious resolution of this seeming paradox was to fashion the slab in the form of a torsion box, a concept I first learned from Ian Kirby. My historical trek is as follows.
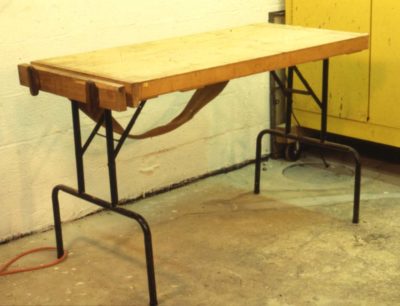
Version 1.0 was really just a proof-of-concept prototype, although it is still in use more than twenty years later, albeit as a table next to the barbecue grill. The 24″ x 48″ top was indeed lightweight and very strong, but that was countermanded by using folding steel legs heavier than the top.
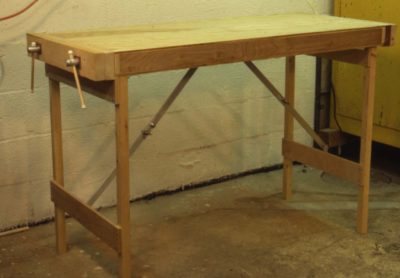
Version 2.0 was a marked improvement in many respects, and is still in use on the fourth floor as a work table. The top dimensions remained at 24″ x 48″.

Version 3.0 was a demo project from a Groopshop eight(?) years ago for/with my friend BillR, who needed a bench to use in a museum gallery, which happened to be identical to the original purpose concept for the bench project. Make a large, strong, lightweight collapsible bench that one man could easily carry into a work environment, set it up and take it down. One of the major changes to this version was to make the top 24″ x 60″ which increased the overall weight around 4 pounds but added some important improvements to the undercarriage layout and construction.
Version 4.0 builds on the earlier improvement and takes the bench many steps farther.
Stay tuned.
With the Romastonian Low Bench up and working a little bit, mostly because I have just been too busy with other activities lately to give it a solid and lengthy workout, I identified one last feature to incorporate into/onto the bench.
While planing the edge of a board wedged into the crochet I was setting the board’s weight on my Japanese tool box that resides under the bench. It worked well enough. Like most of you I employ a standing dead-man when using my other benches but that did not seem to work so well here and if I move the tool box elsewhere I need a different utility.

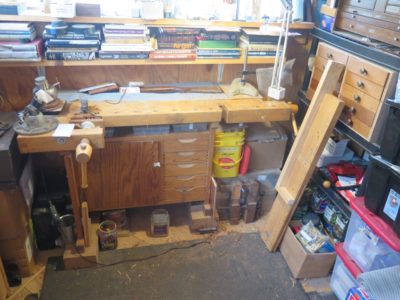
Instead I envisioned some rotating tabs tucked under the edge of the bench, out of the way whenever I am not edge planing, perfectly suitable when turned out as needed. As you can see clearly this was exquisitely elegant craftsmanship. A scrap of 1×2 chopped into five pieces, then affixed to the underside of the bench edge with decking screws and fender washers. I am certain that if Roubo had owned a battery drill, decking screws, and fender washers this is the exact way he would have solved this problem.

While upstanding for “normal” use the new utility is imperceptible. When readied for combat the knee busters come out.
And in the heat of battle they do their task perfectly. I’m thinking I might decide to scoot the crochet a few inches in from the end to better fit my own posture when working while seated.
About the only thing left for the bench is to wait through a winter in the heated space (with its attendant reduction in RH) I’ll true the top then tooth it in keeping with my preferences. I am very much pleased with the bench and expect it to become a workhorse in the shop.
Is it my final workbench project? Don’t be silly. I’ve got three more already in various stages of development and fabrication, each of them profoundly different than the others. Besides, since I just learned I am going to be a grandpa I’ve gotta be ready with whatever bench Barngrandbaby #1 would like. Working on that first tool kit already…
Yes, I know it is Friday. Travel disruptions… So sue me.
With the end point approaching on the design and construction of my Romastonian Low Bench (Roman low bench of two millennia ago + Estonian benches still in use) there are a last few elements to integrate and affix to the bench. This week it’s the crochet to engage a workpiece for edge planing.

Since I wanted to make sure I did not crack my kneecap on the crochet more than necessary, it being at precisely that height and also immediately adjacent to the door of the shop, I used a piece of 2-inch chestnut from the scrap pile, aligned to be parallel to the bench slab rather than projecting at an angle that would make it even more weapon-ish. I cut the inside taper to allow for workpieces up to 1-1/2″ thickness (it is highly unlikely that I would ever work thicker stock on this bench).
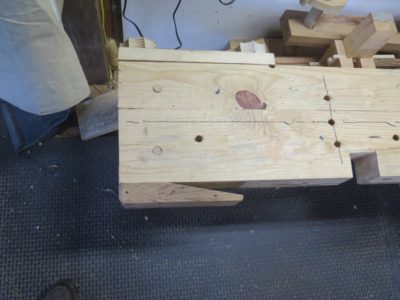
Using four of the 12×3″ old-style flathead wood screws from Blacksmith Bolt I put it in place and stood back to admire my handiwork. As you can see the crochet is on the same end as the twin-screw vise (at the moment; I have the twin screw threaded sockets running the length of the slab edge so the vise can be laced anywhere along that side) and fits neatly behind my knee crook when I am seated.
I would say “I can’t wait to us this bench” but as is evident at the edge of this image, I am already piling it up with the stock for my big project for this coming winter.
Two more features and it will be done.
I have not made any more progress on the Romastonian Low Bench since the last posting on the subject, so I thought I would give you a sneak peek on the next workbench project. This bench will be the most excellent nearly full-sized portable workbench 2.0, a newer and much improved version of workbench #2 from 1990.

The beauty of this new version is that it remains fully portable, roughly 50 pounds and fully collapsible, yet has an astonishingly high degree of functionality.
***************************************************************************
I am hoping that the pace of activities slows down here in Shangri-la, but lately we have had a lot of travel across the mountains for medical appointments in the Valley. Nothing particularly earth shattering, but every trip to the doctor is an all-day affair.
I am now in the second week of physical therapy on my knee, the joint remaining pain-free and according to the PTs, “Way ahead of schedule.” I would gladly take the credit but I had nothing to do with it. One morning I went to sleep with a hurting knee joint, and two hours later I woke up pain free. At this point the agenda for my sessions and ongoing daily exercises is to 1) strengthen the much weakened musculature throughout my left leg, and 2) get that hamstring stretched and supple. Due to my limping over the past couple of years that muscle has weakened and shrunk, and lengthening it is an unpleasant undertaking. The only pain I have now is from that process. Interestingly I can now sense the gentle ache from arthritis in the knee; before the surgical housekeeping that sensation was being masked by the sharper pain from the torn cartilage.
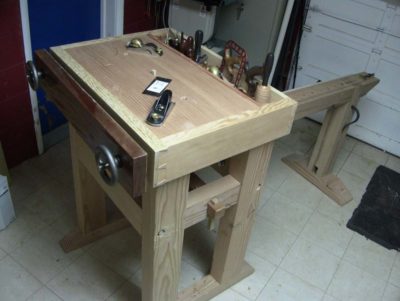
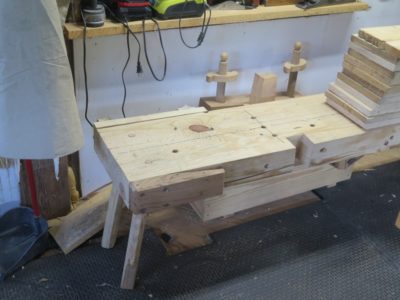
With the detachable post vise finished I moved over to the opposite edge of the bench slab and installed a twin screw vise.

Unlike previous versions of the bench outfitting I’ve seen, I decided to cheat a little and use Roubo’s method of making it rather than the Roman version, as demonstrated in his veneer sawing bench from Plate 278 from L’art du Menuisier.
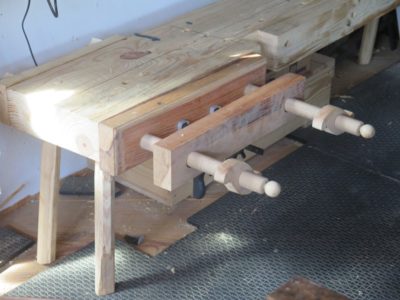
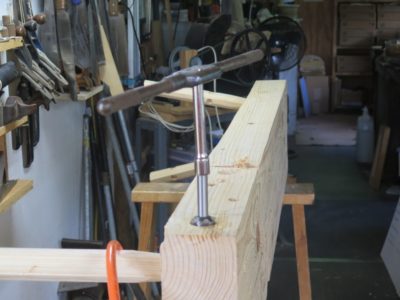
The projecting screws on the Roman version looked like a cracked kneecap waiting to happen. The true Roman version would have looked a bit like this mock-up, featuring a gift vise from my pal Derek Olson. Thanks a ton Derek. I use the vise/press a fair bit in the shop for veneer work, but as a feature of a low bench? No thanks. I’ve limped enough as it is (actually I am now walking without any limp for the first time since forever).
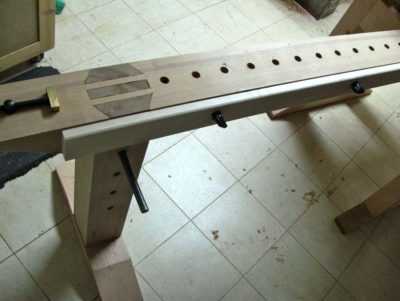
Instead, I drilled a horizontal 1-3/8″ hole into the edge of the slab, then tapped it with my Beale threading tap. I used a Forstner bit with an extension to get the depth of hole I wanted, about seven inches.
The tap was likewise too short for the hole so I augmented my tap handle with an extender from my 1/2″ ratchet set, which fit the end of the tap perfectly.

As the need arises I will drill and tap holes all the way down the edge of the bench so that I can put the twin-screw vise wherever I need it. The beauty of a low bench is that it is omnidirectional in use. If the vise is on the wrong side I just stand up, rotate my kiester, re-straddle the bench and sit back down to work.


Recent Comments