Poking around the interweb often has many surprises, and sometimes they are beneficial.
I’m working on my next article for PopWood on the topic of parquetry jigs (which almost certainly turn into a book; hmmm, I need to have a chat with Chris Schwarz about that) and found this video about the end product in the hands of a genius. I cannot help but reflect that Jean-Francois Oeben was succeeded in his shop and his bed by Jean-Henri Riesener, who beat out fellow Atelier Oeben journeyman Jean-Francois Leleu to marry the widow Madame Oeben and became the shop master and one of the most famous furniture makers of all time. For several years I’ve been noodling a mystery novel about Riesener and the intersection of historic French furniture making and a modern Skull-and-Bones-ish group, and how Western Civilization is at risk and needs to be saved by a furniture conservator, and then the bodies start piling up…
I was delighted to get a “You’ve got a package” notice in my PO box today, and my delight was amplified with the realization that the package was Volume 2 of Joshua Klein’s Mortise & Tenon magazine. I can’t wait to get plowing through it.
If you did not already order your copy of M&T make sure you get on board.
This really is the Golden Age of tools and toolmaking, furniture craftsmanship and scholarship, and the community of artisans.
Last year I was contacted by a client who asked me to reproduce a c.1820 mahogany desk, entirely (or at least as much as was practicable) using the craft technology of the time period, and for the past several months I’ve been working on it. I will blog in greater depth about the project, but recently I have begun to turn several spindles integral to the piece.
Since I did not have access to the original I used photogrammetry to ascertain the dimensions. While I am told that programs such as SketchUp have this utility, I do not have enough interest in it to learn it. Instead I use my Old Faithful program, CorelDraw 9. I’ve been using CorelDraw since version 2 and it serves my needs just fine.
Importing an image into CorelDraw and then resizing it to fit some “known” dimensions available on-line I derived the patterns for the project, including the templates for the spindles. With the dimensions and profile established I made this story board to keep a the lathe, and included the two main caliper measurements so I could easily and quickly judge the progress and end point. Using it I fired up the lathe, to judge my ability to get back to work (the hand and wrist are still pretty stiff) and also to get a sense of the wood I was using and the fit of the turning chisels I had on-hand. (I know you will be SHOCKED to learn I decided to purchase four more scrapers and purchase tool steel to make another half dozen if necessary). Since this was a practice exercise I was simply trying some things out, I know it does not mimic the original exactly but I did learn what I needed to know to proceed.
The mahogany turns like a dream; it is very old swietenia I obtained specifically for this project, I think it wa milled around 1900 or so. Once finished with the chisels I touched the surface lightly with sandpaper, then went at it with a wax-impregnated polissoir. I was pleased with the result, but not the picture. A new camera is in the works.
I noticed this morning that yesterday’s post was my 600th over the last 3-1/2 years. Who knew I had so much to say, about anything? I guess folks who correspond with me on a variety of topics including history, technology, politics, economics, faith, art, etc., might not be so surprised.
In response to some comment about why I liked to write thriller fiction as well (none published but the exercise is darned good catharsis), Mrs. Barn quipped, “That’s because you get to put words in everyone’s mouth!”
With performance functionality assured — I’d flattened the sole, made sure all the parts fit together and worked well, and brought the plane iron to sharpness — it was time to turn my attention to making the infill plane pretty.
I disassembled the plane again and removed the infills to clean and apply a first coat of varnish. Since the surface was a little friable and I did not want to grind away the wood to get down to uniformly solid wood for fear it would change the character of the infills I chose instead to coat the cleaned surface with a diluted application of West System epoxy, thinned about 25% with acetone to get the best penetration.
While that was happening I was cleaning the metal shell with fine sandpaper and 4F pumice.
Reflecting my personal aesthetic preference my plan was to use gun bluing in several applications to turn out as black as possible.
As I was doing an in-process reassembly I made a fateful decision that changed the course of the project irretrievably: I gave it away. The problem was morphological, as my hand was simply too large to fit into the “D” tote with any degree of comfort, and I simply did not like the feel of getting only my pinkie and ring finger comfortably inside the opening. Instead I packed it up and shipped it off to my brother-in-tools MikeM whose hands are, unlike my meaty Germano-Welsh mutt peasant mitts, are sinuous Mediterranean limbs that fit the opening more perfectly.
Mike took the project over the finish line and it is now both a showpiece and his introduction to the incurable fascination with infill planes.
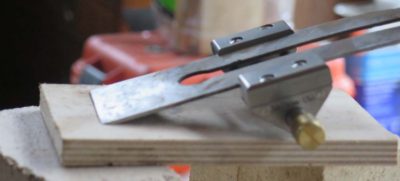
With the sole flattened and all the moving parts verified as functional, I quickly brought the iron up to snuff. The “cutting edge” when I got it bore an eerie resemblance to the smile of a pre-adolescent who was missing half of their baby teeth.
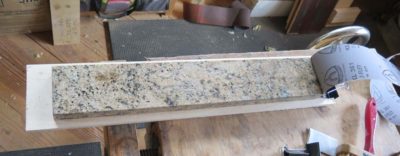
My tools for whipping the bevel into shape were the Lie-Nielsen honing guide, an angle jig for the honing guide with several angles pre-set so I could get the rig ready to go in about five seconds, and my 50-cent granite lapping plate made from a piece of salvage counter backsplash.
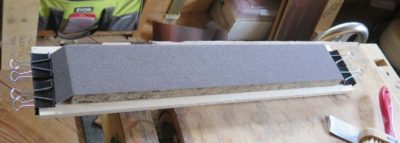
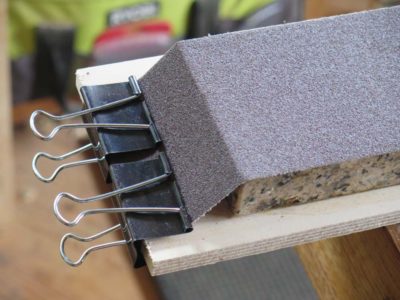
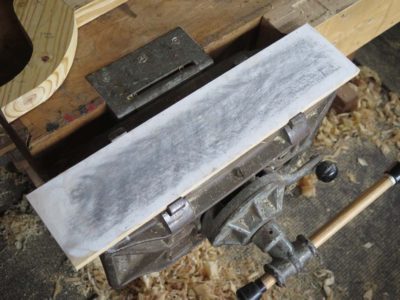
For a long time I used the slab freestanding, but recently I glued it down to a piece of plywood to allow for better attaching of the 60-grit sanding belt I use to really get things going. In this case it took a dozen strokes or so to remove the gap-toothed effect and establish a new bevel.
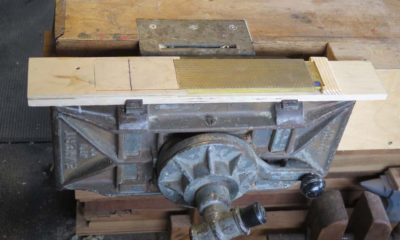
I moved the honing guide to my jig for holding my diamond stones and took a half dozen strokes on each of the 220-grit and 1000-grit surfaces. I removed the iron from the honing jig and took a dozen strokes free-hand on my 8000-grit water stone, a half dozen free-hand pull strokes on the wood polishing plate charged with 0.05 micropolish powder and was ready to reassemble the plane.
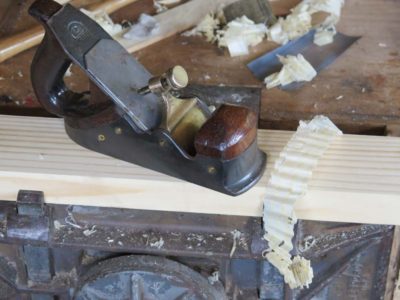
The results were immediate and satisfying, and with the functionality assured I marched forward with the “purdyin’ up” of the tool, a critical component since it is a proven fact that beautiful tools work better than uglier tools. I read that somewhere on the interweb, so it must be true.
In heading down the road of restoring the three infill planes I got at the MJD auction last in 2015, in fact whenever I restore almost any tool, my first step is to determine whether or not the tool can be made to work excellently, rather than just looking purdy. If the former can be ascertained positively I will likely embark on the latter. If not, not.
The first thing I did was take inventory of the components by disassembling the plane completely (third from left) and making sure all the parts worked ell, or, could be made to work well without a boatload of headaches. They did, so it ws time to get this thing tuned and singing.
In this case I was ready to bring a heavy hand to the task since I spent less than a pair of sawbucks for the tool. I first disassembled the tool to make sure all the parts were there, and they worked as the should. They were and they did.
The first stop was the grinding plate, my 50-cent slab of granite counter-top splash board outfitted with a 60-grit sanding belt, to flatten the sole. Which worked out just fine. All I wanted was uniformity of the abrasion pattern which was accomplished easily (this picture was from a later stage of the project).
My friend DaveS at Fresh Air Finishers sent me this link, and I am passing it along to you. If you are into turning mega-bowls, this is the machine for you! I wish I had the money, space, and need for it, but to be honest I don’t, I don’t, and I don’t.
It of course drew my memory back to my formative days in the pattern shop when we had an analogous machine we used to turn pump shell patterns for the foundry and fabricators to then do their magic. Whenever I am at a woodworking event and someone brags about turning a “really big bowl” of 18-24 inches, I sometimes resist telling my tales of turning “bowls” up to 12-feet in diameter. Our setup was such that there was a freestanding tool rest on which we stood, leaning into the workpiece and at times were mostly literally inside the bowl of the pump shell we were turning. The heat of the cutting was such that I wore a welders glove on my tool-rest hand to keep from getting burned by the hot chips.
Is was an intimidating experience, to be sure, and I will remember to my death bed my first “solo” session. The Master of the pattern shop, Johnny Kuzma, handed me the turning chisel and said,”Good luck, kid.” Then he stepped back and threw the switch.
Of the luminaries in the return-to-traditional-woodworking there is no figure larger than Veritas Tool R&D maven Vic Tesolin, whose 2015 book “The Minimalist Woodworker” has become the starting point I recommend for every nascent craftsman. I am delighted and very excited to announce that Vic has agreed to venture into The Old Dominion from The Great White North and teach a week of hand-tool woodworking at The Barn next summer, July 24-28, 2017. Our project to start out the week will be to fabricate, entirely by hand tools, a Japanese-style tool box. If you are fast, we’ll move on to another exercise which remains to be selected.
Vic’s raucous good humor is combined with a bedrock-solid foundation of working wood skillfully with the most slender menu of tools possible, and I promise that this week will transform the way you think about your tools, your skills, your shop, and your projects.
I am eagerly anticipating this week, not only for the time of fellowship with Vic (I will probably hurt from all the laughter) but for the way in which it will change and improve me as a craftsman.
I hope you will join us for the week, the tuition for which is $675.
If this exciting week interests you, contact me here or Vic here.
For unto us a child is born, unto us a son is given: and the government shall be upon his shoulder: and his name shall be called Wonderful, Counseller, The mighty God, The everlasting Father, The Prince of Peace.
The angel went to her and said, “Greetings, you who are highly favored! The Lord is with you.”Mary was greatly troubled at his words and wondered what kind of greeting this might be.But the angel said to her, “Do not be afraid,Mary; you have found favor with God.You will conceive and give birth to a son, and you are to call him Jesus.He will be great and will be called the Son of the Most High. The Lord God will give him the throne of his father David,and he will reign over Jacob’s descendants forever; his kingdom will never end.”
Isn’t this the carpenter’s son? Isn’t his mother’s name Mary?
And I heard a great voice out of heaven saying, Behold, the tabernacle of God is with men, and he will dwell with them, and they shall be his people, and God himself shall be with them, and be their God. And God shall wipe away all tears from their eyes; and there shall be no more death, neither sorrow, nor crying, neither shall there be any more pain: for the former things are passed away.
I pray for you to have a blessed time with loved ones, and that you are celebrating the Incarnation, through whom we can be reconciled with The Creator.










Recent Comments