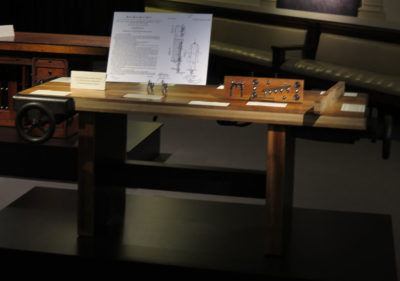
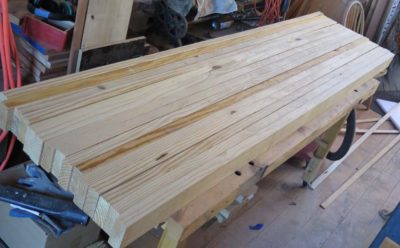
For last year’s Studley Tool Cabinet and Workbench exhibit I fabricated a mock-up of Studley’s workbench top to use as part of the exhibit itself. I set the top on a display base in order to hang a number of Studleyesque vises from it, and to show the construction techniques he used for the slab. I used some *&^%$# African “mahogany” for the outer lamina with white oak for the core, and finished the surface nicely with several coats of Tru Oil.
Since returning home in the aftermath of the exhibit the bench has been sitting in my studio, covered with a furniture pad and cardboard, serving as nothing more than a nice work table. That episode has come to an end as it was time for the little beauty to be put to work.
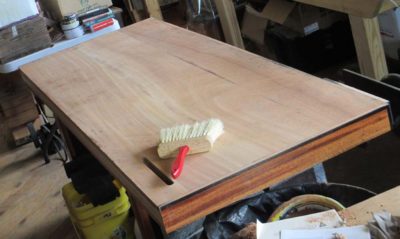
The first thing that had to go was the slick shiny varnished surface. A half hour with the toothing plane took care of that.
I doused the toothed surface with a 1:3 mix of Tru Oil and naphtha and let it sit over night. The result is very pleasing, providing a sealed surface with a flat but pleasantly textured work surface.
The bench top already had one vise on it, a true piano maker’s vise that was very generously supplied by DanD. For the end vise I will mount a Sheldon in the coming days, not nearly the same quality as the piano maker’s vise but adequate for the task. A series of dog holes will be drilled through the top to make it ready for work.
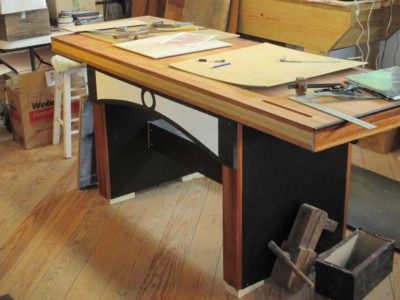
To overcome the unsteadiness of the base, it shimmied a bit on the longitudinal axis and slides on the floor too much since it was designed as a display stand not a functioning workbench, I first added a pair of apron stretchers to cut the wiggles to a nearly unnoticeable minimum, and that works very well. Some day I may build a cabinet base a la Sleepless Jim, but it will not be this day.
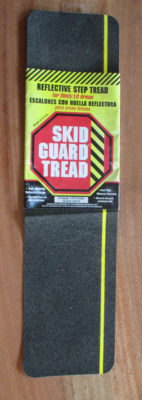
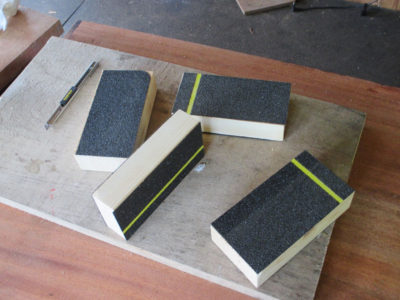
The final step was to get the bench top higher than the 32″ as constructed. I made a set of non-skid spacers to put underneath the feet by cutting some 2x stock to the right size for four spacers and facing them with some PSA non-skid matting for flooring. Slipped under the bench feet, the top is now at a more amenable height and I promise you the bench does not slip on the floor one bit.
Now my Little Pretty is all dressed down and ready for work. I have not yet decided about what to do with the rear edge of the bench so I am leaving that unfinished for now.
This addition leaves my total workbench inventory for The Barn as 3 Roubo benches, 2 piano makers’ benches, 2 torsion-box-top benches, one Nicholson, one Sjoberg Euro bench, one planing beam, and a partridge in a pear tree. Once I get done with the three more Roubo’s I have in various states of completion I will be flush with workbenches. But surely I will have to build myself a Roman style bench, won’t I? And I don’t have a Morvian bench yet, although Will Myers’ video is really enticing. And I still have that extra Emmert #1 laying in the corner…
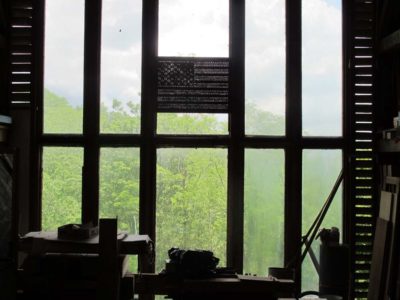
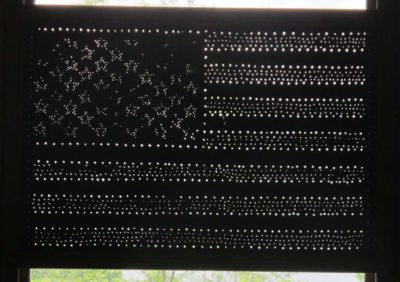
At the recent Groopshop my long time friend Alan Noel presented me with a gift that I will treasure. He recalled my delight in seeing this punch-work US flag when I was visiting him some years ago, and had been saving it to give me ever since. I have mounted the piece at the center of the wall o’ glass facing the morning sun, where it will be a constant presence in the visuals of The Barn.
If I can find a punch-work version of the Gadsden Flag to exhibit along side this one the composition will be complete.
The second option for attendees to the upcoming Workbench Building Workshop at the barn July 25-29 will be to make a butcher-block top Roubo style bench. As with the Nicholson bench described earlier, this one will be made entirely from southern yellow pine I get from over in the Shenandoah Valley from Virginia Frame and Lumber, who stocks amazing 24′ SYP 2x12s. Fortunately for me they can and will cut them to 8′ lengths.
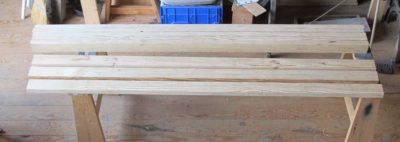
Using a spacer jig to set the fence on my circular saw I cut the 2x12s into three equal boards. During the workshop we will likely joint and thickness these but for this prototype I did not.
In this case I simply cut up enough lumber to make a 24″ wide top.
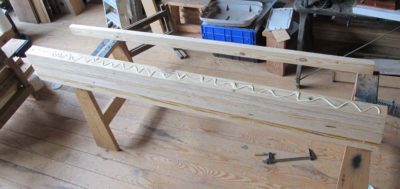
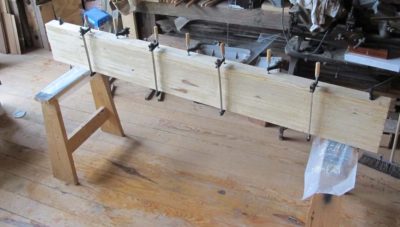
Loosely following the protocols presented by David Barron in his excellent video I began by gluing together the central core of the top, that is, the eight pieces glued together to form the lengthwise portion of the bench top between the legs.
Using PVA adhesive and several 12″ clamps I got this done in just a few minutes.
After the slab had dried overnight I lightly scrubbed the unit and was ready for the next step.
=============================================
I’ve still got a couple of spaces for this workshop, so if you are interesting in joining in drop me a line here.
I just noticed that according to the counter , yesterday’s was my 500th blog post. Let the celebrating commence. It wasn’t that long ago that I did not even know what a blog writer did, and now I are one.
The routine for the blog is my trying to get something written four or five times a week, with about 300-400 folks kindly stopping by each day to browse. Some days a little more, some days a little less. According to the blogniscenti the readership of a blog should trend upwards over time unless the blog is offensive or spurious, in which case it will either skyrocket or drop like a stone. My visitorship has remained essentially flat for the past two years which is a curiosity I do not know how to interpret. I know that one aspect of the blog to which I intend to spend more time is posting my Shellac Archive, which is voluminous. I am told that soon the web site re-build will be done and it will make it a lot easier for me to get things done and posted.
Still, 500 blog posts is a lot of verbiage.
Who knew that I had that much to say? Well, pretty much anyone who knows me well. Mrs. Barn has often remarked that one of the reasons I write fiction is that, “You get to put words in everybody’s mouth.” I suppose I would be irked were it not true. I don’t get any fiction published, I don’t really try too hard, but some of the stories work for me including one I have been working on for some time that is probably best described as a thinly disguised textbook on furniture conservation collided with a Frederick Forsythe potboiler. There are another eight or ten novel outlines drafted, just waiting for the manuscripts to write themselves. I am currently noodling some short story ideas based on the theme of “Jesus as woodworker” but those take a while as I need to get the history/historic technology correct and avoid heresy. The first one of those is pretty much done, but I am sketching several others.
I also write the occasional radical social/political commentary that I distribute privately or post anonymously. Combine all that with the ongoing work on leading the charge to get Roubo presented to the Anglophone audience, my currently-under-construction Historic Finisher’s Manual and another bunch of artifact related manuscripts it is an unusual day when I do not spend at least an hour or two writing, some times a lot more. If I knew how to actually type it would go faster, but I don’t so it doesn’t, and if my eyes were not in such bad shape I could read faster but I can’t any more.
Enough celebrating. Back up the hill to the barn. Or maybe just sit in the recliner with the laptop. I have this idea…
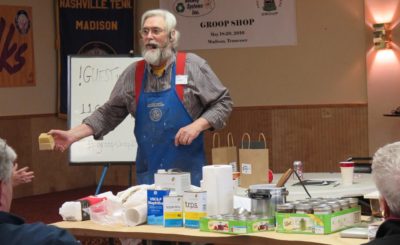
Here is a revised version of my handout at Groopshop.
==========================================
Custom Blending Paste Waxes in the Shop
Don Williams
Martin O’Brien in absentia
The fundamental thing about paste waxes is that they are a solution, consisting of a solvent (or solvent blend) into which is dissolved a solute (or blend of solutes). For the most part furniture relevant paste waxes are super concentrated solutions consisting of roughly 1/3 part wax or waxes to 2/3 part solvents like turpentine or naphtha. Sometimes other additives are included, these may be soluble in the solvent, such as low molecular weight acrylic resins or oil-soluble dyes, or suspensions like abrasives or pigments.
No single paste wax solution is satisfactory for all applications. Some require ease of use, some higher in-use performance, and these two are often mutually exclusive. We overcame this problem with the invention of “Mel’s Wax” emulsion, a stoopid-easy-to-use but premium high performance product while at the Smithsonian, but that is a subject for another time.
In order to keep the variables down to a mere multitude, for today’s exercises we will concoct recipes blending variations of the following components:
Waxes
Beeswax
Carnauba wax
Shellac wax
Microcrystalline 190 wax
Solvents
Turpentine
Naphtha
T.R.P.S.
Odorless mineral spirits
Additives
Dry earth pigments
Lithography pigments
Crayons for coloration
Rottenstone
Arkon P-90 acrylic resin
We will start with these basic recipes and head off down the rabbit trail from these points. We can mix them and then apply them to sample boards, and evaluate them tomorrow after they have flashed off and been buffed with linen, flannel, and bristle brushes. All recipes were prepared in heated containers warm enough to melt the waxes but not hot enough to risk burning them. I melt the wax first then add the solvent. My favorite set-up for melting is to use a fixed temperature (165 F) fondue hot plate and a Corning sauce pan.
It is important to remember two points. 1) if the paste wax is difficult to apply and distribute evenly over the surface, that is a solvent proportion issue. If there is not enough solvent, applying paste wax is nearly impossible. 2) if the dried wax film does not buff out well, or rubs off too easily, or has some other fault, that is a wax blend issue.
Recipe #1 – the old favorite soft paste wax, a bit smelly for my preference (turned out very nice to apply, performance was satisfactory)
2 parts beeswax
1 part naphtha
3 parts turpentine
Recipe #2 – a nice harder surface (very difficult to apply, nearly impossible to get an even distribution; solvent fraction was too low; another 2 or 3 parts of solvent would have made all the difference)
3 parts beeswax
1 part carnauba
2 parts naphtha
2 parts turpentine
Recipe #3 – a nice clean intermediate-to-hard surface that is less stinky than #2 (very difficult to apply, nearly impossible to get an even distribution; solvent fraction was too low; another 10 portions of solvent would be worth trying)
12 parts beeswax
4 parts shellac wax
12 parts naphtha
3 parts turpentine
Recipe #4 – slightly hard with a little “slickness” (very difficult to apply, nearly impossible to get an even distribution; solvent fraction was too low by at least 100%)
100 parts beeswax
10 parts carnauba wax
1 part acrylic resin beads
50 parts naphtha
30 parts turpentine
Recipe #5 – trying to split the difference (applied pretty well but another 2 or 3 parts of naphtha would have been perfect, performance was excellent)
5 parts beeswax
1 part microcrystalline 190
7 parts naphtha
Recipe #6 – trying for better performance (applied pretty well but another 2 or 3 parts of naphtha would have been perfect, performance was excellent)
5 parts beeswax
1 part shellac wax
1 part microcrystalline 190
7 parts naphtha
Recipe #7 – MartinO’s favorite (applies and performs beautifully)
1 part beeswax
2 parts odorless mineral spirits
Recipe #8 – harder but more difficult to buff out, otherwise excellent performance
115 grams beeswax
15 grams shellac wax
15 grams carnauba wax
2 grams Arkon P-90 acrylic beads
250 grams t.r.p.s solvent
(Bonus) Recipe #9 – so darned nice I might start manufacturing this one. Really. This was sold at Mike’s Mostly Honest Auction and I am awaiting feedback from the buyer before proceeding.
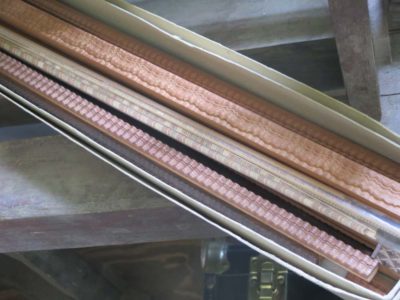
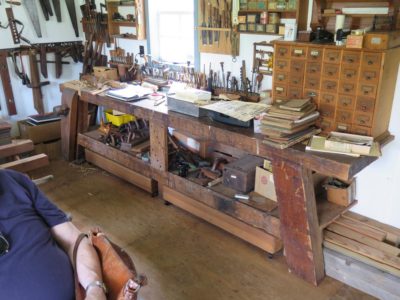
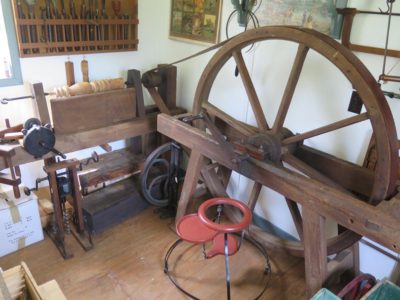
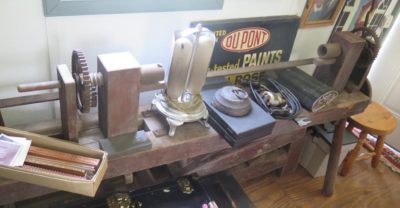
Recently while making my visit to the ripple molding cutter and its owner Jerry, when we were finished ogling that special machine and the remarkable things it made he took us across the yard to another shop. I believe this one was actually never a working shop but instead built as a repository for the tools belonging to his father and grandfather, both renowned local craftsmen. The assemblage of tools used by these men in the pursuit of their livelihood was astounding. My camera battery died or I would have shown the drawers and cabinets filled with the inventory.
There were lots of eye-popping things to see, beginning with this Moravian style workbench I think was 10-feet long.
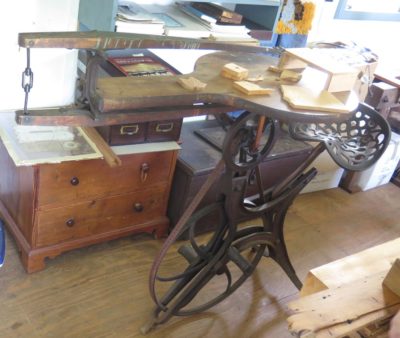
Or the original Barnes velocipede scroll saw.
Or the Great Wheel lathe.
Or the post threader, conceptually similar to that invented by Henry Boyd, one of my personal heroes. This turned right hand threads on one end of a bed rail and left hand threads on the other, allowing the entire bedstead to be assembled in seconds by completely unskilled hands. Here is a another article about him, and this video is worth a look. Truly, given his life story and creative accomplishments, I long ago came to see Henry Boyd as a Force of Nature and a man to be emulated.
The circumstances of getting my busted hip fixed was that the break occurred at lunch time and the structural repair was completed in the middle of the following night. I think I got back to my hospital room about 3AM in something resembling a drug-induced coma. A close friend is an x-ray tech for a hospital and when she described how the orthopedic surgeons manipulate the hip joint to make sure the bolts are set at the right depth such that they hold the joint together but do not interfere with the joint movement confirmed the need for that level of anesthesia. Just hearing the description of the stresses they put on the joint made me hurt.
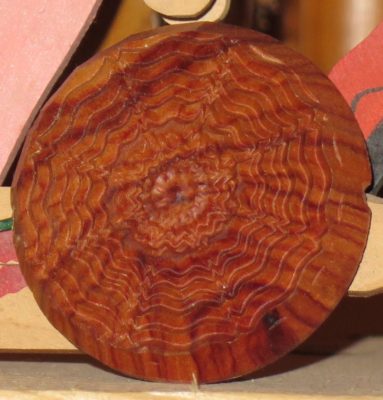
About six hours after the repair the surgeon stopped by to see how I was doing. Admittedly I was not in the clearest frame of mind as pain and narcotics were doing their balancing act. Dr. H said, “I’ve got a present for your wife. It’s something I made. You won’t know what it is but she will probably like it.” With that he pulled a small ornament from his pocket and held it up.
“Oh,” I said, “it’s something you made from Dalbergia tulipwood on a Rose Engine Lathe.” That stopped him in his tracks! Woodworking and woodturning have occupied more of our conversations than my hip ever since. It’s not that he was inattentive to my healing, but rather that once those conversations and examinations were completed, another discussion continued on wood topics. The beautiful little ornament now resides on the top of a bookcase in the living room along with a multitude of other treasures.
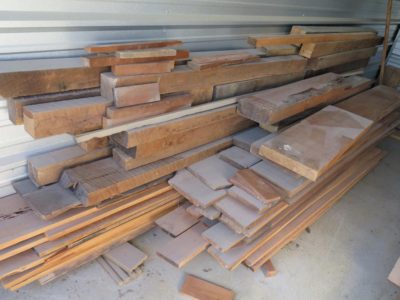
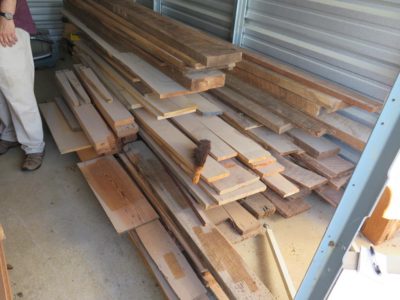
Recently he invited me to come and look over some piles of lumber he was liquidating in his ongoing downsizing as he intends to concentrate exclusively on ornamental turning rather than general woodworking. These were mostly a mix of walnut, including a lot of 5/4, 8/4 and 16/4, figured maple, and black cherry. I was not especially interested in these, although I may talk myself into some of it. If you are interested in buying this pile of vintage lumber that has been seasoning since around 1920 (he wants to sell the whole pile en toto), drop me a line and I will pass it along to him. It is in Bridgewater, Vitginia.
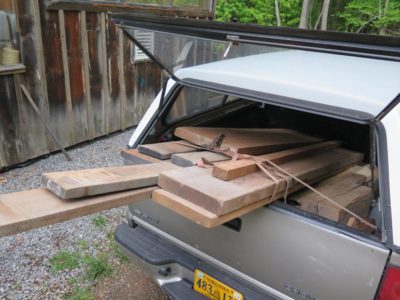
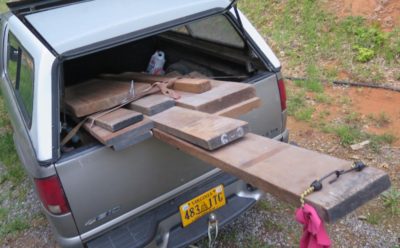
The lumber he had that I was interested in, and purchased, was some ancient mahogany. I bought about 90 board feet, and have just the right project for it. More about that later.
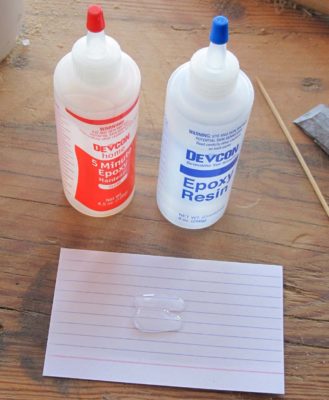
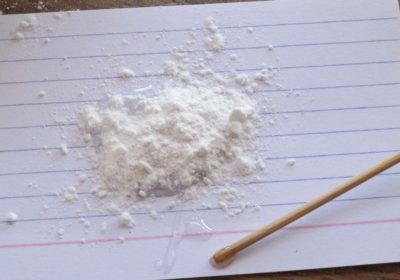
In years past we who are engaged in the compensation for damage of historic wooden artifacts often employed Araldite 1253 carvable epoxy for filling substantial losses requiring high-performance structural integrity. I have found this product hard to find (and it was black!) so I for some time I have been making my own.
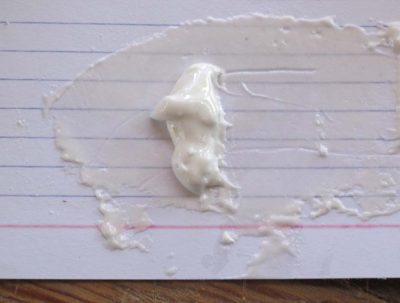
In this instance I took one squirt of Devcon epoxy from the hardware store, although any good quality epoxy will suffice, along with the appropriate proportion of catalyst onto a paper surface and mix them thoroughly. To that I add acetone drop by drop until I get a watery consistency; it does not take as much acetone as you might expect.
Once you have the thinned epoxy ready, stir in glass microballoons a little at a time, making sure to mix until it is uniform in consistency. The microballoons serve to both reduce the flow of the material (to “stiffen” it) and reduce the overall density (making it lighter in weight) and reducing the hardness and brittleness (making it “carvable”).
Keep adding microballoons until the mixture is the consistency of very stiff taffy (or thin putty if you prefer). You can also add pigment for coloration at almost any point.
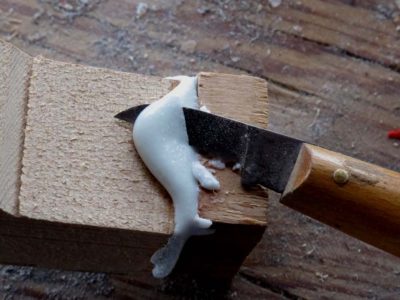
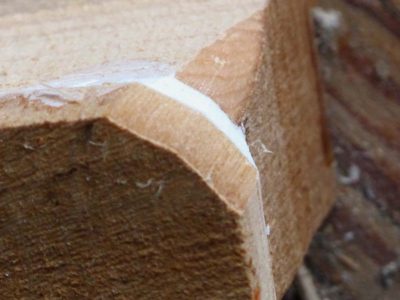
Once the putty is ready you can apply it to the area needing filling with a spatula. When you are done with that that and smoothed out the fill, set it aside. It will take 12-24 hours to harden. Once it has set you can, well, carve it and smooth it to fulfill your requirements for the task at hand.
Since I make my own carvable epoxy one small batch at a time customizing the stiffness, density, and coloration, I simply discard any excess mixture and move on.
Not content to simply throw down the gauntlet before us with his replication of the HO Studley Tool Cabinet and its contents, admittedly customized very slightly for his own collection, JimM immediately dove into the replication of the workbench itself. I saw it in-process, but the finished item is simply magnificent.
Take that, slacker, I sez to myself.
Jim chose pearwood as his secondary wood, and like Studley fabricated an ebony spring-loaded bench dog for every dog hole. Now he is replanting the seed in my own creative garden, namely the completion of the prototype for the Studley bench vise itself as he wants a pair of the vises to adorn this bench. I gotta get done with these projects taking up space — physical and psychic — in the studio so I can turn my attention to getting that enterprise underway.
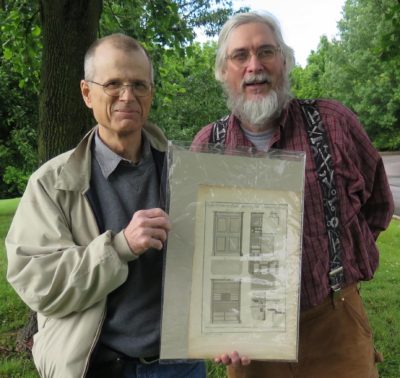
At the recent Groopshop 2016’s very entertaining “Mike’s Mostly Honest Auction” I contributed a print from the group of c.1771 First Edition Roubo prints I purchased a few weeks ago. I hoped there would be some interest in this item, and it turned out there was some spirited bidding before my friend and fellow Pavilionista and Studley exhibit volunteer JohnH prevailed. The outcome could not have been better as John will be a perfect steward for the print.
This is a very special artifact at several levels, not the least being related to my own scholarship on Roubo. This plate was not only designed by Roubo — he designed all the plates for the book — but he actually engraved this plate himself! And in all likelihood he oversaw the production of the book in person, it was that important. So he designed the image, engraved the plate, and witnessed the print-making and binding.
Amusingly (?) even with that degree of attentiveness, this place was not aligned perfectly with the paper so the print is noticeably crooked on the page! I suspect this imperfection only increases the value of the print.
I hope John will find the time to examine the print carefully, to notice and appreciate the hand-made paper, the still sharp plate mark impression on the paper (this picture is of another page), and the exquisite detail in the image itself.
The odds are excellent that I will be selling any surplus inventory from this group of prints once I decide which ones I want to keep and which ones I want to give as gifts. Stay tuned.







Recent Comments