Earlier this week I taught a three-day Traditional Finishing Workshop at The Barn, but since only one person signed up for it perhaps I should more properly call it a Traditional Finishing Private Tutorial. Whether he wanted it or not BruceK had me all to himself for the three days.

The syllabus for the tutorial was a very simple one, encapsulated in this graphic I devised seemingly a lifetime ago. We touched on each topic, sometimes repeatedly, and the days unfolded as a conversation with focused exercises to allow Bruce to leave with the the confidence and knowledge he needed to approach finishing fearlessly and skillfully. We were too busy working to take all the pictures necessary to fully represent the activities, but here are a few.
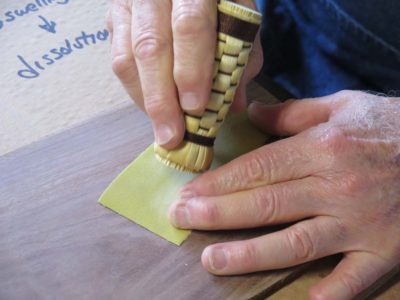
Since burnishing the wood with a polissoir has become integral to my own work in preparing the substrates for finishing, I introduced Bruce to the practice himself. Here he is tuning up his brand new polissoir with fine sandpaper to make sure the tip was a flawless but very slight crown. He made the other end flat, and used both ends extensively in the three days.
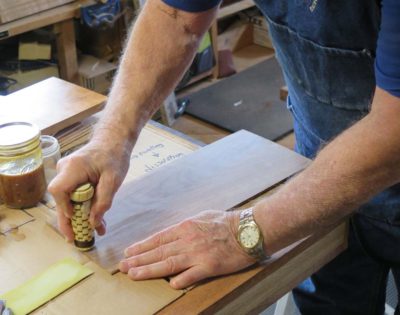
Here is his first try at it in combat, and he agreed the results were impressive.
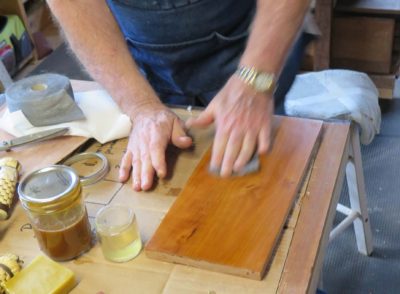
We added four or five coats of 2 lb. lemon shellac to that burnished surface, let that dry until afternoon on the first day, then buffed it out with Liberon 0000 steel wool and Johnson’s Paste Wax. Bruce expressed that “this finish was exactly what I had envisioned” and thought that alone was worth the three days stuck with me in the hinterboonies.
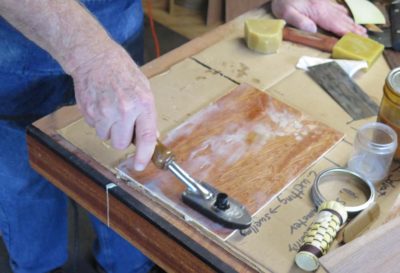
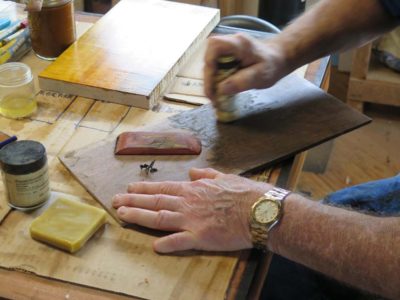
We then dove into the techniques revolving around filling the grain with wax. Here he is finishing up the application of molten beeswax which will be scraped off leaving a filled surface ready either for buffing or shellacking.
One of the variations on this theme was to fill the grain on this beautiful piece of walnut with solid beeswax scrubbed on the surface like rubbing it with a bar of soap, and sprinkled with some raw umber powdered pigments then all worked into the grain with a polissoir.
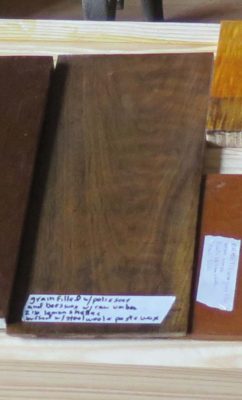
The excess wax was scraped off and the surface was shellacked a couple of times with terrific results.
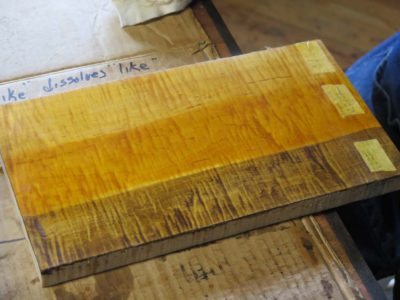
We moved on to colorants, using this exuberant piece of curly maple as our palette. On one section we used asphaltum, probably the most widely brown-ish colorant in the days of old, on another we used high-tech organometallic dyes. I do not use chemical stains. Period. On the third section we just built up the lemon shellac.
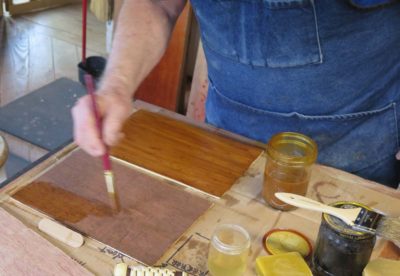
On these two sample boards we applied asphaltum as a glaze over the initial coats of finish (rear) while on the other we used the asphaltum as a stain. I wanted Bruce to get a sense of how the same materials can perform differently (or not) depending on the situation.
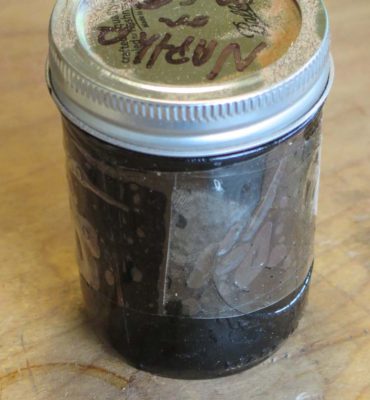
I made sure to send him home with a lifetime supply of parging tar, which is what I use for asphaltum colorant.
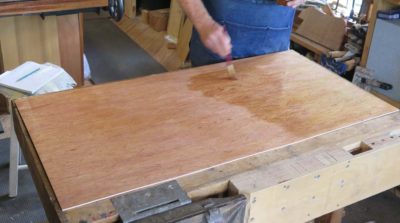
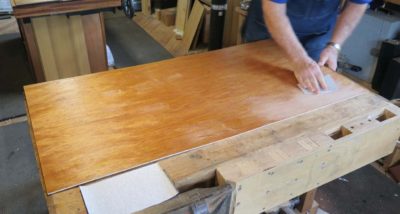
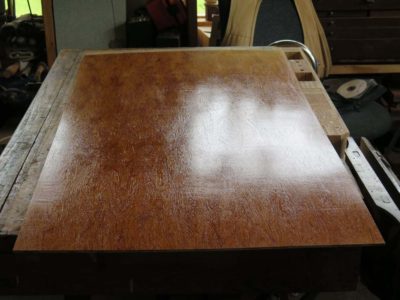
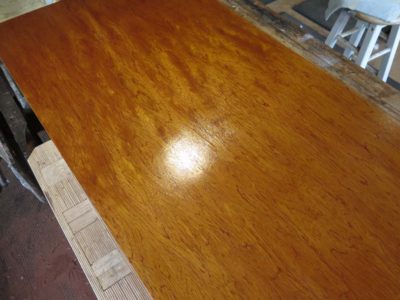
Traditional finishing is a lot of burnishing and brushing, so there were a number of brushing exercises and a lot of discussion about good brushes to have in the tool kit. Certainly the most extreme exercise I like to employ is to use a giant piece of plywood as the foundation for building up a finish brushed on with a 1″ nylon-and-sable brush. The objective is to overcome the intimidation of working such a large surface with such a small brush, and to leave a finish that is flawless. This exercise is usually three “innings” of several coats of shellac. After the first inning dries it is sanded lightly with 320 silicone carbide paper, and after the second inning it is rubbed lightly with 0000 steel wool. After the third inning, which already looks pretty great, the surface is burnished vigorously (you cannot rub too hard or too long) with 0000 steel wool and paste wax. Spectacular, and all the more when you consider it is just a piece of cheap luan plywood from the lumber yard.
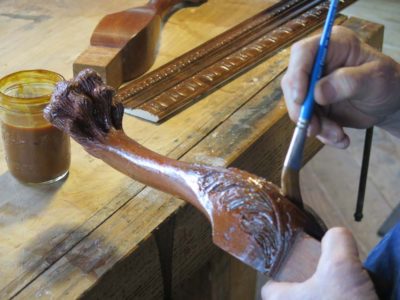
We also covered the brushes and brushing techniques needed for contoured and voluptuous surfaces such as carved moldings or Chippendale legs. Again, flawless results.
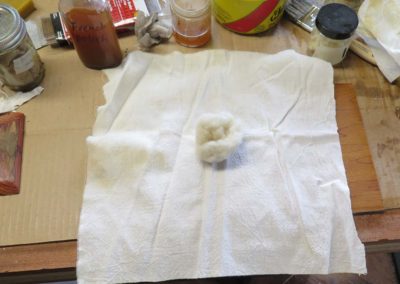
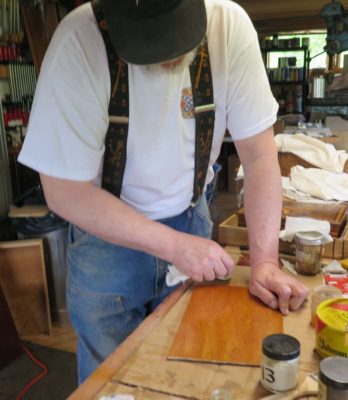
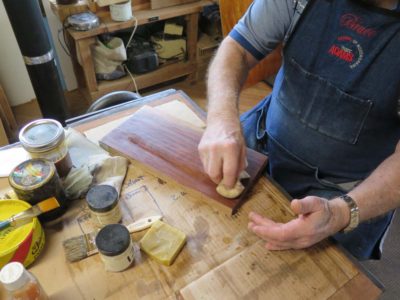
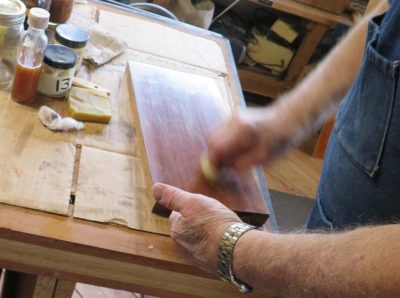
Of course we covered “French” polishing, beginning with the making of the pad itself with raw, combed and washed wool wrapped in a linen rag, and mixing up the spirit varnish for the pad polishing. I gave a short demo, yielding a glistening surface, then Bruce went at it. He was able to pick it up and with a little practice will have “the touch” cemented in his brain and hands.
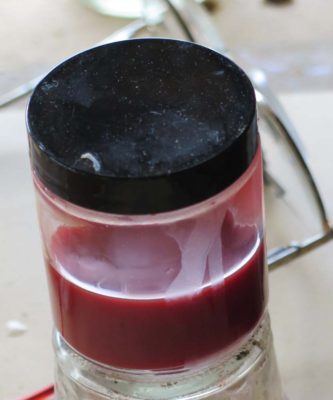
We even got into making some custom paste waxes. In the first case Bruce mentioned that he’d finished a piece that seemed a bit too green/brown and wanted to add some red hints to the appearance. So, I made him lightly tinted batch of reddish paste wax.
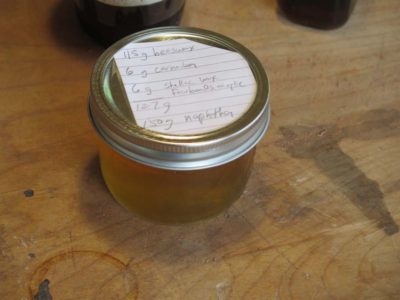
Then we made a new batch of my Special #13 blend of paste wax. The picture is misleading as the wax is still molten, but it cools into a pale translucent mass ready to be put to work.
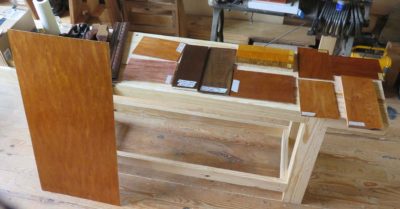
Just before Bruce departed I took a picture of the sample boards he had made. He left with an increased confidence and knowledge about finishing his projects, ready and eager for the next one.
I very much enjoy finishing and teaching about finishing, and expect to offer this workshop every summer at The Barn. Perhaps next year I can get twice as many students.
Once I finally had all the pieces accounted for in the line between the left elbow, the lute, and the right elbow I tried to reassemble them and wrap up the project.
Didn’t work.
Due to the wood shrinkage along that arc, which followed almost perfectly the tangential orientation of the wood, the region had suffered dozens of breaks and repairs, and was now at the point where the pieces simply did not make up the whole. Given that the lute body was pegged to the figure’s torso and that the arm was supposed to be in a fixed location, there was a space of approximately 1/8″ on the neck of the lute. That’s generally considered to be a problem when a construct with fixed ends does not meet in the middle.
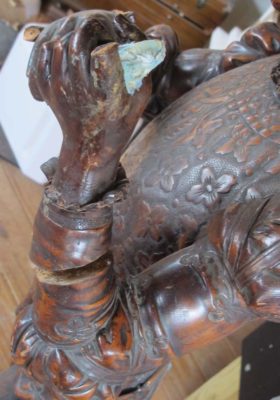
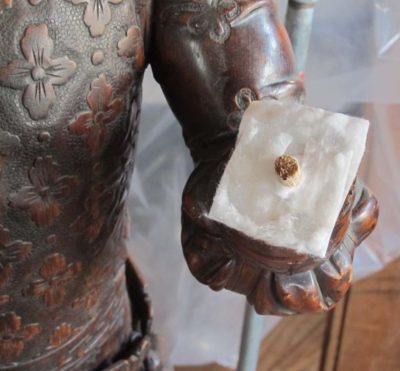
My only real option was to disassemble completely all of the pieces in the region and augment them with a newly grafted spacer in the fingerboard. I began by gently torquing the left forearm which had been broken at some point in the past and reassembled (misaligned, alas) with a very large ~1/2″ pin and a gob of glue. Fortunately the repair had not held so I could get it apart with some gentle mechanical persuasion. I used DBE poultice (Safest Stripper) to remove the mass of PVA left behind, then trimmed the pin to allow for a correct alignment of the pieces back together.
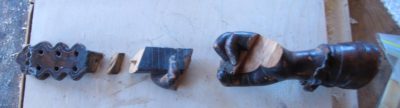
With the pieces all apart I could get down to business. The first thing was to put the lute head back together. With a plexi caul on the fingerboard I used hot hide glue to tack the head to the neck at the proper angle. It was enough to hold things steady for back filling the sizable voids I described earlier.
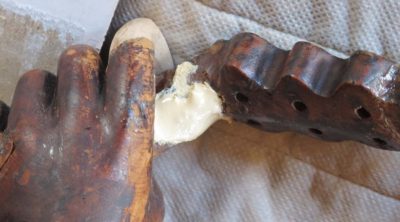
Since the entire area of gluing surface was well-coated with hide glue I proceeded with making a fill of carvable epoxy that I mixed up myself as I described a couple of weeks ago. The fill material was mixed to be very stiff in working, almost like butter so there would be zero flow, but would be very light and carvable in situ. This worked exceedingly well as the fill was now approximately the stiffness and density of the wood and provided 100% adherence at the gluing margins. The surface of the fill was modeled with emery boards.
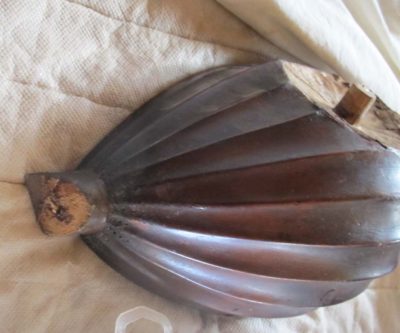
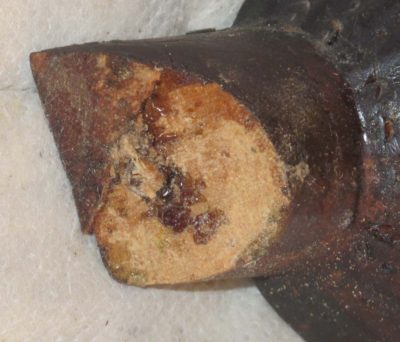
Th next step was to address the mess that was the lute neck. As I said it had been repaired multiple times in the past, none of those attempts particularly elegant. Again, DBE poultice did the trick in removing the fragments of the previous repairs and cleaning up the gluing surfaces. I “dry assembled” the entire composition at this point to see how much of a fill I needed to fabricate and insert into the void. This was not without its challenges as the area had been worked over so many time it left the pieces un-alignable to some degree.
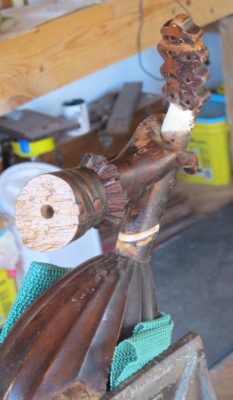
Reassembly/gluing the neck together was a tightrope walking experience. There was no way to clamp anything together given the shape and delicacy of the pieces involved. Instead I placed the lute body in a vise with plenty of padding and oriented it so that the hand/neck/head mass would be perfectly balanced. Holding my breath I applied the hot hide glue, put the assembly together and aligned the pieces the best they would allow, and held it with both hands for two or three minutes until the glue began to gel. I left it overnight to dry.
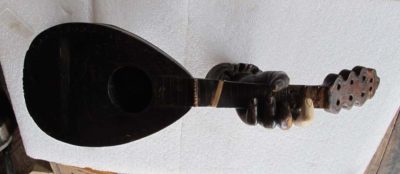
The result was acceptable. I did have to trim a bit of original material on either side ex poste, which I am loathe to do, but it did allow for a strong reassembly.
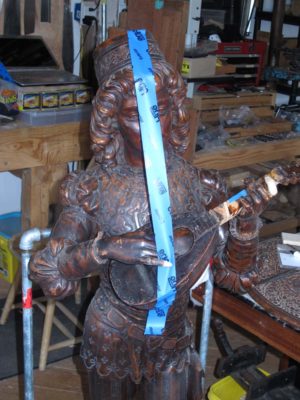
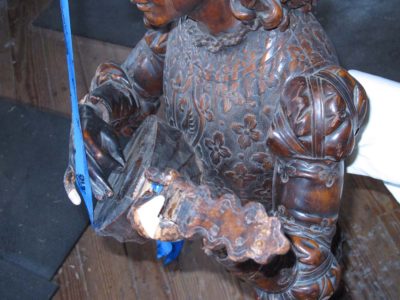
The final hair raising step was to assemble the entire section together on to the torso. This was another instance where clamping was simply not possible. Very gently I placed all of the pieces together in the right orientation and alignment using ht hide glue. Since clamping was not possible the best I could do was hold everything in alignment with low-tack masking tape. Which is what I did.
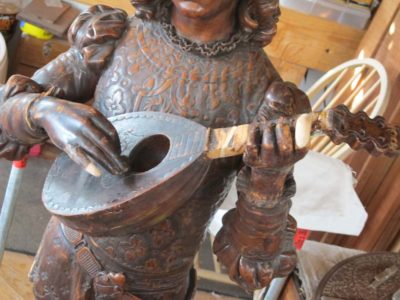
The next morning it was together, soundly adhered and as stout as could be expected.
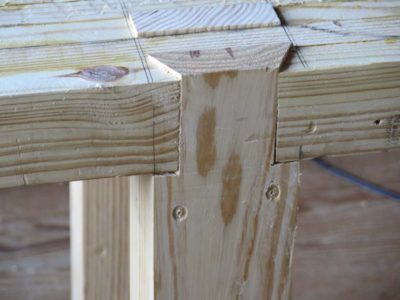
Perhaps nothing identifies the Roubo bench from all others like the beefy legs set into the double mortises, one dovetailed, through the slab top. For this prototype I simply chopped and ripped the 2×12 SYP stock to give me four legs of three lamina, 36-1/2″ long and 5-1/8 wide to give me a margin for trimming the length and planing the width.
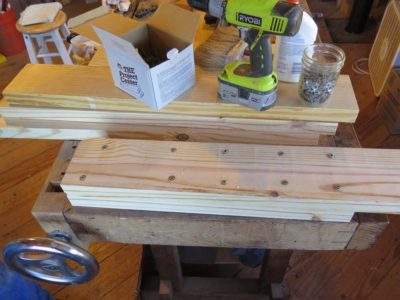
To glue up these legs I used my favorite laminating clamping system, namely decking screws and washers. I’ve written about this before but forgot to take pictures this time, so I’m inserting a picture from a previous project where I used this method. I simply laid the middle lamina on the bench applied the glue, and placed the outer lamina offset along the length to slightly exceed the thickness of the top slab, and drove in 10 2-1/2″ decking screws with 3/16″ ID washers. (These washers left some substantial divots in the wood, so next time I will probably use fender washers instead). I flipped the assembly over and repeated the process with the opposite outer lamina, again off-set by the thickness of the slab, applied the glue, drove the crews and set it aside overnight. The next morning I removed and screws and washers and was ready to clean them up at the bench.
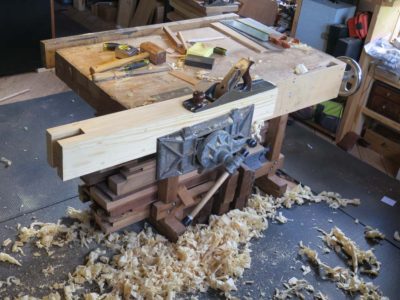
Fortunately my Emmert K1 was up the the task as always, as I planed the legs flat and true. Good wood, good tools, good time.
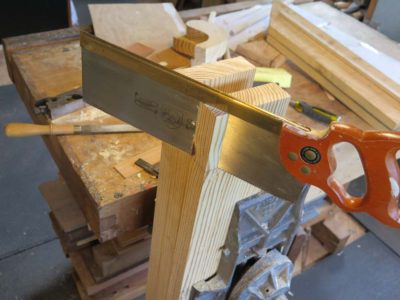
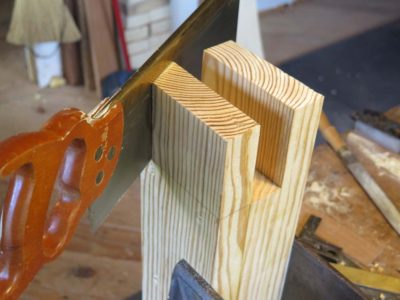
I wrapped up the leg prep with the single hand work step required for the project. since my goal was to make a prototype that could be replicated by the full range of woodworking aptitudes and experiences, yet come out the other end with a heritage quality bench, I was determined to keep the skilled hand-tool processes to a minimum. I think the number “1” meets that requirement. Using a rasp and a float to finish the fitting the legs were ready for insertion into the slab, which is what comes next.
===============================================
If you are interested in joining us for a week-long workshop to make your own heritage quality Nicholson-style or Roubo-style bench July 25-29, drop me a line.
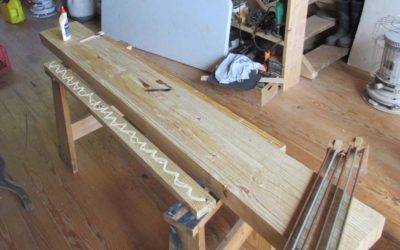
With the core of the top glued up and scrubbed, I added the three lamina to each face with the openings cut out for the double tenoned leg ends. Since this was a down-and-dirty prototype I just used a chop saw to make the cuts of the 2x stock prior to assembling the bench top.
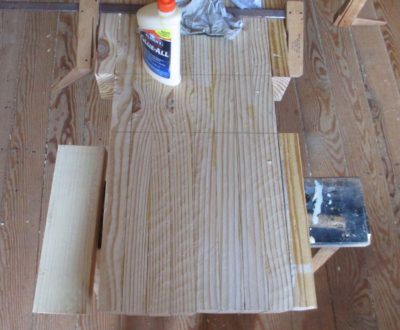
I marked out the mortises and just made each piece the correct legth for the opening, slathered on some yellow glue and clamped it up.
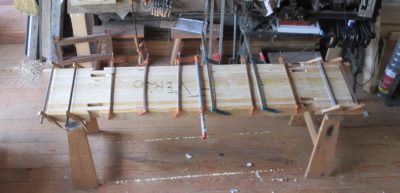
Mostly I needed a pile of clamps to hold it together and then some wet rags for the clean up.
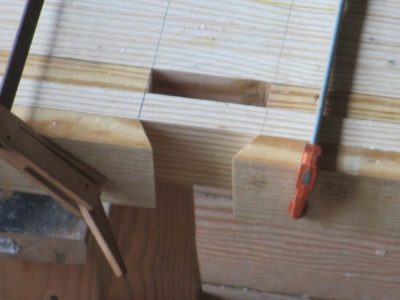
As you can see my chop saw is barely carpenter grade. I think for the workshop we’ll use a cross-cut sled for the cutting the pieces on the table saw.
=========================================================
If you are interested in a week-long workshop for building your own heirloom quality Roubo or Nicholson style workbench July 25-29, drop me a line.
While conserving the wood sculpture “The Lute Player” I needed to carve some replacements for missing fingers on the sculpture. Have you ever tried to carved curled fingers in short grain softwood? Holding them little things is a pain. For a bit I contemplated making some non-wood replacements, such as making a wax maquette on the finger stub, taking a mold, then casting an epoxy replacement in place. In the end I concluded the the approach most beneficial for the long-term health of the object would be to simply carve some new fingers in similar wood. I chose some vintage Eastern White Pine with the exact grain orientation as the unidentified softwood of the original, and with approximately the same growth ring density.
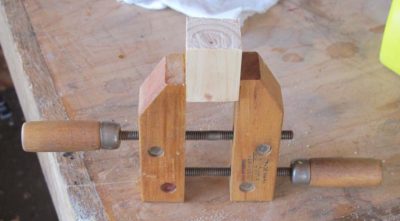
To come to grips with the problem of carving short grain stubs I came up with a nice solution that undoubtedly a multitude of you have accomplished before. I glued some blocks onto the tips of a wood screw then excavated voids in the block faces that fit the fingers perfectly.
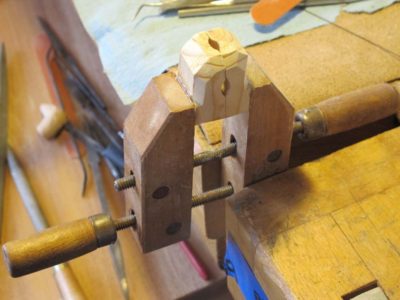
It made sculpting them a piece of cake. Most of the shaping was accomplished with a small Auriou Modeler’s Rasp or a beautiful Swiss file I believe is known as a barrette file I got from Slav the file pusher (just kidding Slav, it’s just that I have a weakness for elegant and exquisite files, and he is my supplier of NOS files).
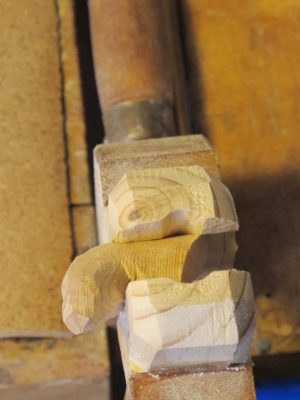
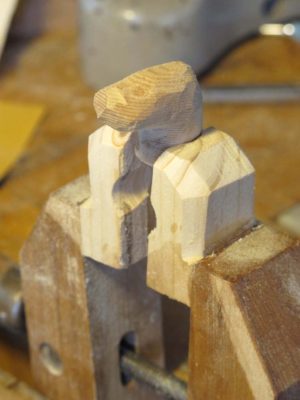
Once the fingers were roughly correct I fitted their gluing surfaces to those on the finger stubs of the sculpture and glued them in place with 192 gram hot glue. Then I could make the surfaces of the new finger parts fit the adjacent surfaces and conform to the overall composition.
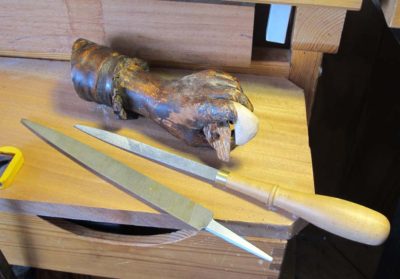
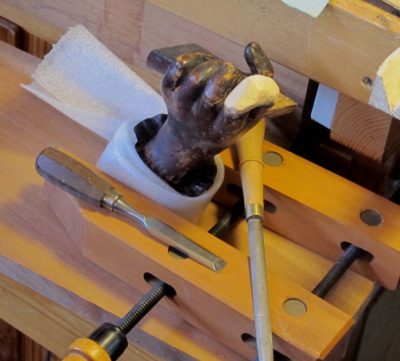
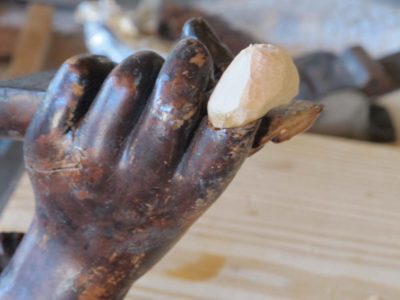
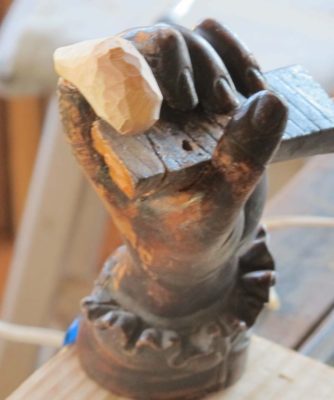
This was especially necessary for the index finger on the left hand; I simply could not figure out its exact proper position and shape until after I had glued the finger blank on the hand, then had the hand set in place on the sculpture. Once that was done the correct shape and attitude became readily apparent.
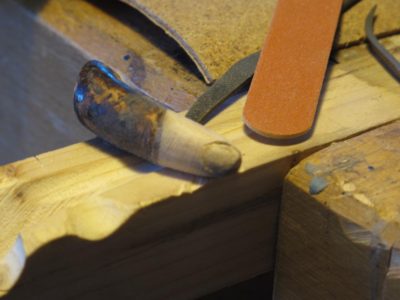
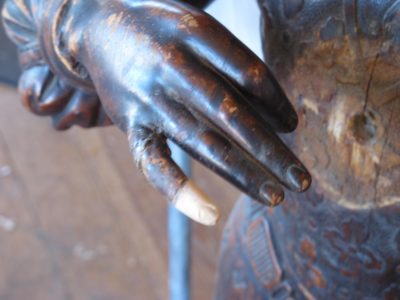
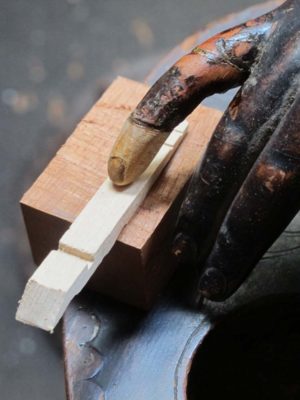
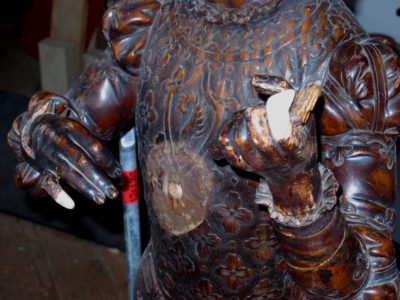
The final steps in this finishing process occurred only after all the reassembly was complete, but I wanted to present the process in toto, so do not be confused by the pictures as they seem out of sequence. Even the pinkie on the right hand, which I could ascertain the size and shape very closely as the digit above it was also detached, required some final shaping in situ. Since the piece was pretty small and mostly short-grained, I placed a felt pad and block underneath the fingertip, gently slid in a clothespin half to provide the exact amount of support, and finished it off.
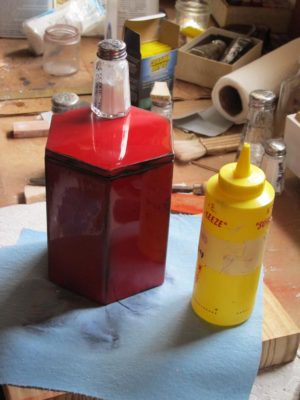
At the recent Groopshop I was showing off the faux urushi hexagonal box I have been experimenting on, and the question of my polishing procedures came up. (I will be revisiting the issue of cissing epoxy very soon) So I thought I would go over it here. It is very similar to the procedures I use to polish tortoiseshell, about which I blogged last year I think.
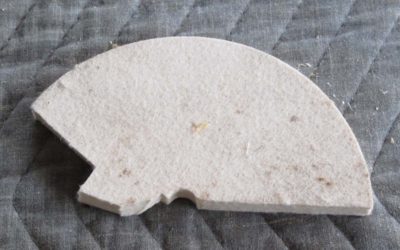
For the most part I use a cut-up felt buffing wheel as my rubbing blocks that I charge with the abrasive polish. I probably bought this one on-line at Caswell or maybe even at a Woodcraft store but I honestly cannot remember precisely as it was many years ago. They do not really wear out, and I only discard them if they get contaminated.
As for the abrasive powders for final polishing I generally use three: 1.0 micron agglomerated microalumina, 0.05 micron agglomerated microalumina, and whiting. (At times I will use 4F pumice or rottenstone/tripoli to get the final stages, but then I switch to the metallography powders) The first two are ultra-fine abrasive polishes used for preparing laboratory samples for metallography or geological examination, the third powder is also used for mixing up gesso. The microalumina powders come from Buehler, and my favorite whiting for polishing is Gamblin brand I get from Dick Blick.
For the polishing slurry medium I use water, naphtha, or alcohol, depending on which is appropriate for the substrate being polished.
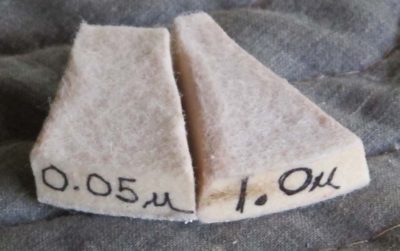
I make a point of cutting a polishing block for each grit, and usually for each material being polished. I mark them with permanent marker to help keep them straight. This pair of felt blocks are for use on transparent coatings, but I have a separate set for silver, copper alloys, tortoiseshell, and ivory.

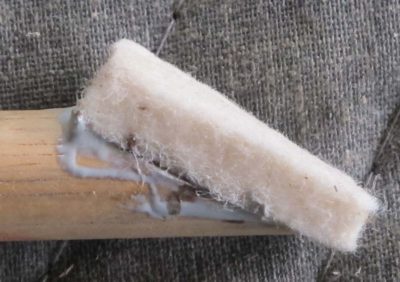
For intricate surfaces I take a 1/4″ dowel and cut the end at a shallow angle, then epoxy a small chunk of felt to the end to use as my polishing surface so I can reach difficult or recessed locations.
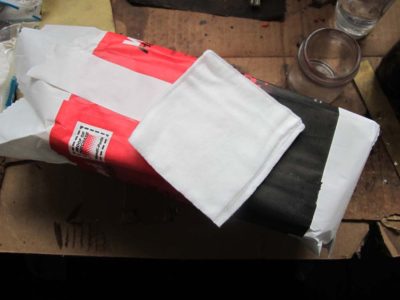
I generally use Webril litho pads for cleanup of the dry abrasive powder afterwards. Alternately I might use hypo-allergenic cosmetics pads. Either way, I use them once and toss them into the trash.
My first task on undertaking the actual hands-on treatment was to see to what degree I had the pieces in-hand, and how well they fit together. It was my ardent, and ultimately unfulfilled, hope that with a little “undoing” of the previous repairs followed by simple reassembly and the project would be done. It was not to be, alas.
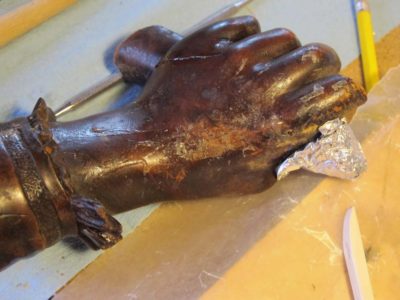
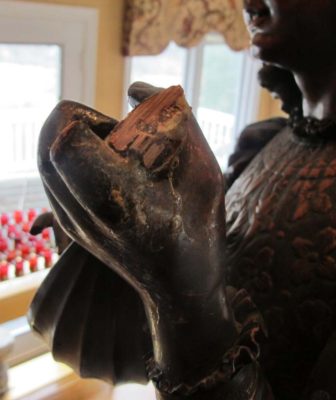
The most readily evident focus of this effort was to “unpack” the broken neck of the lute and the adjacent left hand. This was not particularly simple as I would estimate there had been 5-10 repair campaigns on just this area alone. At least two of these attempts involved the use of a home made wood putty consisting of wood dust and PVA adhesive, used liberally. Someone(s) had evidently seen some advertising about PVAs and figured if some was good, more was better. There was yellow glue goo all over the place.
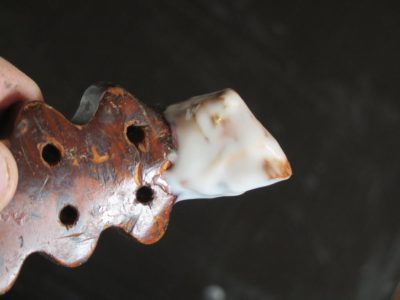
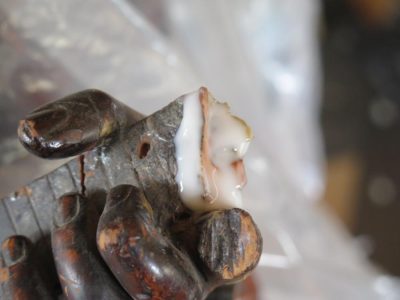
My favorite technique for removing PVA when integral to a fragile surface, which given the vast number of fractures and repairs these gluing surfaces were, is to soak the offending material with Safest Stripper from 3M, a water-based di-basic ester solution with extremely low volatility and an affinity for polymerized synthetics. In other words. perfect for softening hardened PVA.
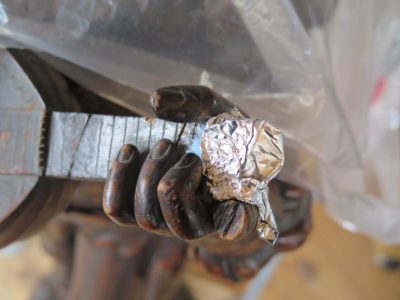
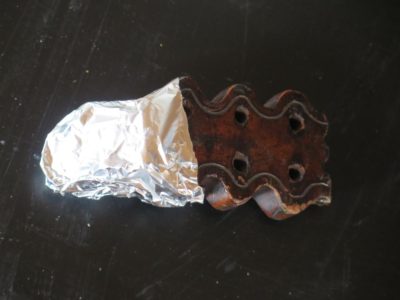
So I slathered on the Safest Stripper on the affected areas, wrapped those areas with aluminum foil, and walked away for three weeks. Yes, I said three weeks. Conservation is not an undertaking for those without patience, whether it is the practitioner or the client.
After three weeks I opened it up and the glue mass was still a little too stiff, so I repeated the process, applied more Safest Stripper, wrapped it with aluminum foil, and set it aside for another three weeks.
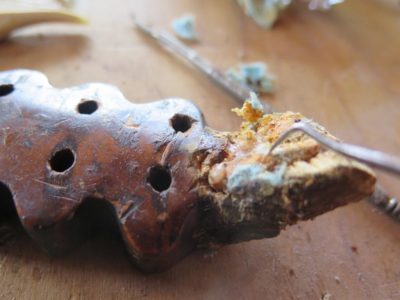
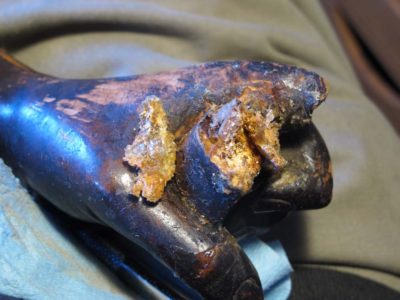
This time when I opened it everything was ready to go. The glue had been thoroughly penetrated with the DBE and had the consistency of very stiff taffy. With dental tools and a gentle tough it came out literally in chunks, but since the material had been softened and loosened from the wood fibers, there was minimal disruption of the gluing surfaces.
One of the characteristics of DBE is that it has a barely-above-zero volatility but it is nearly completely water soluble so it is imperative to flush it out of the fiber matrix before proceeding. I placed damp cotton wadding in contact with the gluing surfaces, changing the wadding out every day for about a week. A the end of that time I let it sit to see if it would dry nicely (the evidence that the DBE is absent), which it did. This told me it was ready to proceed to the next steps.
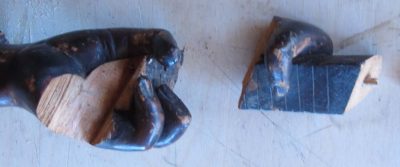
It is worth noting that while this had been ongoing, other processes were underway as well. Hence, though I am recounting this project in a linear conceptual method, in reality there were other portions of the treatment “in process” so some of the photodocumentation might seem confusing at times, but stick with it. We’ll get to the end without any career-ending injuries, I promise.
A topic that I covered during Groopstock 2014 and emerged again at Groopshop 2016 is dealing with active insect infestation in furniture or other wooden artifacts. By request here is my protocol for dealing with such an issue.
If you determine that there is an active infestation – the presence of frass, a granular excrement and wood pulp mix in tiny pellet form (it often looks like very fine sugar except it is tan in color), or pupal exit holes the walls of which are the color of fresh cut wood – then there is little choice but to address the problem.
Generally the first option is often to find an exterminator who has a vacuum chamber large enough to place the infested artifact en toto (if part of it is infested, you have to assume everything is infested, and you should be suspicious of anything sharing the same uninterrupted space of the object in question) so that it can be impregnated with vaporous poisons like ethylene oxide or sulfurofluoride, or whatever is the toxin of choice these days. I do not draw on this world any more and have lost track.
But there is another low tech, inexpensive, easy, and low-toxicity-to-humans method that works in a large range of applications: impregnation with liquid glycol solutions laced with borate complexes. I have used this method for going on a decade and am very pleased with it.
The ingredients are simple. The liquid required for this is RV/marine anti-freeze sold just about everywhere. Heck, here in the hinterboonie village closest to me there are at least a half dozen places to get it. The second ingredient is BoraSol WP, a disodium octaborate tetrahydrate powder I purchase from Quality Borate Company in Cleveland OH. Ordering through their on-line store www.qualityborate.com is a snap. I bought a 22.5 pound case, which is enough to make over thirty gallons of insecticide.
The only tools you will need to mix and apply your home-brew insecticide are a 1.5-gallon plastic bucket, a paint stirring impeller from the hardware store, a drill to drive the impeller, an 8-ounce paper cup, and an inexpensive pump sprayer. If the circumstances require them, you can add dropper pipettes or glue syringes to the kit.
The borate powder must be agitated in order to disperse it fully into the glycol anti-freeze liquid. Heat helps, so I usually set the jug of anti-freeze in the sun for an hour or so to get it nice and warm, then pour the gallon of it into the plastic bucket.
Into each gallon I put two 8-ounce cups of the borate powder, which amounts to about 11 ounces of borate by weight, and fire up the drill and paint stirring impeller. I agitate until the solution in the bucket is clarified. It is now ready to use. You can adjust the overall size of the batch but the ratio should stay the same. For a gallon, I use two 8-ounce cups (5-1/2 ounces by weight per 8-oz. cup) of dry borate. For a half Gallon, use a single 8-ounce sup. For a Quart, use a single 4-ounce cup.
Note: the shelf life of the mixed borate insecticide solution is pretty short, I make a point to use it within 24 hours.
Using a brush if appropriate, or a sprayer, saturate the wood with the solution. You are now done. Really. All you have to do is set it aside and wait for it to dry, which should be a day or two. I have systematically sprayed all of the timbers in The Barn until they are dripping wet in order to eradicate any critters burrowing inside the wood (or fungi), and mitigate any future attacks.
Obviously for furniture you may not choose to literally douse the piece with the glycol/borate solution as it might affect any decorative or show surfaces, or lift veneer, etc. Besides, when left on a coated surface the glycol solution gets pretty sticky as it dries. If you have a piece of furniture you might consider applying the solution by brush to all the underside or backside surfaces (essentially everywhere that is not a presentation surface) and count on the fact that the glycol/borate solution wicks like crazy. Depending on the species of wood the solution can travel 4-8 inches across the grain, and 4-8 feet (!) along the grain. If swabbing, brushing or spraying does not fit your needs, you can even use droppers or syringes to inject it into the exit holes, as long as you do it adequately to provide the necessary concentration of the solution into the wood matrix. You can remove any excess solution by simply wiping the surface with paper towels or cotton pads, followed by a pad dampened with distilled water, followed by a dry pad.
***Make sure to test this on an obscure surface of your object to make sure it does not harm the appearance!***
Note: Any materials treated with borates are no longer glue-able with PVA adhesives as borate, including borax itself, is a gelling agent for PVA. Adding borax to diluted PVA is how kids make “slime” in science class. To my knowledge and by my experience and observation the borates do not interfere with any adhesive processes employing epoxy or hide glue.
The “official” option for following the same application procedure is to employ a fine product known as BoraCare, which is purchased as a concentrate and diluted 1:1 with warm water and used in precisely the same manner as I described above. I have used BoraCare in the past with great success, but at about $100/gallon for the concentrate (or $50/gallon for the application solution) I switched to home-brew once I needed many, many gallons of insecticide for the barn. The comparative cost is home-brew is about $8-10/gallon for application solution.
I will soon try to recount my process for the anoxic insect eradication technique we used in the museum field and is also applicable for many shop situations.
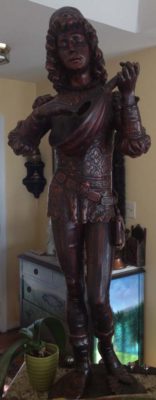
For the past many months I have been working off and on to conserve a group of three artifacts including a mid-19th century Italian sculpture and this post will present my starting point so you can have a reference for subsequent accounts of the progress. I will follow this over the next coupe of weeks or so with several posts about the objects’ conservation, including detailed descriptions and recitations of my rationale and approach for the processes I used. I’d hoped to get this wrapped up last fall, but being out of commission for six months certainly messed up life’s schedule. I recommend you not inflict a major injury on yourself as it is a major nuisance and fairly unpleasant to boot. I am still busier than ever and do not expect I will be accepting any new conservation projects until next summer.
This sculpture was a new addition to my client’s collection, and he acquired it with some extant damage. His request for a referral was passed on to me by a former colleague at the Smithsonian American Art Museum, and he requested me to work on his artifacts which I agreed.
This nearly life-sized sculpture was some pretty amazing work by the renowned artist Valentino Besarel, given that most of it was carved out of a single hunk of softwood log. The base and lute body were carved separately then integrated to the composition as a whole Not too surprisingly the century-and-a-half of wood movement lefts its mark and there were many areas of concern and need for my attentions, and some additional ones which were left for another time.
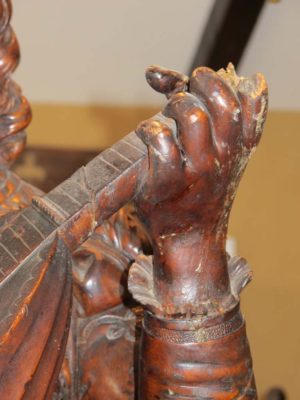
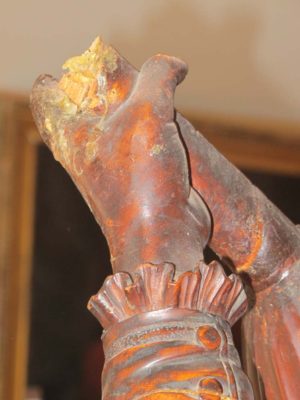
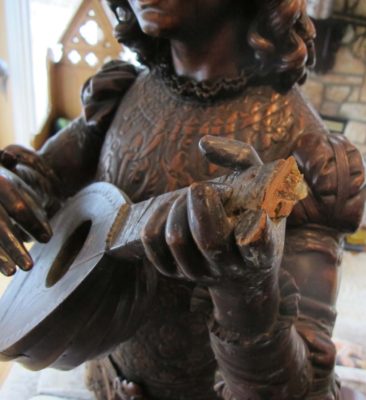
The most serious structural issues revolved around the level of damage between the left elbow and the right elbow of the figure, with the lute in between. None of this was surprising given that it was all tangential and short grain wood. The head of the lute had been snapped off (many, many times it turned out, and repaired less than elegantly) but remained with the object, the index finger of the left hand and the pinky of the right hand were gone altogether, and the neck of the lute had been broken perhaps a dozen times in the past.
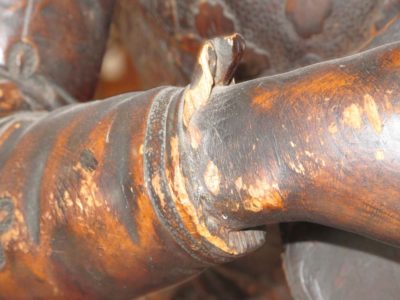
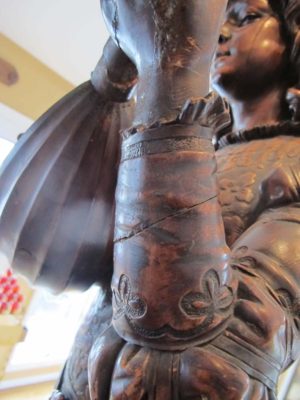
Ruffles on both cuffs had been broken off, and the left forearm had been broken and repaired repeatedly and was loose.
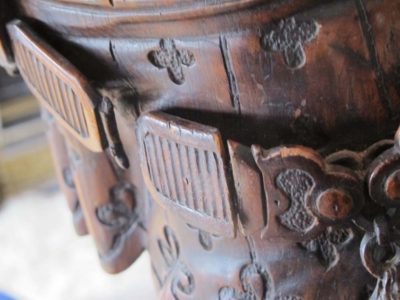
The belt, carved continuously to be separated from the body of the figure by about an inch or so, had been broken and repaired several times and the broken element was now simply nailed in place.
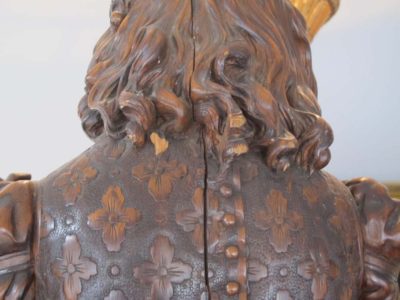
It wasn’t exactly plumber’s crack but there was a pretty noticeable split running for over two feet up the back of the figure.
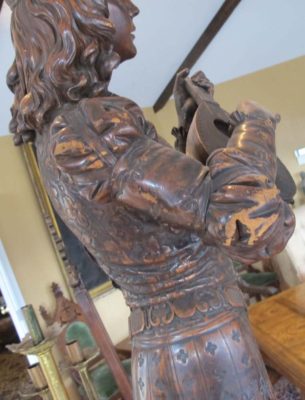
Finally, the surface was heavily abraded, with accretions of grime and a fair bit of light damage throughout.
I’ve blogged about isolated aspects of this over the life of the project but now you will get a beginning-to-end account.


Recent Comments