WIA began with a sumptuous breakfast courtesy of our hosts, the good folks at Popular Woodworking magazine. I had been kibitzing with friends and acquaintances down in The Marketplace and was a bit late for the start and Editor Megan Fitzpatrick’s comments, but there was still bacon and eggs and lots of fruit when I got there so all was well.

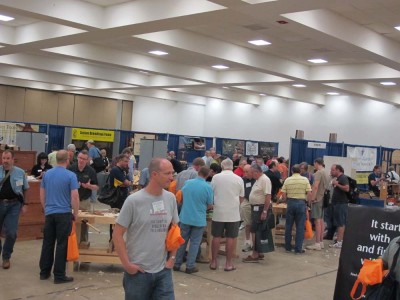
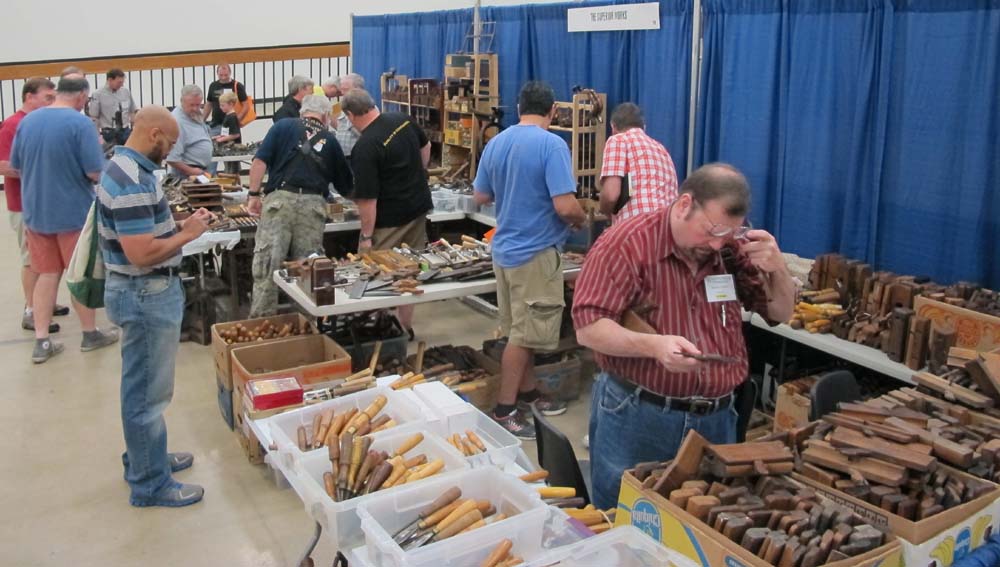
We then moved en masse down to the same Marketplace, where the money started flowing from the guests to the vendors, and there were many fine vendors selling exquisite tools.

At the appointed time I dashed upstairs to sit in on Patrick Edwards’ excellent talk on the history and range of French Marquetry, which given my investment in the Roubo franchise should make my interests pretty clear. Patrick and I first met 32 years ago, and have remained acquainted ever since. We invited him to contribute the Foreward to To Make As Perfectly As Possible: Roubo on Marquetry.
Patrick did a terrific job of covering an immense amount of material in his allotted time.
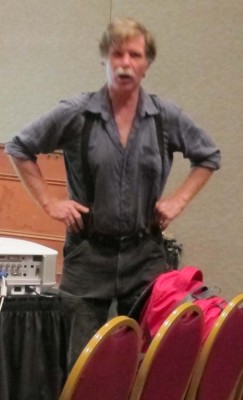
That session had gotten off to a rousing start with stand-up comic Roy Underhill introducing Patrick with a wild story of their first meeting at the Great Brine Shrimp Roundup in The Great Salt Lake of Utah, and how Patrick somehow saved the day in diffusing a brine shrimp stampede that threatened any and all who were nearby.

Immediately thereafter I was next door feverishly setting up my session, “Secrets of Period Finishing.” It was well attended by an enthusiastic audience that frequently led me down rabbit trails with their insightful questions. I really have to watch myself about that and remember to stay on course.

I am now thinking that a four-hour session is too long in that it actually encourages me to divert from the main theme, and that a three-hour session would impose a certain disciplinary constraint. I’ll have to talk to Megan about that. Still, a large number of folks stuck it out to the very end.
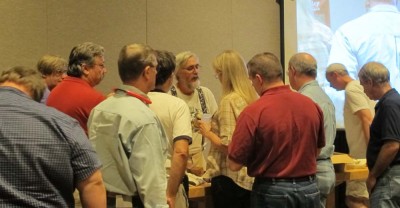
The day concluded with a festive gathering at Martin O’Brien’s eerily tidy shop, where fellow Groopsters were joined by Phil Lowe and Will Neptune.
Since we were planning on taking all my stuff to WIA late in the afternoon, we decided to follow our hosts’ recommendation and view a local museum exhibit of Chairs at The Reynolda Museum on the north side of Winston Salem. Unfortunately they did not allow photography, but it was a terrific exhibit. We were accompanied by old friend and brilliant furniture maker Freddy Roman.
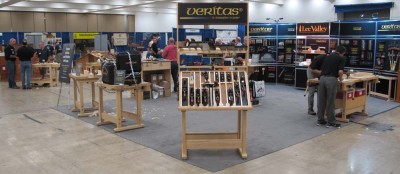
Later in the afternoon we navigated the clogged pathways of the WIA Marketplace in the convention center to get all my demonstration supplies up to the room I was using for teaching, and noted several things along the way.

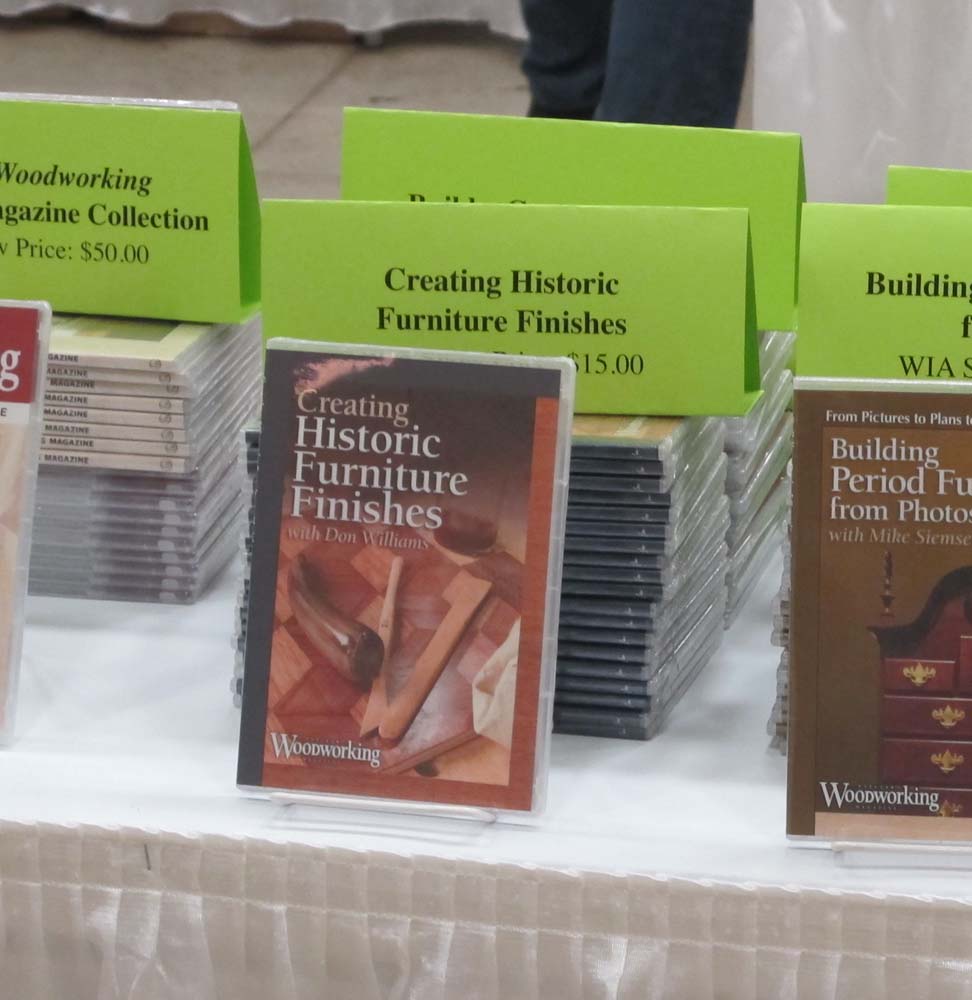
First, I must admit it was quite a kick to see the video front and center in the Popular Woodworking bookstore. I had actually only seen the released version two weeks ago; it was not terrible.
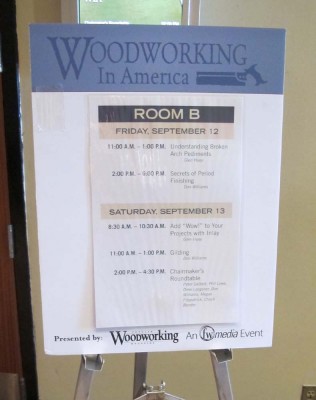
Second, even though I have given scores (hundreds?) of talks it still is a bit of a jolt to see my name listed on the room schedule. I don’t know why, it just does.
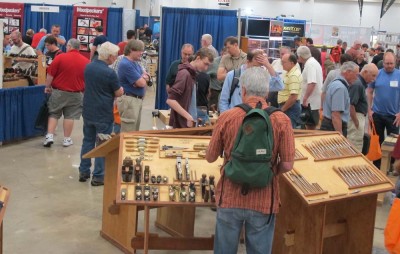
Third, there were a lot of great folks exhibiting mighty fine tools in The Marketplace. Somehow I managed to emerge from the weekend with zero dollars spent. Not that I wasn’t tempted…
We wrapped up the day with some good old North Carolina barbecue and bluegrass music a Prissy Polly’s, a renowned local eatery a few miles away in Kernersville. Ummmmmmmmmmmmm.
I see that according to WordPress this is my 200th blog post. Who knew I had that much to say about anything? I mean besides anyone who actually knows me.
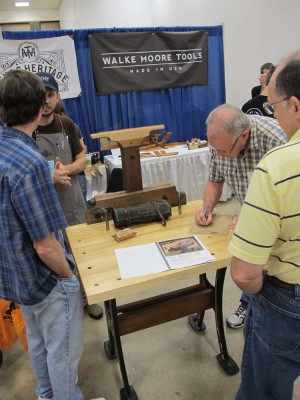
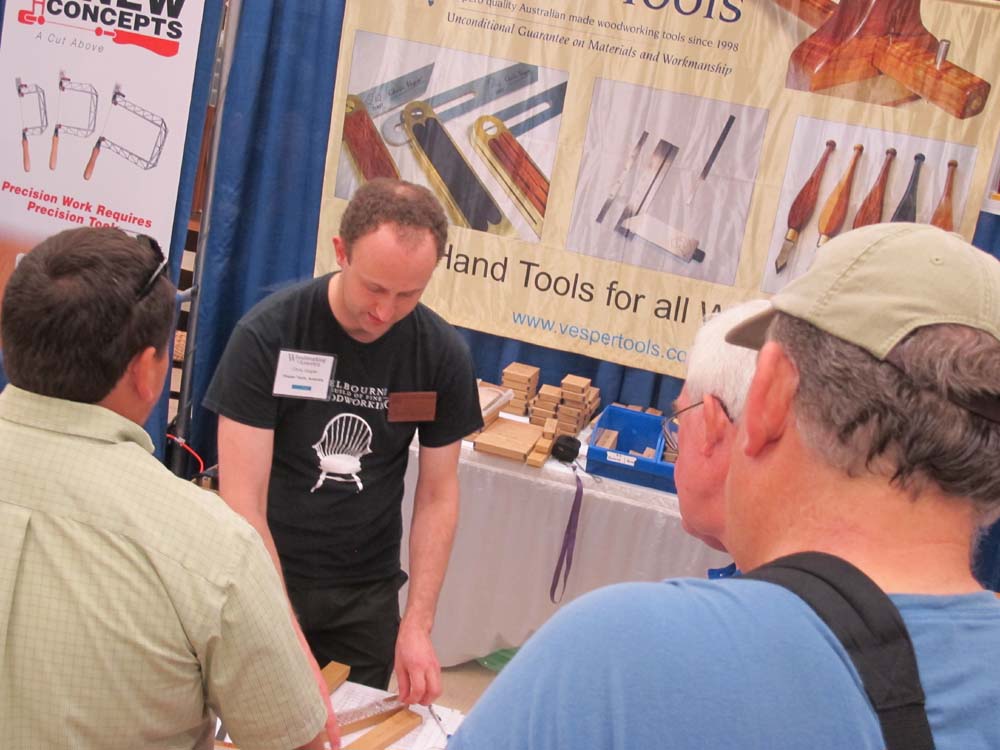
On the eve of departing for Woodworking in America we were delighted to host a brief visit from Chris Vesper, toolmaker extraordinaire whose handiworks are simply the standard in my opinion. Chris wrote me about a month ago saying he was flying into Richmond as the terminus for his flight from Australia, and after 36 hours in the Williamsburg area we saw his headlights peeking up the driveway. His navigation was mighty good as we are pretty much beyond cell service, but apparently not beyond satellite. I need to remember that fact…

Chris had an amazing tale of woe relating to his two suitcases of tools being confiscated by the Customs clowns in Dallas. He hoped but did not know for sure the tools would show up in time to set up his booth. As you can see from the picture above, in the end it did work out although he had to pony up some pretty serious unexpected express shipping fees.
After dining we set about to commencing to talk, and it was well past midnight when we turned in. the next morning we toured the barn and then he headed off for Winston Salem. We followed him a couple of hours later, arriving just in time for a late supper with the friends we were visiting.
Now that the rough/first draft of VIRTUOSO: The Tool Cabinet and Workbench of Henry O. Studley is in the computer I can now focus on those areas of the manuscript that need beefing up. One of those areas was the dearth of description regarding the possible daily activities of Studley in the Poole Piano Company when he was building the tool cabinet and work bench. That information has been very hard to find.
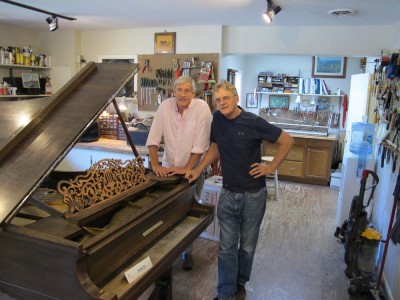
Fortunately I came across a shop in Charlottesville, two hours away, that was dedicated to the restoration, preservation, and care of fine old pianos. Owner Tom Shaw (right) and historical piano specialist Randolph Byrd (left) were a tremendous source of encouragement and information. Their framed poster of the Studley cabinet is jut out of sight on the right.
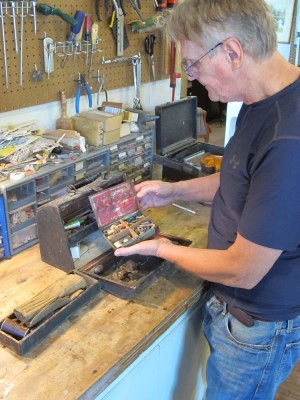
What made me excited to visit them was the breadth of their activities, plus the fact that Tom’s grandfather was a piano craftsman in Boston beginning in 1907, in other words, a contemporary of Studley’s. Here Tom is proudly showing me his grandfather’s piano tool kit, which his grandfather made himself. It put food on the table, and you can’t ask for much more than that.

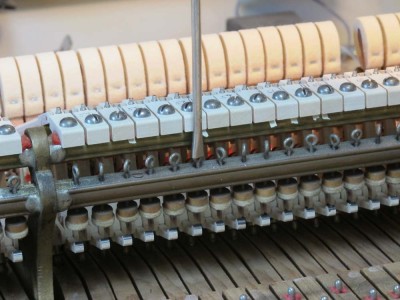
The one and only known portrait of Studley depicts him as an “action man” at the Poole Piano Company. His task would have been to assemble a kit like this one (this is for a grand piano, but you get the idea) into a perfectly functioning mechanism that would produce beautiful noise whenever the keys were pressed down.
I even got to see the working of one of the tools identical to Studley’s for adjusting some part of the action mechanism.
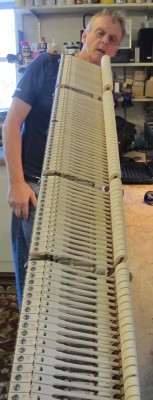
One of the final steps before assembling the action is “sighting the hammers” in order to make sure they are aligned and evenly graduated. While this is for a grand piano action, the process for an upright would be conceptually identical.
Gentlemen, thank you for pushing back the boundaries of my ignorance considerably. A copy of the book will wing its way to you when it is available.
The Benchcrafted folks opened the registration for the November 2015 reprise of the amazing French Oak Roubo Project I was privileged to to participate in last year (and no, my own bench is not yet finished. It has been languishing for the past 14 months while other things have been closer to the top of the “Get This Done Now!” pile).
I will once again be part of the teaching-and-helping team, along with Jameel Abraham, Raney Nelson, Chris Schwarz, Jon Fiant, Will Myers, Jeff Miller, Ron Brese, and our incomparable host Bo Childs.

I was outside working all day today, and just now saw the posting for the registration being opened, and the posting indicating that all the slots were filled.
My only sage advice is to make sure to wear clothes you do not mind getting stained. This oak was so rich in tannins that everything I wore then still has a faded black tint to it, but given my wardrobe that’s no big deal.
Between Roubo 2, VIRTUOSO, The Studley tool cabinet exhibit, and probably Roubo 3, 2015 looks to be a mighty exciting year.
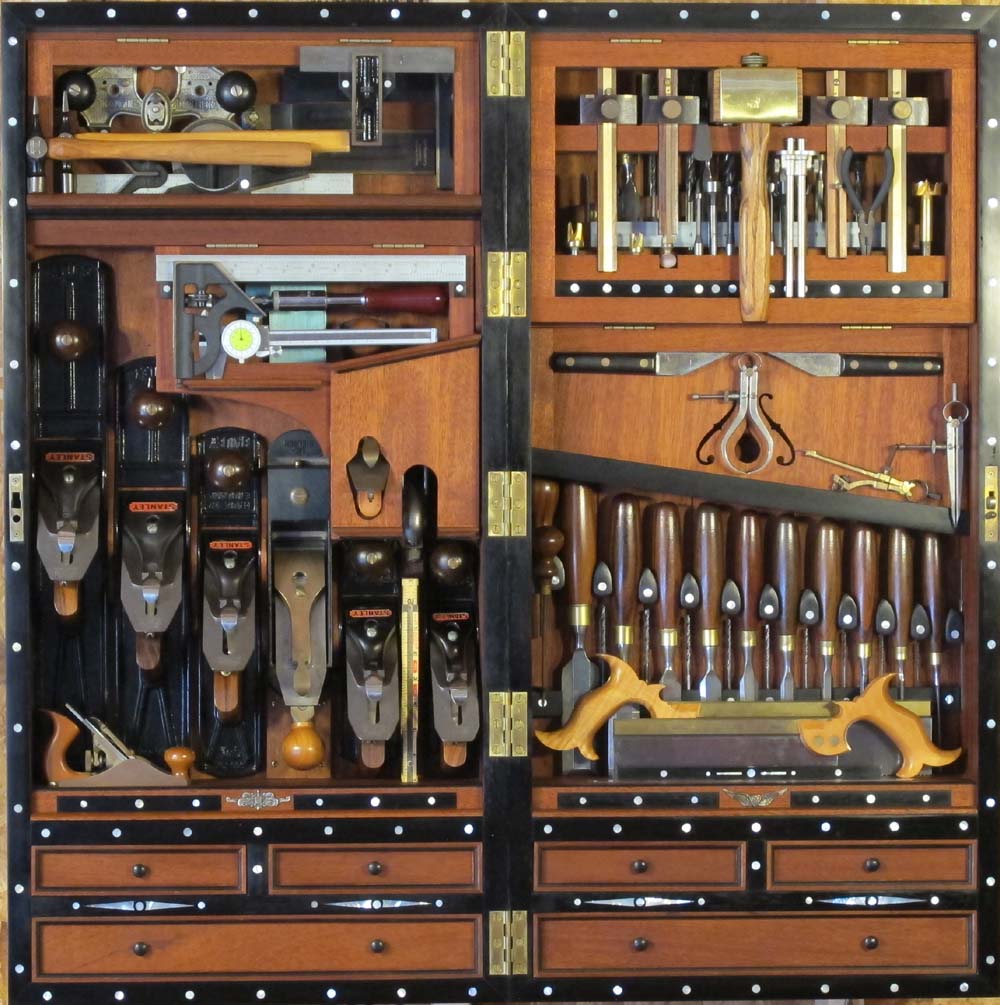
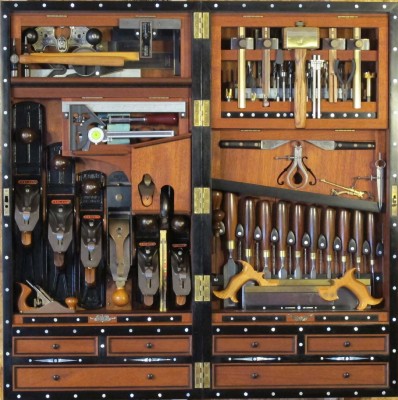 Ninety miles from the Studley-era piano maker’s workbench was the finest Studley-inspired tool cabinet I have seen. No, it wasn’t Studley, nothing else is, and it is not yet finished as there are still many tools destined for it, but I cannot imagine any serious woodworker not wanting this hanging on the wall above their bench.
The maker is a tremendously skilled fellow whose other projects revealed that like Studley, he enjoyed making intricate and complex things.
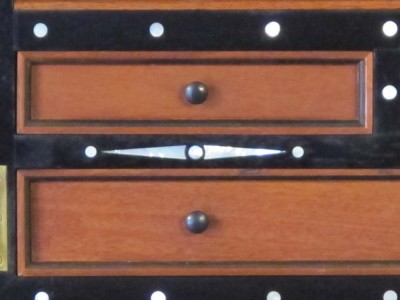
Oh, and all the screws are clocked. He wouldn’t bite on my suggestion that this revealed he was anal-retentive/compulsive, he merely replied that it was attention to detail. He was a great sport about the whole thing, and I truly enjoyed my time with him and hope he will make it to the exhibit next spring.
Yup, it’ll be in the book too, in far greater detail and length.
Back home now, and finishing the first rough draft of the whole book tomorrow!
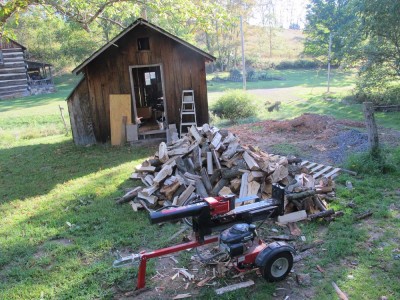
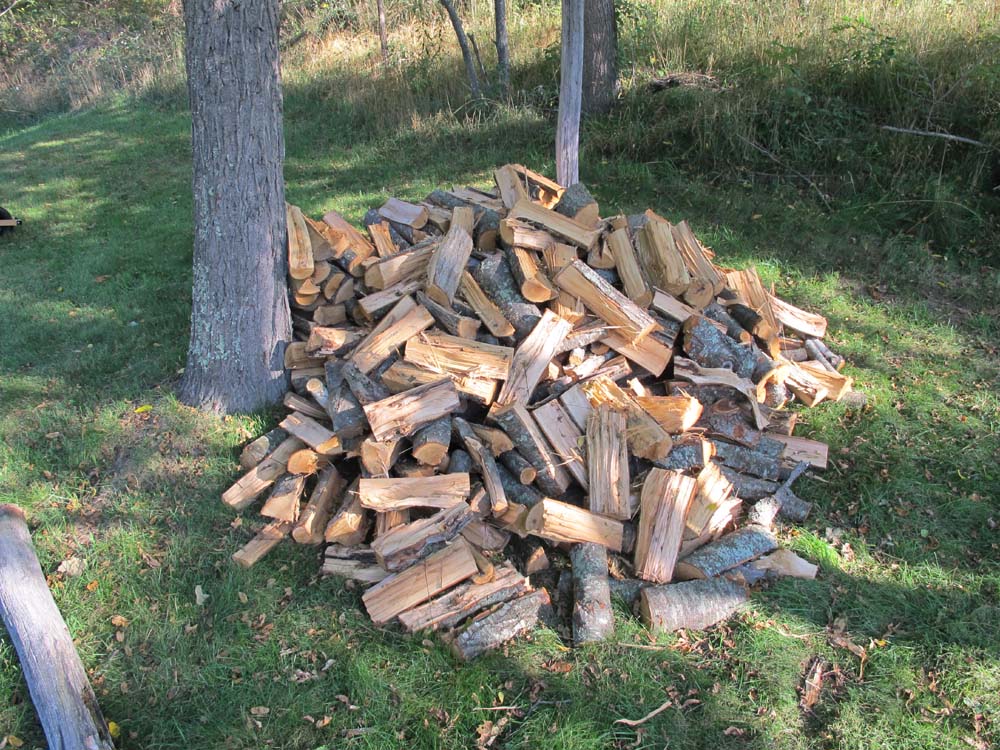
This will be our first full winter in the Virginia Highlands, where it gets “upstate New York cold.” For the past few weeks the sound of chainsaws and log splitters has been a constant drone in the background of the valley atmosphere, as the locals are getting ready for intense global cooling. Me too. In addition to the firewood already stacked in the storage shed next to the cabin, other piles of split wood are growing around the homestead.

Last winter was perhaps the coldest in a century here, and the woolly worms, walnut trees, and Farmer’s Almanac are all projecting an even colder winter this time around.

Walnut trees? Yep, by mid August they were already turning yellow and the leaves are now falling in a constant wave. Hence, concerns for an even worse winter. That would be pretty brutal, as at least on three occasions last winter the dusk to dawn temperature here in the holler was 20 degrees below zero.
Given the cold-nature of my bride the need for firewood and lots of it is riding high at the moment. Yesterday was one of those times when I hunted and gathered firewood. In the morning I went to my friend Mike’s farm and he cut down two trees, one maple and one beech and helped me load my truck to the gills. I’ve never bottomed-out my 4WD s10 before, but it was yesterday.

When I finished splitting that (our altitude lets split wood dry really fast!) I went up the hill to work on a giant maple that fell last winter. So far it has yielded two truck loads and will probably get another two by the time it is all done. For scale, the log on the ground is 16″ by about 15 feet long, and the larger of the two trunks still on the root ball is about 24″. It’s stretching my 14″ Stihl chainsaw to the limit. It might be time to get another, larger one. But for now as long as I keep the chain sharp it is doing okay.
How much wood do we need to keep the home fires burning non-stop for five-plus months? We will find out, but the other night at Bible Study one of the fellows indicated that he had put up 19 cords of wood. I certainly hope he needs a lot more than we do. Otherwise I am only about 1/3 of the way there. Fortunately(?) I want to clear more space on the south side of the barn for more winter light, so a bunch of trees will be coming down next week.
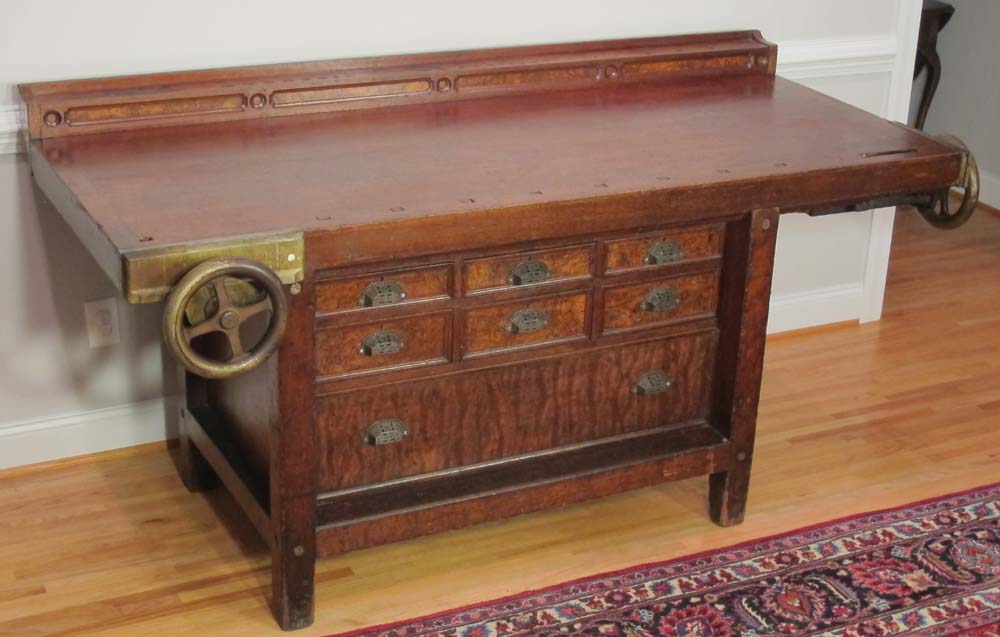
Monday just after dawn I hit the road for a longish drive into the Heart of Dixie to see a workbench. The owner had contacted me through the Lost Art Press web site indicating he had a really fancy Studley-era piano makers work bench. So of course I had to go see it.

He was right. It was spectacular. Other than Studley’s, all the other piano maker’s benches I had seen were at least in part “store bought.” Not this one, it was all craftsman-made. By a mighty good craftsman.
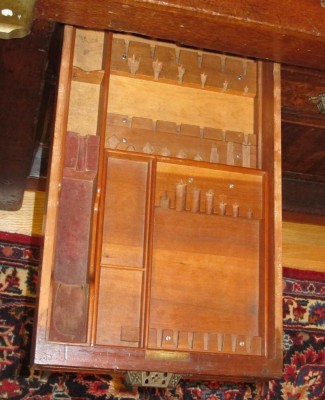
With its burled veneers on the drawers, delicate a whisper tight dovetails, superb cast drawer pulls, and the really neat tool rack, it was a work of art.
And yes, it will be featured in the book, in a Gallery of Piano-maker’s Benches.
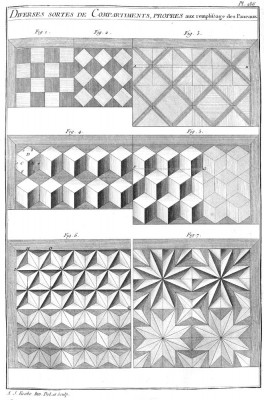
Once you have sawn a great pile of equilateral parallelograms with the jigs from the last post, you need to arrange them into the final pattern. Next post will go through the nuts and bolts of assembling a finished parquetry panel to adhere to a substrate, but for this post I want to diverge for just a few minutes and talk about the pattern layout itself. I feel justified in doing this because I have yet to teach a workshop where everyone does not make some layout mistake that has to be undone, often with great damage to the glued up pattern or at the very least loss of a lot of time and a raised level of frustration.
The key is to remember that in most instances, this exercise included PARQUETRY IS A REPEATED PATTERN. In fact, this simplest exercise is really about a dozen patterns superimposed on each other, and you must be mindful of their construction in order to avoid catastrophic mistakes that might deter you from finishing or continuing.
The pattern Roubo illustrates in the plate above, Figures 4 and 5, is simple and to my aesthetic taste, garish. I prefer to adapt it to my own preferences by using all the same wood for all the lozenges, and establish the shimmering pattern only through the changing grain patterns of the lozenges via laying them out.

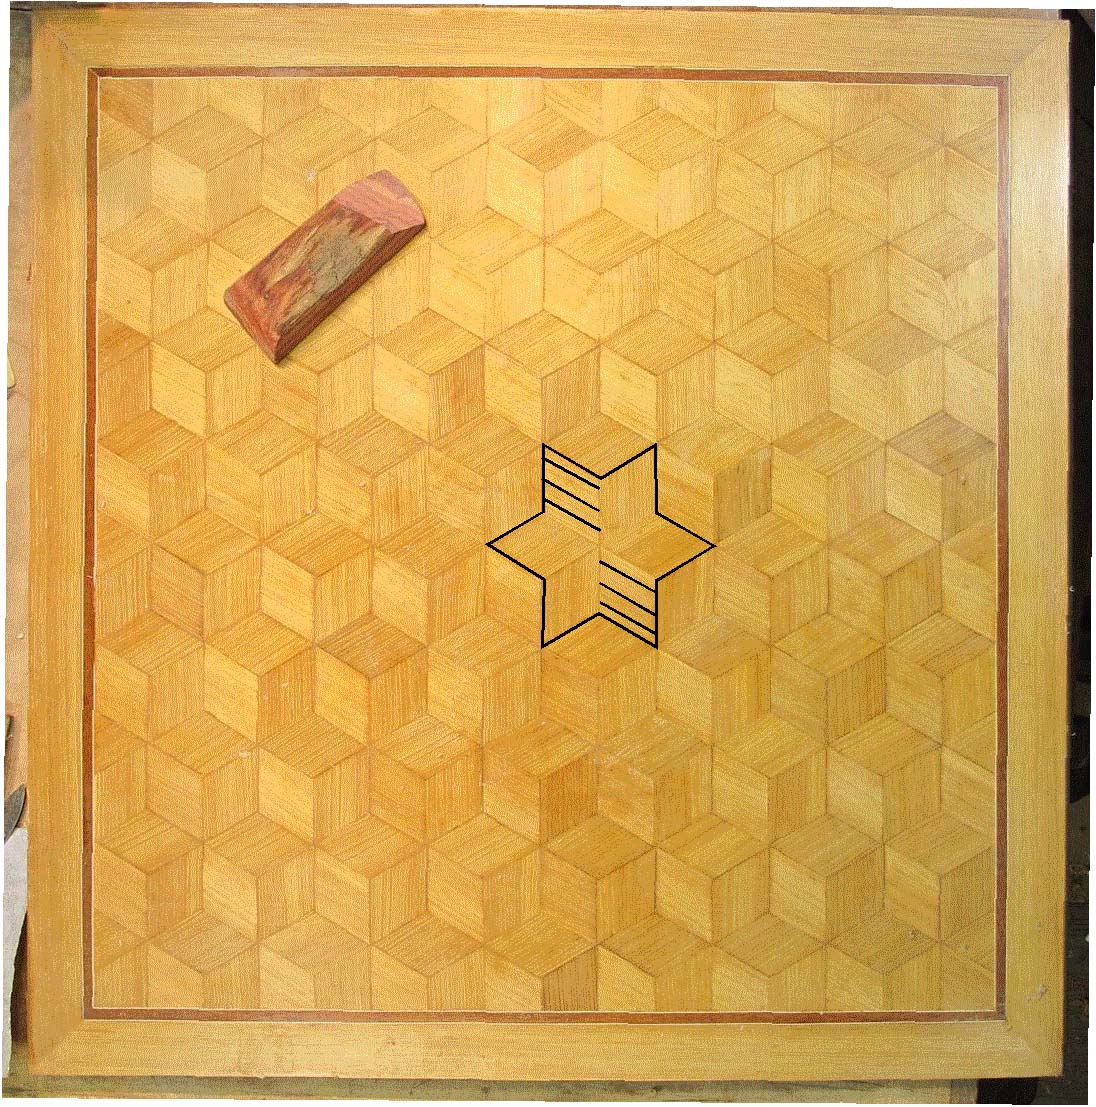
The simplest unit of the design is the cubic die. It is repeated ad infinitum until the panel is complete.
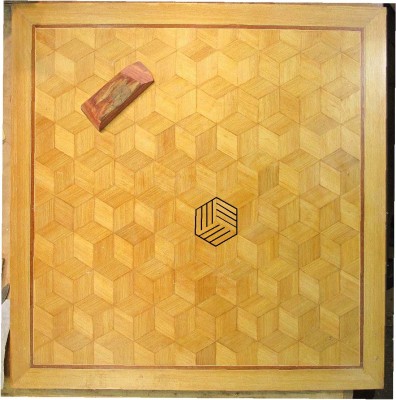
All you have to do is make sure you lay out each and every one of them with the grain pattern like this.

Or perhaps more simply, just remember to make it a whorl like this. But in truth, this is like George Costanza getting hypnotized by a poster on the wall of the bathroom. Hopefully you do not proceed only partially robed.
Such would be the risk when you realized suddenly that the dice overlap each other, and your eyes start to spin around. Let’s see if there are other approaches that might help.

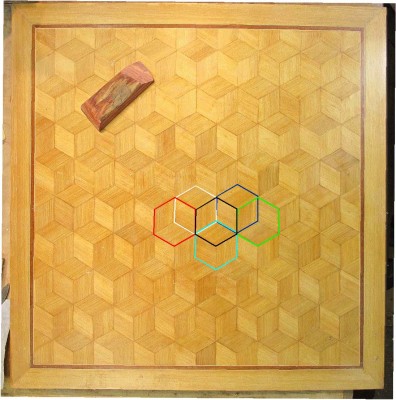
Another, second set of patterns is the pinwheel with a center point.

They are simple to lay out, just make sure that each opposing pair of lozenges is aligned to each other and the overall pattern. Like this,
and this,

and this.
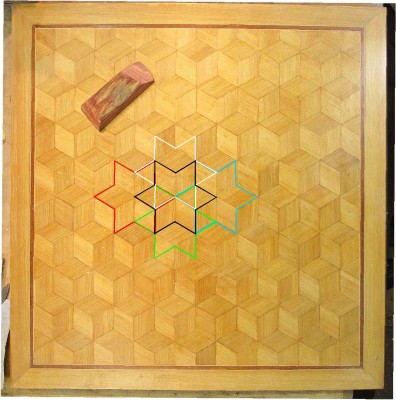
Unfortunately, the pinwheels also overlap each otherand there is the risk of visual confusion. Arrrrgh!
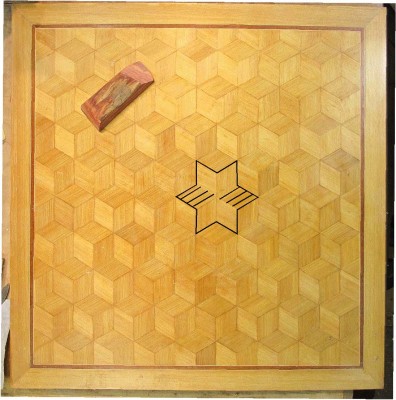
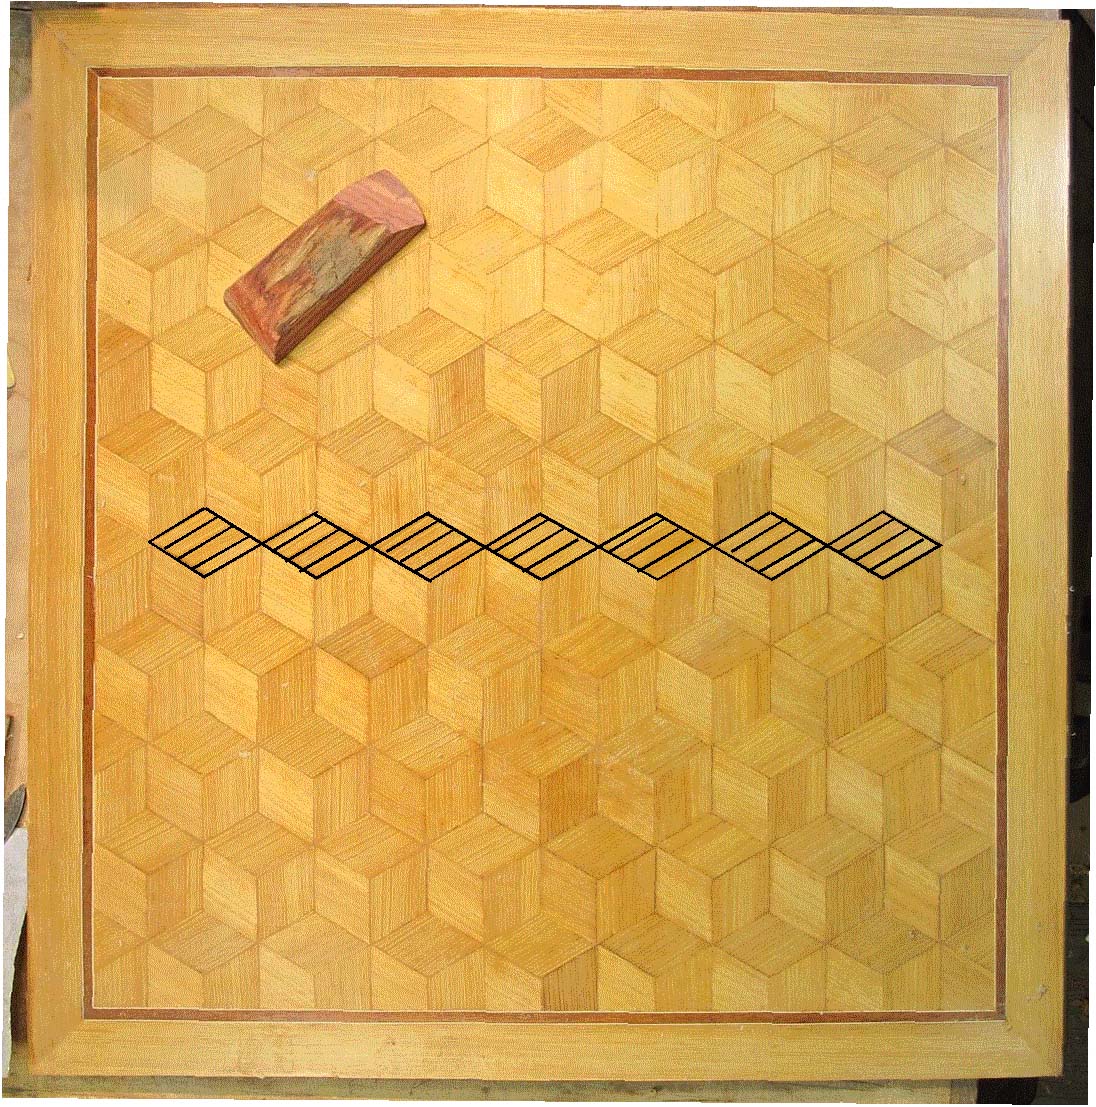
There are a third set of simultaneous patterns at work on the panel that are easy to keep in mind, running always in the background like a security system on your computer. It is the most straightforward pattern set, and this is often where I begin, laying out a horizontal row of lozenges tip-to-tip, each with the same grain orientation.
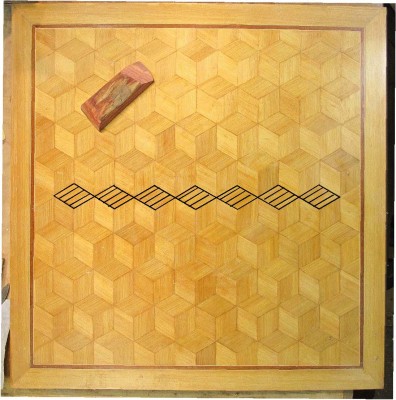
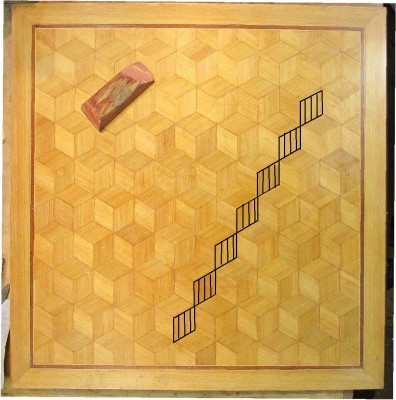
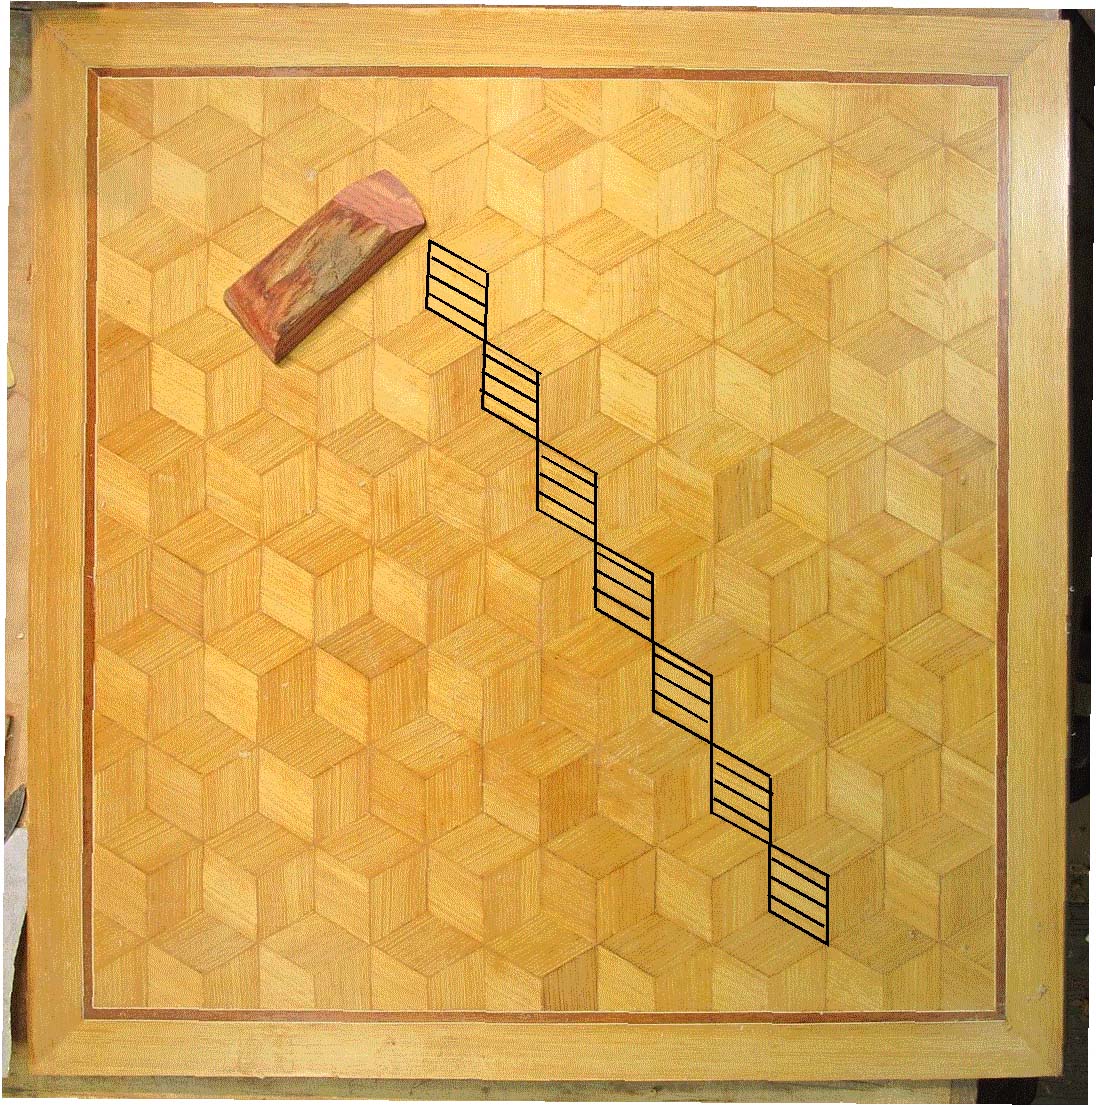
But, since we are working with a six-sided form, there are two additional complimentary patterns identical to the first one, each of these two off-set by 60-degrees.
Like this,

and this.
So, you can see the advantages of thinking about complex complimentary rows.
If you keep all these things in mind while you are assembling your panel, success is at hand.
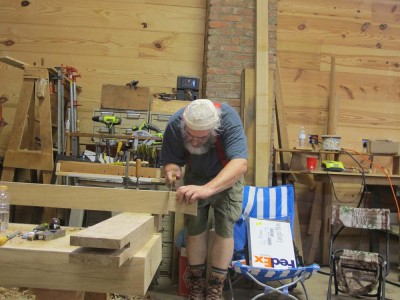
Periodically to take a break from sitting and writing, I get out of the recliner and hike up the hill to spend a little time puttering in the barn. I am getting much faster at writing over time — I penned the thousand-word introductory essay for the new l’Art du Menuisier: The Book of Plates in about two hours, but still it is simltaneously exhilarating and tedious. Since I know I have to get back to work to stay on track, my times in the barn are short and the activities brief and episodic for several more days.
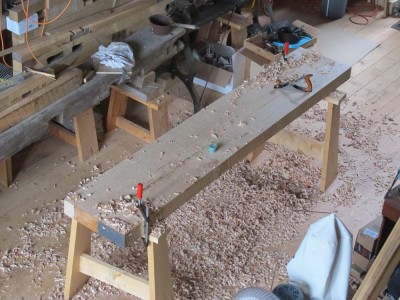
In addition to periodically loading the solar wax melter to purify more beeswax I grab a scrub plane to continue the flattening of a maple slab I glued up several winters ago. It is destined in short order to become a Roubo-hybrid bench in my barn studio, perhaps even under the east bank of windows. The “hybridization” of the bench will be in the form of another Emmert K1 vise, a tool I consider unsurpassed in the bench world.
The 18″-wide maple slab was out-of-flat by more than a quarter inch and I do not own a power planer that large and the darned thing is just too heavy to take to a friend’s shop where a planer that large sits. A few minutes of scrubbing here and a few minutes of scrubbing there adds up, and now the slab is flat enough to start laying out the legs.

Ten feet away my old Roubo bench I built for my conservation studio at the Smithsonian, where the climate control was perfect all theim time, developed a 1/2″(!) crown once I moved it to the unregulated environment on the south side of the barn. I will also will be taking a whack at that as a vigorously physical respite from writing.
Another fortnight or less and the first draft of VIRTUOSO will be done.


Recent Comments