I’ve been able to build up my inventory of raw beeswax enough to begin planning for processing it by the boat load for sale as 1/4 lb blocks, and to use in the making of Mel’s Wax. In the past I’ve done processing with a variety of electrical cookers, CrockPots and the like, but I wanted to try something else.
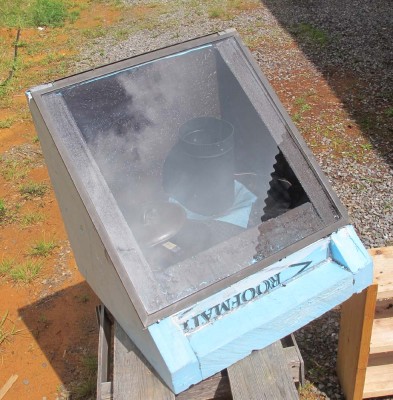
Following the copious information on the internet — and if it is on the internet it MUST be true — early last week I built a fairly typical solar oven to give it a try. Using some of the scrap 3″ XPS rigid foam insulation I’ve got laying around along with a glass panel from a long-dead storm door and some construction adhesive, I built a prototype to give it a try and see if it worked.
Boy howdy, did it ever work.
I took my remote sensor for the thermometer (it’s the unit I place out in the unheated part of the barn to tell me when I am inside the heated part how cold it is “out there”) and placed it inside the solar oven. Before long the interior temperatures were 130F, 140F, 150F. I set up a wax batch and it melted in less than 90 minutes, not a whole lot slower than I would get starting from cold with a Crock Pot. Plus, since the entire volume is at the same temperature the wax flows through the filter much more easily.
I filtered the raw wax through metal window screen to get out the bug parts then a disposable shop towel for tiny particulates, and let it drip into a pan of water to dissolve out any remaining honey or propolis. The resulting wax is beautiful, ready for remelting and casting into rubber molds.
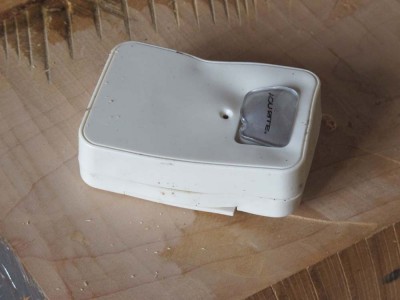
Last Tuesday the sun was bright and mostly uninterrupted. My peak temp was 162F, which was hot enough to not only melt the wax easily but also melt the case of the sensor unit and actually the solar oven began to melt itself! Clearly the XPS was not the ultimate answer.
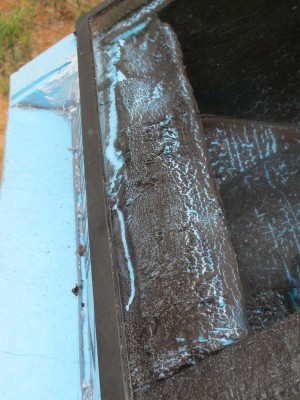
I grabbed some 2″ foil faced polyurethane sheet insulation and built another one. That should do it. If not, I’ll switch to foil faced fiberboard insulation, but the idea is definitely solid. From now on I expect that every bright sunny day will find the solar wax purifier hard at work.
Now I just have to wait for a warm sunny day. It’s been grey and cold(!) the last several days, but I have hope for this afternoon.
Stay tuned.

It’s hard to believe that Woodworking in America 2014 is only a month away!
Once again I am honored to be a presenter. My main frustration is that there are so many great presenters that I will be unable to see nearly as much as I want.
On Friday afternoon I have the remarkable luxury of having four solid hours to talk about and demonstrate historic finishing. I have presented this at WIA several times before and it always seems to be a crowd-pleaser.
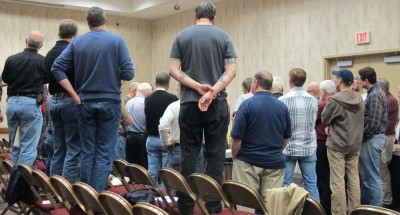
Last year the audience was especially enthusiastic; the facilities crew tossed us out sometime close to 7PM.

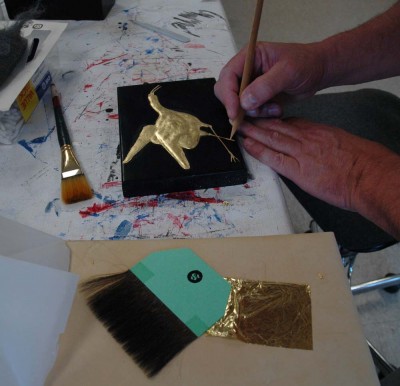
Then, mid-day Saturday will be a new WIA topic for me, Gilding. I don’t do much large scale gold leafing anymore, but I do use it a fair bit in my japanning work.
I hope to see you there.
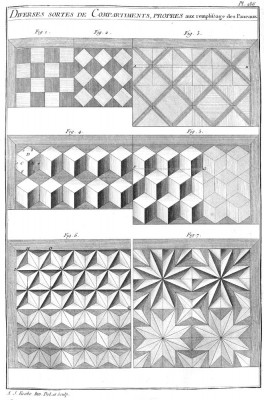 For virtually any of the parquetry patterns described by Roubo, one or several sawing and planing jigs would be used. For a shop doing a variety of intricate parquetry, an inventory of dozens or even hundreds of jigs would not be unexpected. Quite literally every single shape for a parquetry pattern would require its own jig(s). In the simplest configuration that I am describing here, the cubic hexagon or “dice” pattern, also known as a “sunburst or pinwheel” pattern, a large number of identical 60-120-60-120 rhomboids were required, the number ranging from several dozen for a drawer front to a couple hundred for a door or even a couple thousand for a complete piece of furniture. Quick and accurate fabrication was and is integral to the success of this endeavor.
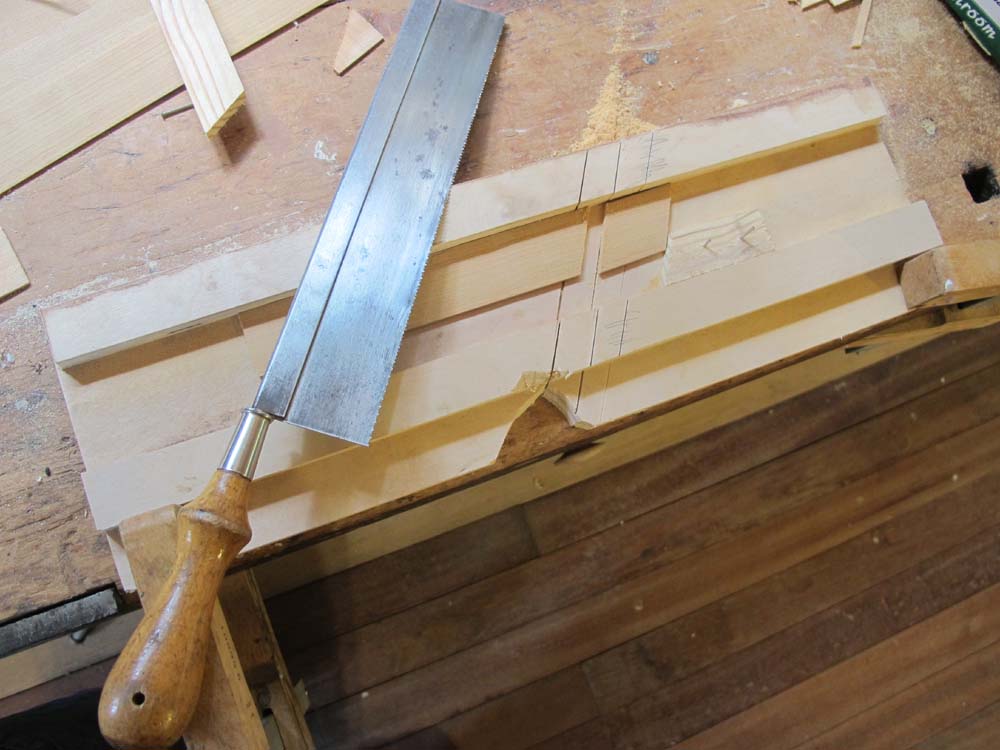
  Fortunately it requires only the simplest jig and fairly careful layout and execution. I make a mitering jig with parallel fences on front and rear – the wider and thicker the better — with the space between them slightly greater than the width of the veneer strips being cut into rhomboids.
  Using a 30-60-90 triangle establish a 60-degree angle on your bevel gauge, then set that gauge against the rear edge of the back fence and cut the kerf. It is critical to get this angle correct, it must be 60-degrees. Not, 59, not 59 ½, but 60 (well, 59.9 might work). When engaging in a fairly large scale project I make new kerfs somewhat frequently to mitigate the compounding error of wallowed out kerfs in the fences.
 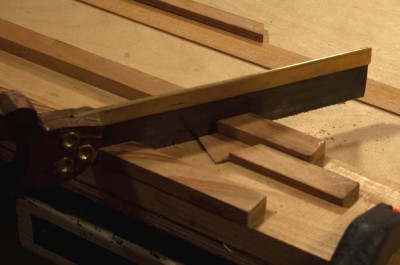 Since the width of the veneer stock can vary, for each run of parquetry a new spacer block needs to be placed for the rhombus being cut. To do this, simply place a piece of stop block stock in the saw and cut a small piece to be used as the angled stop block. Then take a piece of the veneer strip in the jig and saw off a small section at the 60-degree angle. Leaving the saw in place, fully embedded in the jig, rotate and flip that off-cut so that the recently sawn edge is now against the rear fence, and the side formerly against the rear fence is loosely against the saw blade. Place the spacer block against the edge of the off-cut and tack it in place, and you have a setup for making perfectly identical “lozenges” for composing the pattern.
 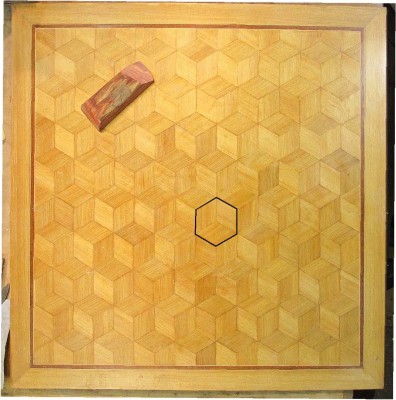 To check the accuracy of the set-up cut three pieces of the veneer strip stock and place them in the “dice” pattern. Make sure that the angles meet perfectly in the center of the pattern. If they do not, you need to lay out and cut another kerf until you get it right. Also, make sure that the sawn edge of the rhombus is EXACTLY the same length as the un-sawn edge. If it does not, tap the stop block towards or away from the saw a tiny bit until you get the dimension right.
 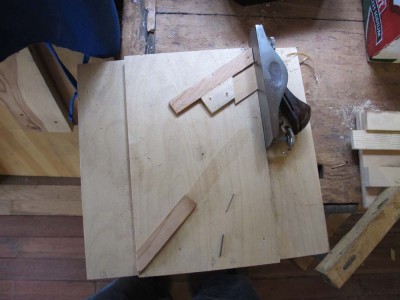 Another very useful jig is a dual shooting board with one fence at the 60-degree angle to adjust any lozenges (as you progress, it is almost inevitable that some inaccuracies will compound and need to be rectified) and a second fence at 45-degrees, to make perfect the ends of the banding where the pieces meet at the corner.
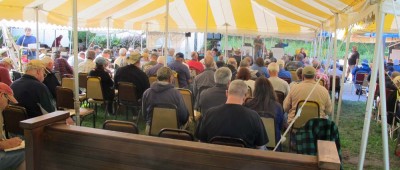
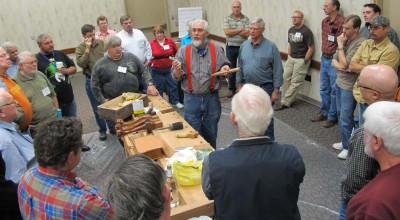
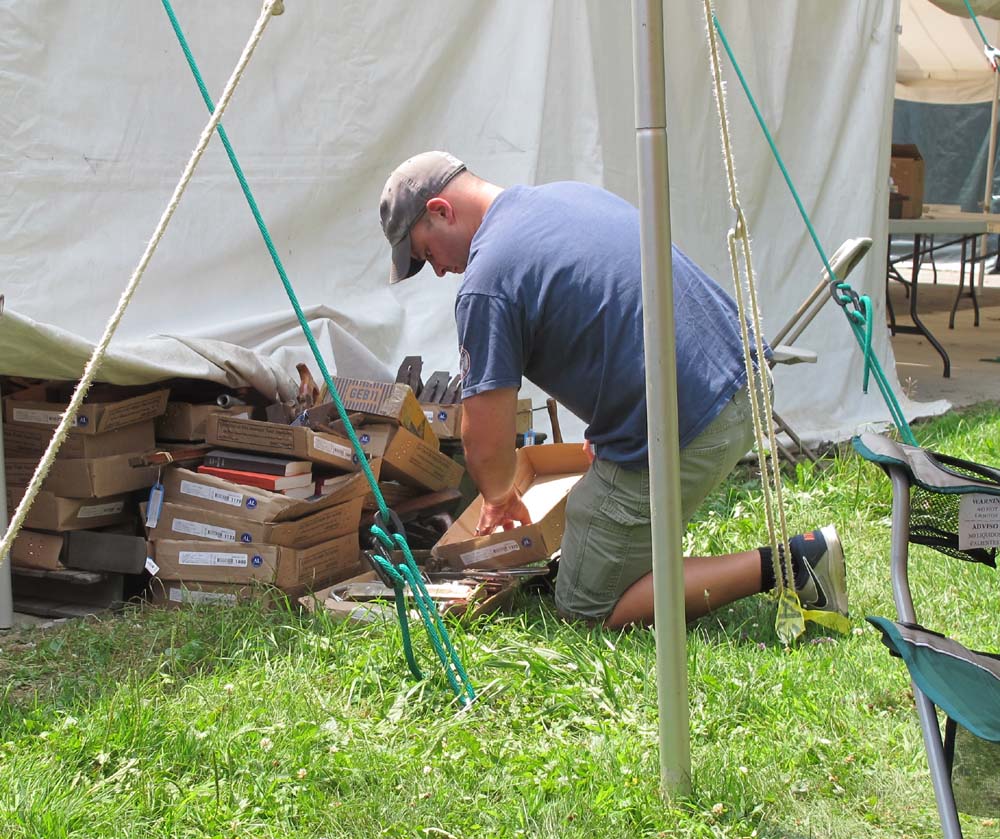
This year at Martin Donnelly’s annual warehouse-clearing auction of 75,000 tools in 3200 lots over 20 hours of auctioneering, I sat in a cluster with new friends Martin from Dayton and Jim from Boston, along with older friend Josh Clark from Hyperkitten Tools and my long time friend Jon Szalay, one of the very smartest guys I know.
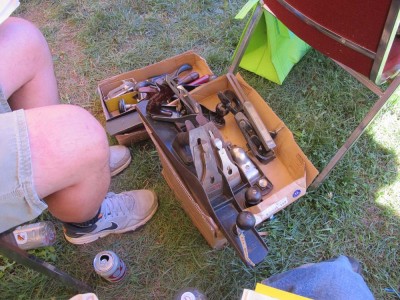
Josh’s business of buying lots of quality tools needing some TLC, tuning them and then reselling them for a modest prices is a tremendous boon to woodworkers coast-to-coast. He was having as successful an auction as mine was not. Time after time he would get a solid lot of tools, each one containing some, sometimes very many, tools that would fit nicely into his inventory.
Fortunately for me, on occasion these box lots contained items he did not really want but I really did, so plenty of sub-rosa horse trading was going on.
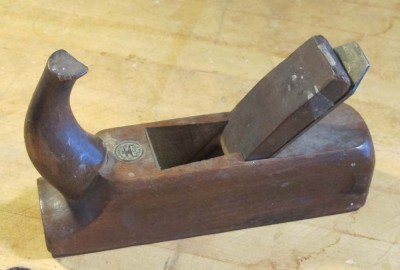
The first item we transferred from him to me was a horned scrub plane for my friend Dave, who has caught the hand-tool bug with a vengeance. I’ll tune that up and send it to him next week.
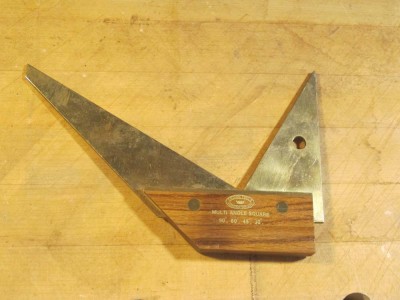
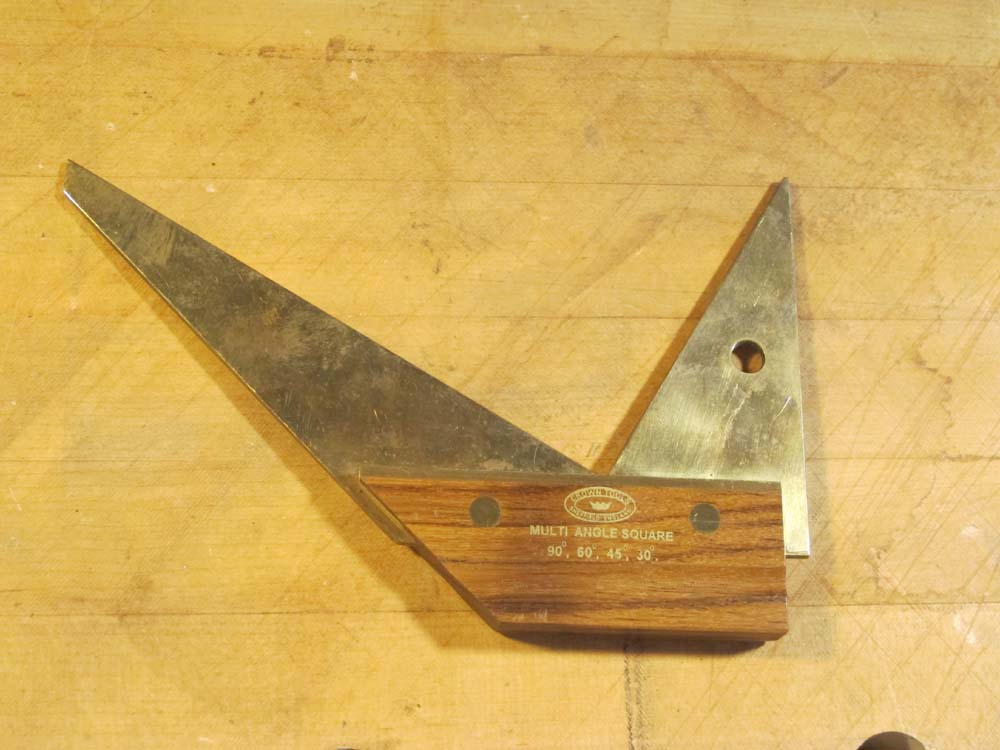
Next came a snazzy but weird layout template which features 90-45-30-60 degree angles, perfect for my use in making simple French parquetry.

It bears a remarkable resemblance to the marking template featured in Roubo’s Pate 14. Hmmm.
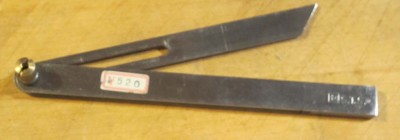
Also in the same lot was an excellent little Japanese-style bevel gauge, the smaller version of one I already had. Josh felt this tool was outside the interests of most of his customers, so I bought it to include in my traveling tool kit.
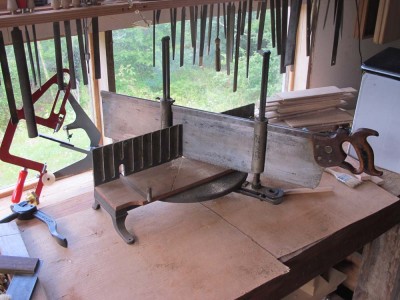
Finally, Josh implored me to take a very nice Stanley miter box off his hands so he would not have to pack it up. Being a generous sort of fellow, I accepted it. Just to help him out.

Spending those days aside Josh was a delightful interlude of good-natured tool chat and tale telling, and I strongly urge you to follow his web site and patronize his business. You will not be sorry.
Thanks Josh!
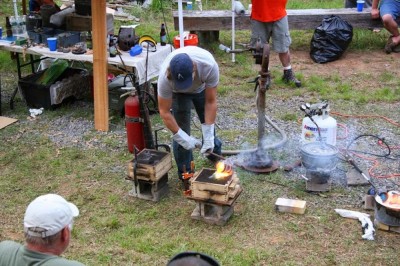
photo courtesy of Joshua Klein
Jon Szalay is someone I’ve known for many years through our membership and participation in the Professional Refinisher’s Group, an online forum that is part of our every day surfing. His presence was prominent in our recent Groopstock ’14 gathering at The Barn.
Jon is one of the most talented and inventive guys I know, he’s an antiques dealer, machinist, vintage motorcycle expert (he’s renowned for taking a 1911 Harley motorcycle on a transcontinental road trip, “Fix and repair hourly” he quips, and is the “go to” guy for the American Pickers crew), metal caster, carver and artist, the list goes on and on.
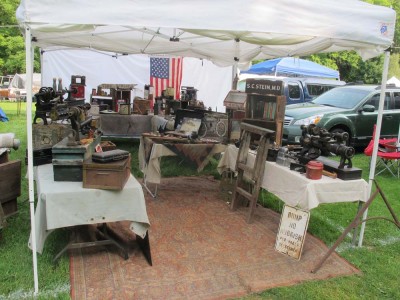
Jon had a booth at the tailgating section, and was somewhat overwhelmed by the scope of the auction. “I don’t know where to begin!” he said on more than one occasion.
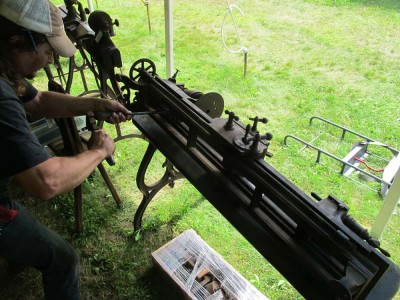
What eventually drew his eye was a mid-19th century machinist’s lathe, and with his encouragement I bought it for us to restore together (unlike most lots, it went for WAY under the estimate). We’ll get together this fall at The Barn to complete the task and for him to help me set up my blast furnace so metal casting can be part of the ongoing activities there.
My recently departed friend Mel Wachowiak said something that resonates with me often at the moment as I am assiduously putting meat on the bones of the manuscript that is becoming VIRTUOSO:The Tool Cabinet and Workbench of Henry O. Studley.

What Mel said was this:
Whenever something is made that is more beautiful and more expressive than it has to be in order to function, then you have art.
Oh yeah, H.O. Studley was an artist alright.
========================================================
For more information on the upcoming exhibit of the H.O. Studley Tool Cabinet and Workbench, you can go to the exhibit’s web page here.

Recently my friend Bill wrote me to ask if I had any thoughts about portable workstations, as he was about to embark on a project requiring him to work in the gallery of a museum.

photo courtesy of Joshua Klein
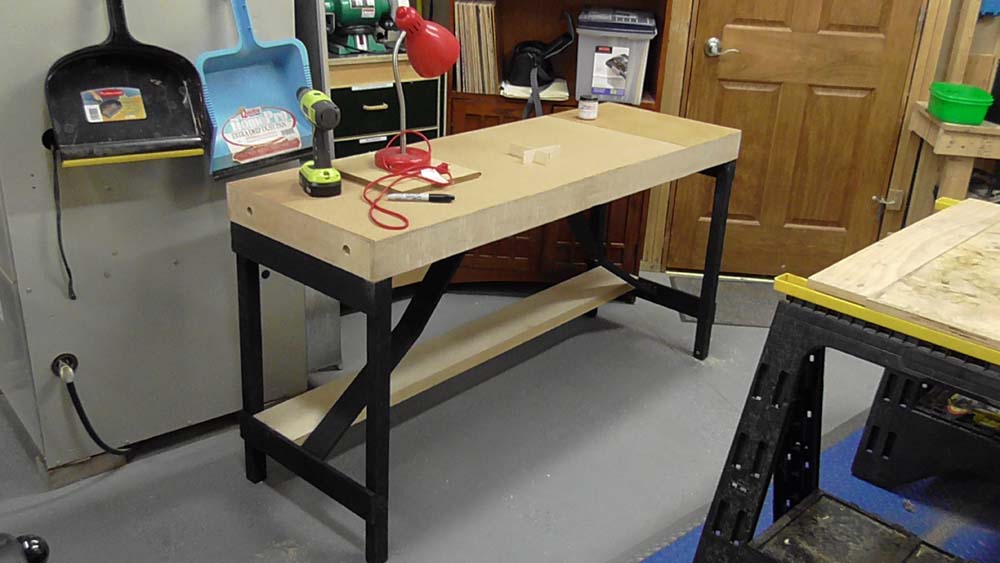
I was able to help him, and in fact together we built a new bench for him to serve his purposes. I enjoyed it so much I built myself yet another one and am documenting it in great detail here.
Note: Like the “Parquetry Tutorial” this entire series of blog posts will be edited and packaged for download as a complete PDF once I have finished it. WordPress is being obstreperous about the spacing of this post, but it will be corrected in the PDF.
Working as a furniture conservator requires me to frequently work “on-site”, that is, I go to the furniture rather than bring it to my studio. There are many reasons for this; the legal liability of transporting very valuable objects, the cost of renting a truck and hiring someone to help out (I usually work alone), the ability to call it quits at the end of the workday, etc. Regardless of the reason, I often found myself working in unfamiliar, and usually unequipped, surroundings.
Thus, several times a year I would move lock, stock and workbench to a new location. Loading and carting big sawhorses, plywood sheets and cardboard boxes full of supplies to the new site is a truly odious activity. Over the years of scraped knuckles and bashed shins carrying sawhorses and plywood up or down three flights of tight, winding stairs, I vowed to find a better way of setting up a temporary work station. Obtaining the perfect portable workbench was my original goal, but by the time I finished it turned out to be just one of several aspects to my quest.
In the end, that process of finding a “better way” resulted in the design and fabrication of a new workbench to make the task of working in a portable studio more manageable and productive. Through several generations of prototypes over twenty years I have it now refined to the point where I am not sure what more there is to improve.
What did I want?
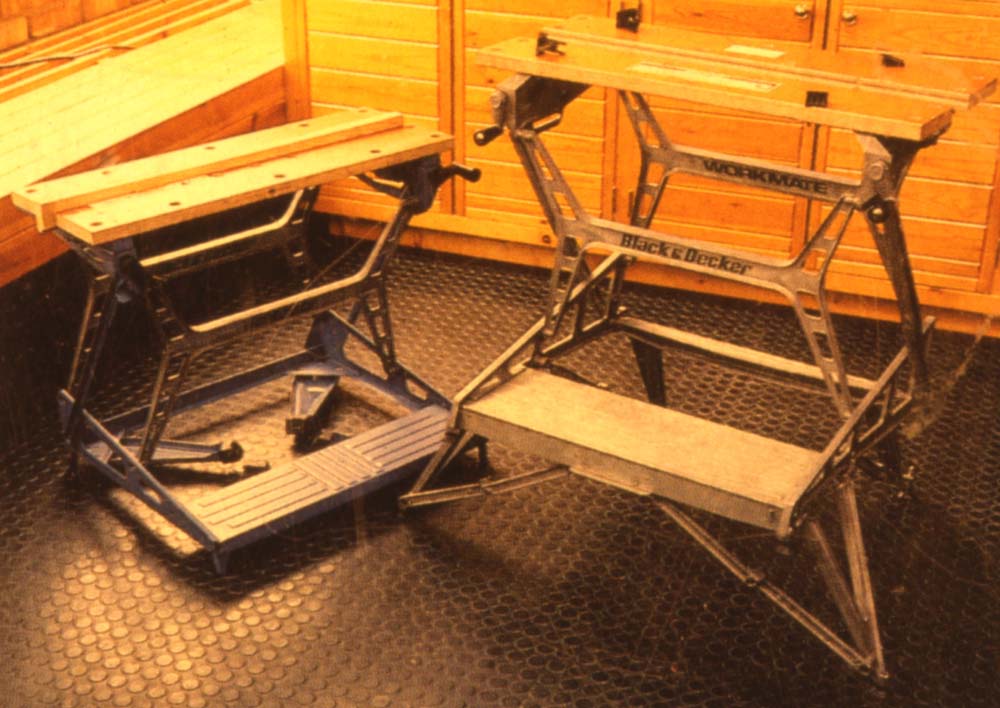
The only thing I was sure of was that my sawhorse and plywood routine had to go. But what arrangement was to take its place? My first step was to acquire a suitable workbench. Being a lazy fellow, my first actions were to look around at the market to see if any of the available “portable” workbenches were suitable. I discovered only two real options; a small version of the European-style butcher-block-top bench, or a Workmate. I looked at a couple of the former, and own one of the latter.
I found the portable Eurobenches to be too small and unsteady for my use (and quite frankly, too “cheezy”). In addition, they still weighed-in at over 100 lbs., simply too heavy.

I tried my Workmate on a couple of projects, but it wasn’t exactly what I really wanted because it was too top-heavy and the work surface was too small. My search for a manufactured bench to suit my needs wasn’t exhaustive, but nevertheless, in the end I decided to design and build my own portable workbench.
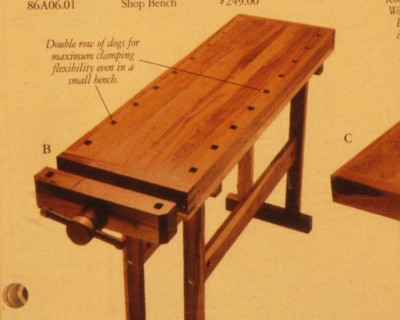
The process of attempting to procure a new portable workbench began with the question of exactly what I wanted out of the bench, regardless of its source. When I decided to make my own, I had only to review those requirements and build to fit them. But back to the original question; what were my specifications for the bench? The answer was simple; 1) the top had to be perfectly flat and at least 2’x4′ (any smaller and I might as well stick to my Workmate), 2) it had to have an integral large capacity vise sturdy enough to take a modest beating, 3) the bench had to be very light, compact, and easy to set up and take down because I didn’t want to have to assemble a kit each time I moved, and 4) it couldn’t cost a fortune in time or money to acquire. It was also important to remember that the bench wouldn’t have to stand up to immense weight or stress, since the pounding necessary during general joinery is rarely required in a conservation project. Any heavy work dictated by a particular treatment would still have to be done at home.
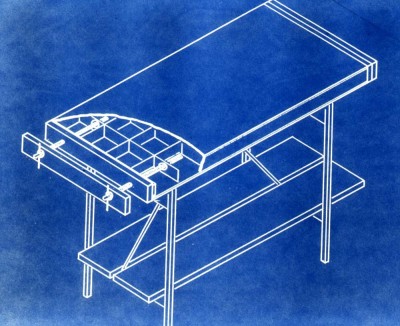
The bench I ended up with was not an example of exquisite handworked joinery, but it did require precise machine woodworking .
In the next episode I will begin to walk you though the step-by-step process of making one for yourself.
Through the first half day of the auction Thursday afternoon, there were several lots that went to the next highest bidder after I dropped out of the running. I tend to be pretty disciplined about setting a bid ceiling and sticking to it. I was beginning to suspect an Govcom conspiracy but thanks to Josh Clarke I was not being caught empty handed (I will detail the coolness of sitting alongside an active successful bidder tomorrow).

Friday morning at about 10.30 came the item I drove there to get, the Emmert Universal Benchtop Toolmakers Vise. I’d looked it over carefully on Wednesday and Thursday (twice) and it was both a beast and a beauty. Astonishingly, bidding started at $5, indicating there were no absentee (internet) bids. I jumped in, hard. At about $300 there was a lull and I could feel the thrill of victory rising in my chest. Then another bidder jumped in and the price soon chased me off. No, I did not win the bid, which was an out-the-door price of just under a grand. The disappointment was bitter.

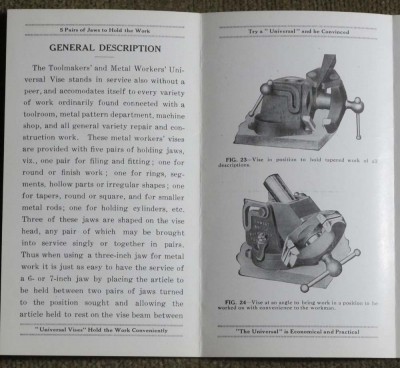
However, all was not lost as my friend Jon found a pristine sales brochure on that very tool out in the tailgating section and gifted it to me as a very nice consolation prize. It was a truly thoughtful and generous gesture I will recall for a very long time.
I’ll keep looking, but so far this tool has eluded my wallet. If someday I find one in good condition for a fair price I will get it. If not, not.
The patternmaker’s chest also came and went above my limit. At the end of the day I saw the buyer examining it and I congratulated him on it. He knew nothing of the contents, and I spent several minutes explaining what each of the tools inside was. In the end it was apparent he cared only for the chest, and I was only interested in the contents, or more specifically, the Buck patternmaker’s chisels with the interchangeable handles, shafts, and gouges.
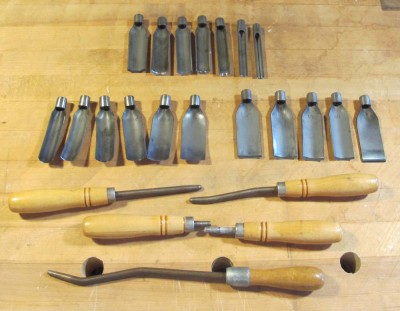
He offered the set to me for a very modest price, and in moments I had them in a box and was toting them off to show my friends. These high-chrome steel chisels are made only for gentle pushing to finish the surfaces of wooden patterns for foundry work, and I now have a pretty complete set as these joined my previous acquisitions from years past.
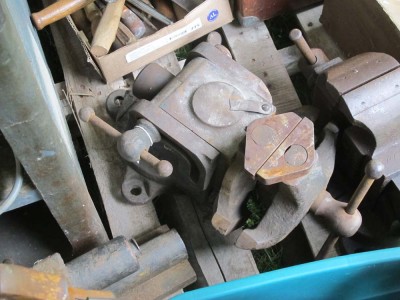
One last forlorn visit to say farewell to the Emmert on the buyer’s pallet (he was buying A LOT) and then we headed for the line to the pig roast. Roast pork is the near-perfect conclusion to almost any kind of day.
Tomorrow, finally some winning bids and horse trading with Josh.
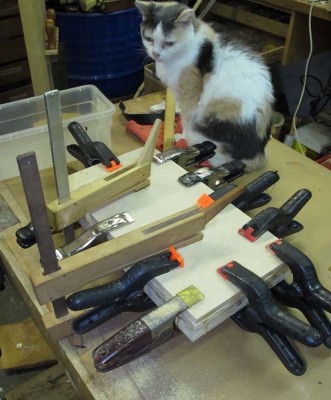
Recently I got the call that the last of our gerontological felines had departed for the Great Catnip Patch in the Sky. 18-year-old Calico Girl, or “Callie,” featured recently in Popular Woodworking, died while my daughter was at work, and she buried her alongside our others. Another old gal, “Baby” also 18, had died only a fortnight earlier (all these are natural deaths of ancient cats simply fading away.) They were all rescued cats who lived long and much-loved lives.

This picture of me editing Roubo in about 2011 was a pretty typical image on a cold winter’s night, when even though we kept the house heated the cats knew it was cold outside and wanted to suck as much body heat out of us as they could. From top to bottom they were Lazy Boy (d. 2012), Toby (d. 2011, he adopted us out at the cabin in 2001), and Baby.

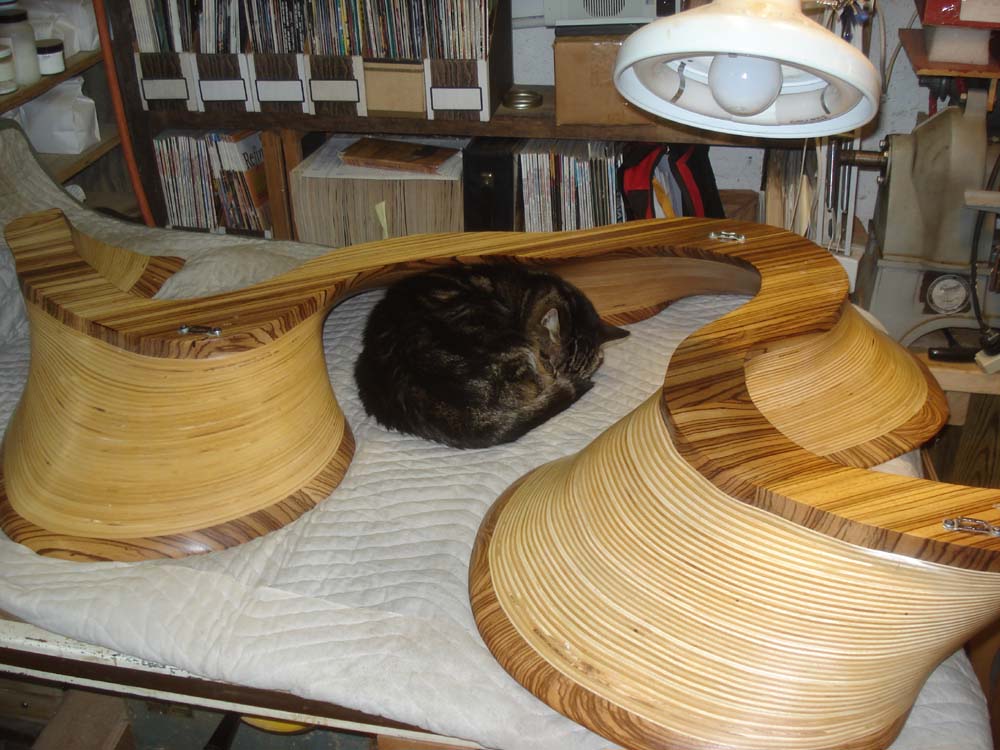
This is one of my favorite pictures of Toby curled up in the void of a modern sculpture I was restoring. If ever there was a person in a cat costume it was Toby.
We are now cat-less for the first time in more than 30 years. As a cat person myself, it feels a little weird. I know cats have a reputation as being aloof, but their indifference to me makes them all the more appealing companions.
I think I’ am in the market for a barn cat…
While attending a memorial celebration of Mel’s life and work last week, I revived an old acquaintance with one of Mel’s long time collaborators, a renowned architectural conservator. Our conversation was a winding one, reminiscing on our mutual respect and admiration for our departed friend.
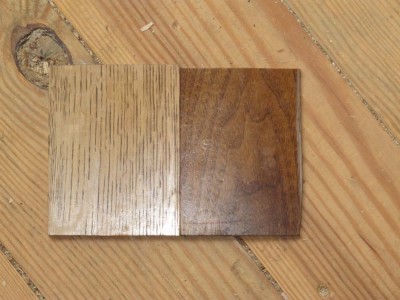
Eventually we passed into the territories of our own projects, and he mentioned a gift he had for me out in his car. In a couple minutes he reappeared with an envelope with two index-card sized pieces of wood.
“These are some of the parquet floor remnants from the Oval Office, removed during the renovation of about 1990.”
Wow!
I do not know the configuration or pattern of the parquet flooring, and even if I did the pieces are so small I could not make sense of them. Perhaps some day I will get a photo of the Oval Office flooring during this period and replicate it, but for the foreseeable future I will be content to enable these remnants to be prominently featured in The Barn alongside the c.1670 oak parquet flooring from the Palaise Royale in Paris.
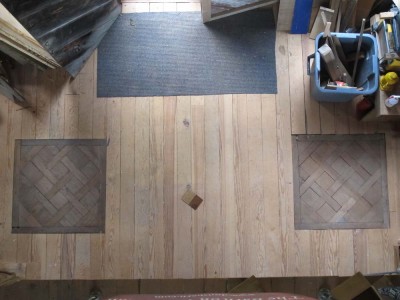
So, in addition to sections of floor that may have supported Thomas Jefferson and Benjamin Franklin, I have a scrap of floor that almost certainly bore the footsteps of Ronaldus Magnus. How cool is that?
Now I just have to somehow find a piece of flooring from underneath the only truly great President of the past 200 years, Calvin Coolidge…
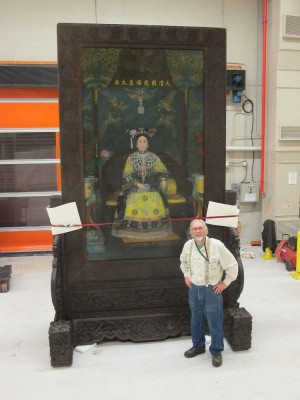
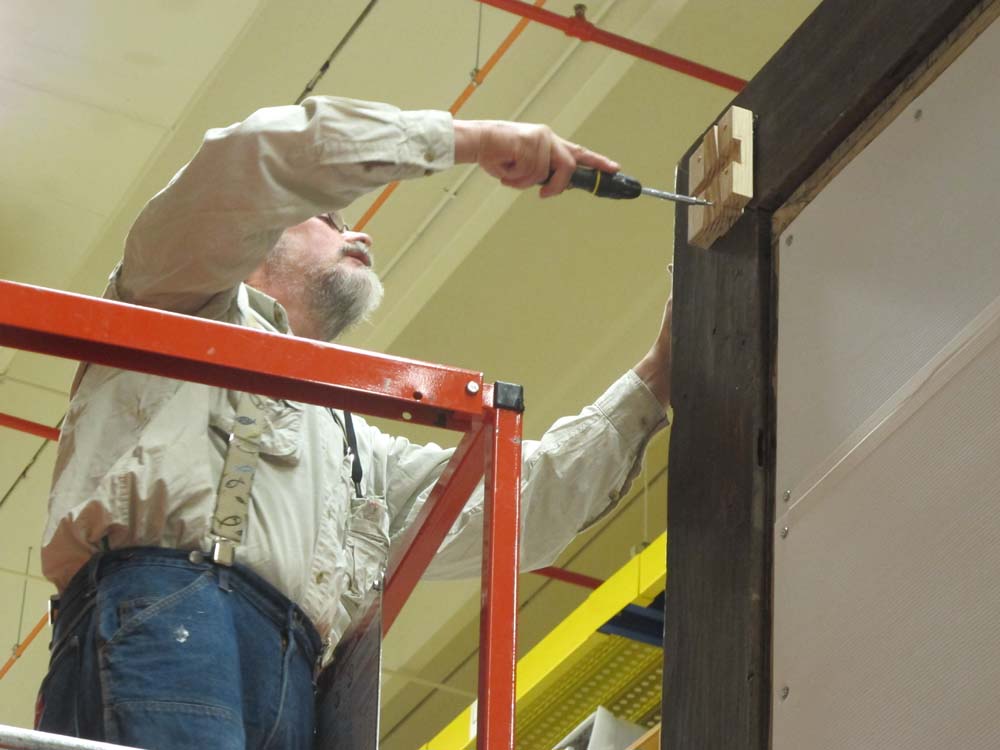
A few days ago I returned to Mordor on the Potomac for the completion and assembly of the c.1900 gigantic portrait of the Chinese Dowager Empress. I was astounded at the change in the painting by my colleagues Jia-sun and Ines who, along with a legion of others, transformed it into a sparkling image.
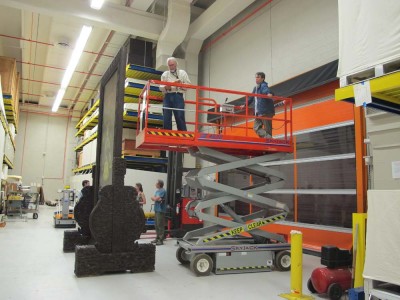
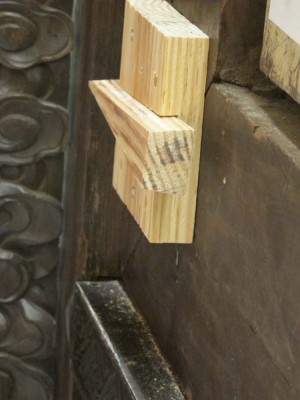
My role in the day’s festivities was to affix the locking corner cleats I had fabricated for the frame.

I used double tapered cross battened cleats to make sure the corners do not come apart unless you want them to.
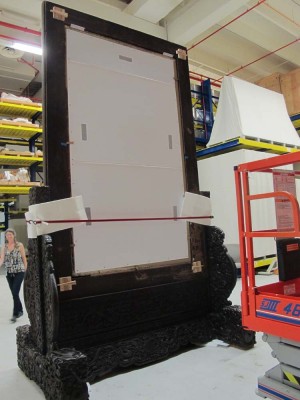
I beat a retreat as fast as I could back the the mountains. It was a great project, and it is unlikely that I will ever be conserving a painting frame quite like this one again.


Recent Comments