Even as I continue the process of winnowing the barn contents, including (especially?) surplus tools, I am strategically improving my tool holdings. This is one of those instances.
At last summer’s SAPFM Mid-Year one of the presenters was plane maker and one of my favorite guys Tod Herrli. I never fail to learn something mighty useful from his presentations, but this year I was able to come away with something extra. He’d brought a few planes with him and I bought this slightly diminutive scraper plane. It’s been used several times since I got back home.

I’ve got a pair of snipes bill planes on order from him, to be made in some spectacular black cherry I delivered to him.

Finally I had a perfect use for some of the magnificent select 4/4 Southern Yellow Pine I obtained a couple years ago, and this tool box was it. I grabbed couple of the 10-inch wide boards and headed up the hill to get started.
My first step was to mill it down to 5/8″, there was no need reason to use it any thicker. One of theo notable characteristics of a Japanese tool set is how much lighter it is in the aggregate versus a European one of the same variety. I mean, many, many pounds lighter. So, even a fairly large box would be sufficiently robust at 5/8″ wall thickness, anything heavier would simply add unnecessary poundage. I ran the boards through the planer, and in retrospect I would have instead re-sawn them rather than turn 3/8″ of prime SYP into shavings. Next time…

I cut the boards to the rough lengths I wanted and ripped one of them to re-glue into the top and bottom panels after hand playing the edges.

Cleaned up with a Japanese plane they were ready for me to move forward.
In my quest to be both generous and strategic I have been slowly paring down my inventory of surplus tools, mostly by giving them away to the worthy trio of Rob Hanson (whom you too should support and shame on you if you are not), my son-in-law LtCom R, and webmeister Tim. Given my de-emphasis on in-house workshops I simply do not need so many redundant tools and it is time to get them to a good home. My 10-year goal is to condense my tool holdings to what will fit into a cargo van, so at some point in the distant future I will have the Mother of All Workbench Yard Sales! But that day is not yet even on the horizon.

Here is the most recent package (the fifth?) I sent to Rob a couple months ago, with more to follow. I have been in the shop so little over the past few months that I have not really had a chance to go grazing for him but I’ve got a surplus Record 52-1/2 vise with his name on it, awaiting only crating and shipping. I also keep boxes for LtCdr R and Tim that get things put into them as they are readied.
As I mentioned earlier I have reluctantly come to the conclusion that the hanging wall cabinet for my Japanese tools was not a successful solution. I figured a traditional Japanese tool box might be the better path and browsed youtube for examples of folks making them. None of those examples seemed to be exactly what I was looking for. After referring back to the mother ship, a/k/a Toshio Odate’s monumental book Japanese Woodworking Tools, my copy of which is well worn, I was validated in his statement that the tool box is made to hold whatever tools were being housed. Thus there are as many different sizes and proportions of toolboxes as there are craftsmen and their tools. Duh.

With that level of freedom conferred I spent a couple days making the one that suits my needs perfectly, and will, I suspect, make the tools much more accessible and thus more integrated into my work routine. Since Japanese tools seem much more kinesiologically sympathetic to my, uh, aging meat machine, it is likely that this method of work might become my dominant habit. I’m all about cultural appropriation, baby, snowflakes be damned.
Were I to have a conversation with the 1970 Model of Don I would tell him, “You know, playing basketball on asphalt courts several hours a day is going to make your knees really ache some day.” And believe me that day came a long time ago.
Stay tuned to follow along as I go down this path.

I’m pretty convinced of the efficacy of hanging tool cabinets versus a floor-level tool chest. As I was setting up my studio on the barn I had a pile of large surplused drawers and made two of them into a tool cabinet for my Japanese tools.
A few weeks ago I finally had to admit, “Well, this isn’t working.” Not only were the drawer/doors too big for easy access, the space in front of them was simply too convenient for me to pile stuff there, blocking the door completely and rendering the interior tools inaccessible.

Something needed to change, and it was a “one of these days” moments.
Stay tuned.
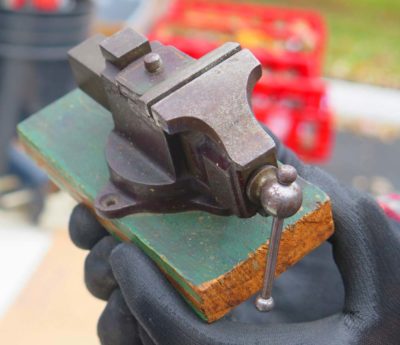
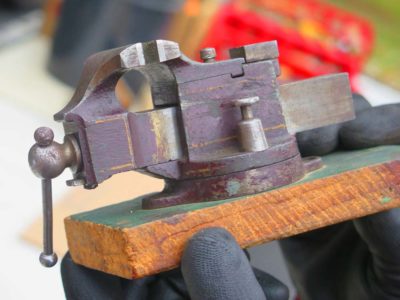
When I blogged ten days ago about the sensation of being thunderstruck at the fellow who brought in a Studelyesque petite Prentiss vise to a recent PATINA gathering I mentioned that I had something sorta similar.

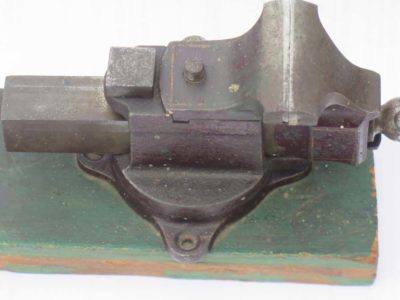
This is it, a charming little piece. It’s a smidge bigger than the prized Prentiss but definitely in the neighborhood. I do not know if any original japanning remains but perhaps one day this winter I will take a swab and solvent to it to find out.
You cannot really see in this picture but the base has been broken through-and-through and remounted to a new metal sub-plate, which is the only reason I could afford it.
I guess those differences really do delineate a $15 vise from a $1500 one.
One of the great joys of living in the mid-Atlantic region is the 42-year-old organization known as The Potomac Antique Tools and Trades Association, or PATINA, which meets every other month in McLean VA on the outskirts of Mordor. I have had a long and fruitful relationship with this group and find their bi-monthly swap meet and demonstrations sessions to be a genuine delight. Their annual mid-March flea market and auction near Frederick MD are worth the drive from wherever you might be coming from.
The recent PATINA meeting was the fulfillment of all that and more!
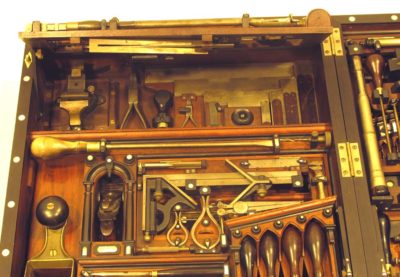
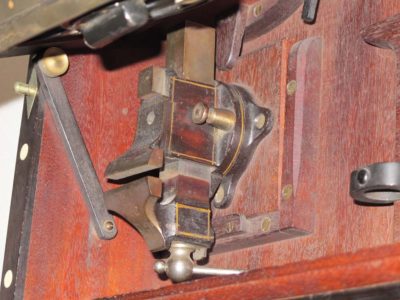
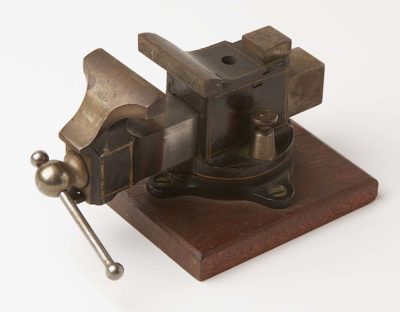
Let’s back up a year or ten, reflecting on my research into Henry O. Studley and his tool cabinet and workbench. Experiencing it, up close and personal, it is even more spectacular than can be captured in images. The nooks and crannies can be appreciated only in 3D in real space. One of the tools it contains is this little 1″ x 1″ Prentiss vise mounted on a Cuban mahogany block, tucked up away and entirely out of sight to the normal viewer. I love this vise and have been looking for a sibling without success since I first saw it almost a decade ago. I’ve been in the neighborhood a time or two (more tomorrow) but never found the exact house address.

Thanks to the ongoing project at our daughter’s house near Mordor I was in town for last Sunday’s PATINA meeting and flea market (I bought a few useful items).

And then my friend JohnD summoned me over to his table. A fellow named Kevin had strolled in and showed him this. John knew what it was and also knew I would pop my eyes. I did.
Holy cow!
I offered him five bucks cash, no questions asked. He declined. I think John was dickering with him for a while. I would love to own this but cannot justify the money it would take to reach a fair price. But at least I got to look at it closely on this grey, drizzly day.
You just never know what you will find at a PATINA event!
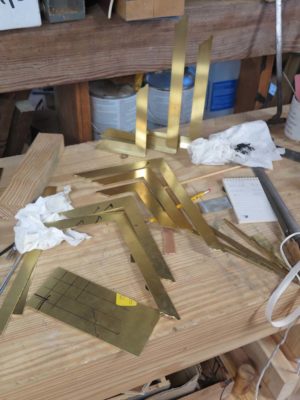
Two of the students from the recent workshop have posted photos on their Instagram pages.
LenR posted an impressive glamour shot, and JohnH posted an image of his entire collection, although just short of the finishing line. It was indeed a great weekend, and I look forward to actually getting my two sets finished next month. At the moment I am just swamped with other priorities.
I’m thinking of diving in to the Instagram swamp; I am so old fashioned that I think of “social media” being conversing or corresponding with an actual human. Silly me.
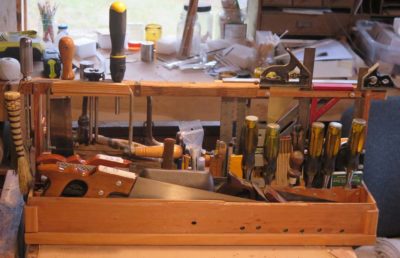
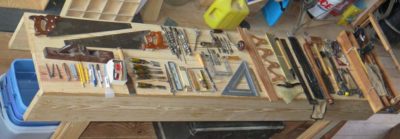
Just for jollies I took all the tools out of the tote and inventoried them, which I share with you now.
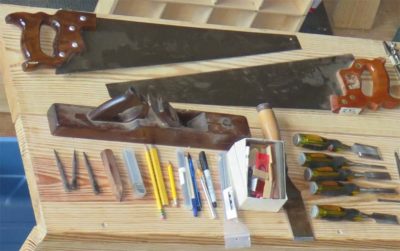
I have probably almost two dozen vintage hand saws, but the ones I included in this kit are selected in part due to the fact that they fit into the box. One of these is an 8 t.p.i. crosscut saw, the other a 4-1/2 t.p.i. rip saw. Just below them is a 14″ solid Brazilian rosewood razee shipwright’s plane, it is a fussy tool to get right but once it’s there, boy howdy! I include this rather than a #5 because it is a bit lighter in weight.
Working across the bottom of the picture,left to right, we begin with three nail sets. This is almost certainly overkill but they do not take up a lot of space. The next thing in line is a home-made line transfer scribe that is one of my favorite tools. I will blog about making one for yourself soon. No marking knife is better at the task of tracing and transferring lines from one piece to an adjacent piece.
Moving to the right I’ve got a package of utility knife blades, a collection of pencils including a #1, #2 (mechanical), carpenter’s, a #3, some coping saw blades (obviously I did not tage the photography quite right), and ball-point and Sharpie pens. Next comes a box with a variety of items including a small diamond stone, my small oil stones, my home-made dovetail gauge, a bullseye level, and probably some other items I cannot recall just now.
Rounding out this image are my 2″ framing chisel and a set of Stanley chisels; I bought the Stanley’s from Lowes for a demolition job many years ago and found them to be of such superior quality that I rehabbed them after that project and now use them dialy. I found them to somly be the best value in chisels there is.
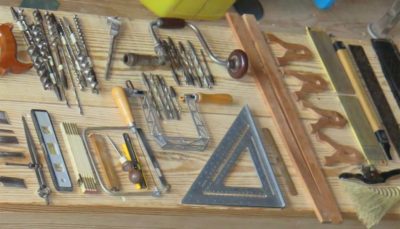
Moving on to image #2 across the top from the left is a large set of auger bits for the brace, an expansion bit, the brace itself, a vintage rosewood-handled 6-incher, with a set of twist drills for it. Continuing the rightward-ish flow there are my Roubo winding sticks-on-stilts, which have changed fundamentally the techniques I use for flattening stock (the sticks for these serve as straight edges whenever I need them), and my pair of DMT combination stones, one 220/325 and the other 600/1200. Just below them is a vintage spokeshave and one of the Turkey Wing whisk brooms that I sell..
Going back to the bottom left I have a pair of 10-inch dividers, a small level, a folding carpenter’s rule, the coping saw inside of which are the utility knife, a 24-inch four-fold furniture maker’s ruler, and a rosewood handles awl. Adjacent to that is my smaller Japanese bevel square and my Knew Concepts webbed frame saw. This was pretty much overkill and really superfluous for the kit so I will almost certainly leave that one hanging on the joint over my main bench in the shop.
Rounding out this grouping is a 12-inch speed square and a 4-in-1 rasp, old enough to be from the time when they still made good ones.
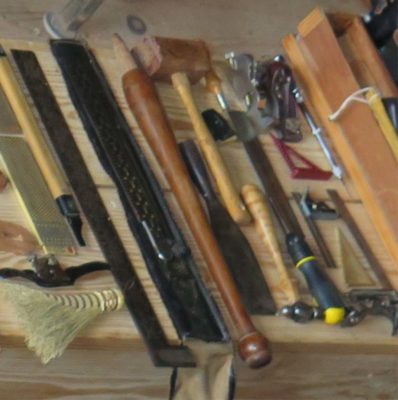
The final vignette from this little account begins with a Japanese saw handle which accommodates three interchangeable blades, which I must have left in the tote during picture time. Then I have a superb ancient take-down framing square, complete with its original sleeve, followed by my 3-inch hand forged slick, a $5 from a tailgate sale. I made a new black walnut handle to replace the piece of junk that had been appended to it.
Next to that is my beloved home made tulipwood mallet that has pounded innumerable joints and assemblies over the years, a 12-foot tape measure, my treasured dovetail saw that I’ve had for almost fifty years and has not needed sharpening for almost 30. The upper right corner is populated by a small Record rebate plane, a Stanley block plane, a Yankee drill and one of my newer tools, The Delve Square designed for Woodpecker’s by my friend Tom DelVecchio.
The bottom right corner has my Starrett 12-inch and 6-inch combination squares, my newest tool the 30-60-90 square, a combination screwdriver, and my equally treasured curly maple handled ball pein hammer, a gift from my log time pal MikeM.
That pretty much wraps it up. I am pretty sure I will add a Shinto rasp along with some additional files soon
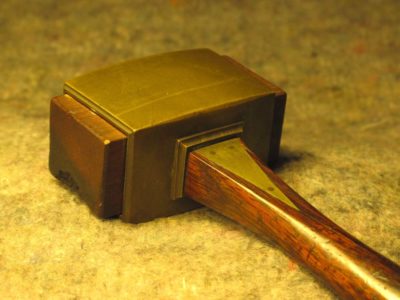
One of the seductive features of the Studley mallet is that the shell of the head is curved on all four sides, making this blunt instrument of smashification seem almost streamlined. In addition the edge detailing for the head was elegant, almost delicate.
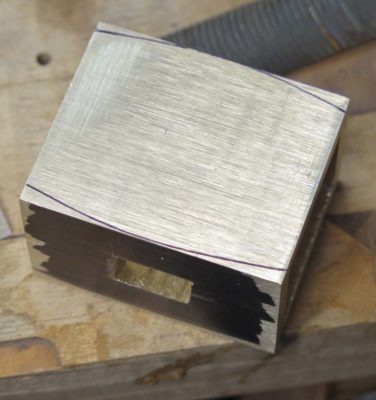
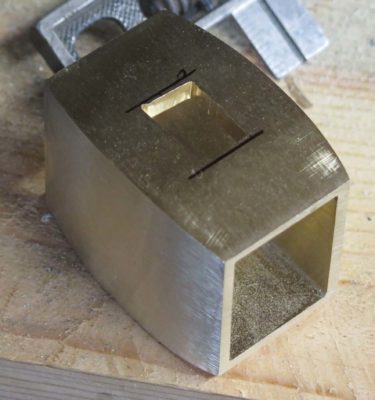
In this particular case I decided to use brute mechanical/abrasive force to achieve part of the results, and hand filing for the other. For the general gross rounding of the shell I just used my belt and disc sanding machines to literally grind off almost half of the shell mass.
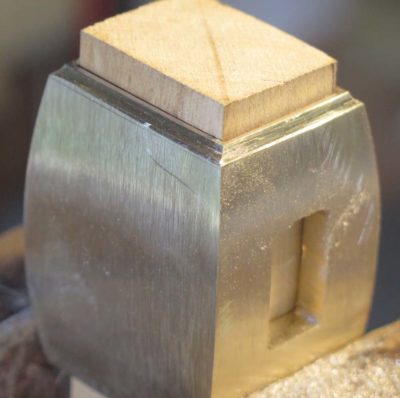
Once the overall shape was finished and the handle openings trued I filed the teensy moldings on the faces and fit the shell with its infill block. The original block was beech but I had maple handy.
One thing is for sure, this is a hopelessly inefficient way of doing things. Once I get done with this proof-of-concept model I will make the patterns needed to cast this thing in the foundry.


Recent Comments