Because of the rigidity and (light)weight requirements for the portable restoration workbench, the obvious choice for the top was a torsion box, the construction of which was virtually identical to those described in the woodworking literature. My first attempt used 1/4″ faces and 1/2″ ribs of luan plywood. The weight and rigidity were good, but the working surface of luan was a little too fragile. Nevertheless it was a confirmational “proof of concept” exercise.
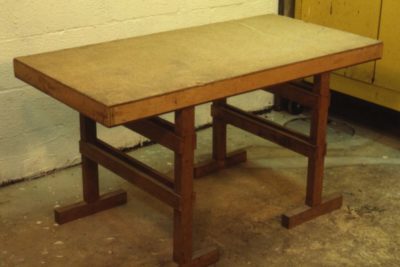
My first step was to make a simple torsion box as a test run. It was near-perfect as the top and working surface. I faced this prototype with cork on one side and plastic laminate on the other, and it remains in use in the shop to this day almost thirty years after being made.
Concept One – check.

My first inclination was to make a trestle base for the bench, but considering my master scheme this idea had some significant drawbacks. While easy to build and assemble, the knock-down/assemble/disassemble trestle requires multiple parts, and one of my stated intentions was to not build anything that required keeping track of lots of pieces. Instead, on my first attempt I tried using a pair of commercially available tubular-steel folding-table legs. These worked fine along the short axis of the bench but weren’t stiff enough along the long axis because of short diagonal braces. Though a good concept, this shortcoming and the unnecessary weight of the steel legs made it a non-starter as a final option. Even with those hefty legs the unit weighed in at only 55 pounds, well within the limit I wanted.
Concept Two – check.
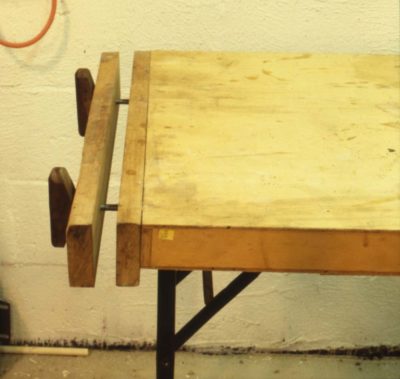
As for the vises I simply used pieces of 2x stock cut to match the dimensions of the ends of the top combined with 3/8″ steel threadstock from the hardware store and some wood handles epoxied onto the ends. Again the concept was successful but the fine-ness of the thread made the vises tedious to use.
Concept Three – check.
Finally I threw on a piece of upholstery webbing to serve as a shoulder strap so the folded bench could be carried and maneuvered easily. That concept was an absolute winner. Throwing the strap over my shoulder it was a breeze to navigate the twisting rabbit trail to a work site.
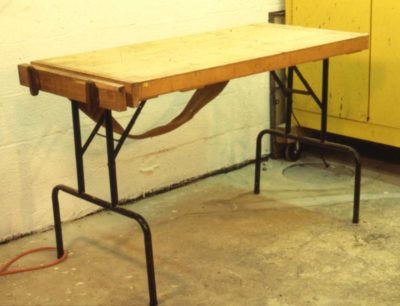
As a final test run I took the prototype to a job and it worked out just fine within the confines of the limitations enumerated above. With what I learned from this it was time to move forward with a final iteration.
Check, check, check, and check.
By the way, this bench is still in use but as a food preparation station for the barbecue.
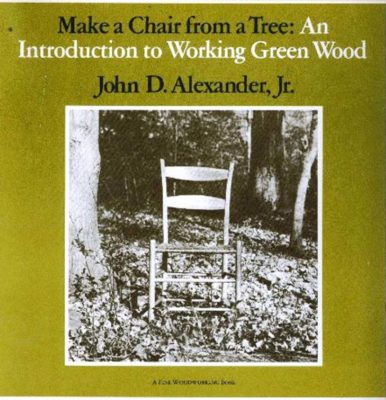
Like a multitude of fellow craftsmen my interest in traditional woodworking was fostered by the book Make A Chair from a Tree by John D. Alexander, Jr. I probably bought it shortly after it as written, then a few years later I also purchased the excellent companion video. I cannot recall now if that video included some delightful bantering with saw maven Tom Law, or if it was Tom’s video on saw sharpening that featured bantering with John Alexander. Either way it was an engaging and delightful foray into learning. (Actually one of my great curiosities is why the producers never made any more videos; their video with Tod Herrli is simply one of the best instructional videos I have ever seen on any topic.)
I never really became chair maker, my Gragg chair adventures notwithstanding, but the approach of thinking through then executing a project resonated with me. Mr. Alexander’s blend of historical understanding, winsome wit and practical craft applications served him well as an evangelist for the cause.
The chronicle of his entire journey is recounted here by the inestimable Kara.
I read recently of his death not too terribly far short of 90 years, and reflected on the transforming power of solid scholarship blended with infectious enthusiasm. Our paths never crossed in person, but I offer my condolences to those who knew and loved him.
I am delighted to report that both electricity-producing components for the barn have been repaired and are en route on the return trip. If all goes well I will be reinstalling them later this week.

Yes indeed, soon enough there will, once again, be light!
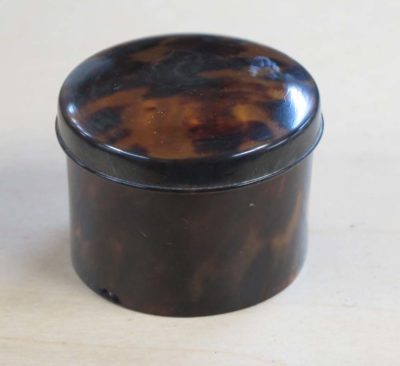
Recently I was puttering around my basement shop in my daughter’s home and came across a lovely little tortoiseshell box. My first response was to wonder where I bought it (I cannot remember, it was very many years ago). My second response was, “Hmm. I wonder where my box of other tortoiseshell boxes and vintage lacquer boxes is? I sorta know the answer to that one is, “Somewhere in the barn. You just haven’t unpacked it yet.”
A third observation leaped at me as soon as I got the little round box out into the light; it was a wleded box, scraped and turned on a lathe, made from a scute (plate) from the carapace (back shell) of a hawksbill sea turtle. What we call tortoiseshell comes from one of two sea turtles, hawksbill and greenback, the different shells being as different in morphology from each other as are the habits and diets of the two turtles.
In terms of its constituent components, if you thought of a piece of tortoiseshell as a fingernail with freckles you would not be far off. The main structural difference is that your fingernail grows in a linear pattern from the bed of the nail, while a tortoiseshell grows as a full layer across its entire area. For reasons that remain unclear to me, even after lengthy discussions with herpetologists, why the nature of the two species’ scutes are so different.
Tortoiseshell from a greenback is usually only 1/32″ or so thick and pretty uniform in that thickness. In other words, they do not build up much thickness. Hawksbill scutes on the other hand can reach more than a quarter inch in thickness at their center, and a part of the craft in tortoiseshell-work was the ability to split and delaminate the hawksbill shells for greater yield.
And, since hawksbill shells are comprised of an ever-increasing number of layers, when that shell is worked and mechanically thinned with scrapers or abrasives the layers are not penetrated with perfect evenness. The result is a pattern that is often called “watermark” in other contexts, paper and silk for example. Sometimes the pattern is difficult to discern, I have tried many times to show this to conservation students with varying levels of success. It really is trying to find a pattern of shadows lurking deep in the mass of the shell.
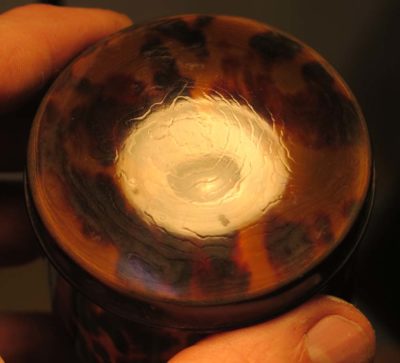
Fortunately for this post my little round box’s watermark pattern was impossible not to see on the outside of the top.

The inside of the bottom was a bit trickier, but the watermark pattern is there too.
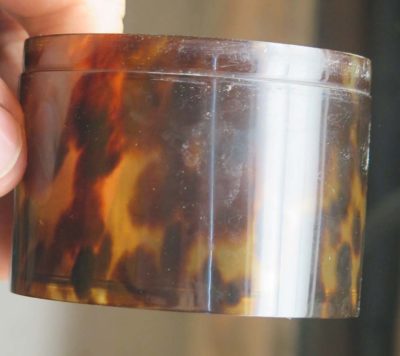
On the outside of the welded and turned the watermark was just a shadow hiding just below the surface.
Now you know.
Forty years ago, being younger and foolisher, I believed that buying “Name Band” pricey hands tools was necessary for good craftsmanship. Turns out that might be true sometimes, but not always. In fact some “name” brands are capable of producing dreadful products, poorly designed, poorly executed, and actually moving you backwards as a craftsman. Or, sometimes it is just that your way of working is not reflected in the way the tool works. Such is the case with my first “professional” dovetail saw.
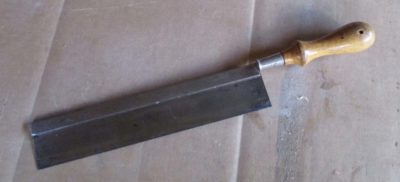
Prior to that moment I had been “making do” with this un-branded “gent’s saw,” progressing in my skill to the point where I was making real dovetail-ish constructs. Given my circumstances at the time I am nearly 100% certain that I bought this saw at Sears in the mid- to late ’70s, back when they were a purveyor of quality merchandise rather than a real estate management/liquidation enterprise. But as I fell under the thrall of the Fine Woodworking ethos it became (falsely) apparent that I needed better, brand name, tools to make better progress.
Then came a third try at college with the three years of a highly restricted purchasing and time regimen attendant to that. In 1984 I started employment at the Smithsonian Institution’s Conservation Analytical Laboratory, allowing for a modest tool budget. This was in the days prior to our current Golden Age of Tools and tool making so the options available to anyone outside the vintage tool network were limited to one or two mail-order catalogs. So I went to the best hardware and tool store in the DC area and bought the best, most “Name Brand-y” pair of back saws they had. How was I to know in advance that the “dovetail” saw was dreadful? It only took me one or two sessions at the bench to realize that this was the case.
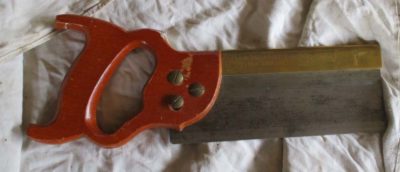
Everything about this saw’s ergonomics was wrong. The handle did not fit my hand as nicely under fire as it did when being admired at the store (was Angus MacAskill their hand model?). And though the cutting length was nice, in fact the teeth were excellent, the height of the saw plate combined with the absurd weight of the overly stout brass back made the thing so unwieldy for me that my facility at cutting joinery actually regressed when using it. It might have been a fine tool, in a purely theoretical sense, but it was not suited to me.
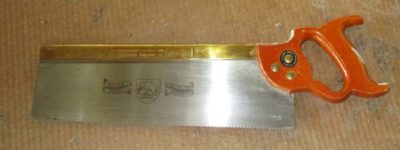
The odd(?) thing is that the companion tenon saw I bought, same time, same maker, suits me almost perfectly for its purpose.
So I tossed the dovetail saw aside for more than two decades, no, make that three decades. With my little gent’s saw I made steady progress in my workmanship. I even augmented that with a Bad Axe standard issue dovetail saw early in that company’s existence. Though these were excellent saws I found that when working in thin stock making petite joinery they were too aggressive.
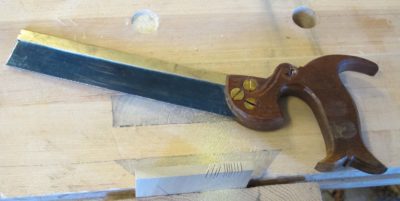
Me being me, I decided to try to make my own little saw and that outcome was excellent, resulting in not only a perfectly suited saw but even better, some Ivory Tower Coin of the Realm — a publication! I continued making more saws, becoming more confident in them, giving most of them away as I finished. I even commissioned Bad Axe to make me a custom saw based on what I learned in making them myself, and that saw remains an integral part of the inventory.
But let’s return to the saw whose shortcomings led me down this path; could it possibly be rehabilitated? After all, the cutting edge was excellent, it was just everything else that was not.
Next time — the rehabilitation.
When making traditional-ish workbenches one of the considerations is making the holes for the holdfasts. I might have said “To holdfast or not, that is the question,” but in my experience a woodworking traditionalist either decides to incorporate holdfasts from the start or comes around to using them eventually.


As a general rule the hole for the holdfast is a smidge bigger than the shaft of the tool so that when the top is pounded to induce flexing tension the holdfast grabs the bench top firmly. As a practical matter virtually all of the holdfasts I know are available now use either a 3/4″ or 1″ hole. Getting the holes perpendicular to the bench top on two axes can be a nuisance some times, and in the past I have made a couple of drilling jigs on the drill press. However, over time both of these versions became wallowed out and somewhat less than fully helpful.
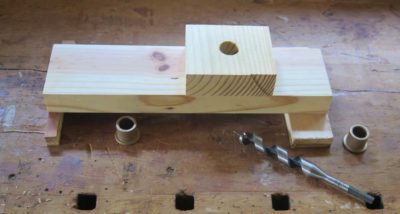
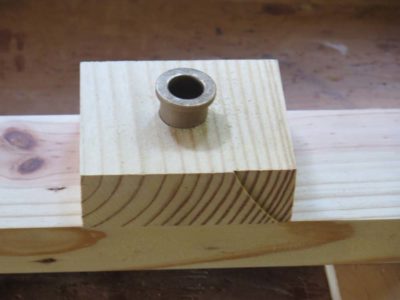
After returning from Arkansas where my older jigs got a serious workout I set to making another more robust and precision jig for fitting the Gramercy Tools holdfasts that I am so fond of. My main modifications for this were to lift its base up off the workpiece with plywood feet to provide exit for the chips, and bronze bushing sleeves fitted to the 3/4″ drill bit.


I drilled the hole for the O.D. of the bushings, then epoxied them in place. Finito.
Among the few public observers to whom I pay attention, Nassim Nicholas Taleb has a place at the table if for no other reason than his monumentally insightful book The Black Swan: The Impact of the Highly Improbable. Now, change gears to the old insight from the military logistics and supply realm, “Two is one, and one is none,” an exhortation on the value of redundancy for important operating systems and supplies. Well, that particular old black swan bit me in the nether regions recently as I found that I’d better start with a bigger number for electricity supply.
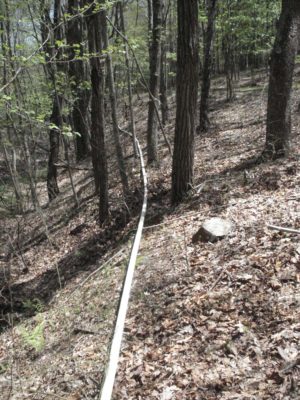

Since becoming my own Power Company for The Barn there have always been hiccups; a connection or section of water line breaks, storm debris clogs the hydro system intake or turbine nozzle, even a nearby lightning ground blowing the fuses on the solar array. In these cases the interruption of one or the other power source is not an activity-stopping hurdle, although it can be a bit of a nuisance and interruption to address.


In essence my system is a hybrid of the microhydrolectric turbine generating power 24/7 through much of the year, along with the array of six 235-watt solar panels cranking out juice whenever it is daylight and they are not buried under snow. When you are your own public utility, maintenance is never far from the “To Do” list.
My two electron sources are tied together in a complex control system designed and installed by Rich at Nooutage.com and my friend BillR, a retired electrical engineer with a robotics specialty. For the past half dozen years or so it has been humming along, providing all of what I need in the barn for general usage. Even in the dead of winter, when I have the hydro system mothballed during the coldest weather, the solar panels keep the batteries charged and I can operate pretty much normally if I am the least bit attentive. If I know I need to use a lot of electricity with a machine or a heating coil (processing beeswax in cookers, for example) I know I need to wait for a nice sunny day.
When I have a particular need for ultra high wattage consumption, like my smelting furnace of kiln, I have to fire up the smaller (3500w) of my two Coleman Suburu generators for that isolated need.
Flash forward to three weeks ago as we were spending a day in the studio recording another session for the Gragg Chair video. I had checked the system the night before as I do routinely, and it was working fine. Batteries were topped off, solar panels pounding out watts, hydro puttering along. (On a normal day each of the production components produce somewhere in the neighborhood of 5kwH, higher on a sunny summer day). Just as I was coming to the end of a session of steam bending some chair parts the room went dark. Quickly I hustled down the hill — I do not run any longer since breaking my hip three years ago — and saw that the system had shut itself down for no apparent reason. It booted back up manually, but still the work for the recording session was lost.
I was leaving town the next morning for a week so I put off conducting the investigation of the hiccup until I got back.

what it should look like
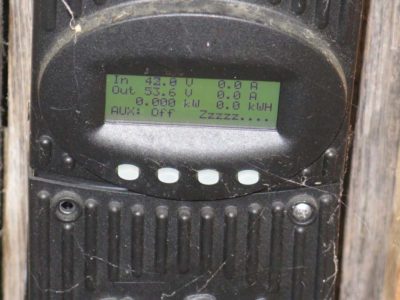
what it did look like
On returning I was able to confirm that the solar panels were contributing zero to the system performance. It. Jjust. Went. To. Sleep. The hydro turbine was still working as it should so the overall system function was adequate, but several days of chasing down the solar inactivity proved fruitless, despite numerous emails and phone calls with BillR, who assigned me several detailed troubleshooting tasks, and literally hours on hold with the tekkies at the solar control module manufacturer.
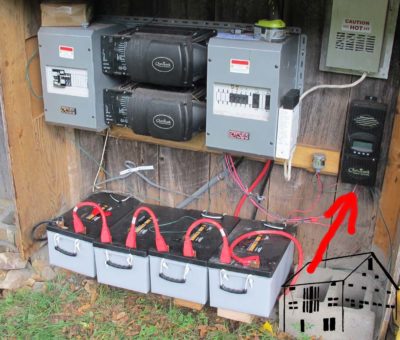
In the end the tekkies told me there was some sort of hardware failure and I needed to disconnect the solar control unit and send it to them for their ministrations. So I did.
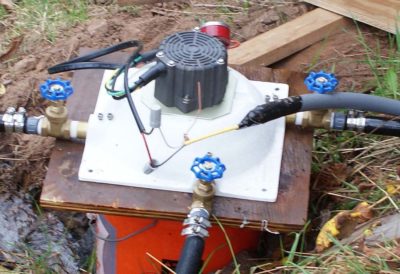
As all of this was unfolding, the hydro turbine suddenly (literally overnight) developed the growling rumble of worn out bearings. I took it off-line as soon as I noticed this, dealing with two $15 bearings is one thing but letting them run to destruction might have damaged the $2k turbine and that was not high on my list of risks to take. After speaking to the turbine manufacturer I decided to remove the turbine core and ship it back to him for new bearings. Replacing the bearings myself was not really an option as I do not possess some of the specialized tools required for the job, although I will have to address that shortcoming in the future.
Quick as a bunny I was without any power system input to the barn and things ground to a halt, including cancelling/rescheduling the Boullework Marquetry workshop that was slated for this weekend.
For now all I can do is wait on the turbine manufacturer to return the turbine core with then new bearings and hear back from the solar control module manufacturer for a report on that unit, and contact the local electrician to come and wire in my gas generator to the system.
I clearly need for “2 is 1” to become “3 is 2,” or maybe even “4 is 3.”
Stay tuned.
In a true Black Swan event both my redundant power sources failed at the same time. Maybe I should have called Nassim Taleb first.
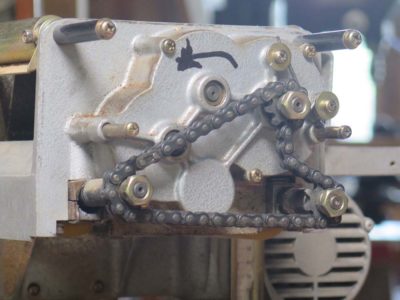
A couple years ago my little Makita Model 2004 combination 4″-jointer/ 4″-planer threw a bearing block on one end of a drive roller for the 4-inch planer. It is the drive system, not the cutterhead, so it turns slowly but with very high torque. The machine was so old and obscure that at the time I acquired it a few years earlier I could not find any information on the machine or its parts. So, the little beauty stayed unused in the intervening months.
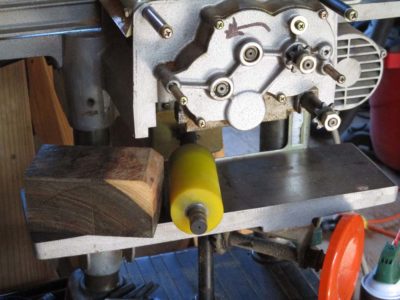
I’ve come to have a use for it on an upcoming project and decided to fix it the old fashioned way by fabricating a bearing block from a hunk of lignum vitae wood, soak it in boiling oil, then reinstall the drive unit for the planer.
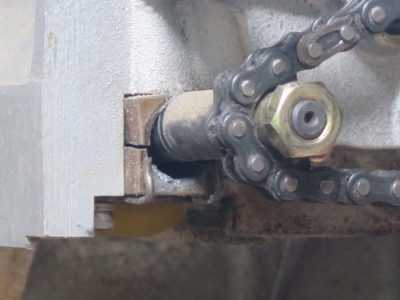
As you can see, the block almost literally disintegrated (I could not even find all the debris from the wreckage). With the shards of the previous bearing block as a guide I set about making something to render the machine functional.
Making a new bearing block is my goal for the week.
This is the first in an occasional series on the dozen-plus workbenches I have. These are presented roughly in the order in which they entered my orbit. — DCW
================================================
1984 was a monumental year for us, as we finished up our time in college (my third try was a charm), both got jobs we wanted (in the same town!) and bought a little house just outside the Mordor Beltway on 3.7 acres to expand (the house, not the property). Though I still had one more year of evening classes to graduate life was beginning to settle down from the maelstrom of a heavy college load and workto pay for college occurring simultaneously (I refused to borrow money for college). I was a poor role model for my daughters’ friends, I took 14 years to get through college.
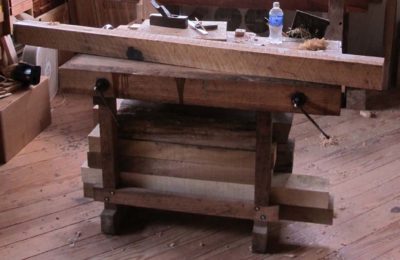
By late 1986 it was time to fashion a workbench for the small work space (10′ x 22′ x 6′-3″) I had carved out in the basement for household and furniture conservation projects for private clients who wanted to throw money at me. We wanted to get ahead as much financially as we could before our family started. Oops, too late. Daughter #1 arrived that autumn. Nevertheless it was time for my first real purpose built custom-made-to-my-specs workbench. Until then I’d had “make do” with whatever I could scrounge together.

The process of bench design weighed several competing and complimentary considerations. The manner in which I resolved and fulfilled them resulted in a workbench that is my third child.
First, I had very limited space, especially when you consider the amount of machinery I had stuffed into the space. A unisaw, a 12″ radial arm saw, a 14″ combination planer joiner, standing drill press, large air compressor, etc., were all taking up residence there, along with a full-sized explosion proof solvent cabinet for my finishing and conservation supplies. There was no way I could afford the luxury of an 8-foot patternmaker’s bench with an accompanying assembly table, which is what I’d had in the foundry, nor an 8-foot Euro bench like the row of them in the conservation studio at Winterthur and the Smithsonian, or the English wall bench from the Dominy shop. I would be lucky to get four feet of bench in my basement workshop. In the end the bench’s overall dimensions are 48″ long, 33″ deep, and 35 inches high.
Second, I was not going to be making much furniture in the basement, or anywhere else for that matter. As it turned out the few pieces I did make in the coming years were assembled either on the front porch or out in the 15×25 barn-ish shed we had for the lawn equipment. It wasn’t so much of a footprint issue as it was headroom.
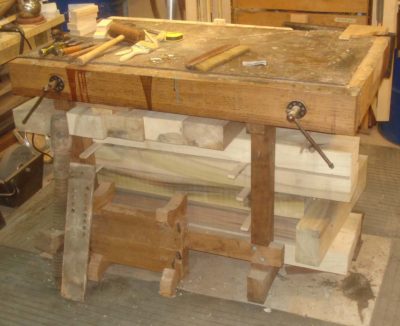
Third, I was very much enamored, and still am, with the concept of the torsion box structure for workbenches and table tops. I’d seen Ian Kirby’s version and really liked it. Not the MDF part, but certainly the design simplicity for his workbenches. I had not become persuaded by the planarity of the sides for many years yet.
Fourth, an Emmert K-1 vise had become part of my work vocabulary in my years at the pattern shop, and I had subsequently purchased a couple of fine vintage ones and was going to design the bench around them, or at least one of them.
Fifth, though I was not a chair maker and would never really become one I was attracted to the expanse of large twin screw face vise often found in their shops.
Finally, I was not the aficionado of hand-work that I have become so keeping hand work to a minimum was desired.
I purchased a pile of 12/4 and 8/4 white oak and a couple sheets of 3/4″ birch plywood and got to work. Unfortunately I have zero pictures of the building process, all these come from much later.
Up until this time my “workbench” was a salvaged 36″ wide solid core door sitting on a pair of sawhorses, which makes for a lousy workbench but a great assembly table.
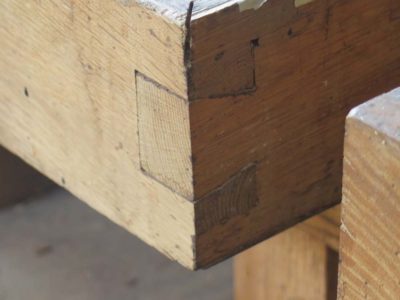
Cutting the 3/4″ plywood on the table saw I constructed the 24x48x5 torsion box bench top, fitting it into a rabeted perimeter of 8/4 oak dovetailed at the corners.
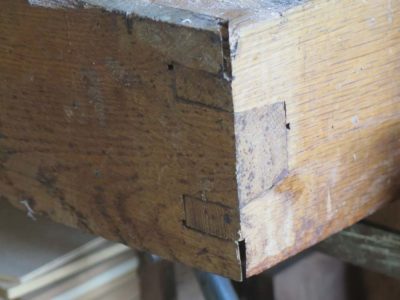
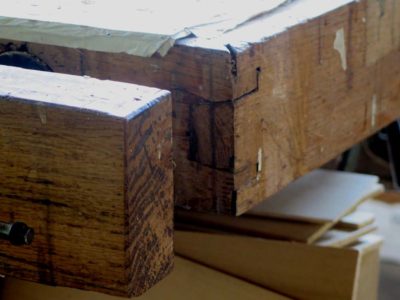
These were my first man-sized dovetails and the inexperience shows, especially in the corners where I laid out and cut the joint adequately but inverted the angles. Think of a dovetail joint where the tails do not spread but rather taper at the same angle and you get the idea. It’s not terribly made, but it’s not proper either. It remains a constant reminder to be more careful and make sure I am envisioning things correctly. I am neither proud nor dishonored by these corners, they were an honest representation of my joinery skills 32 years ago, and emphasize the different skill sets of a conservator and a furniture maker. I have improved in the intervening years.

This top went over a simple trestle-and-stretcher base that was half-lapped on the radial arm saw and bolted together. To attach the top to the base I drilled and screwed threaded brass inserts into the top and drilled the corresponding holes in the trestle top crosspieces, bolting them together. The general assembly scheme has worked for the intervening years without a fuss. Every now and then I crank down on the bolts when anything loosens up, but the unit has remained remarkably trouble-free.
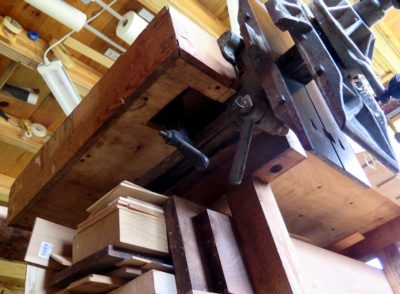
It was in installing the Emmert that I realized a couple of mistakes that I could have corrected, one a nuisance and the other a fundamental problem I will eventually correct. For starters the 5″ thick torsion box was way too thick for the Emmert configuration and I had to cut through the torsion box skin and ribs in order to make it all fit and work. Fortunately this did not weaken the top appreciably.
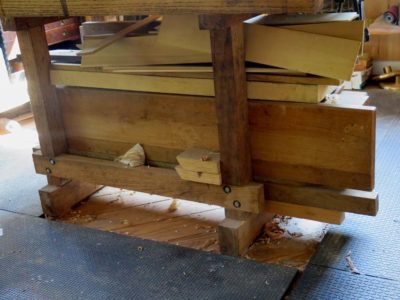
But another miscalculation has required compensation ever since I built it. Rather than fit the Emmert between the trestles I designed it to be outboard of the trestle at that end, rendering the whole thing unbalanced and susceptible to tipping when under load. I’d thought that the weight of the 12/4 & 8/4 oak trestle structure would be enough, but I was wrong. I really should have made the trestle longer to allow the vise to be installed in between the two ends. I finally settled on something resembling a solution when I turned the bench base into a lumber storage unit. The addition of several hundred pounds of counterweight does the trick, but a third trestle (or moving the current one) outboard of the Emmert would be even trickier.
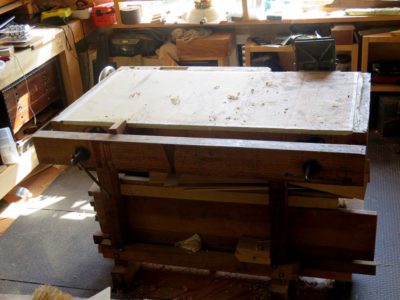
On the long side opposite the Emmert I added a full-length twin screw face vise using hardware I think I bought from the bargain bin at WSJenks, a famed DC hardware store. The movable jaw is 2-1/2″ x 5″ x 48″ in white oak with 32″ between the screws (zero flex), and it is a fixture that is used pretty much constantly.
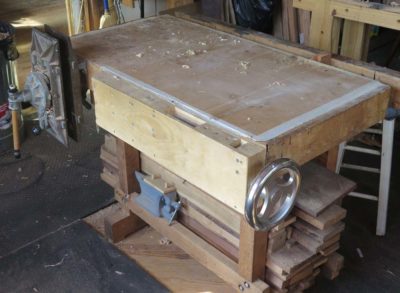
Years later I made a wagon-wheel vise for the side with and aligned with the inner jaw of the Emmert, a project I chronicled in a Popular Woodworking article. It is a useful addition, but since I have so many other options for the same function it does not get used much these days.
While not without flaws and limitations, this bench has remained my “go to” work station for more than three decades, and is only now grudgingly giving up its status as my one and only workbench. It still gets my time and energies every day.
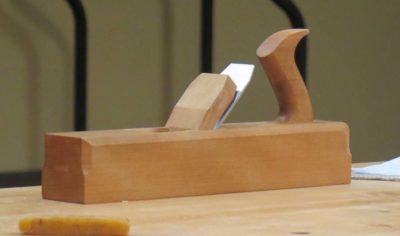
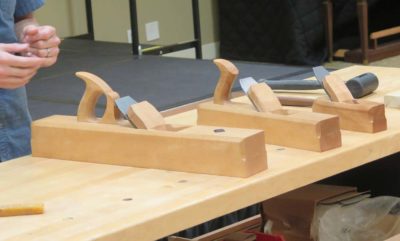
A recent foray to Mordor coincided with the monthly gathering of the venerable Washington Woodworkers Guild, whose fellowship I have enjoyed for more than three decades and at which I have presented numerous times. The meeting included a terrific recitation on and demonstration by music-professor-slash-toolmaker Steve Voigt of the double-iron English-style wooden planes he makes, and he brought his line of planes to show and use.

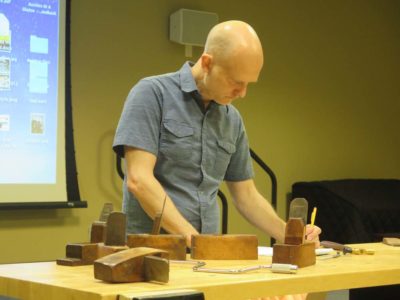
Steve has been cultivating interest in possibly making toothing planes and had asked me to bring a selection from my collection once he learned I was coming. I was delighted to oblige. Prior to the meeting, after he had set up his stuff, he spent a fair bit of time examining, studying, and measuring my planes, occasionally asking me about my preferences for this plane or that feature.

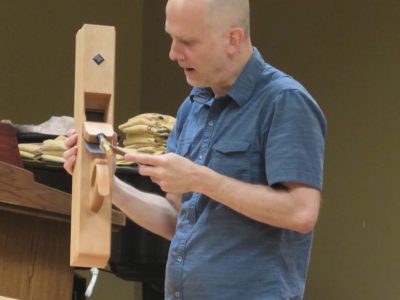
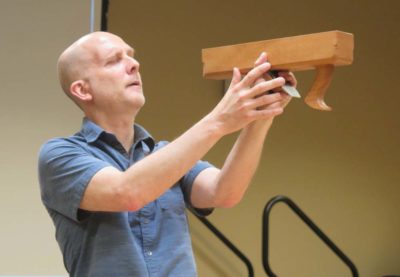
With the soft-spoken straightforwardness that he is known for Steve walked though the process he uses to design and construct his planes, which he has been making professionally now for closing in on a decade. In setting them up to work he prefers the cap iron to be as close to the cutting edge as possible, and he does most of the adjusting by eye (oh, to have eyes that can do that. It must be wonderful!)

His jack plane was set up as a heavy cutting fore plane and soon enough he had a good pile of stout shavings on the floor. One of the things he shows is the effect of a perfectly set-up double iron in the smoothing plane, wherein the gossamer shavings shoot straight up the throat and actually up his arm with very little curling or puckering. It is mighty impressive, and unfortunately I was so engrossed I forgot to take pictures.
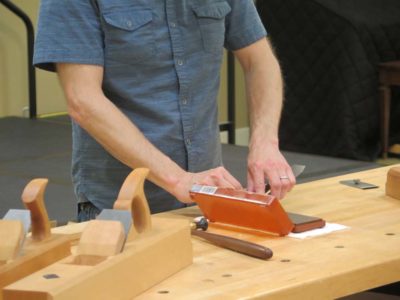
Steve concluded with a demonstration in answer to a question he probably gets every time he is talking to a woodworker; how do you sharpen? He is a hollow-ground, oil stone and free-handed micro-bevel guy, and the results speak for themselves.
I find Voigt planes to be elegant and high-performance, and own one myself (so far).


Recent Comments