I’m not one to air my truly private business excessively on the blog (at least that is my intent overall), but this current aggravation effects everything I am doing in the shop, on the homestead, with work on the store and web site, everything.
Vertigo bites big time.
I am now in my second week of this initial but inexplicable debilitating dizziness. It restricts greatly what I can do, including essentially eliminating any mobility beyond that which is biologically mandated. I note incremental improvement but nothing even close to functionality. A visit to the doctor yielded no immediate relief although I now have some head manipulation exercises to hopefully mitigate the symptoms regardless of their cause(s). Mrs. Barn helps with that and observes that my head is really heavy. Hey, you put that many rocks in the same place… At least I am not flat on my back as I was for three days last week.
Fortunately I can now work on my laptop for stretches provided I elevate the screen and hold my head absolutely motionless, but reading from an actual book is a challenge. I cannot yet perambulate up the hill to the barn and fill the outstanding orders for polissoirs, wax, and shellac flour. I’ll get them sent as soon as I can stand long enough to fulfill them. I may have to rely on Mrs. Barn to take them to the Post Office.
Patience. Good thing I like audio books, lectures, music, etc.
At long last, pure shellax wax is now available from the donsbarn.com store. I know a few of you have already found it as I have the orders in my “Pending” box to go to the Post Office next time I am in town.
Shellac wax, extracted from raw stick lac, is the second hardest of the naturally occurring waxes. Because it is so hard and tends to be brittle at cooler temperatures it is generally used as a blend with beeswax to render it more useful as a block wax. It is especially useful for polishing turnings by placing the block of blended wax directly against the surface of the rotating workpiece to melt it into the surface, followed by burnishing with a polissoir. It is also highly prized as an ingredient in paste wax/grain filler used with a polissoir.
My shellac wax is imported directly from the factory in east central India and is further refined here by molten filtering and forming into quarter-pound blocks for packaging.
Shellac wax is $19/quarter-pound, domestic shipping included. For foreign or overseas shipping please contact me.
Yesterday I read the heart-wrenching report from Rob Hanson of Evenfall Studios, recounting the almost certain devastation to his home and woodworking/toolmaking shop in Paradise CA. Fortunately he and family are safe, but all else is probably gone.
I contributed through Paypal and offered tools to him. You should too.
Think about your shop and livelihood disappearing in a moment, then think of Rob.
I am not one to take note of “mandatory” cultural celebrations, this one included. My only exceptions to this are Memorial Day, Thanksgiving, and Christmas/Easter.
It is no doubt the curmudgeon in me but I fear that in general public celebratory conformity diminishes the heartfelt expressions, reducing them to mere cloying sentimentality, pushing us to compartmentalize integral appreciation into momentary self-congratulatory sanctimony, but I am thus redundant.
For veterans, the reason I do not ostentatiously note November 11 is that I strive to express my appreciation to them every day: thanking soldiers for their service and willingness to write me a check and sign it with their life-blood; anonymously paying for the dinner of a soldier and their family sitting in the opposite side of the restaurant; quietly giving money through my pastor for an airman to fly home for a much-needed but un-affordable visit to his far-absent family. Either such gestures are part of your life or they are not, the calendar does not dictate them.
I was never in the Service, even though my draft lottery number was #1. I could not pass the physical exam due to my eyesight, which was very much compromised then as now. Nevertheless I went through the advance process during my senior year of high school, taking aptitude tests and expressing my specialty preference. I was provisionally green-lit for nuclear engineering school in the US Navy, I had taken a preliminary psych test for submarine service. I was expecting to enlist right after high school but the vision thing booted me out. So be it.
Lest you think I am uncharitable in my (lack of) public celebrations, consider my attitude toward the Fourth of July. Though it is one of four public holidays I note here, any fair-minded reading of The Declaration of Independence, which to me was the very pinnacle of civic human culture, could lead to a fair conclusion that its majestic premises were abandoned generations ago. I revere the Declaration and consider myself a Declarationist first and a Constitutionalist second, but the public hoopla around July 4 rings hollow in a culture that ardently opposes its ideals across the partisan spectrum.
Even the two days most noted in faith, Christmas and Easter, do not resonate with me though I am a devout Follower of The Way. If I genuinely believe in the Incarnation and Resurrection, it affects me in every way and on every day. If not, not. No “ceremonial days” can change that.
This is a blog generally about woodworking and artistic implications of materials science, and life in the hinterlands. It is almost never about my personal tastes of food, entertainment or politics, my faith, or non-artisanal things that merely amuse me. I make no great effort to hide them either, they just are not the main point.
That said, as I sit working quietly at the compewder on this almost-wintry afternoon, waylaid by a virulent and first-ever bout of vertigo for almost a week now, I am utterly enchanted by this sometimes-whimsical Bill Frisell Group concert at Lincoln Center(?) It is majesty on display, purveyed with astonishing restraint by understated masters of the art form (as opposed the the smash-mouth brashness of another of my regular musical companions, SRV). Seriously, when was the last time you saw a non-symphonic percussionist reading a score?
Frisell is featured prominently on one of my “desert island” albums, Fluid Rustle by Eberhard Weber. I first heard Fluid Rustle in the early 80s and it is a rare week that I do not listen to it a time or two. As they might say, “I could listen to Frisell play the phone book.” Proof of that is in the hands of these maestros, even themes from James Bond movies somehow transcend the dreck that they are.
When it comes to non-destructive, non-transcendent choices you make I can be pretty sanguine, but if you cannot appreciate this, then, my friend, you are a barbarian.
Developing, or more precisely re-developing, technology that was once common practice requires lots of mental noodling sprouting from the question, “Really, how did they do that?” In the end it all comes down the the world we artisans inhabit, the world of Applied Materials Science. Fortunately for me the base material, hide glue, was plentiful in the shop so I had plenty of raw material to work with. In the pursuit of gelatin molds for cast ornamental plaster my proof-of-concept work revolved around the observations of how molten hot hide glue (the “gelatin”) actually cures into a rigid adhesive layer and the changes in physical properties while en route.
As cooked glue goes from hot liquid to hardened mass the first step is the one of greatest importance for this undertaking. At a particular point in the process — exactly where and when depends on a number of factors including the concentration of glue solids dissolved in the water, the grade of glue, the ambient temperature, relative humidity, barometric pressure, and probably phase of the moon — the molten glue mass forms a semi-solid gelatin, which is the stage I am interested in both exploiting and maintaining in stasis. As long as the mass stays flexible it can be used and re-used as a molding material.
A major concern for this practice is that the gelled/flexible mass be water resistant. Though that seems, and is, obvious the accomplishment of that feature requires a bit of forethought. If casting plaster is the end goal, and for me and the ancients it was, the mold for holding the plaster as it was poured and cured had better be able to withstand the incursion of the copious quantities of water involved.
A second consideration is that the gelled mass, once transformed from an amorphous blob into a detailed mold, be tough enough to impart said details and allow for the set plaster casting to be de-molded without destroying the mold itself.
And finally, in order to be used repeatedly the gelatin mold must be preserved over some indefinite period of time.
Reflecting back on protein chemistry and historical craft/art practice I conclude that the ancients accomplished all three of the previous items more-or-less in one step: they added the most potent protein crosslinker/preservative they could find, formaldehyde. It has long been understood that exposing or incorporating formaldehyde into collagen matrices renders them water-resistant, or “hardened.” Think embalming. Think taxidermy. Think of the ancient practice of exposing bowstrings and wrapping to the smoke of a wood fire, from which formaldehyde is a by-product.
Since formaldehyde is so noxious I do not have it in my chemical inventory and instead relied on another chemical from the world of film-based photography that performs an analogous function of crosslinking or “hardening” gelatin films. In practice I found this to be an admirable option for a couple reasons, and not so good in another, Not problematic per se, but requiring another consideration.
To be sure the photographic gelatin hardener performs admirably in imparting water-resistance and integral toughness to a gelled mass. I observed it also extends the timeline for the gelled state considerably, apparently retarding the water egress that turns gelled collagen into a hard, glass-like film. This was perhaps my (and their) first ace in the hole. A second observation beneficial to the process was that the plaster itself, being integrated into and reacted by water, served to moisten and thus keep the mold flexible Every time plaster was cast into the mold, it re-plasticized the mold mass.
However, the current safer chemistry of the gelatin hardener does not impart the same biocide/preservative effect that was accomplished previously by formaldehyde. Thus my initial mold attempt turned into a rotting mass of oozing slime in a few days. Not an un-solvable problem, but a stinky, sticky mess.
Back to the drawing board. Sorta.
Next time – Ye Whole Sheebang. This time with lots of pctures.
I recently went through my inventory of tordonshell to see about matching some for a friend’s project.
I can make it pretty much any way I want, matching almost any pattern or dimension required.
At this point I am always working out the finer details, such as toughness, longevity and so on, and experimenting with different chemicals to perform the same functions as those I use already. One of these days I hope to derive the perfect method for re-creating traditional tortoiseshell guitar picks.
If I get all the compewder stuff right I will post my 2003 article on the subject early next week. I have scanned it and am now formatting it and trying to get the transfer to the host server right. Wish me luck.
You can find the background on this initial offering by Barn Attic Productions/Seed and Fruit Media here along with the first episode.
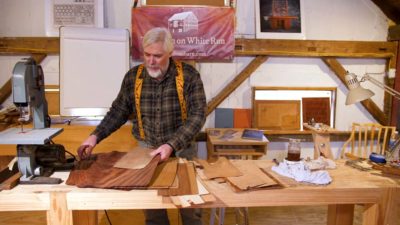
In this episode of my recitation and demonstration of the techniques I use to undertake sensitive veneer repairs — sensitive to the artifacts, not your feelings — such that the compensation (that’s museum-ese for “repair”) is visual harmonious while leaving the maximum of the artifact fabric intact, I demonstrate and discuss the importance of three things: grain, grain, and grain.
If your conscience is pricked by viewing this for no cost feel free to click on the “Donate” button, any proceeds from which will go toward enhancing the rapidity of producing new videos. For those of you who have already shown that generous spirit, I am deeply appreciative.
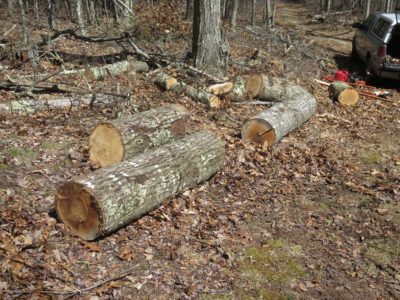
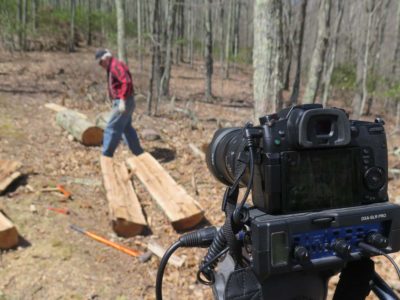
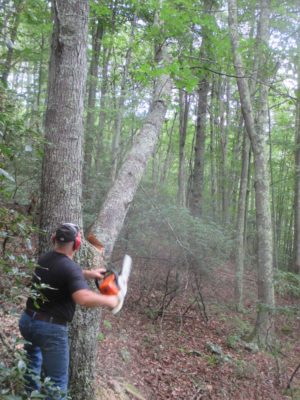
In concert with both ongoing firewood harvesting and shooting a video Building A Gragg Chair I replicated some of the work undertaken at my neighbor Bob’s house five years earlier, this time with oaks felled up the mountain from the barn. There were three large trunks that had nice lower sections and and one smaller but straighter one about fifty yards away, set-aside for the harvesting efforts. Interestingly the larger trees, grown in a dense forest setting, were quite problematic with lots of wind and interlocked grain. My yield from them was about a quarter of what I got from Bob’s “urban” trees. I have no explanation for this phenomenon.
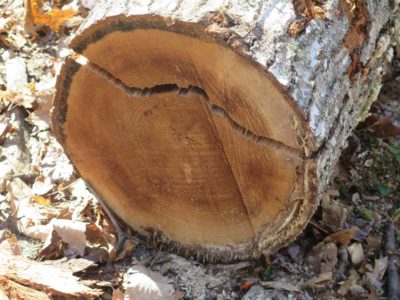
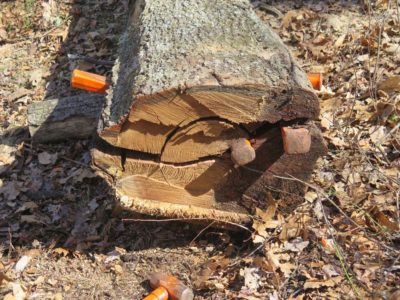
The largest of these trunks was also the largest disappointment. While seemingly sound and straight, the first split caused me to go, “Hmmm.”
As the splitting proceeded the disaster was readily apparent as the entire trunk segmented into an interlocked mass of uselessness, and ate all of my wedges and guts to just get torn apart. The pieces were cut into short bolts for the firewood splitter.
The two smaller of these three trunk sections were better, but still not great. The wood was straighter and more sound, but with more interlocked grain than I expected.
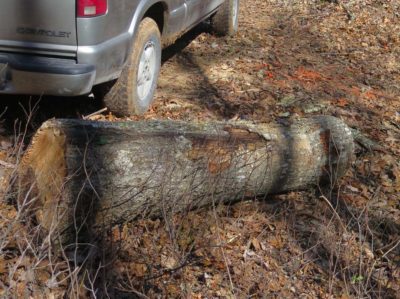
The smaller, straighter trunk was, I hoped, a somewhat different story. It had grown in very tight setting, much, much more crowded than the larger trees and the grain showed it. I was hoping it was more promising than the first trunks, which mostly wound up as firewood. More about that later.
I guess it says something about the nature of life in the hinterlands, I literally did not remember that yesterday was Wednesday and posted the wrong thing. — DCW
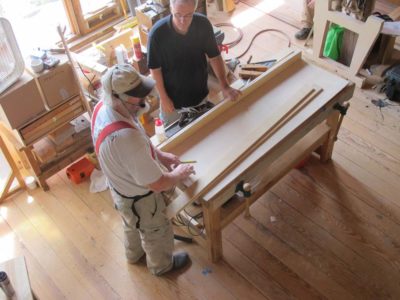
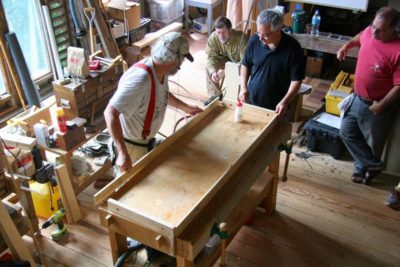
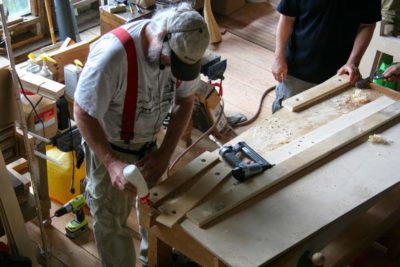
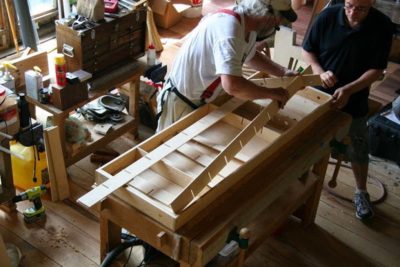
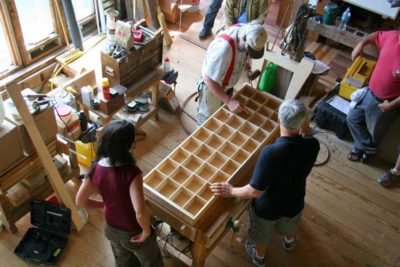
At GroopShop 2014, which I hosted, the program included BillR and me building him a high performance portable workbench similar to my Workbench #2. The portable bench is strictly a power tool project, for the most part I used my cordless power tools, a pneumatic crown stapler and white glue.
This bench has several improvements over the original, and on Workbench #21(?) I take the concept even further in several respects.
One of the primary modifications for this bench was to extend the length to a full five feet rather than the earlier four foot length, we kept the two-foot width. This not only provided a larger work station BillR needed for his project but also made the alignment of the legs much simpler. They simply abutted each other at their feet when folded as opposed to being off-set so they could be folded side-by-side in the initial effort. We used Tom’s bench as the platform for building this one, it was perfectly flat and the same size as what we wanted.
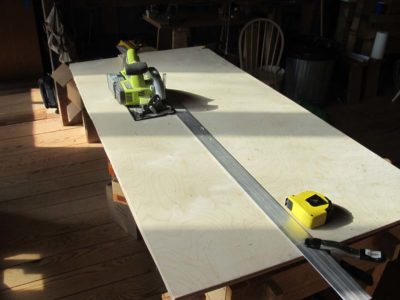
Another change was moving to 1/4″ thick ribs rather than 3/8.” The 1/3 reduction in rib thickness had no effect on the strength, that was all the result of the web height for the rib. So now the whole thing could be made from a sheet of 1/4″ baltic birch and a few pieces of 1/2″. I ripped the faces using my cordless saw and a straightedge, then ripped all the ribstock from the remainders.
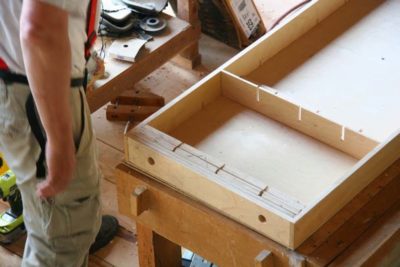
The perimeter was still made from 1/2″ b.b., with the ends doubled since I wanted to make this retrofit-able with twin screws vises. I pre-drilled the holes for the eventual tapping before I began assembly.The half inch edge stock made it simple to use a crown stapler to assemble the outer edges and make whole thing simple to build.
I also pre-drilled the holes for the vise screws to pass through the ribs.
We dry-fit all the ribs and were ready for assembling the top. The last step before that was to mark the location of all the ribs on the underside of the face.
More next week.
(Thanks to JoshuaK for all the preceding pictures.)




Recent Comments